Enterprise Security
Content Outline
Overview
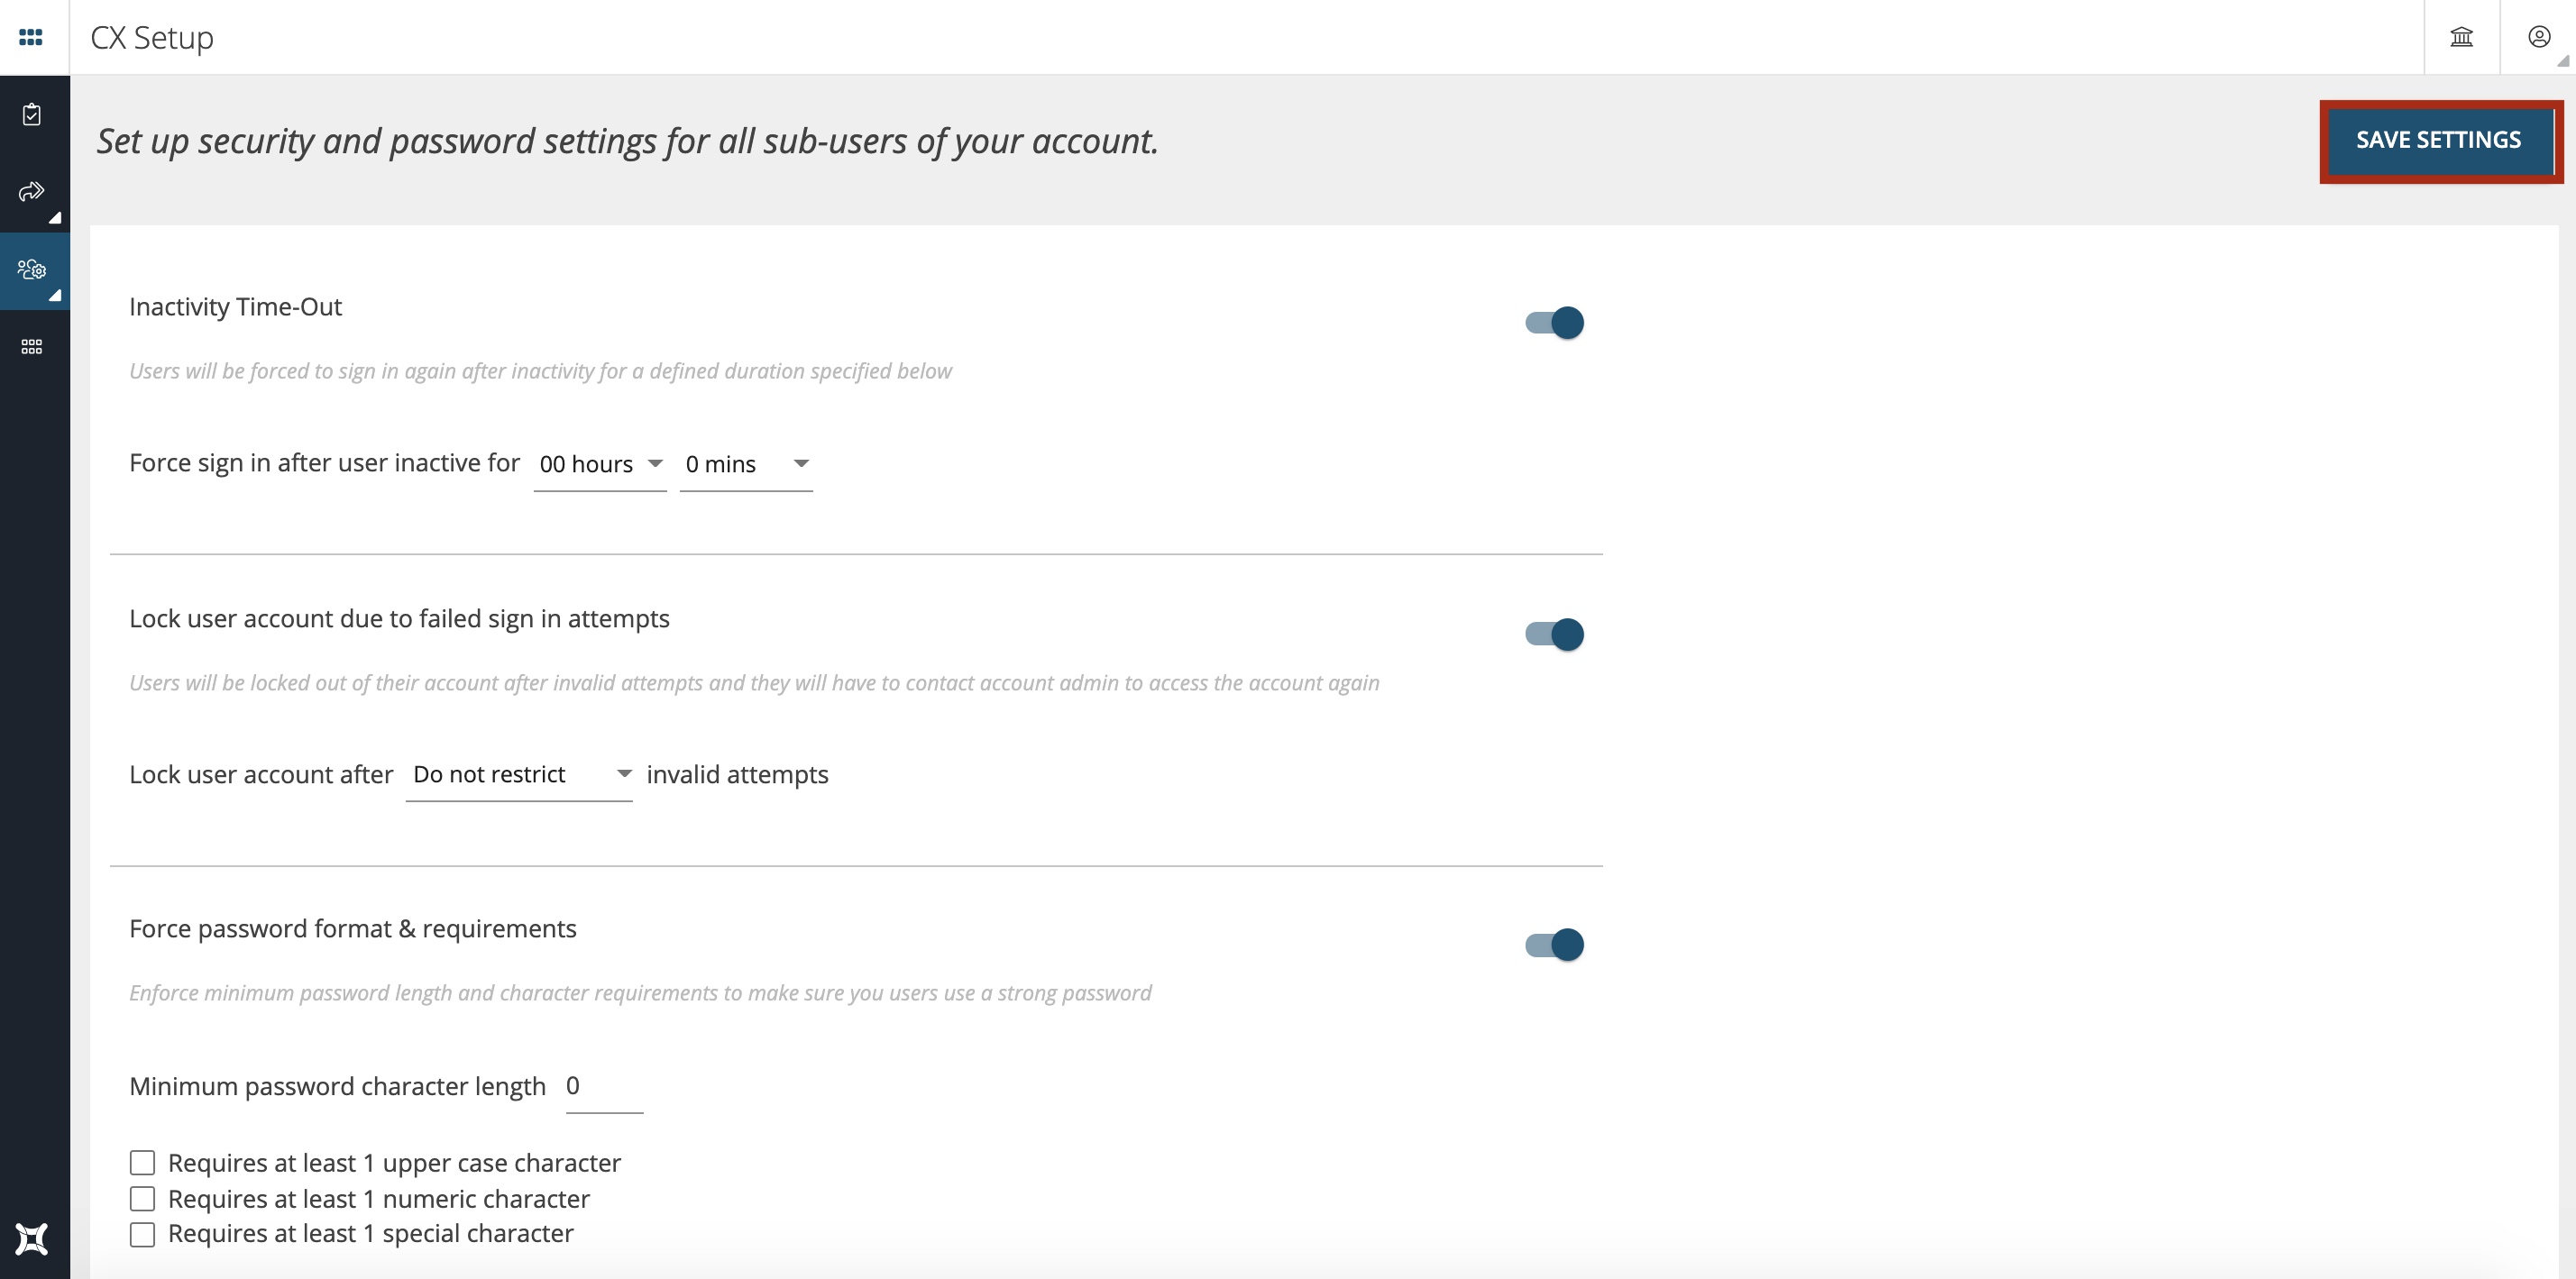
In Enterprise Security Settings module you can set-up your own security policy at the account level that works best for you and your organization. You can Set up security and password settings for all sub-users of your account.
To modify the Enterprise Security settings go to CX Setup > Account Settings > Enterprise Security as shown below.
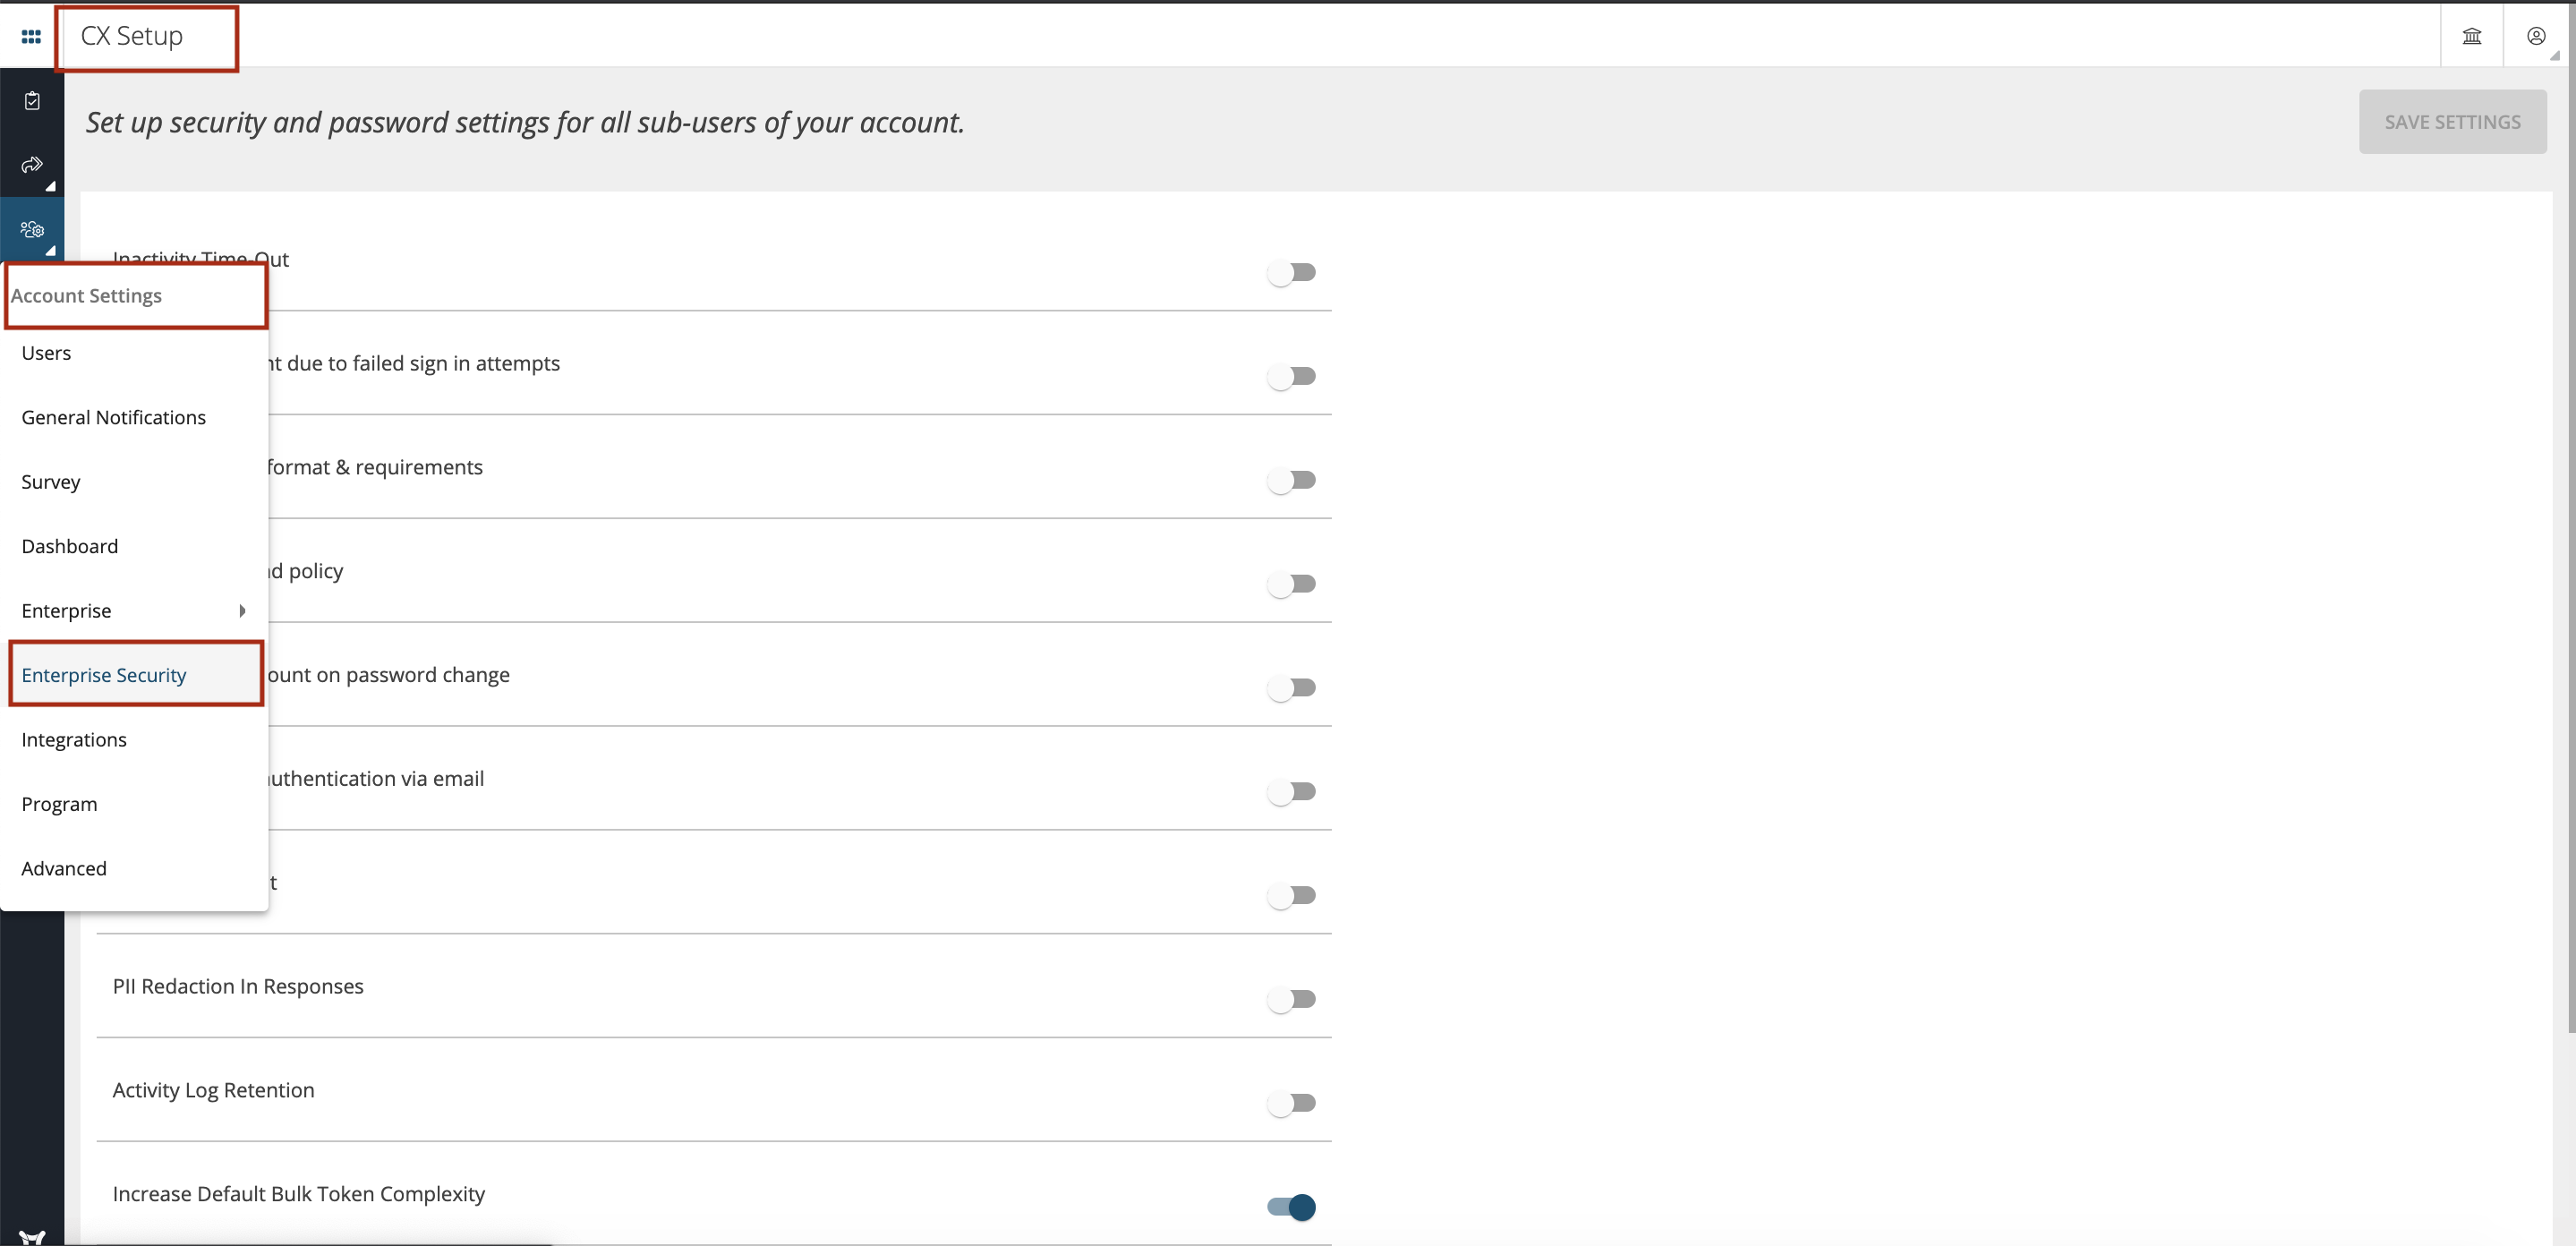
In the Enterprise Security Setup, following settings can be configured:
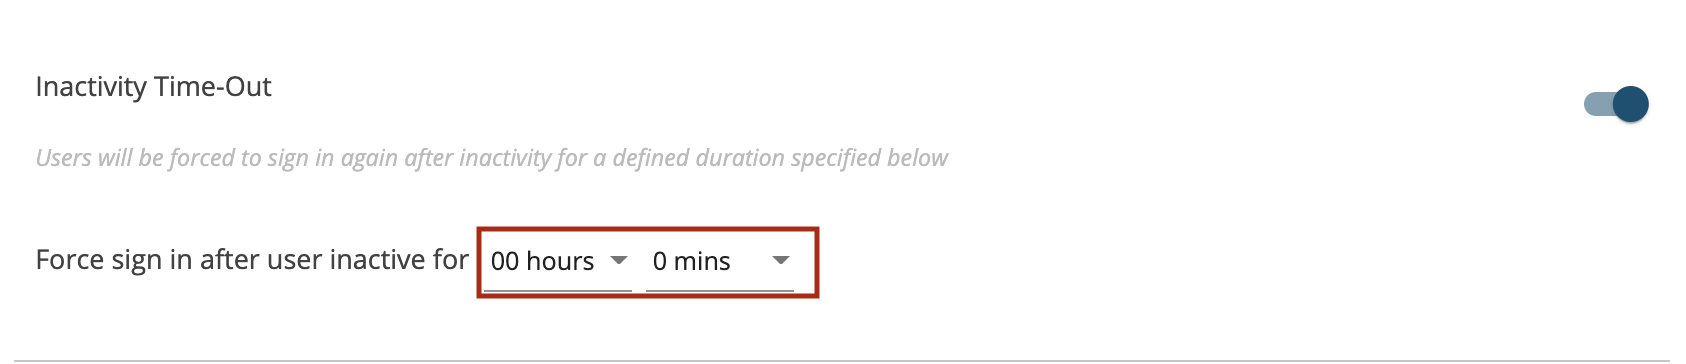
Inactivity Time-Out
You can define the ‘Force sign in after user inactive for x hours and x minutes’, after which the users will be forced to sign in again after inactivity for a defined duration specified below.
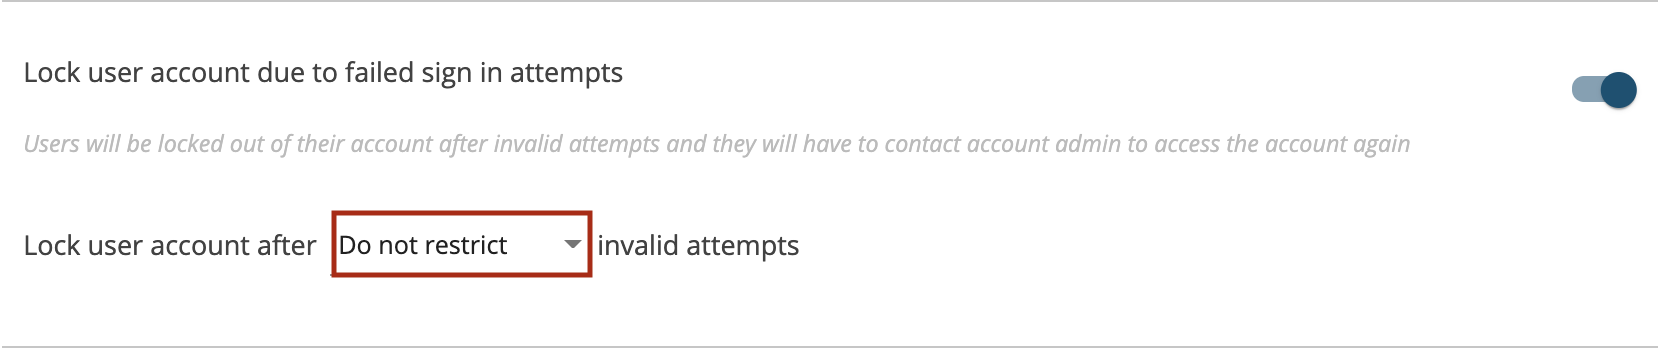
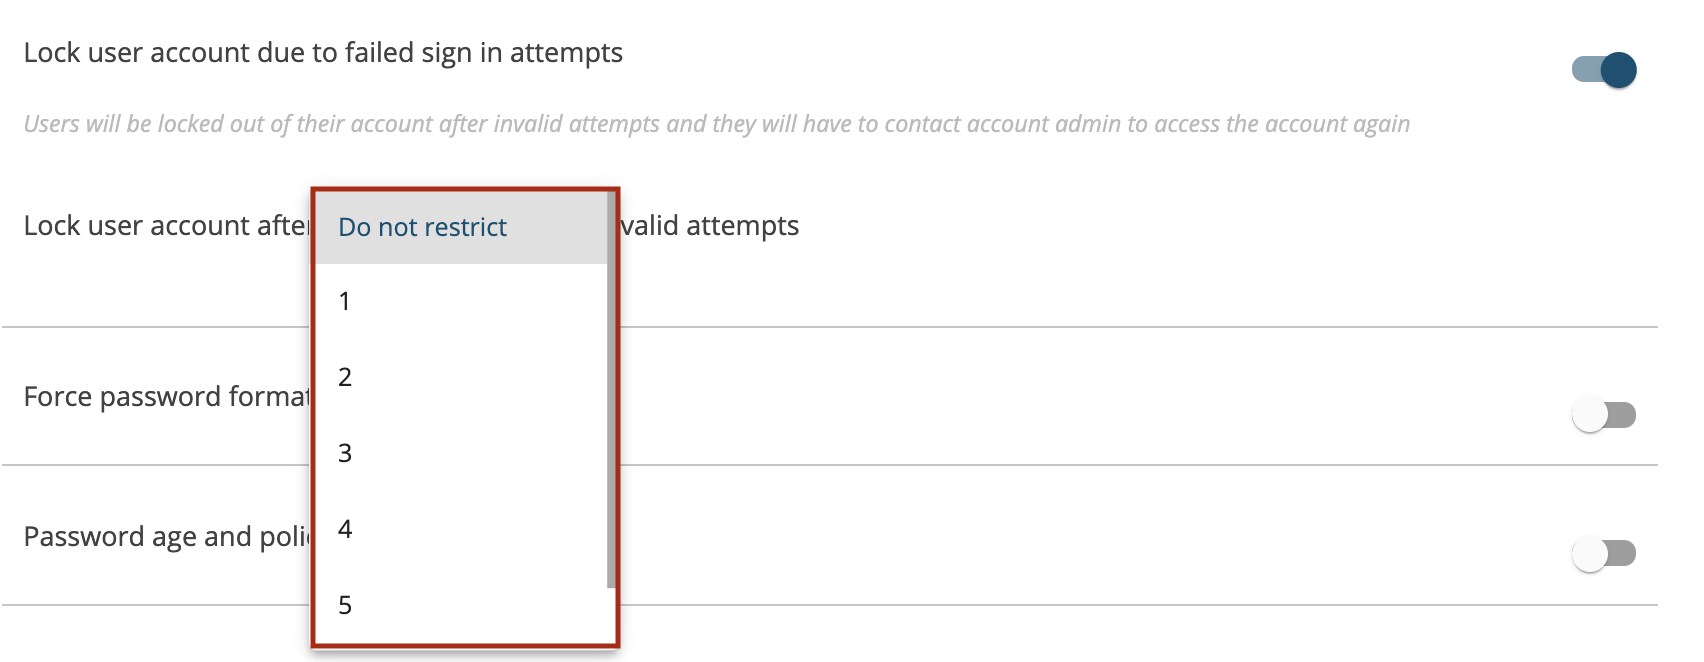
Lock user account due to failed sign in attempts
You can choose to ‘Lock user account’ after minimum of 1 invalid attempt and maximum of 6 invalid attempts. You can also choose ‘Do not restrict’ options for invalid attempts made. Once this is defined the users will be locked out of their account after invalid attempts and they will have to contact account admin to access the account again.
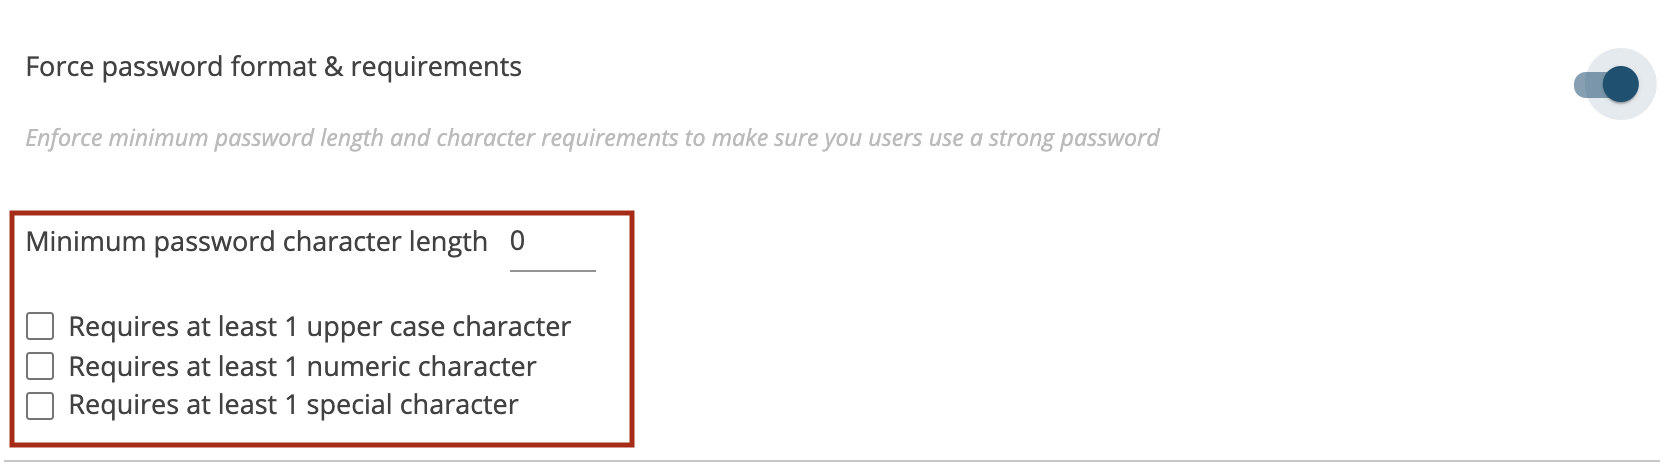
Force password format & requirements
System has the flexibility to support different user password formats but as an admin you can enforce minimum password length and character requirements to make sure the users use a strong password for better security. You can define the ‘Minimum password character length’ with the combination of numeric characters, upper, lower case letters with the options available.
- Requires at least 1 upper case character
- Requires at least 1 numeric character
- Requires at least 1 special character
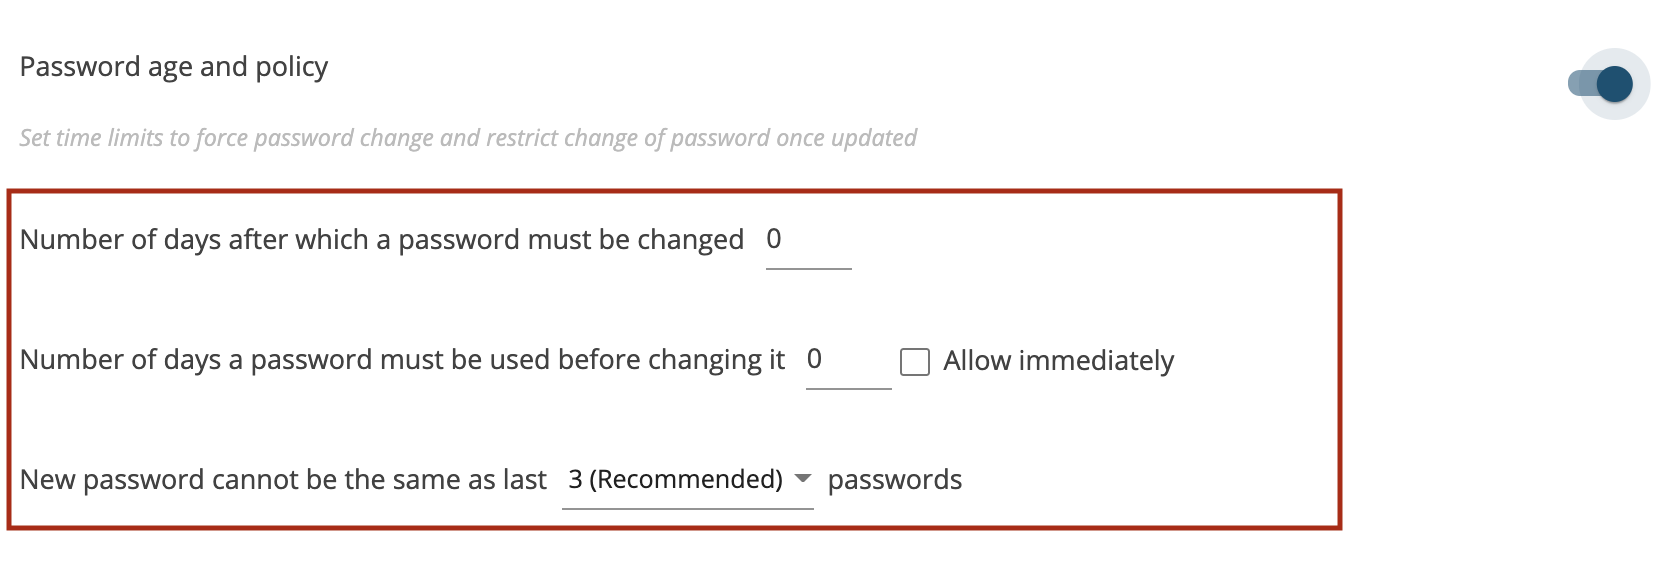
Password age and policy
You can configure minimum password age policy number of days a password may be used before changing it. Set time limits to force password change and restrict change of password once updated. You can define the below options:
- Number of days after which a password must be changed
- Number of days a password must be used before changing it’ and this show be effective immediately one you tick ‘Allow immediately’ option.
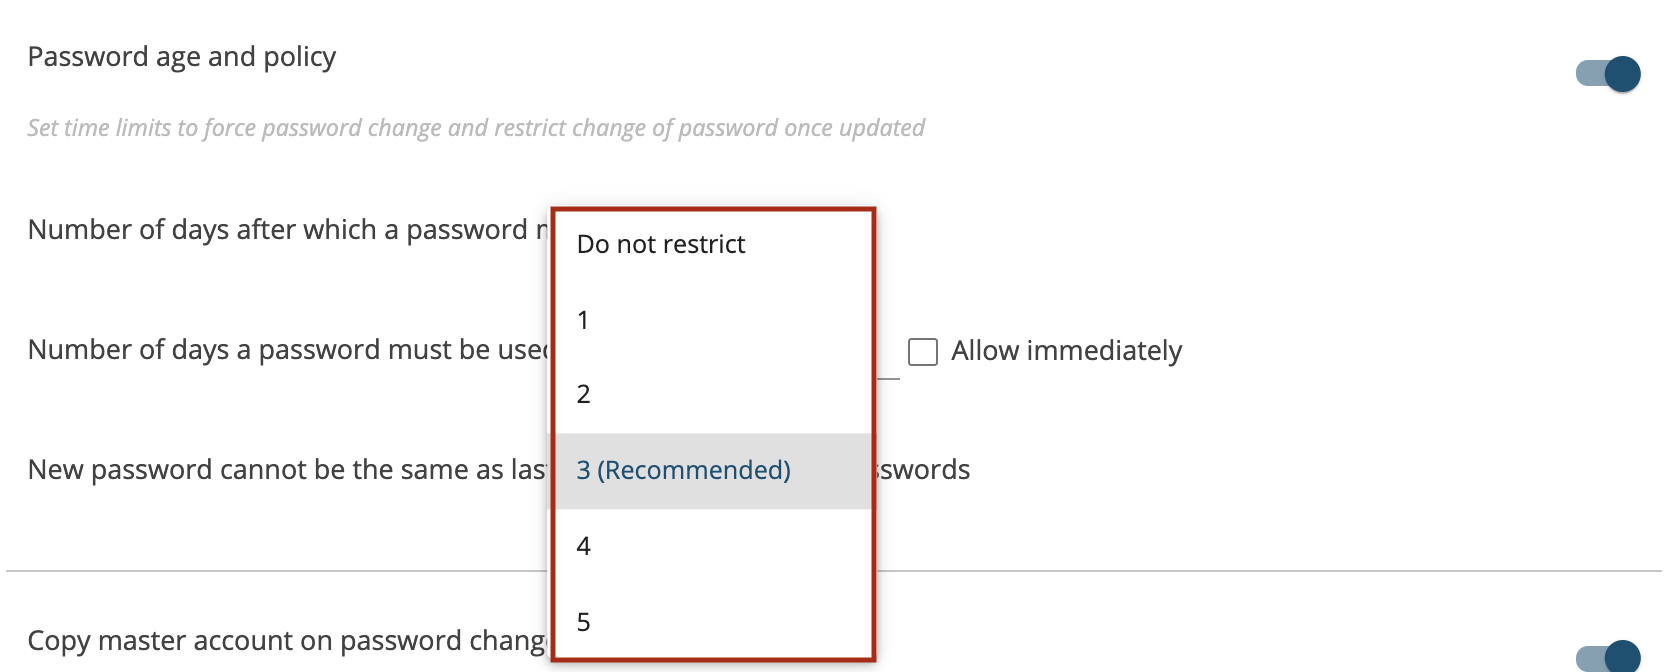
- Set the ‘New password cannot be the same as last’ x number of passwords. The recommended is last 3 passwords but there are other options also available in the dropdown as shown.
Copy master account on password change
You can choose to send email notification to the admin user when a sub-user changes his/her password.

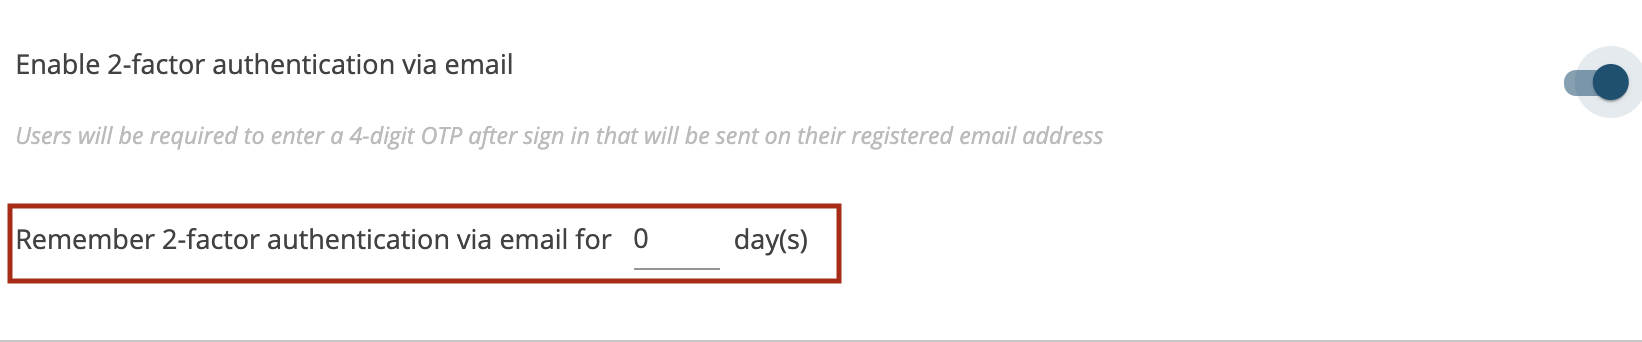
Enable 2-factor authentication via email
Post login users will be required to enter a 4-digit OTP after sign in that will be sent on their registered email address. You can define as to for how many number of the days this OTP should be valid in ‘Remember 2-factor authentication via email for x day(s)’. By default its valid for 15mins and system will generate a new OTP (4-digits) after 15mins.
Session Time-Out
Users will be forced to login after a set time period of inactivity on the server. While users are actively using the server, the token keeps auto refreshing. This is applicable when the computers are put to sleep/hibernation. The authentication token expires on the server after the defined duration specified below (max 24Hrs). You can set the expiry as below:
- OAuth token expires after 1440 mins. (24 hours)

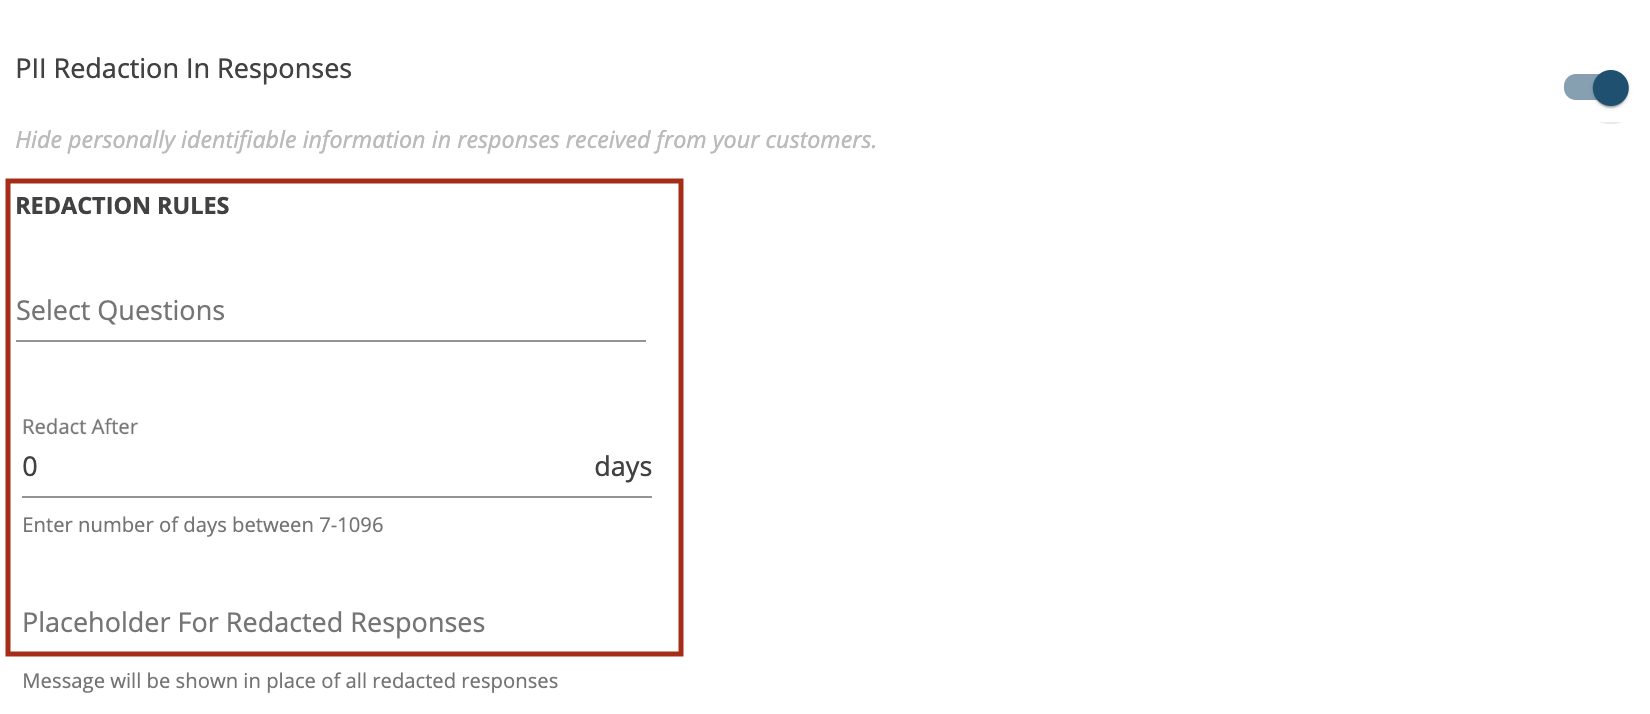
PII Redaction In Responses
Hide personally identifiable information in responses received from your customers. You can set the redaction rules as below:
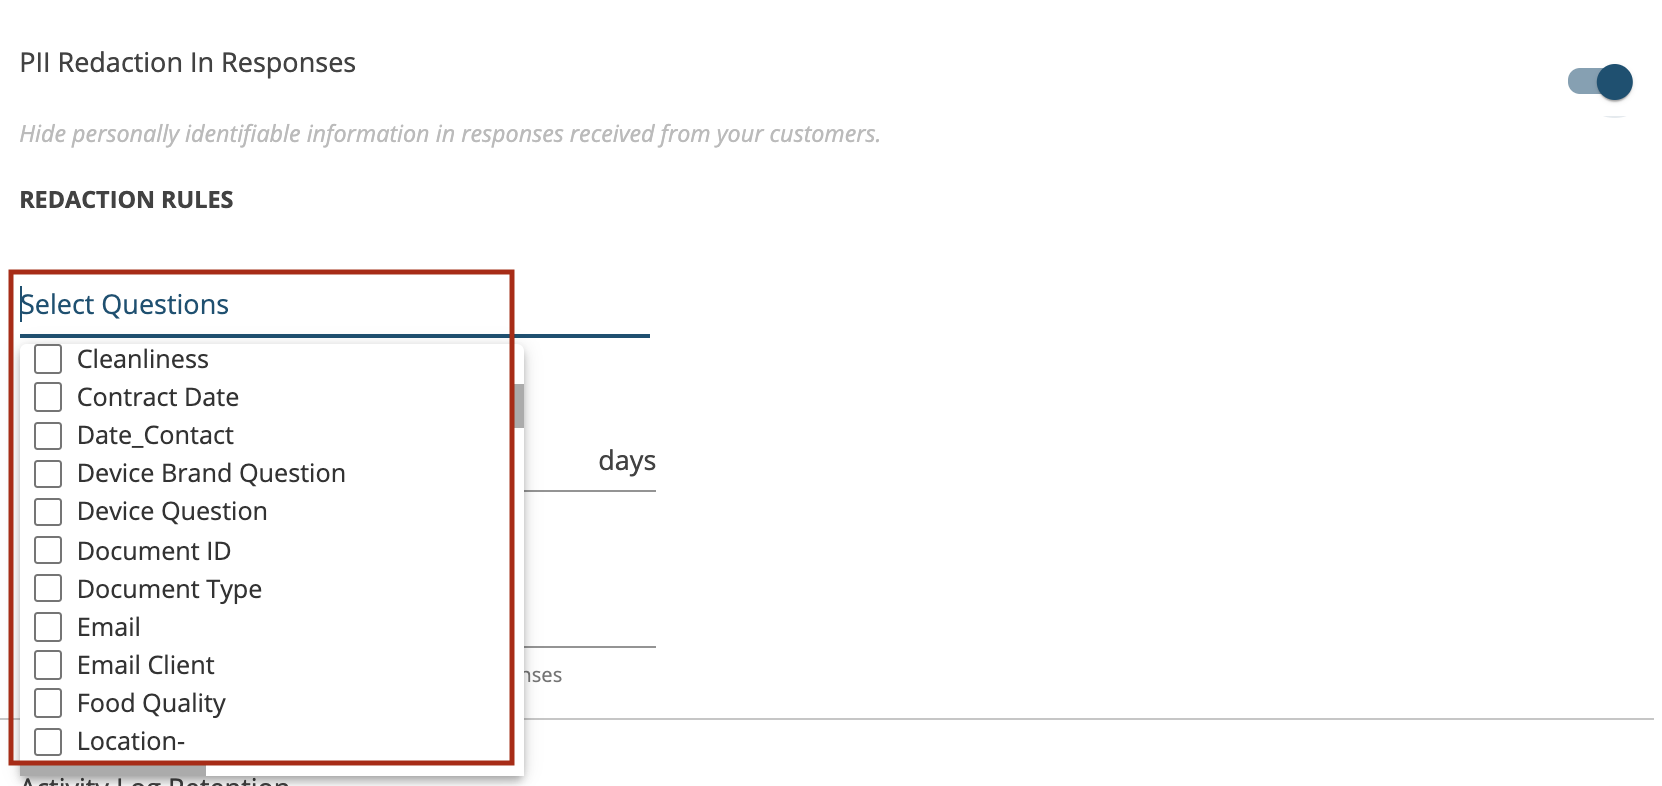
- Select Questions which you want to redact like customer mobile number, from the dropdown as shown.
- Define that after how many days the redact will happen in ‘Redact After x days. You can enter number of days between 7-1096.
- Define the message that will be shown in place of all redacted responses in ‘Placeholder For Redacted Responses’

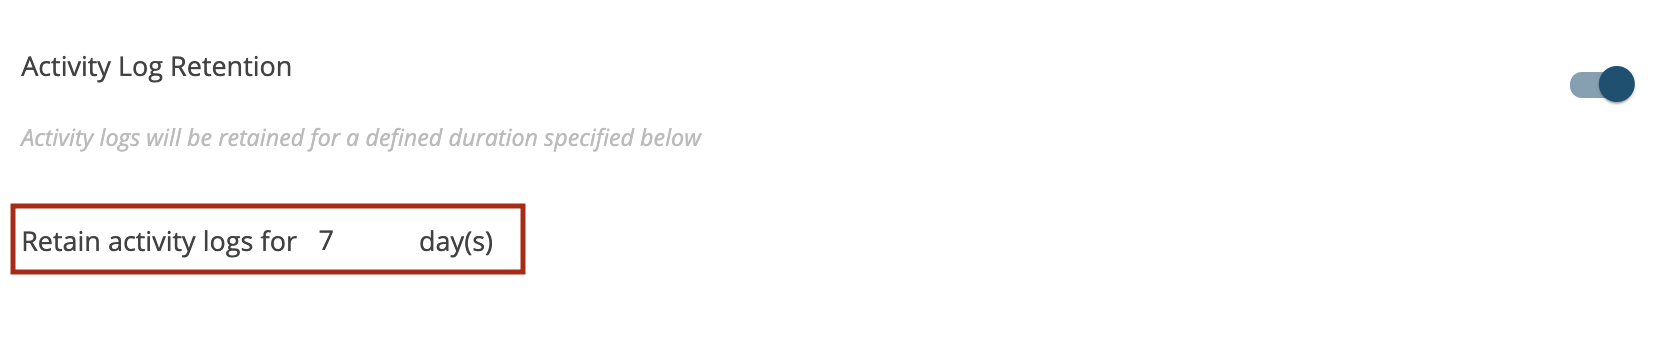
Activity Log Retention
You can set the duration as to for how many days the activity logs will be retained as below:
- Retain activity logs for x days.
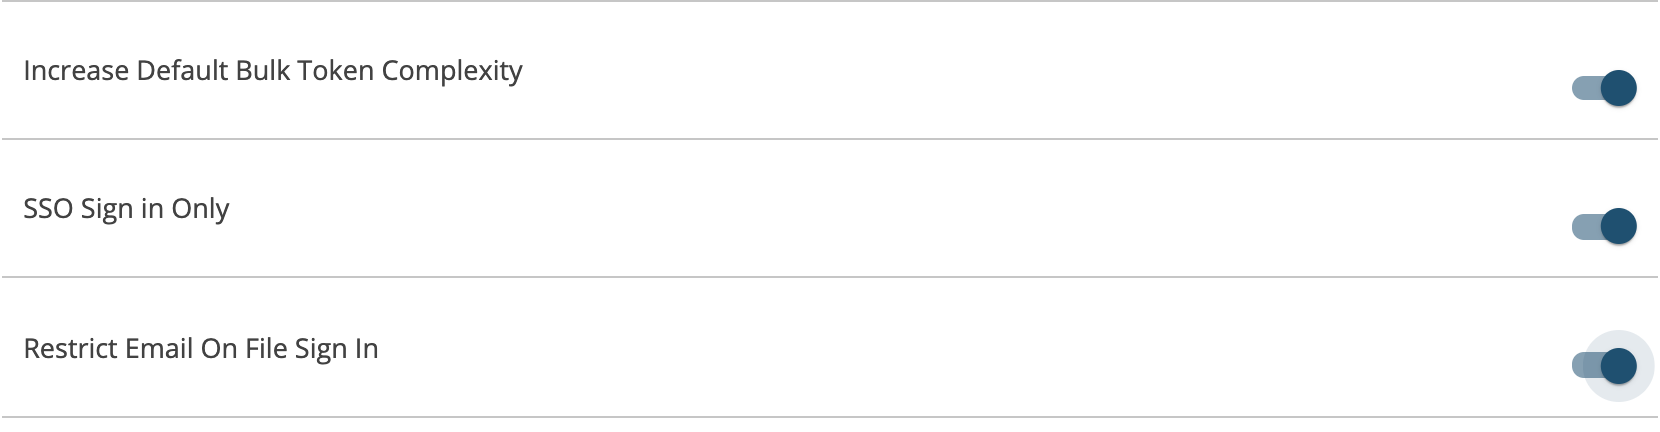
Other Settings
Increase Default Bulk Token Complexity
Once Bulk Token Complexity is enabled then all the tokens that will be generated from the system they will have random characters (alphanumeric) like an encryption code.
SSO Sign in Only
You can enable Single Sign On for the account here.
Restrict Email On File Sign In
Restrict OAuth Authentication Token Issue

Once all the configurations are done with the Enterprise Security settings press ‘Save Settings’ button on top.