General Notifications
Content Outline
Overview
A notification is a way to apprise you (WXM Users) that something has happened and you don’t miss as anything might be worth your or your teams attention. The notification is always accompanied with details so that the user have visibility and can decide as to what action is required.
A notification can be configured to be triggered via:
- Email Alert
- Loop Closure Ticket
- SMS Alert
- Send Email to Customers
- API Post URL
- Mailchimp
- Nexmo
- Kookoo
- Exotel
- Azure Queue
There are two types of Notifications that can be configured in the platform. They are:
-
Response Notification- Response based notification is the type of notification where the system alerts or notifies the user(s) once customer response to the survey questions in a way that it meets the notification conditions logic configured in the system. This notification can be triggered via multiple channels like Email, SMS, etc. each time someone answers a survey question with a specific answer.
-
Trend Notification- Trend based notification is the type of notification by which user(s) can be informed in case any trend changes across NPS or response rates. An email can be triggered to the user(s) if the NPS or Response rate is trend is fluctuating (Going down or Going up) by certain percentage (%) Daily, Weekly, Fortnightly or Monthly.
Configuration & Setup
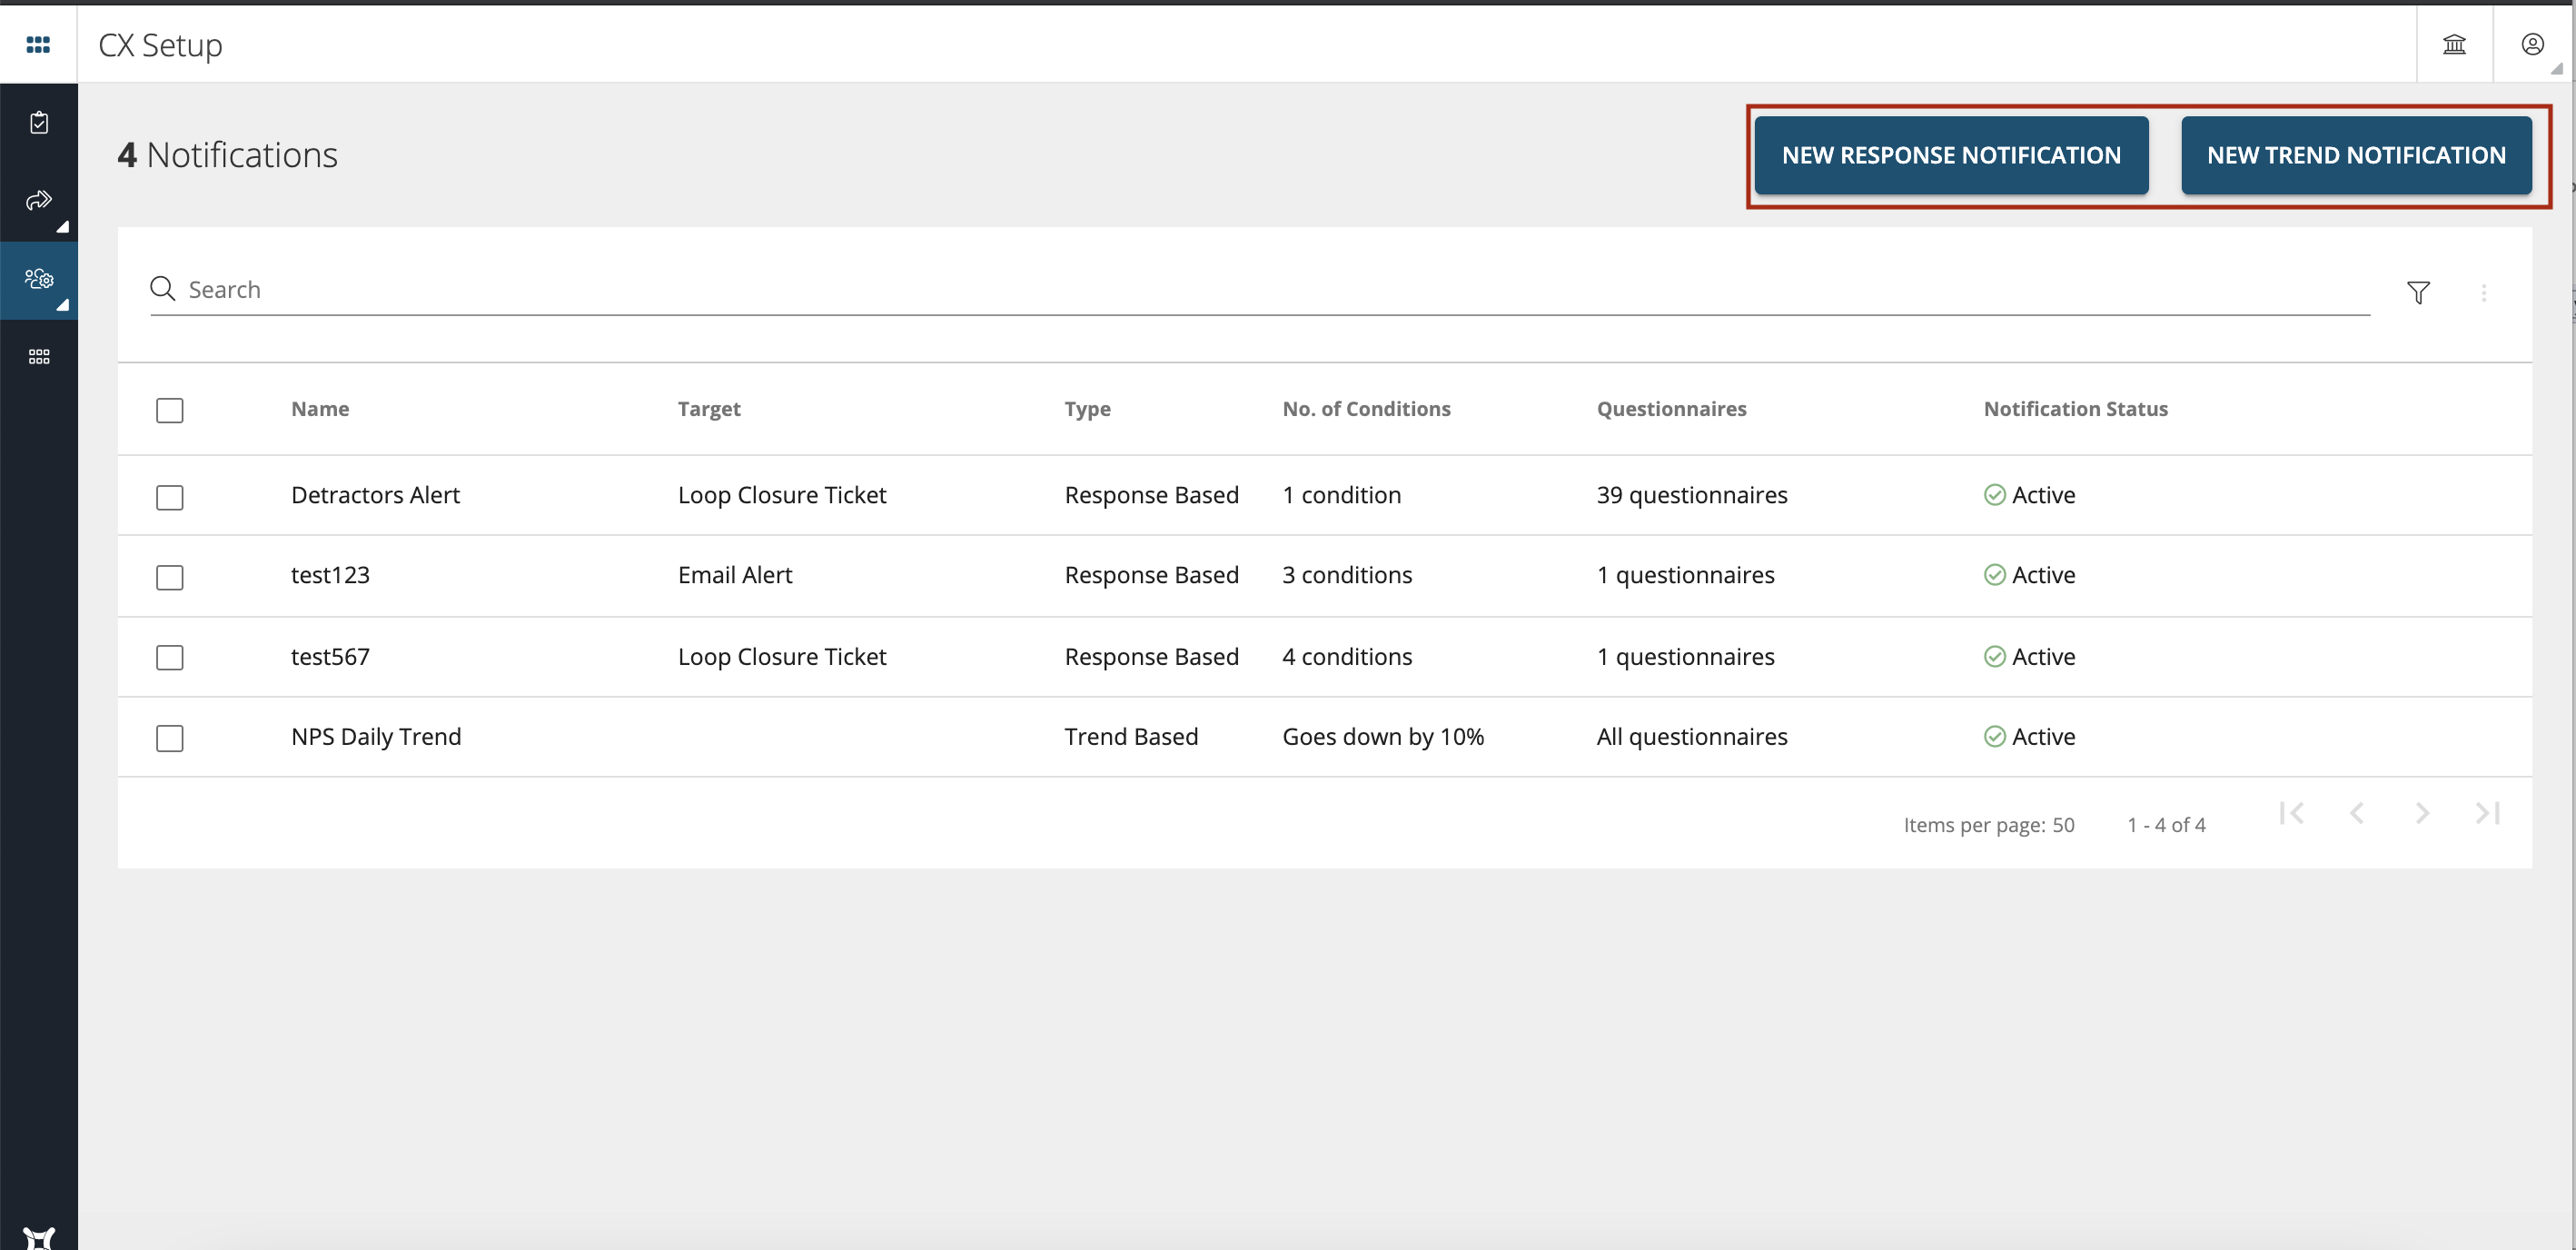
To configure the notifications go to CX Setup > Account Settings > General Notifications as shown in the screenshot below.

To create a new Response Notification click on New Response Notification button as shown below.
A window will open where you can set the notification conditions.
Pause Notification- You can toggle on the Pause button incase you do not want the system to send alerts to the user(s). Pause will deactivate the notification until the button is Toggled Off.
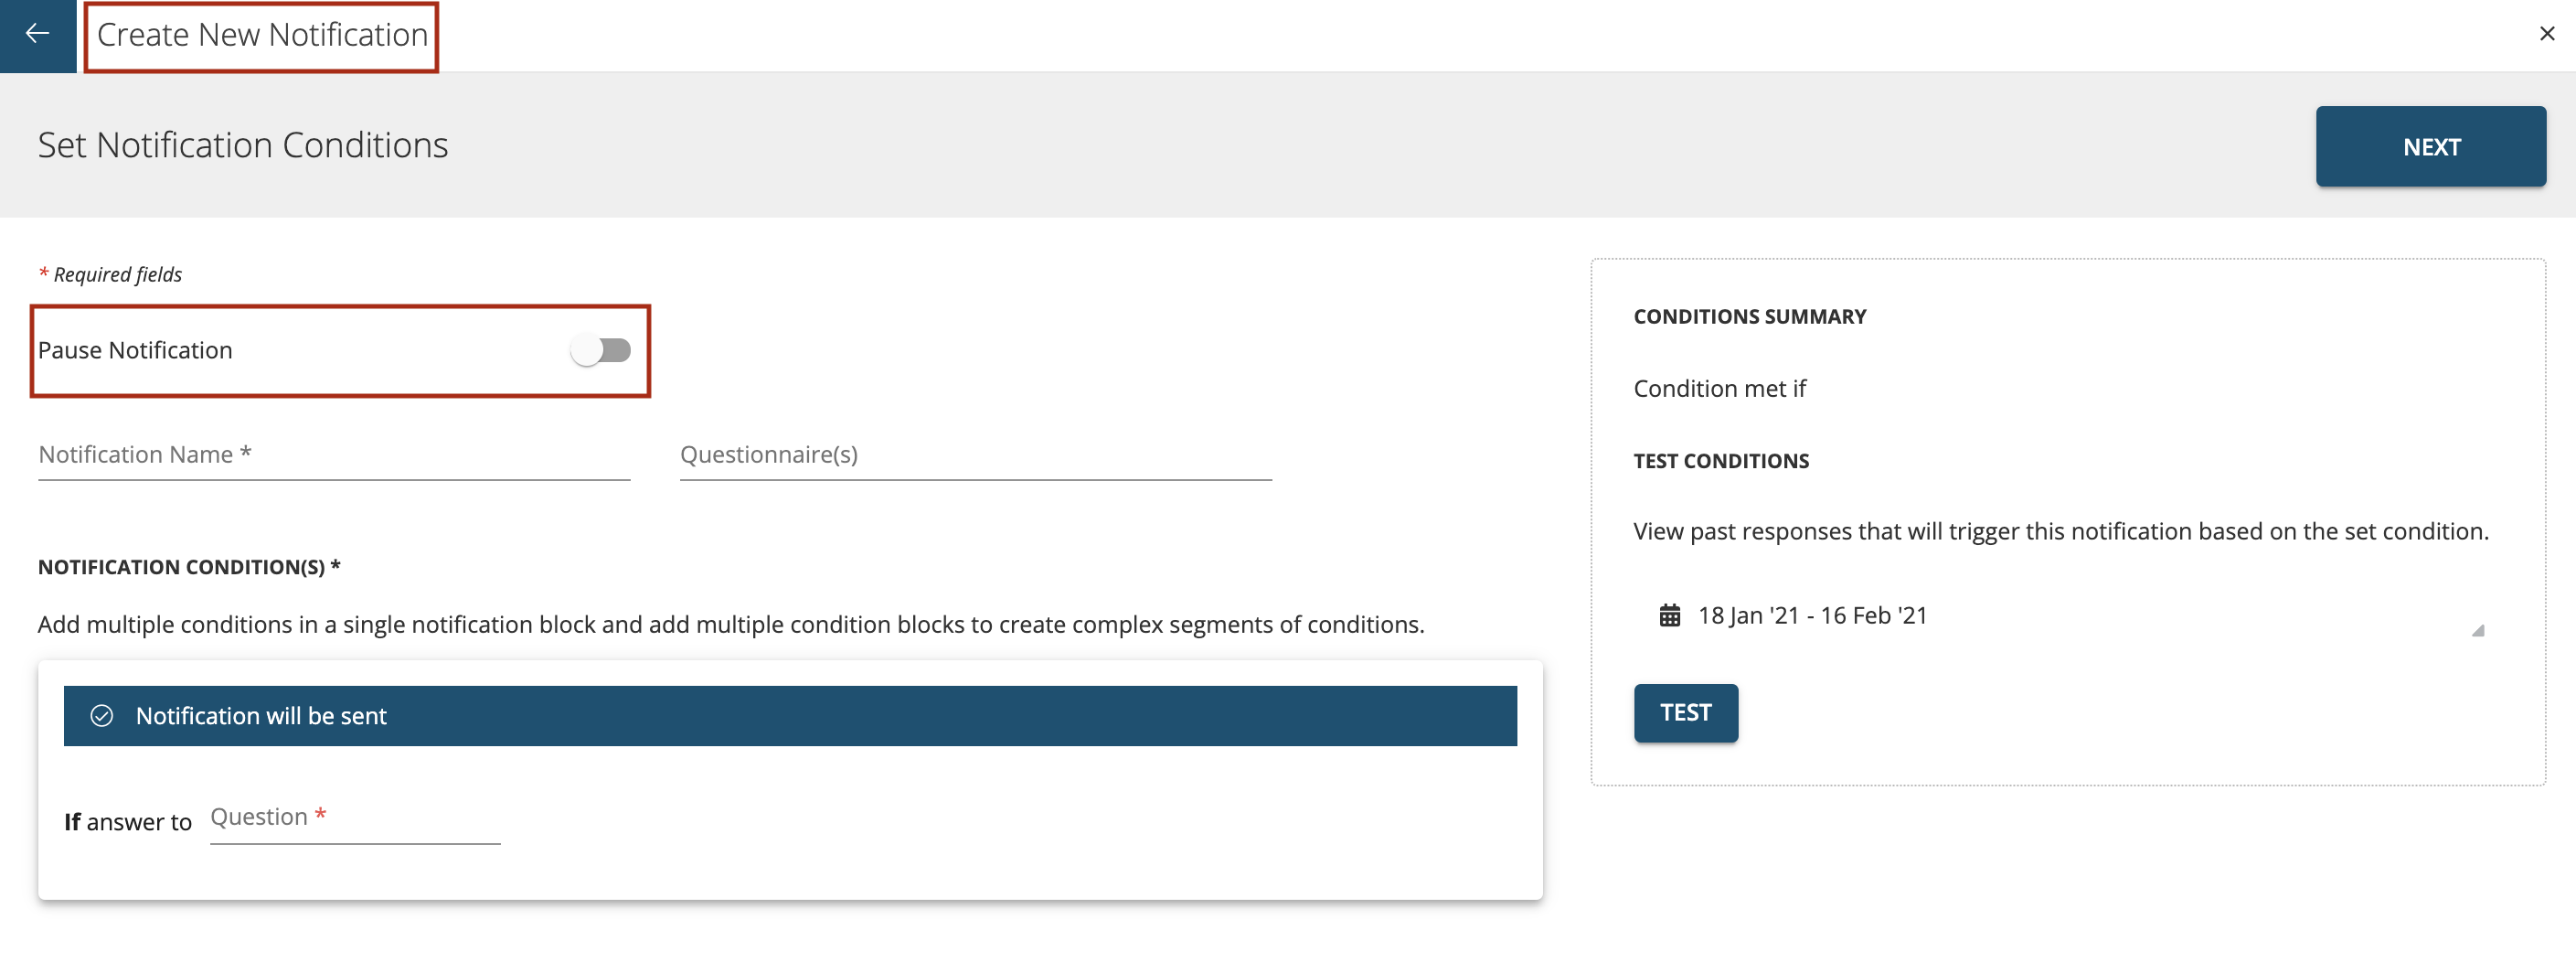
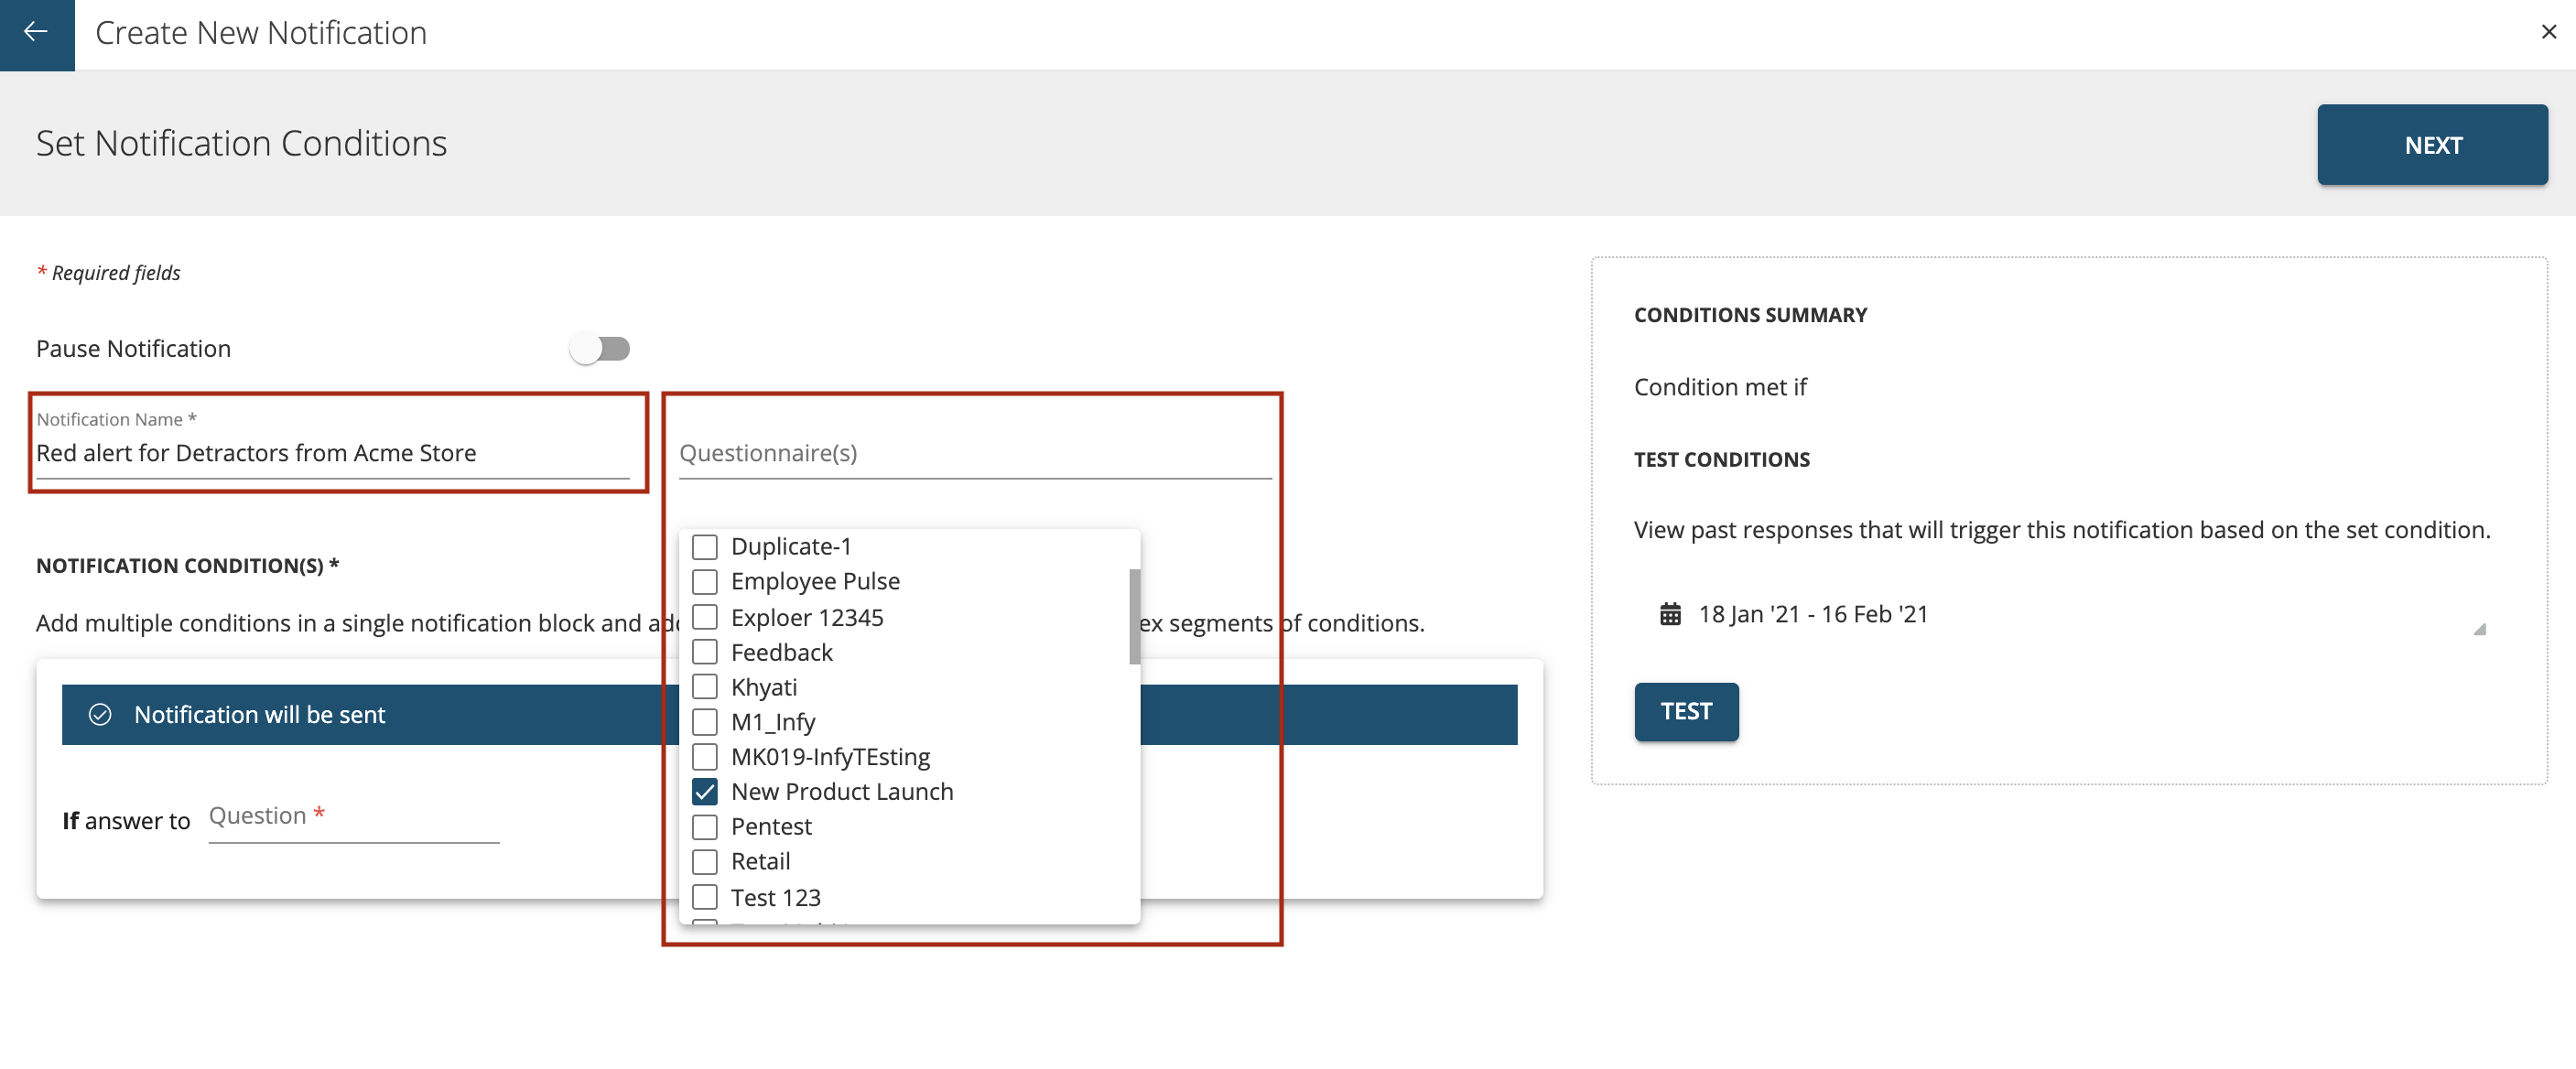
Notification Name- Enter the name of the notification in the Notification Name field that the user wants to provide for its understanding. This notification name shows up in the subject line of the email that the user receives.
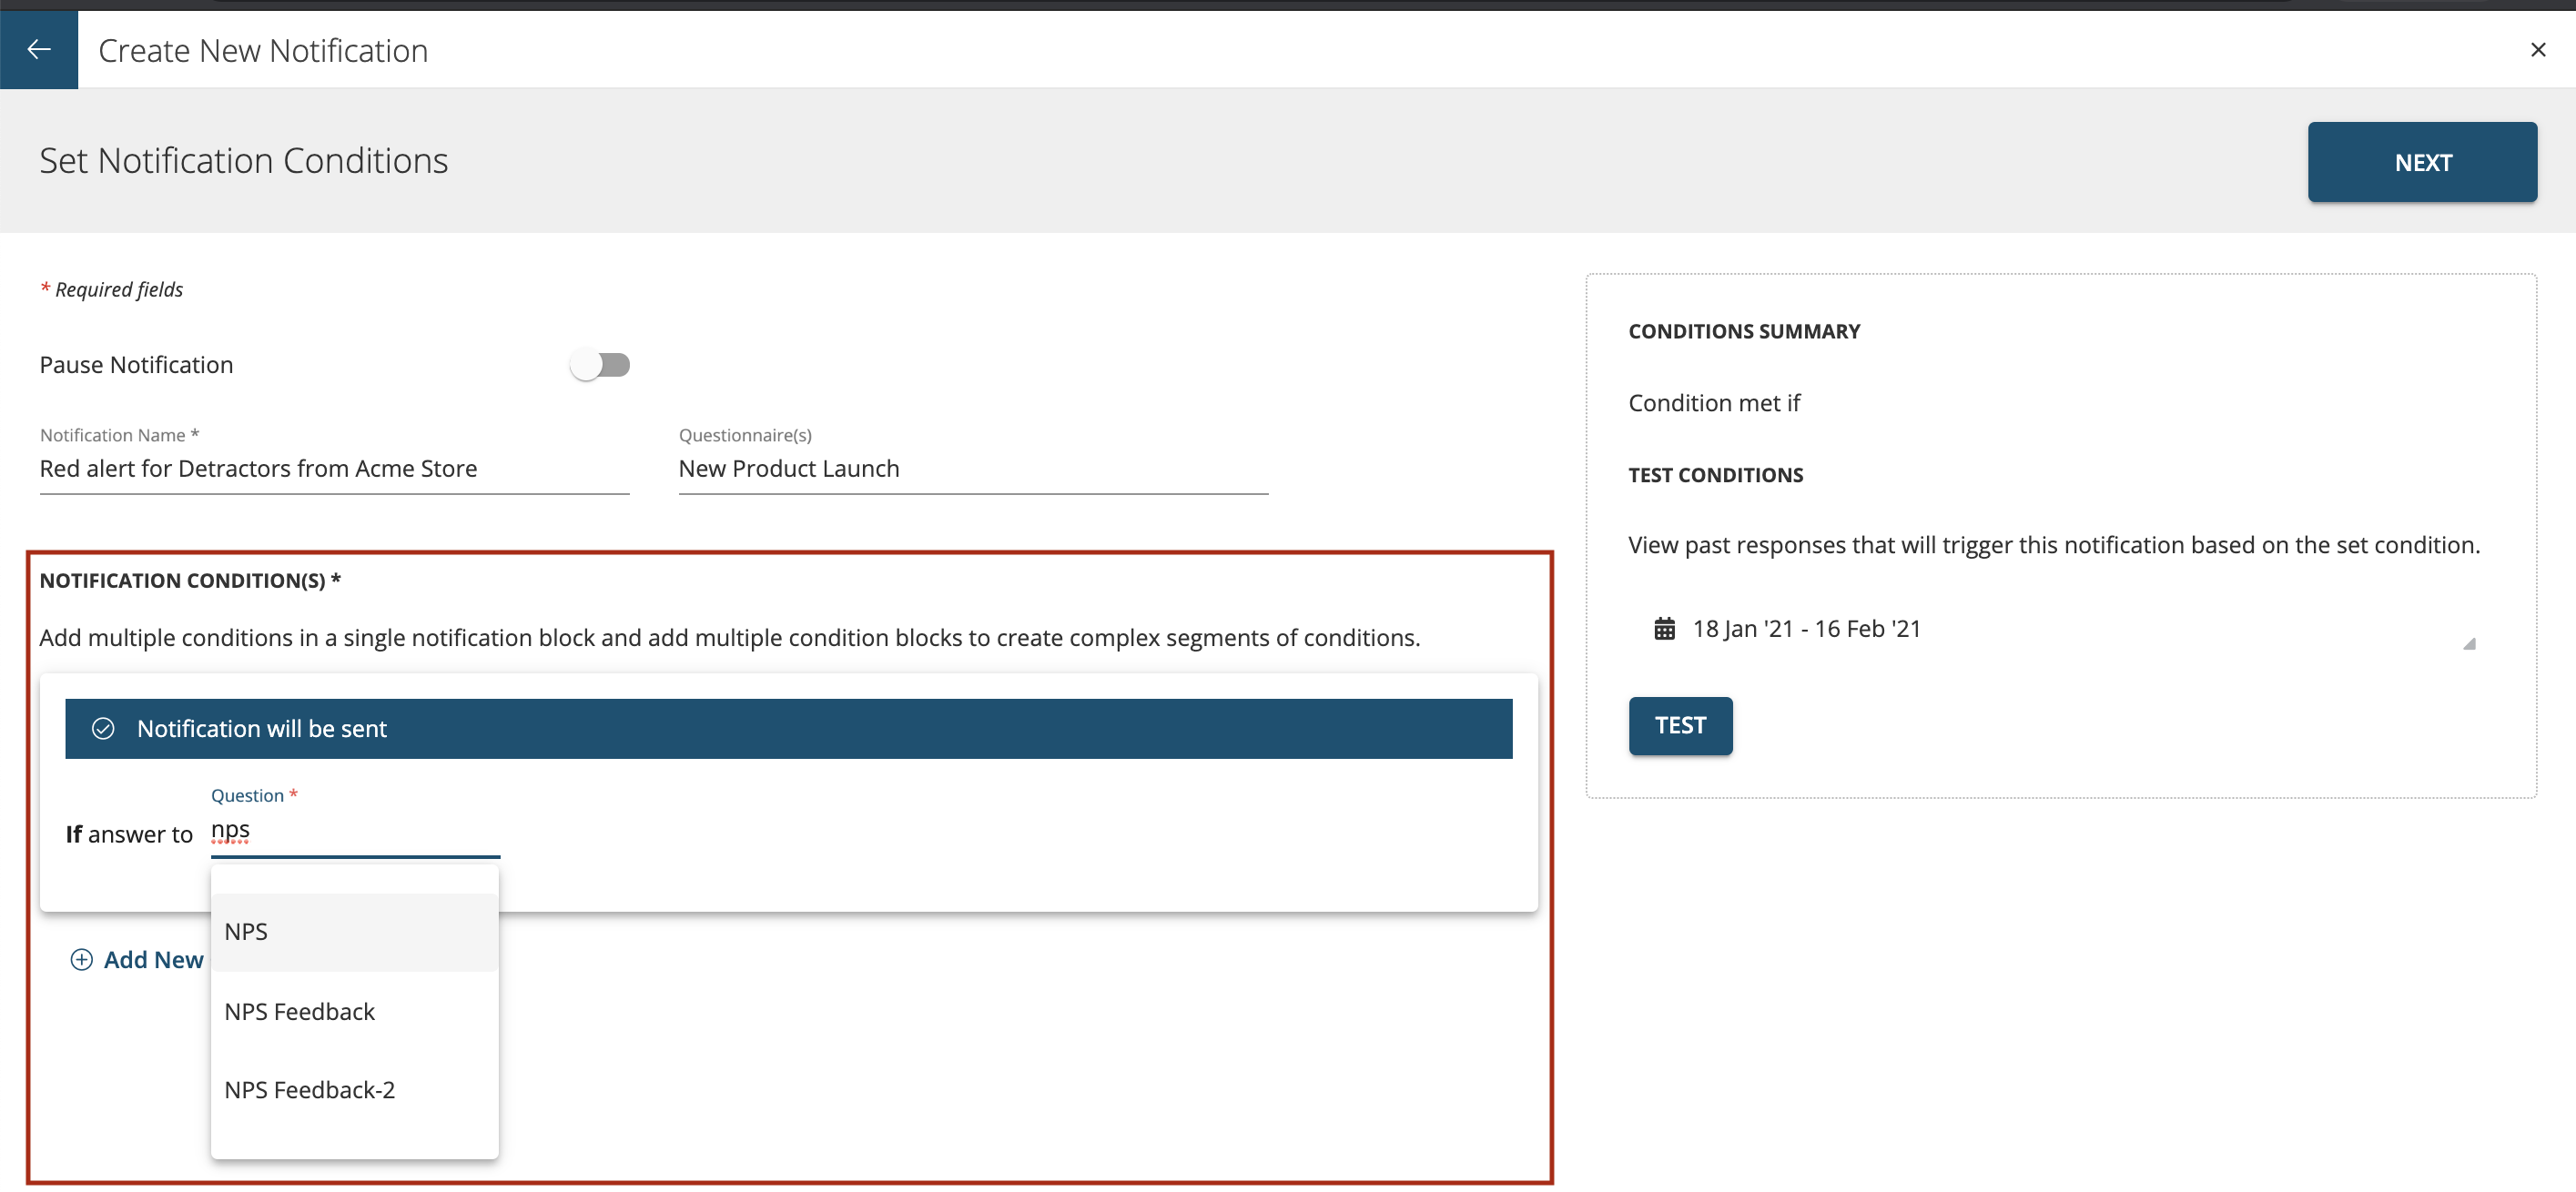
Questionnaires- Select the Questionnaire(s) for which you would like the user to receive the notification for from the dropdown list as shown below.
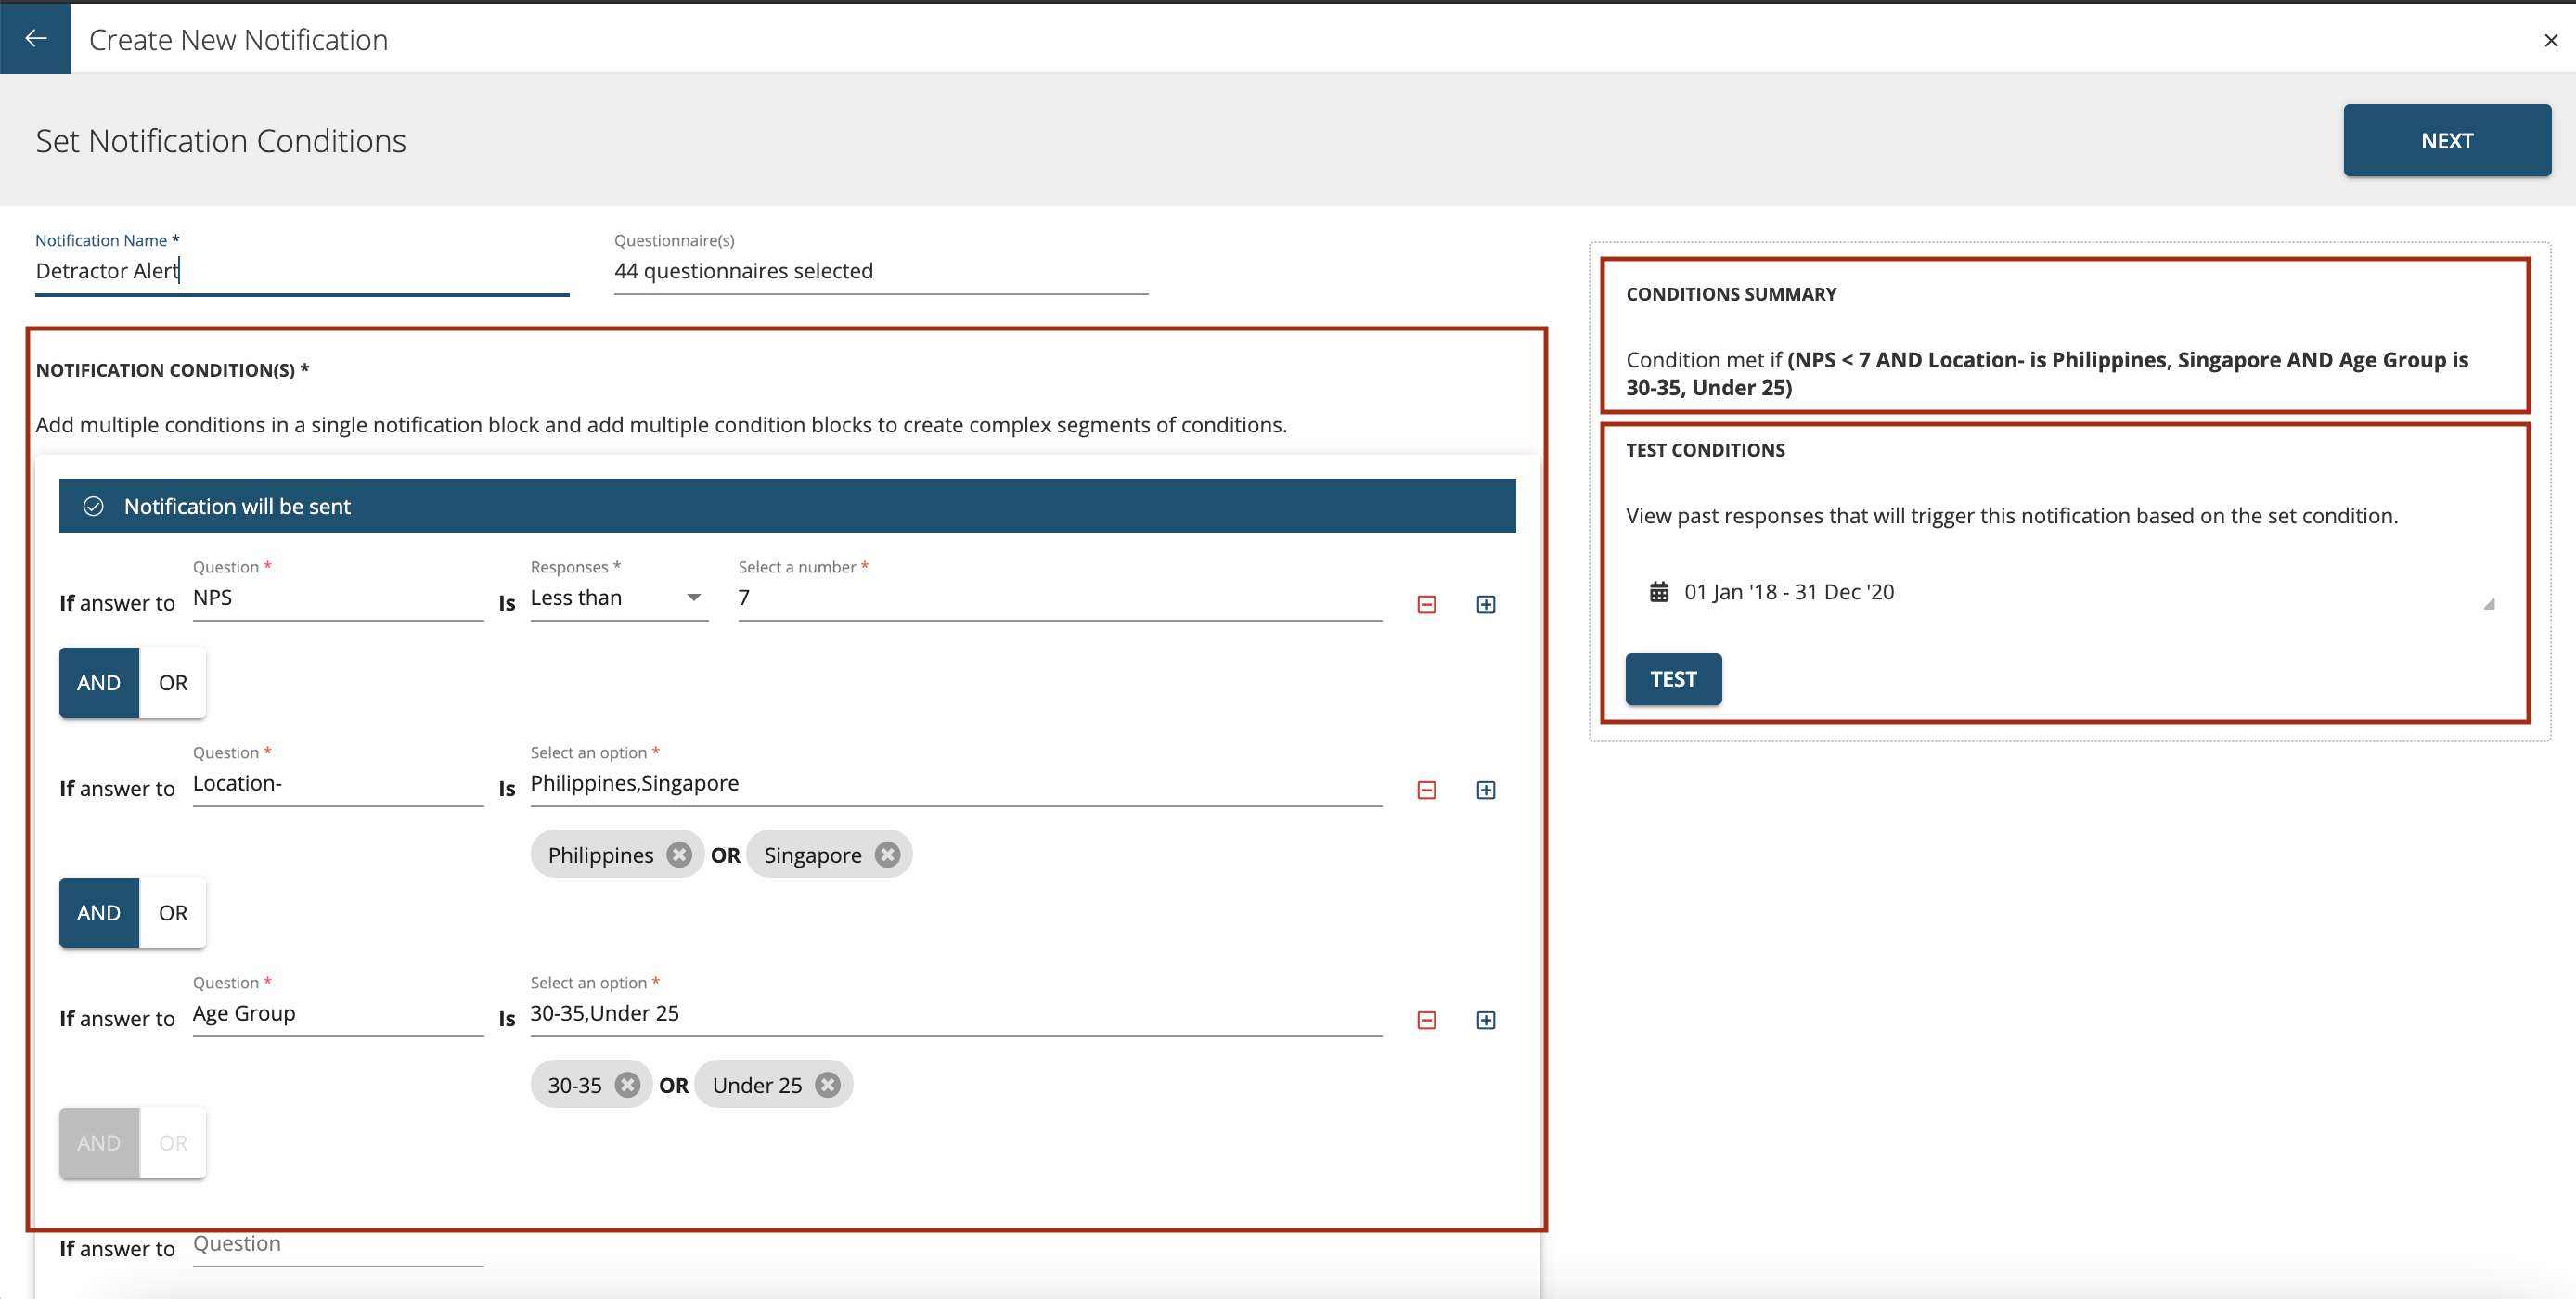
Notification Conditions-Add multiple conditions in a single notification block and add multiple condition blocks to create complex segments of conditions.When these conditions are met based on the defined logic then notifications get triggered.
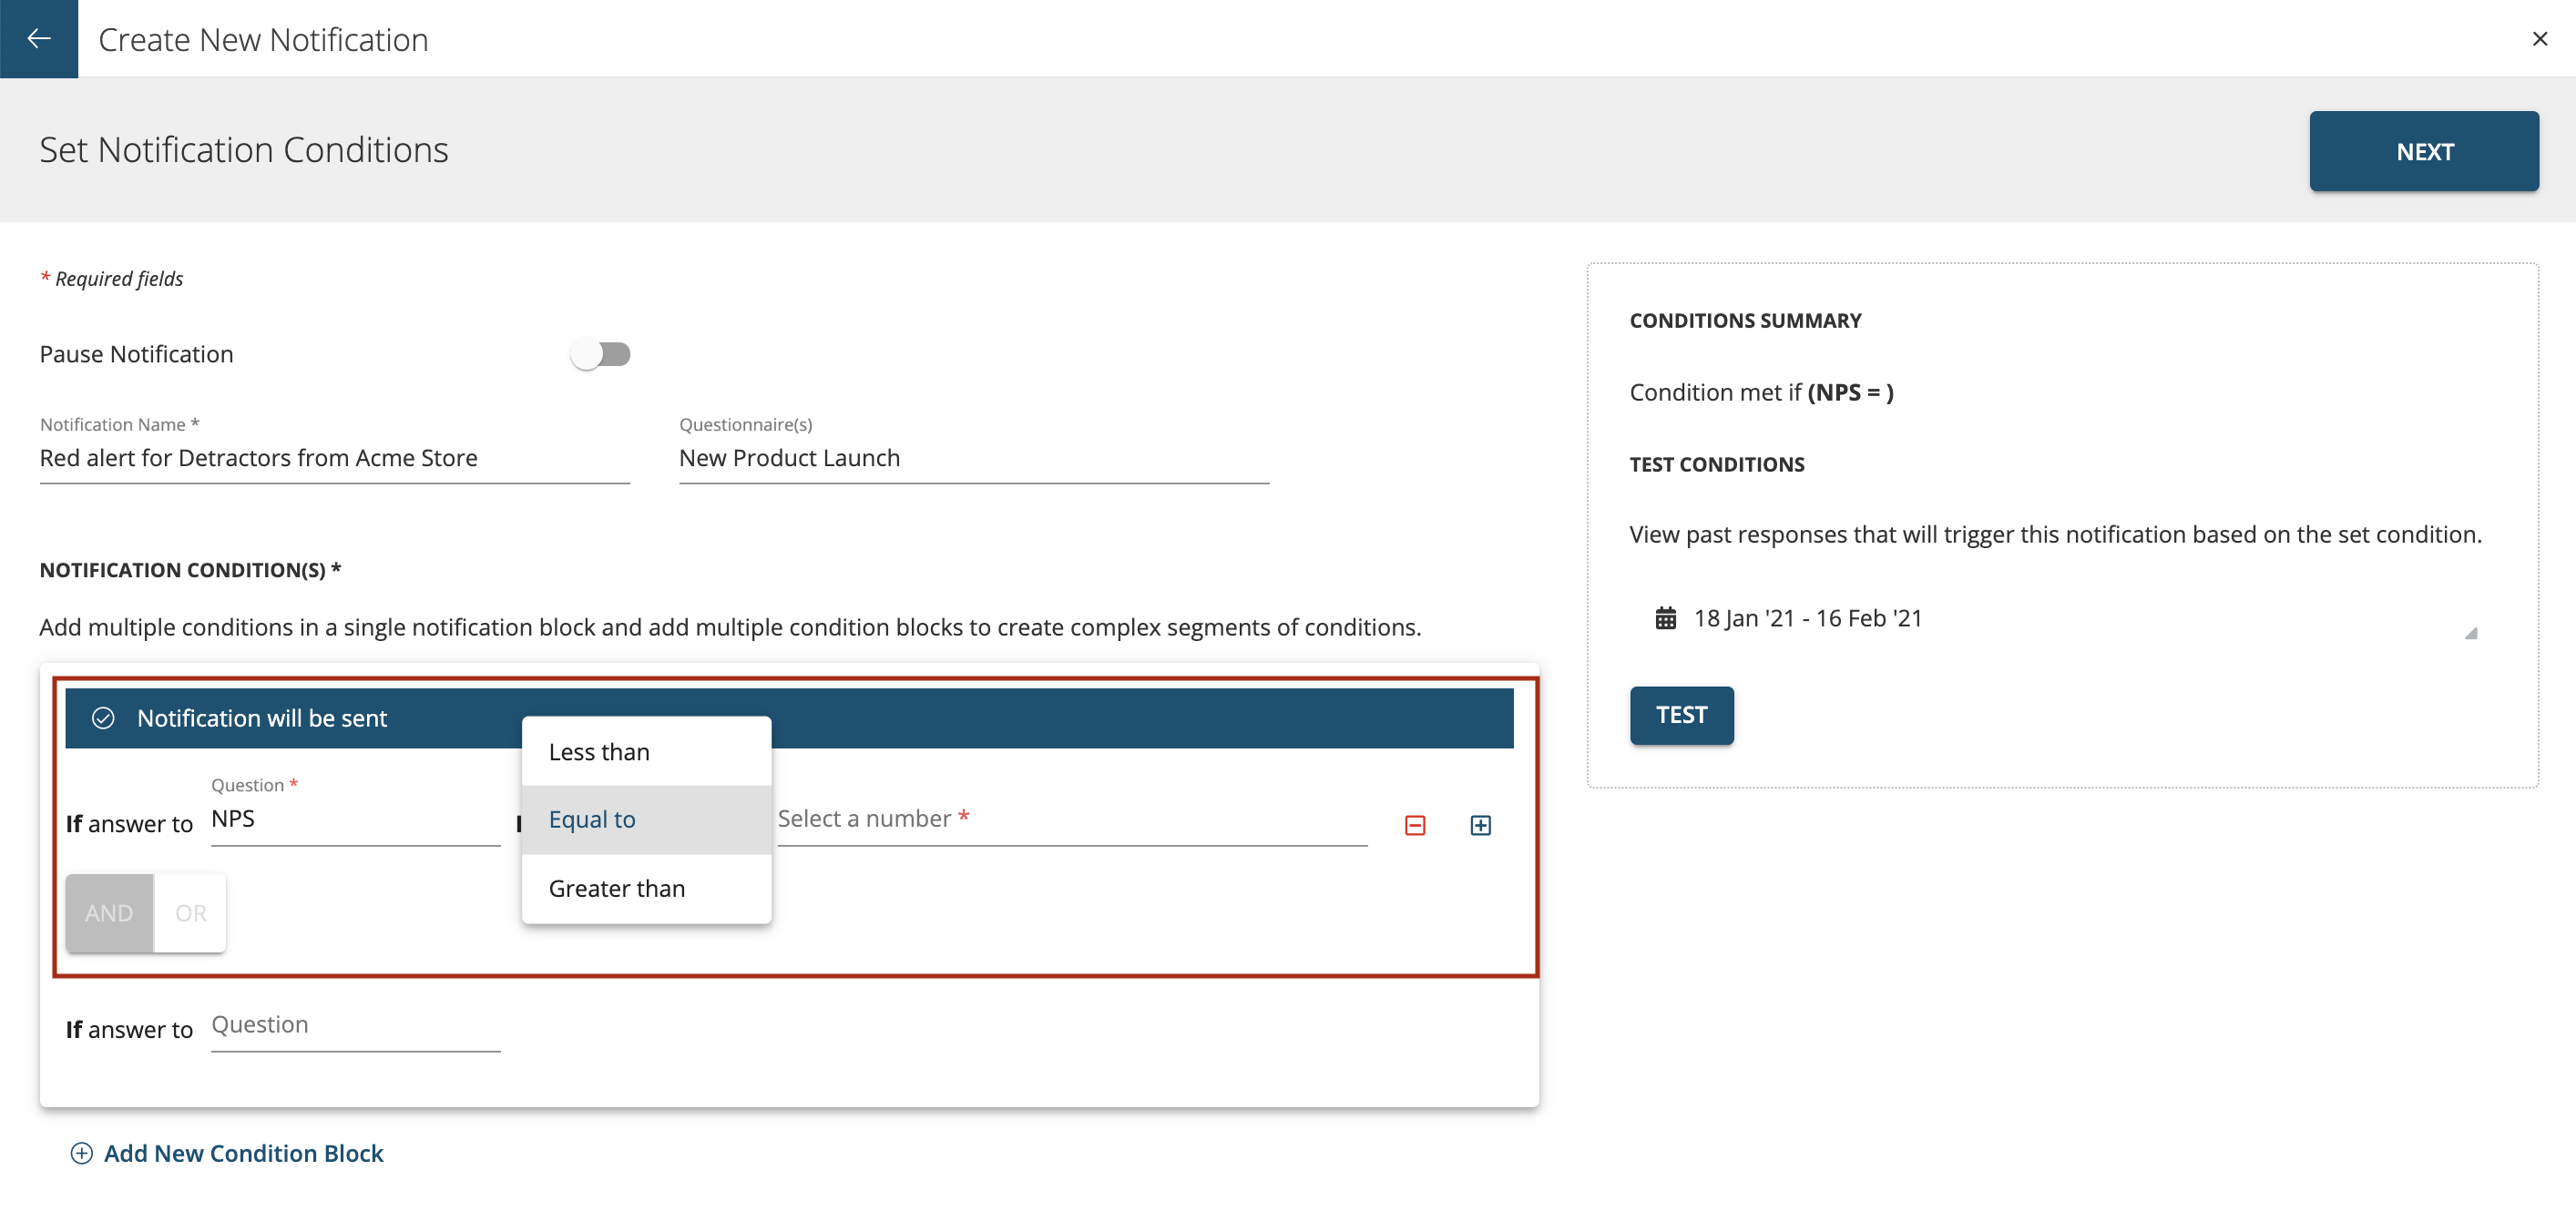
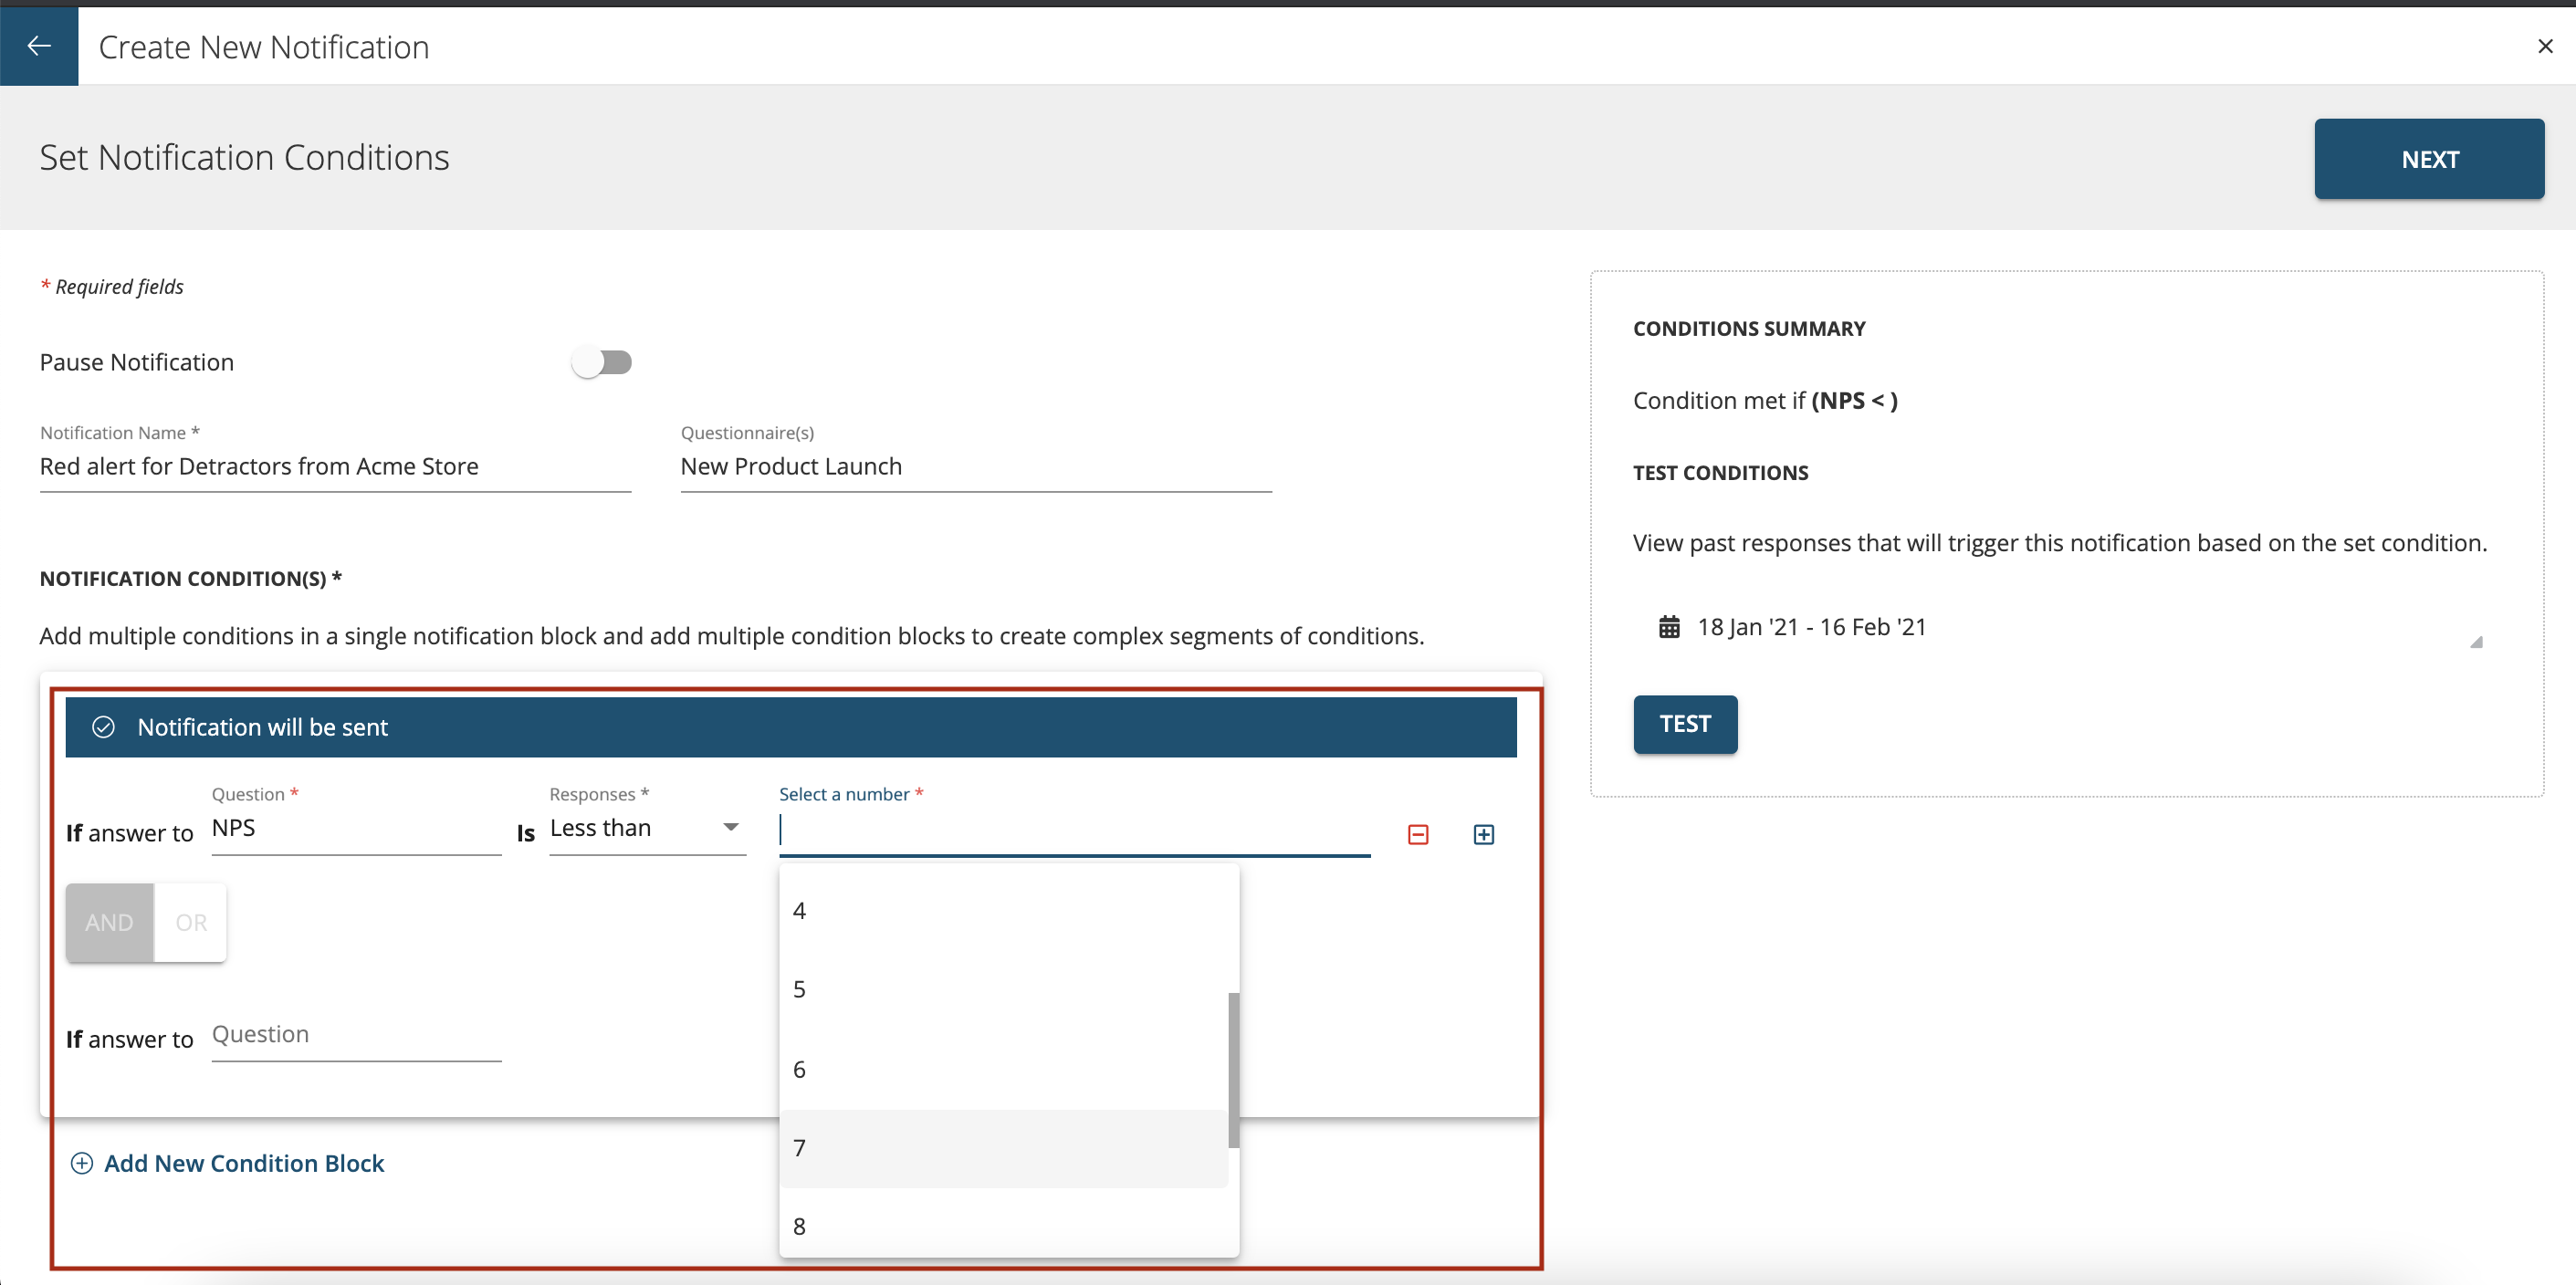
The Logic here refers to the condition that a respondent must meet in order for the notification or alert to get triggered.In the notification condition section you will see various dropdown menus like question, response and options that determine the condition parameters. For example: In the below screenshot if the NPS (Question) is Less than (Response) 7 (Select a Number or option) then user should be notified.
You can have multiple blocks and define multiple conditions as shown below. In order to Add Multiple Conditions the logic requires more complex conditions. These conditions can be connected with an AND conjunction or with an OR conjunction.
AND Conjunction- If the conditions are linked by ‘AND’, it means both conditions must be met. OR Conjunction-If conditions are linked by ‘OR’, that means either condition can be met.

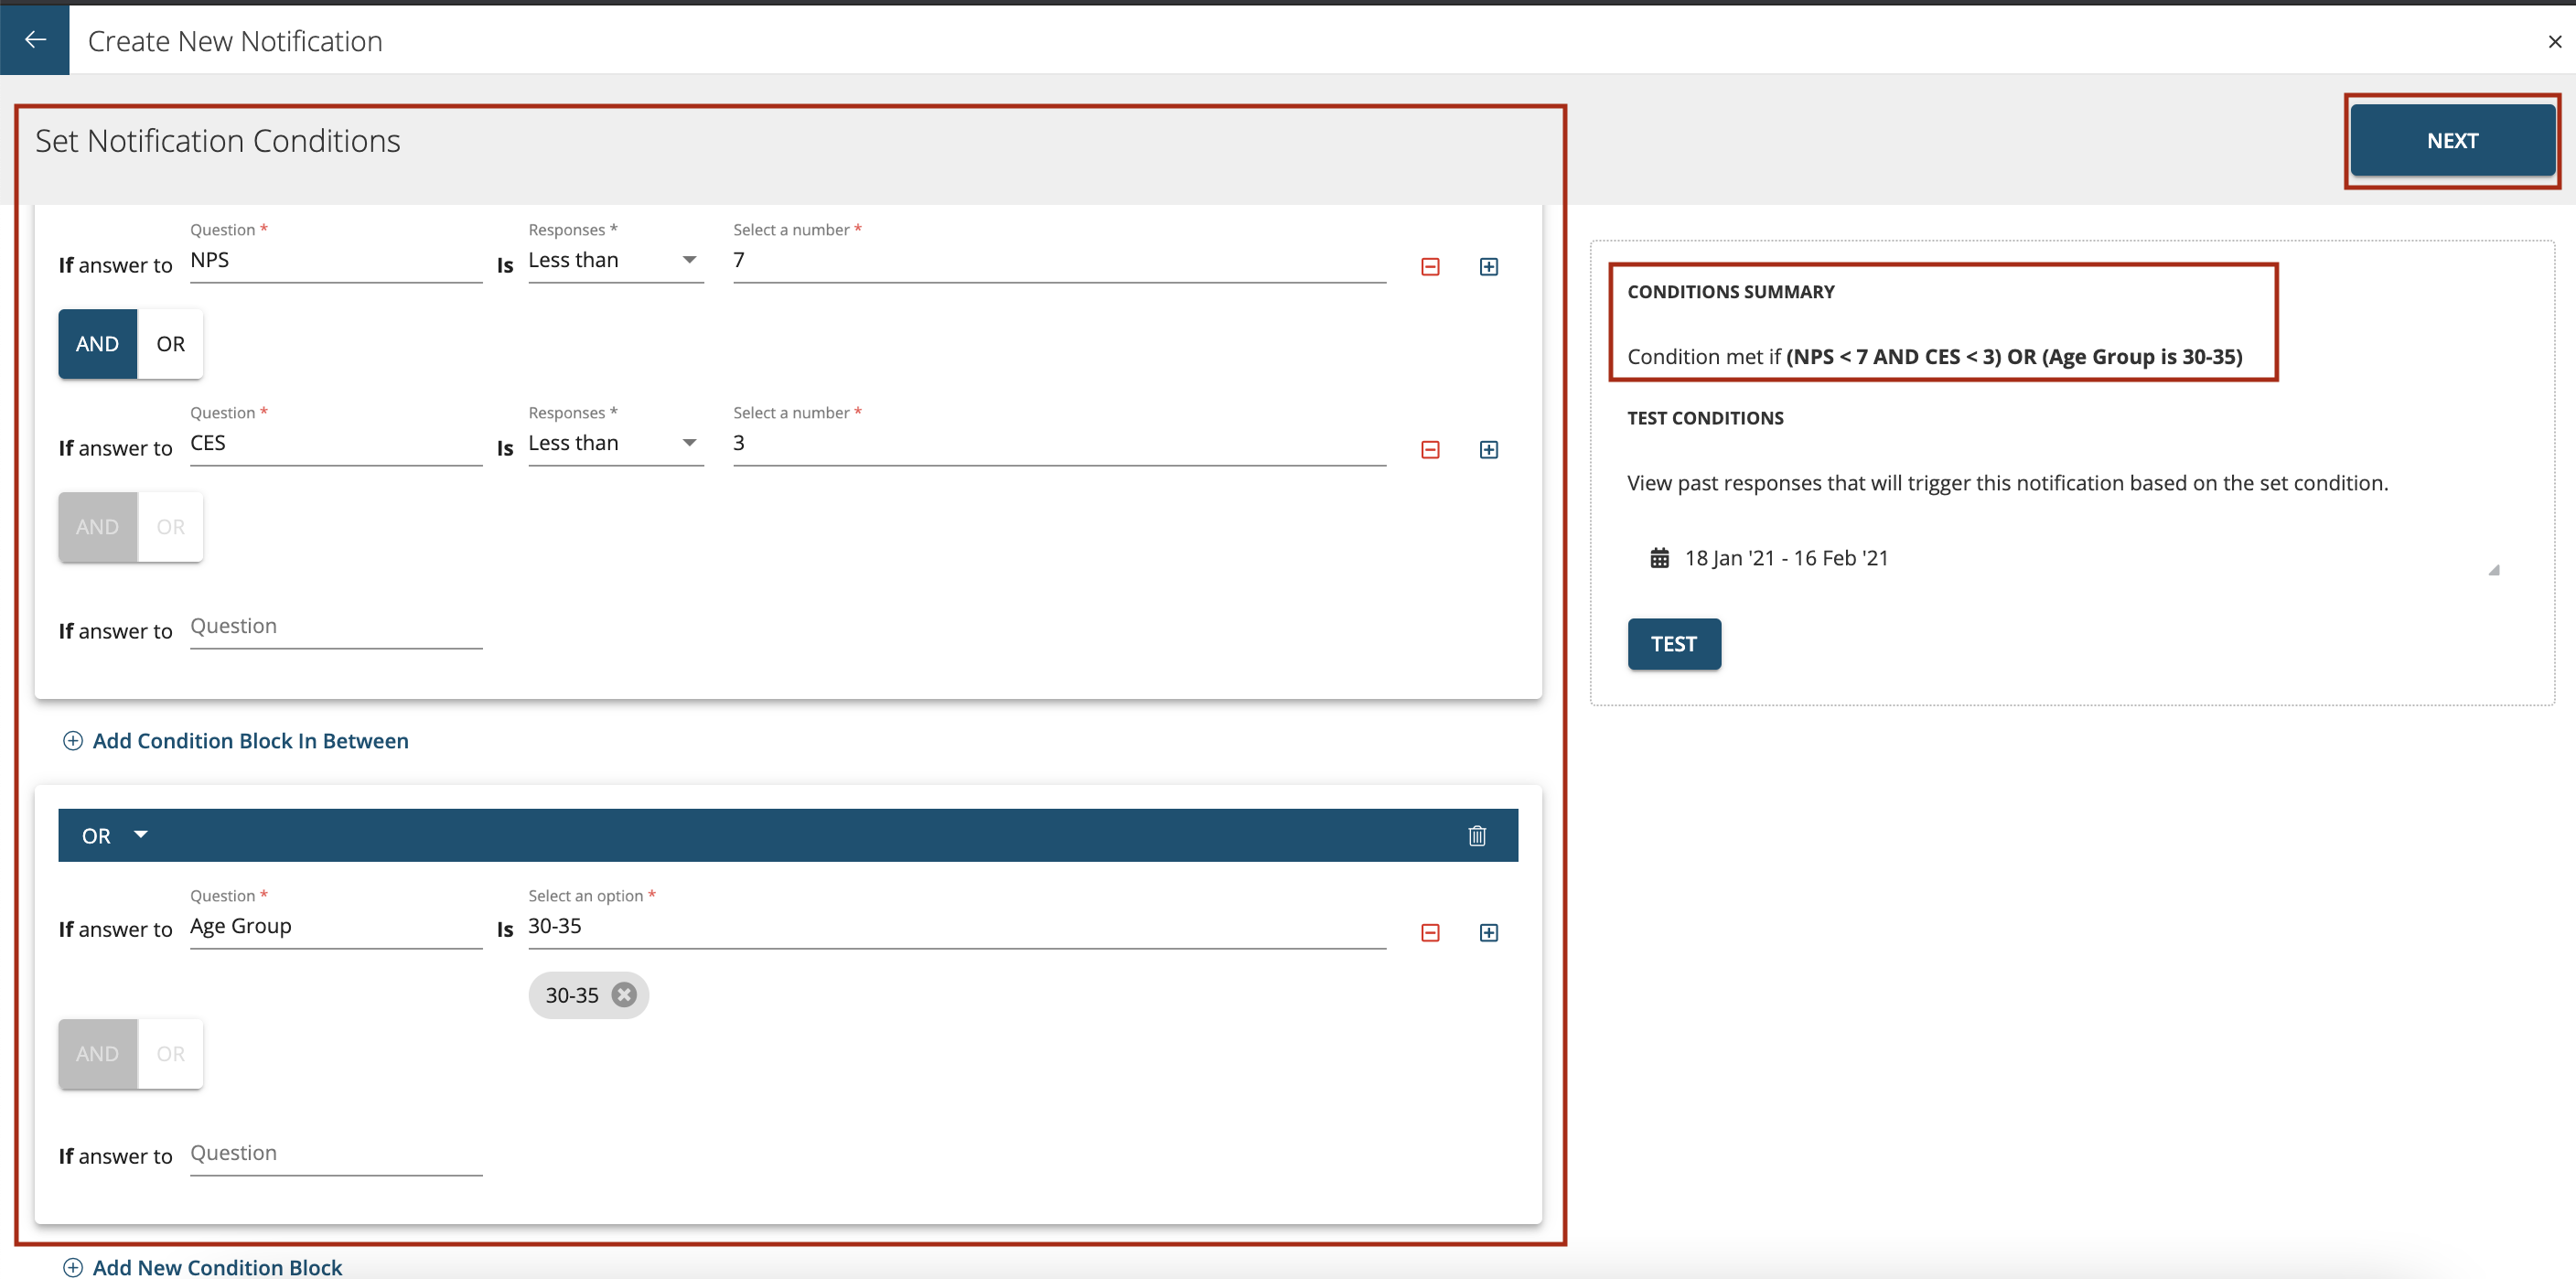
There are various ways by which you can deg=fine the logics. Use Case with Simple Logic - this is where you can use single notification block and add multiple conditions using AND and OR logic.
An example use case of the notification will be that if the customer responds to the survey questions in a way that if (NPS < 7 AND Location- is Philippines, Singapore AND Age Group is 30-35, Under 25) then notify the user via email as shown below.
he right panel of the window shows the Condition Summary based on the blocks configured as shown in the screenshot below.
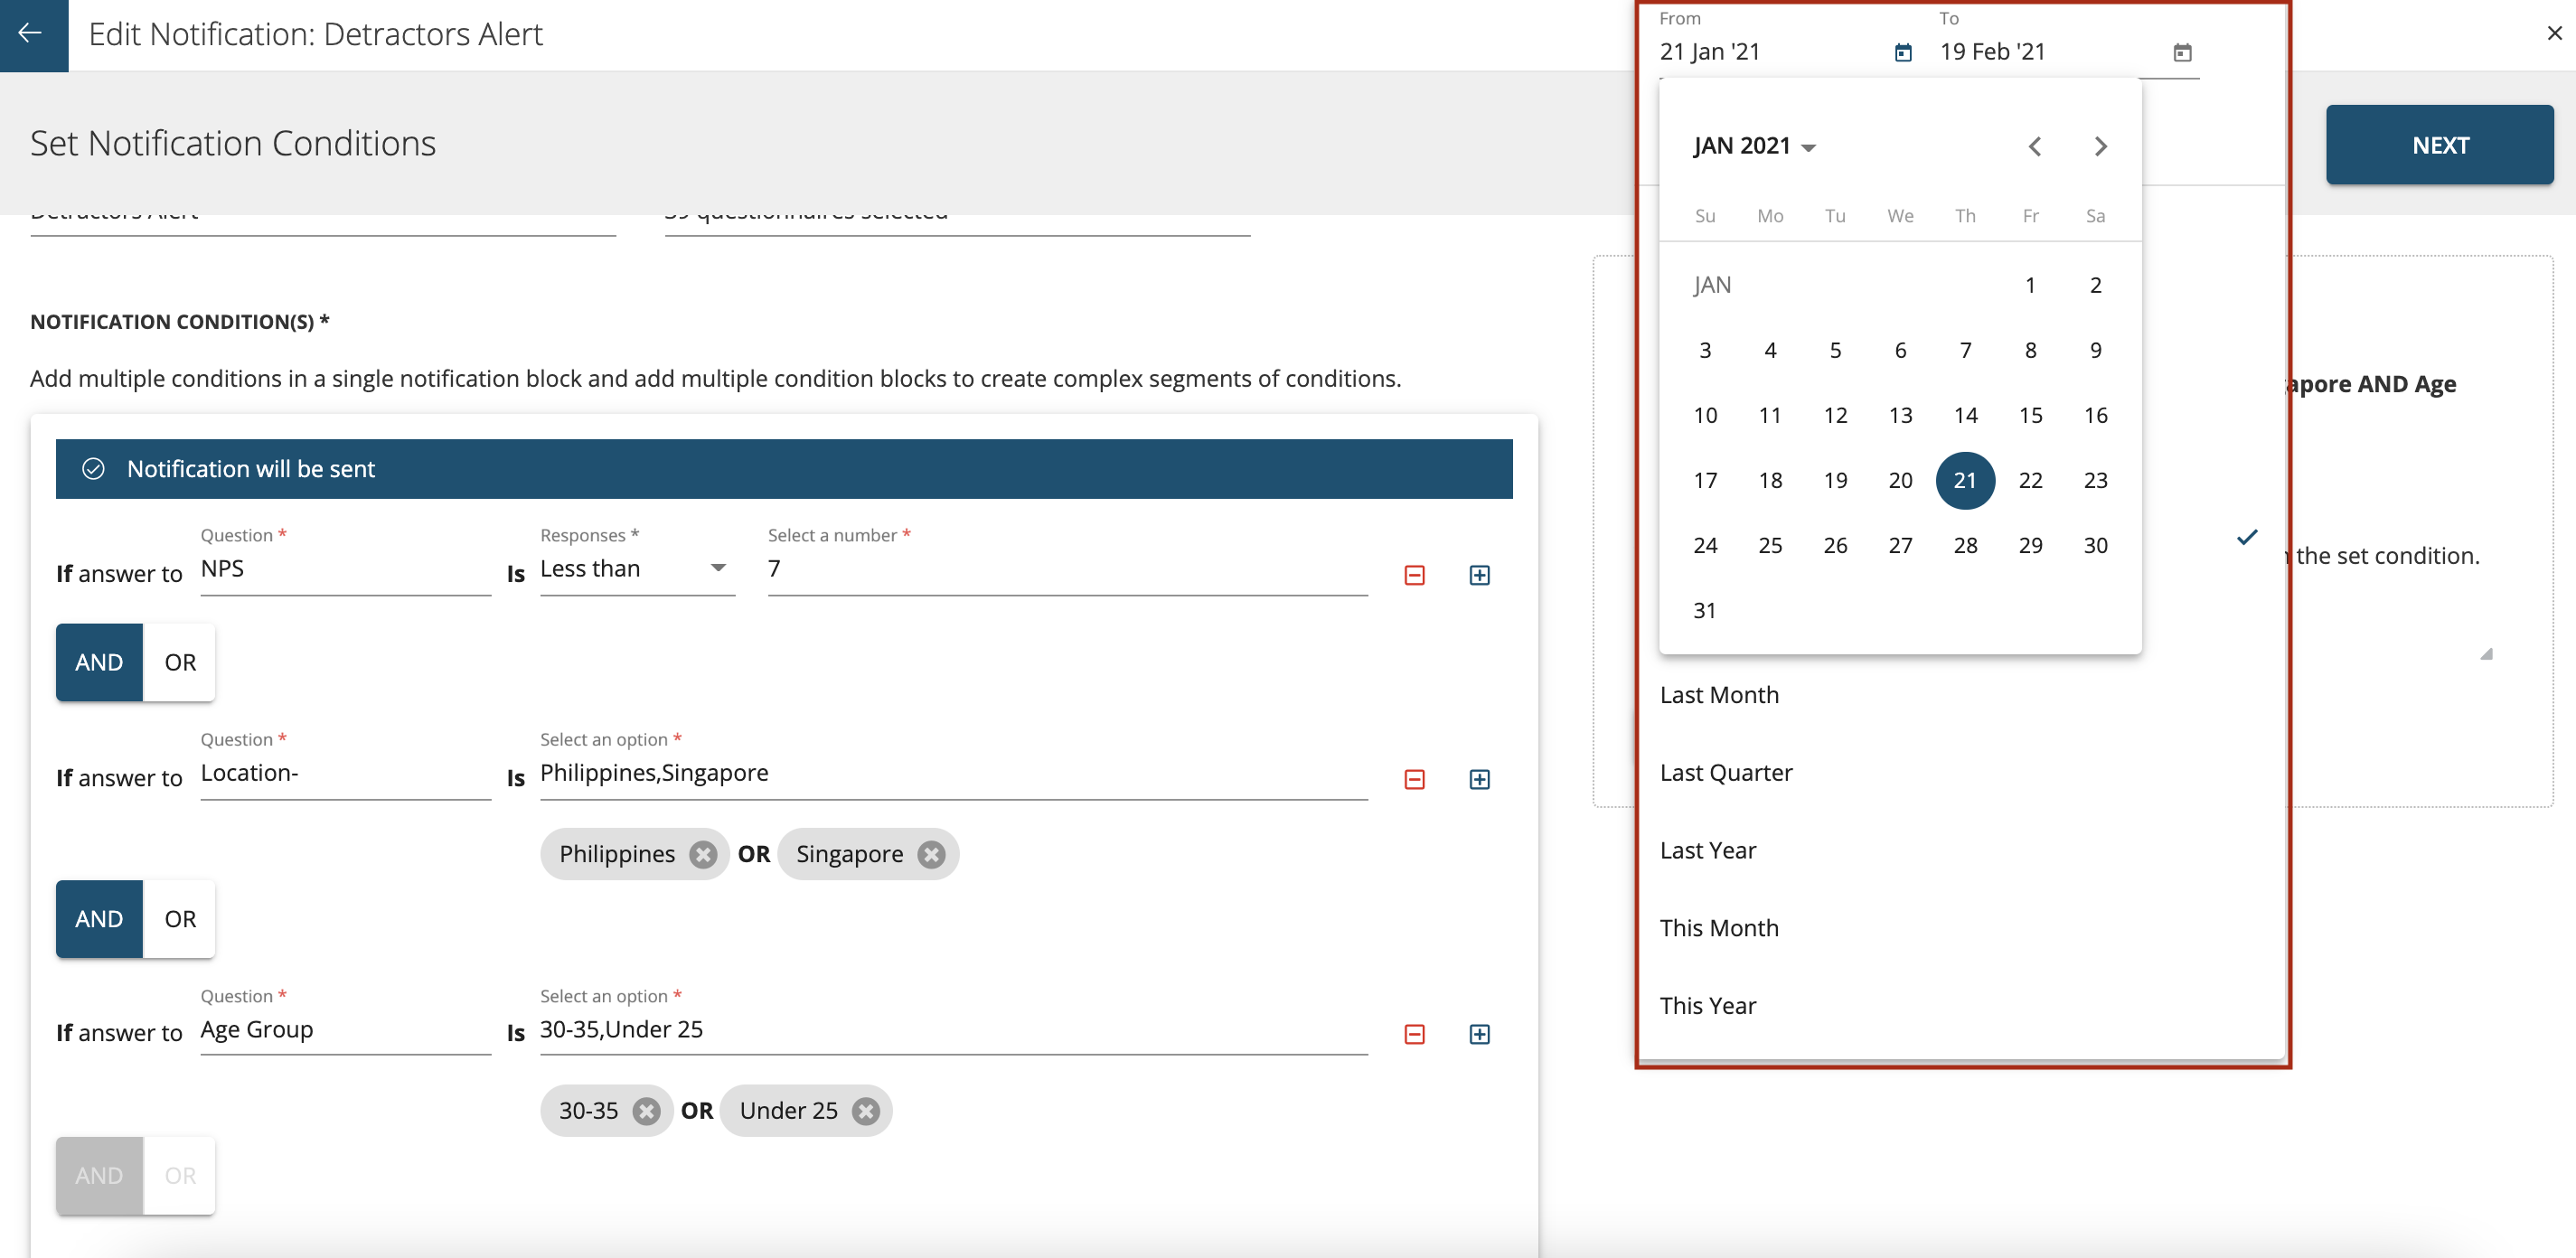
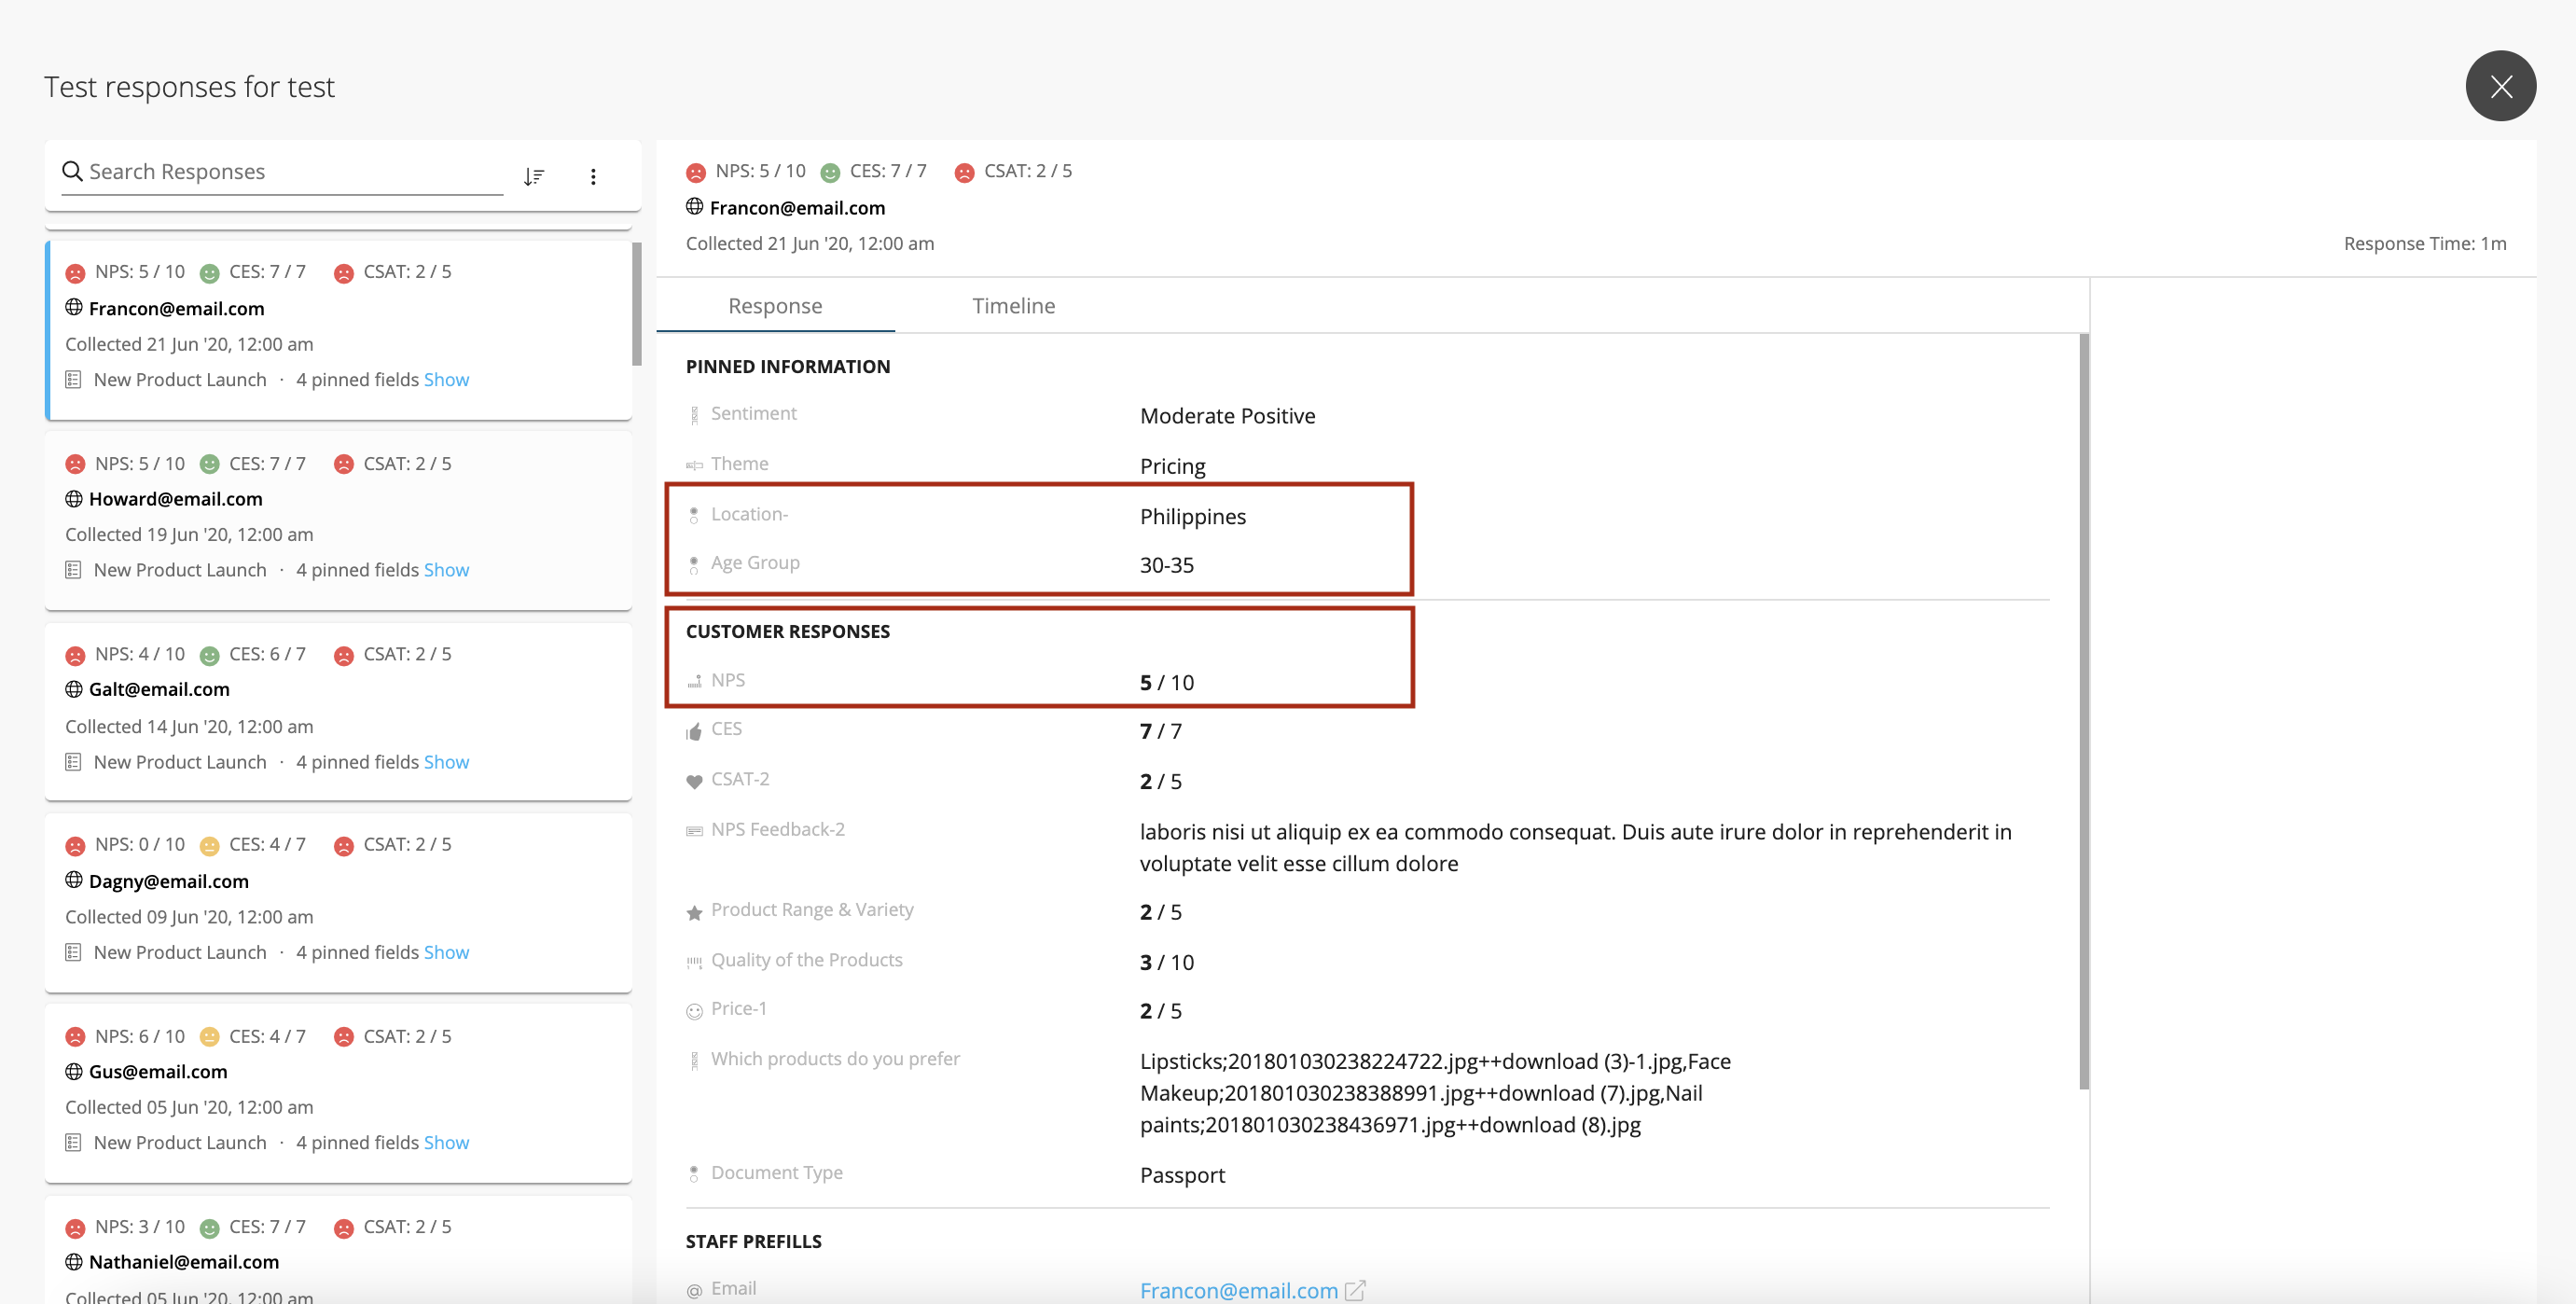
With Test Conditions you can view past responses that will trigger this notification based on the set condition. Choose the date range as shown below to view the test responses for that period in the past.

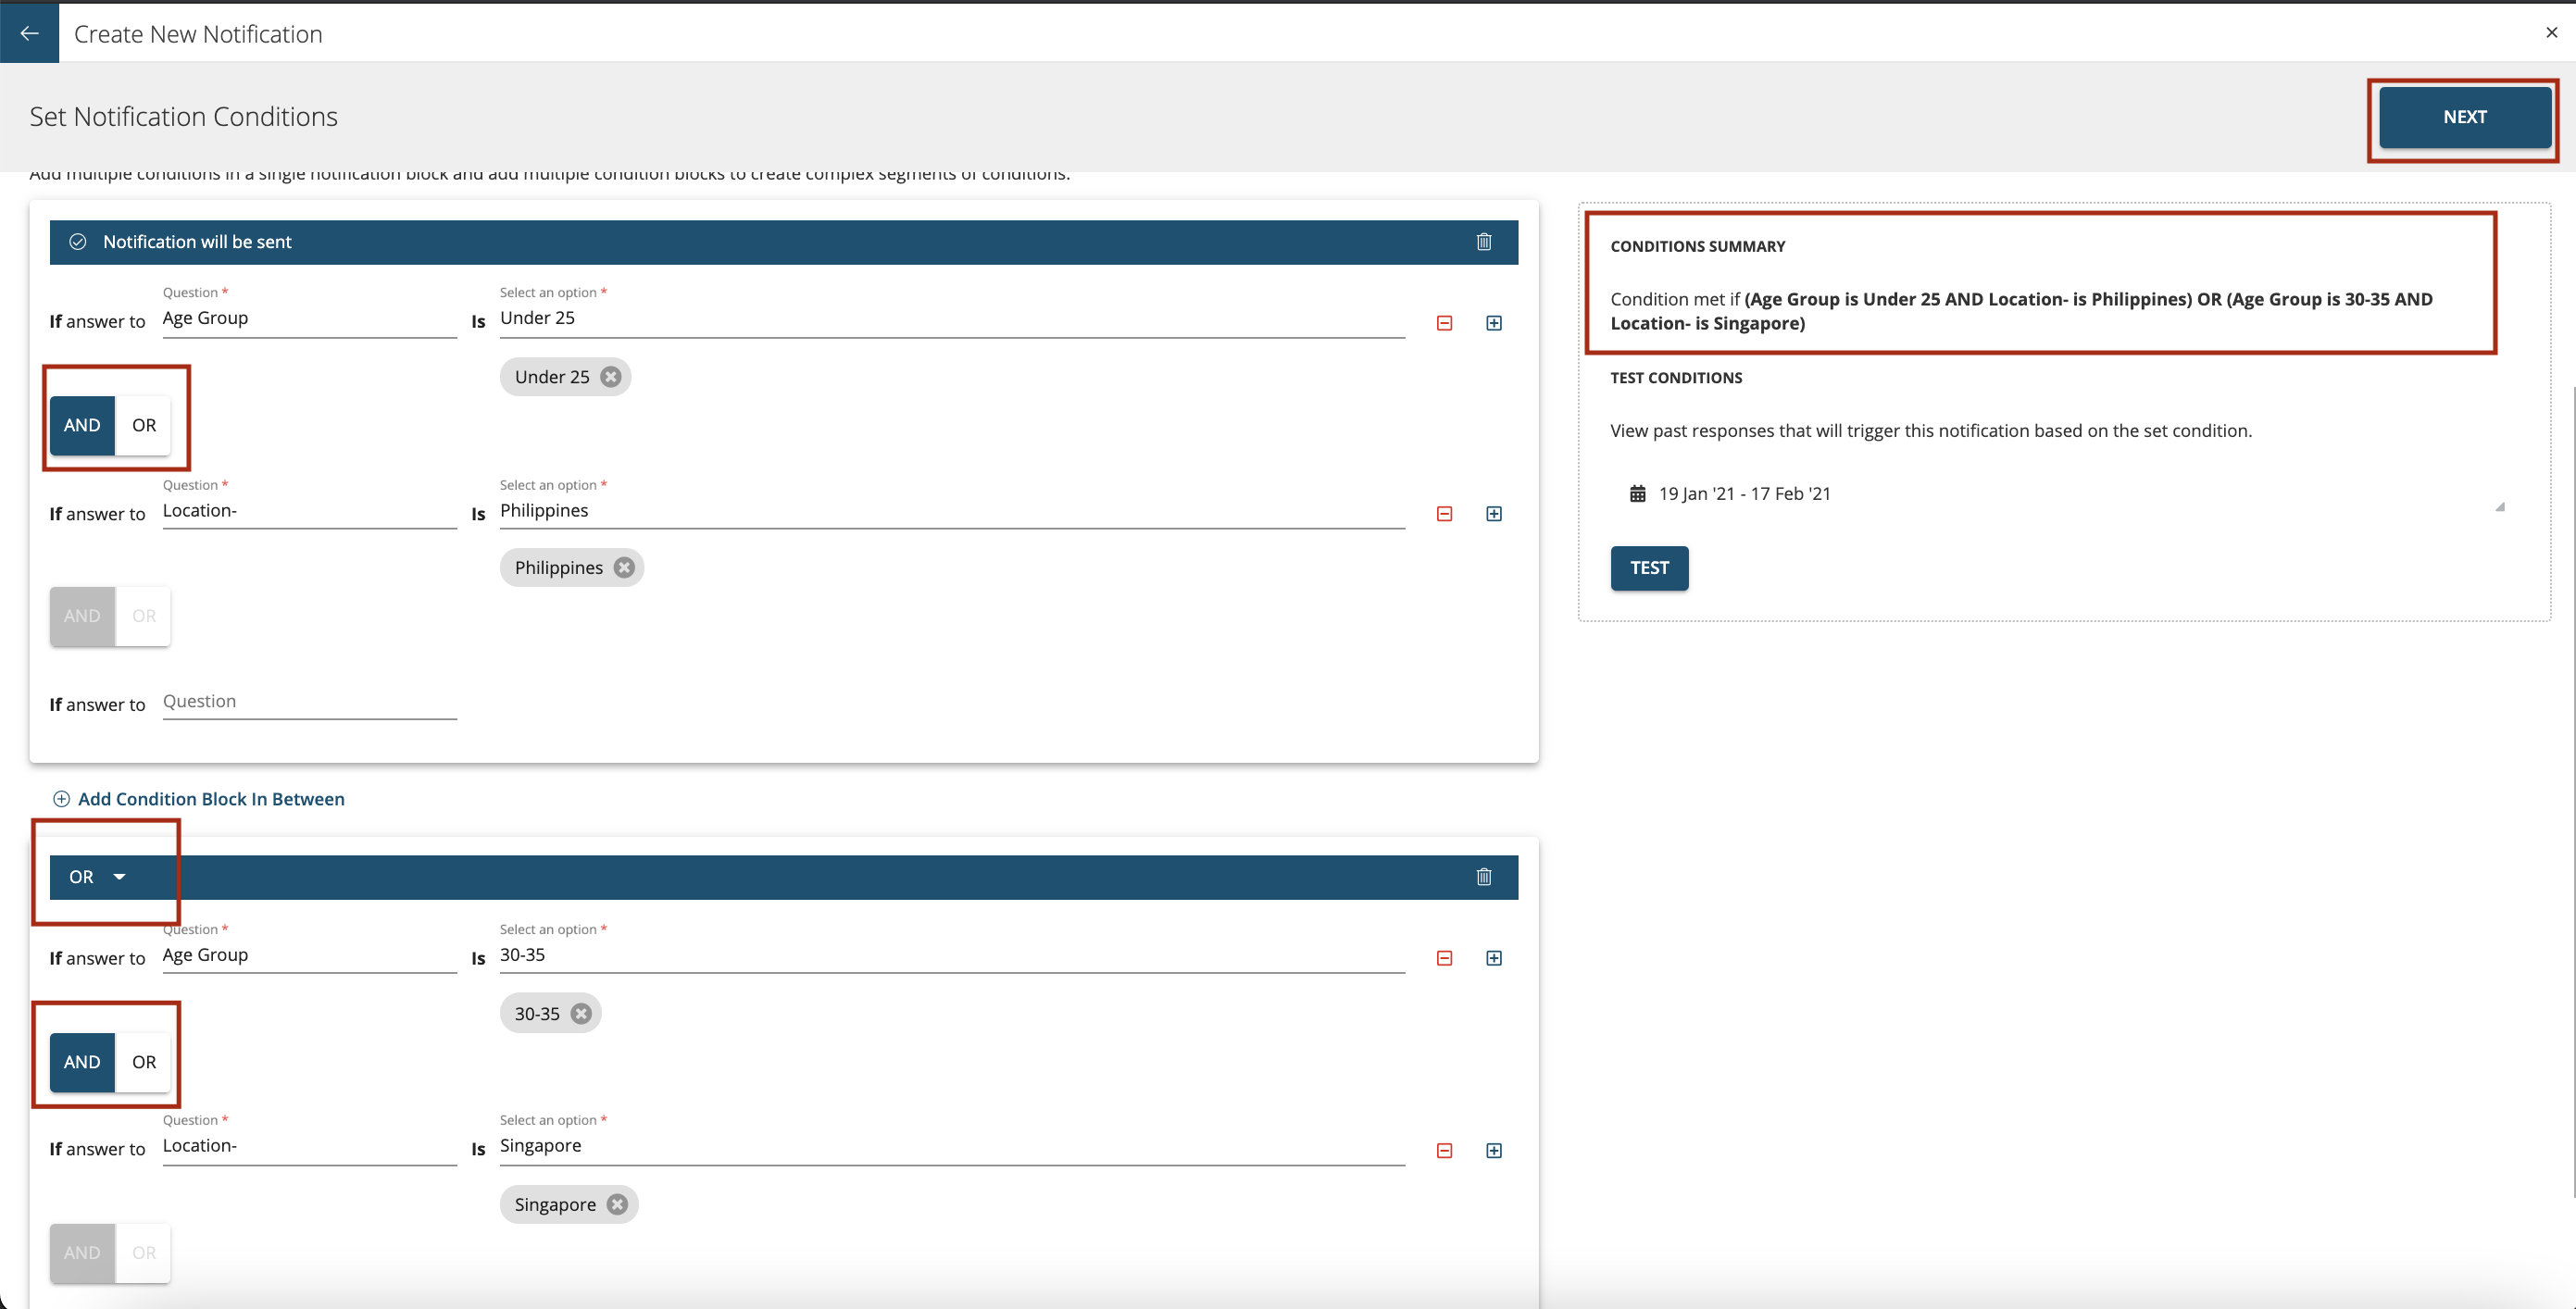
Use Case with Complex Logic - This can be achieved by having multiple conditions blocks as shown below. When you use multiple blocks then all the conditions define in the blocks are evaluated together.The Blocks can also be linked with an AND conjunction or with an OR conjunction.
Example use case: Block-1: If (Age Group is Under 25 AND Location- is Philippines) Block-2: OR (Age Group is 30-35 AND Location- is Singapore) then notify the user via email as shown below.
Once the conditions are configured then click on ‘Next’ button as shown below.
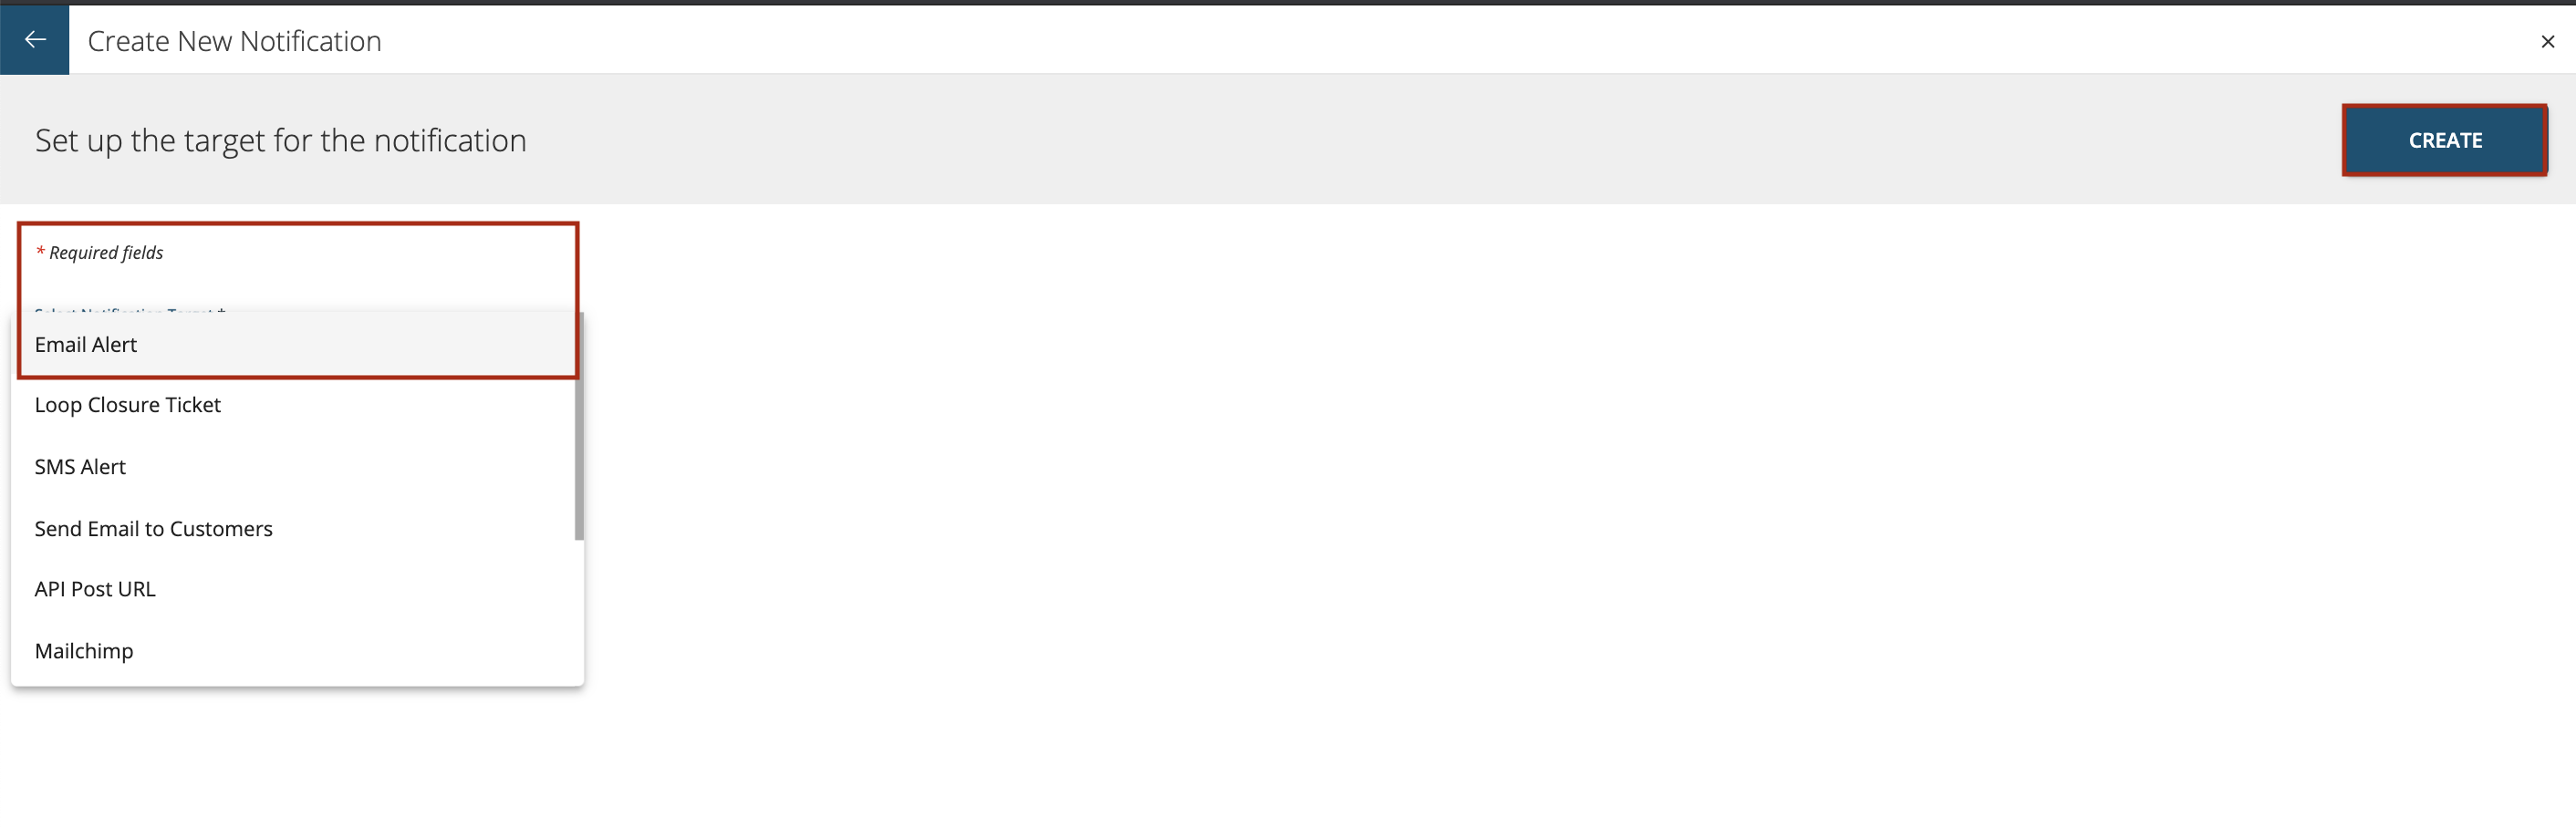
Select the notification target from the dropdown as show. For example: Email Alert. Based on the selection system will send an email alert in realtime or end of day summary when the set conditions are met.
Email Alert
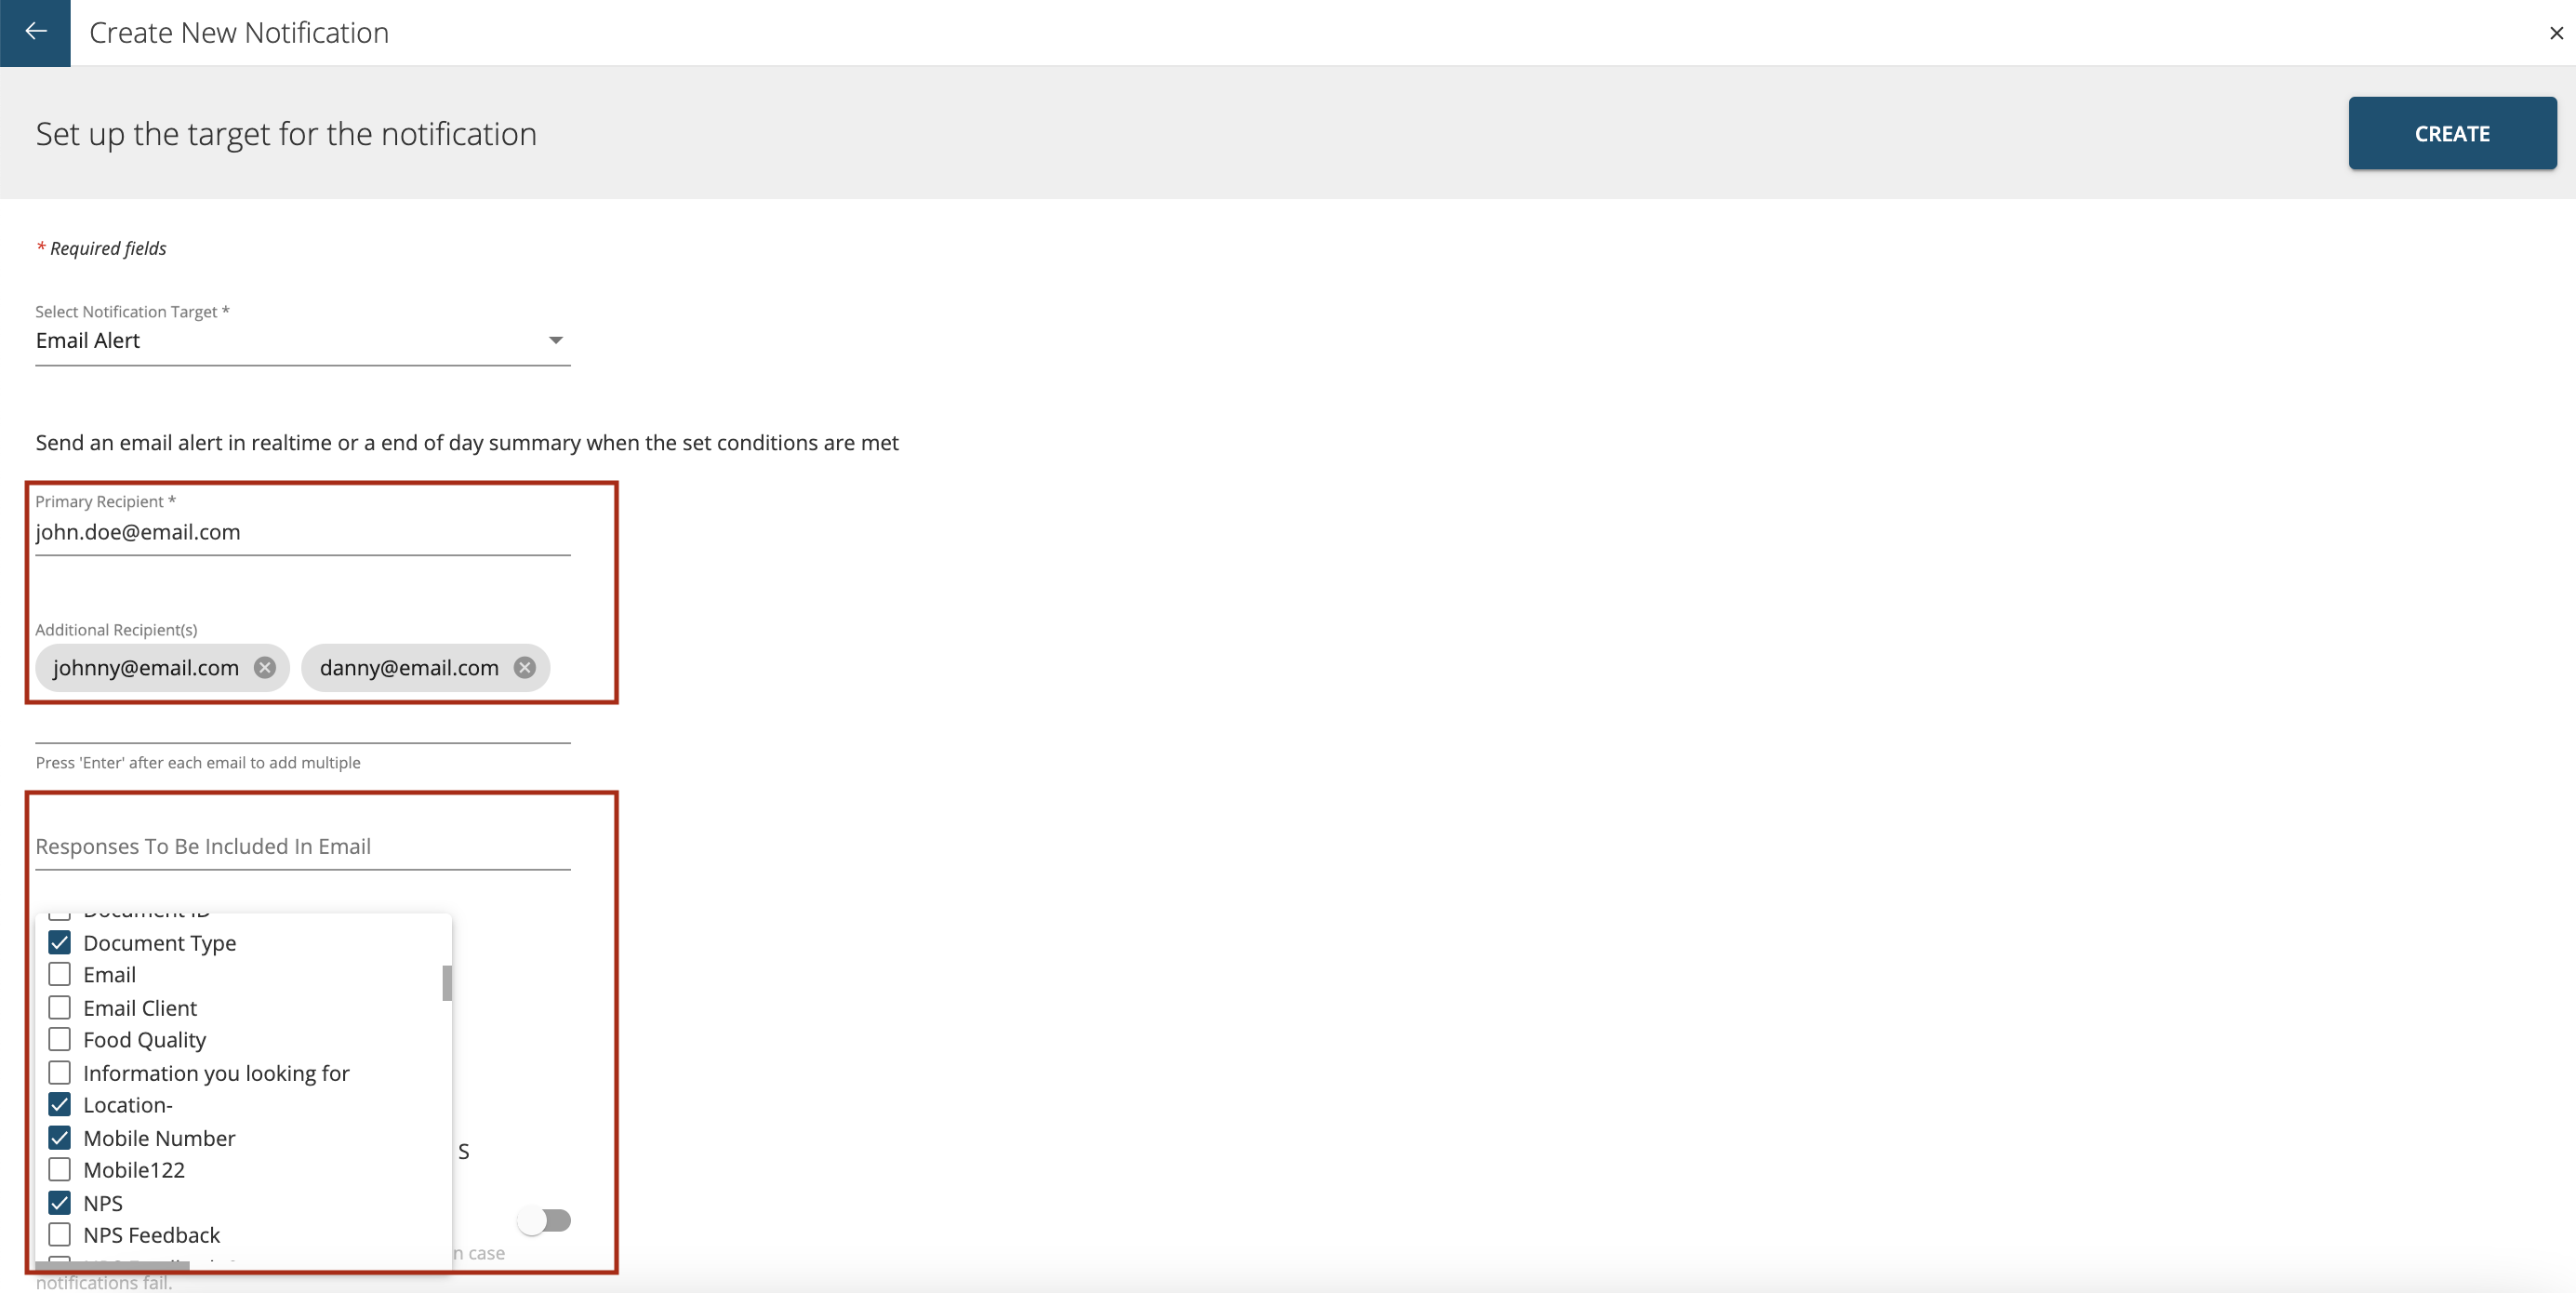
Enter the email address of the ‘Primary Recipient’ and ‘Additional Recipient(s) as shown. Press ‘Enter’ after each email to add multiple email address in the additional recipient section as shown below.
Select the details of responses you would like to be part of the email alert from the dropdown under ‘Responses To Be Included In Email’ section as shown below. For instance: Show NPS score, Location, Age group in the email alert along with the customer comments.
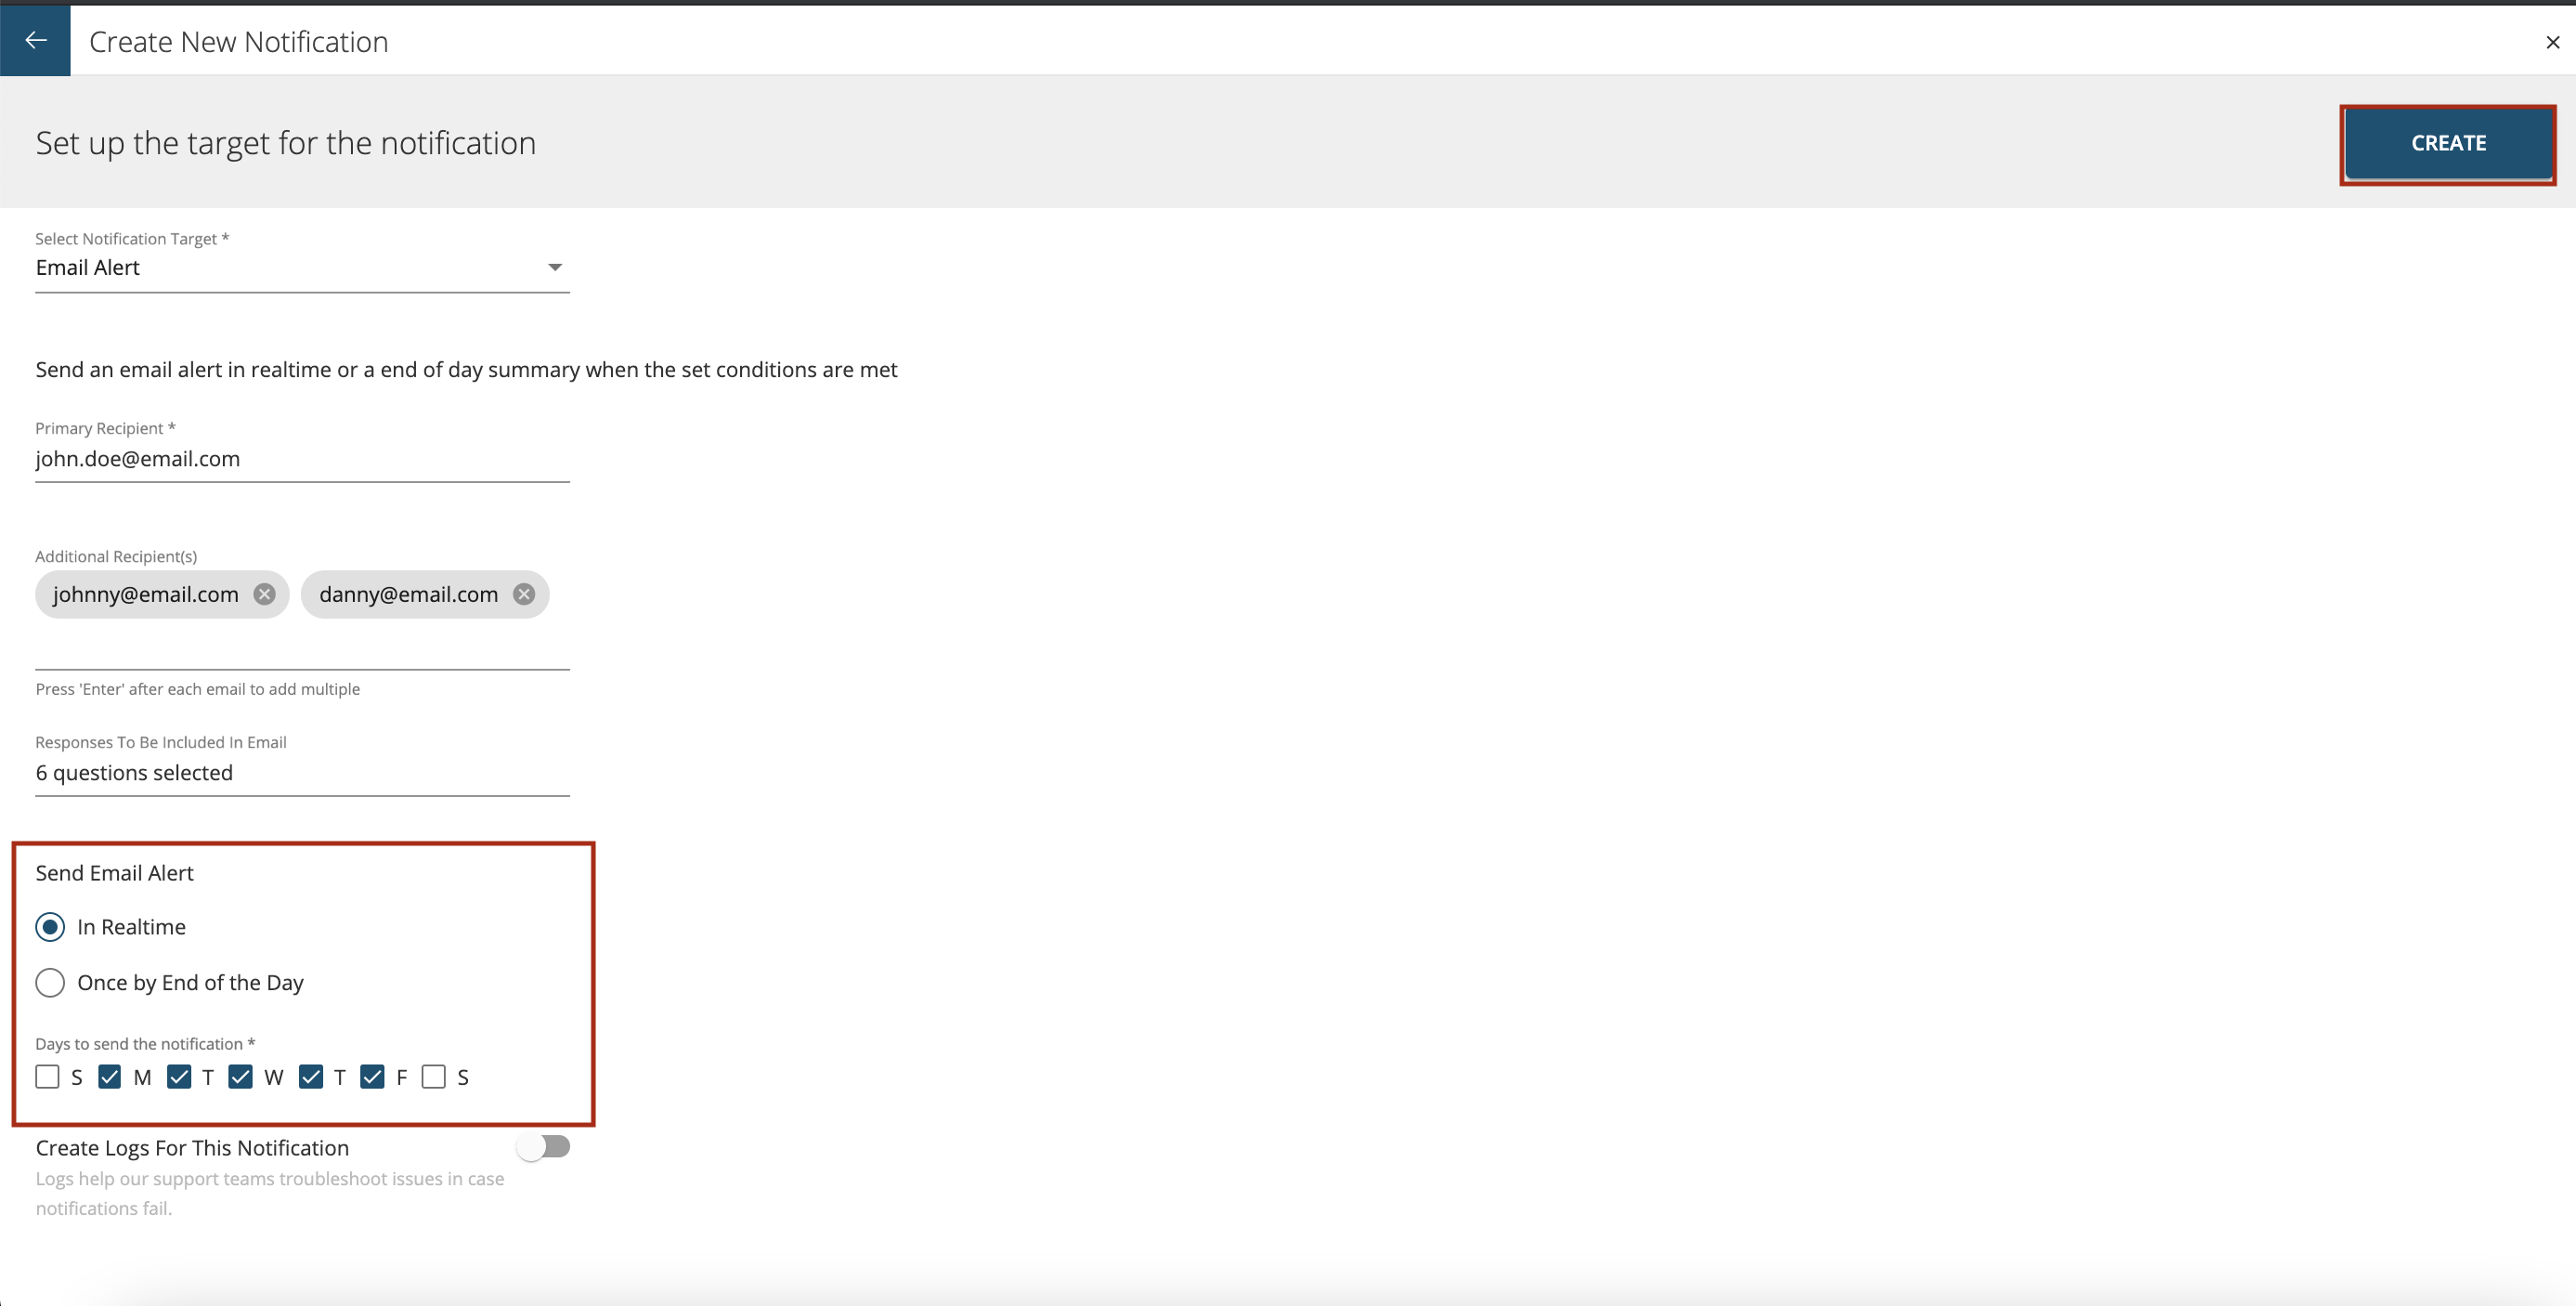
Select how you want to ‘Send Email Alert’
- In Realtime
- Once by End of the Day
Select which days of the week the email alert (notification) should go to the users as shown below. For instance; your organisations SLA’s (Service Level Agreement) says that you will only respond to customers from Monday to Friday and not during the weekends (Saturday and Sunday), then i that case you can uncheck the weekends as shown below.
Then press ‘Create’.
SMS Alert
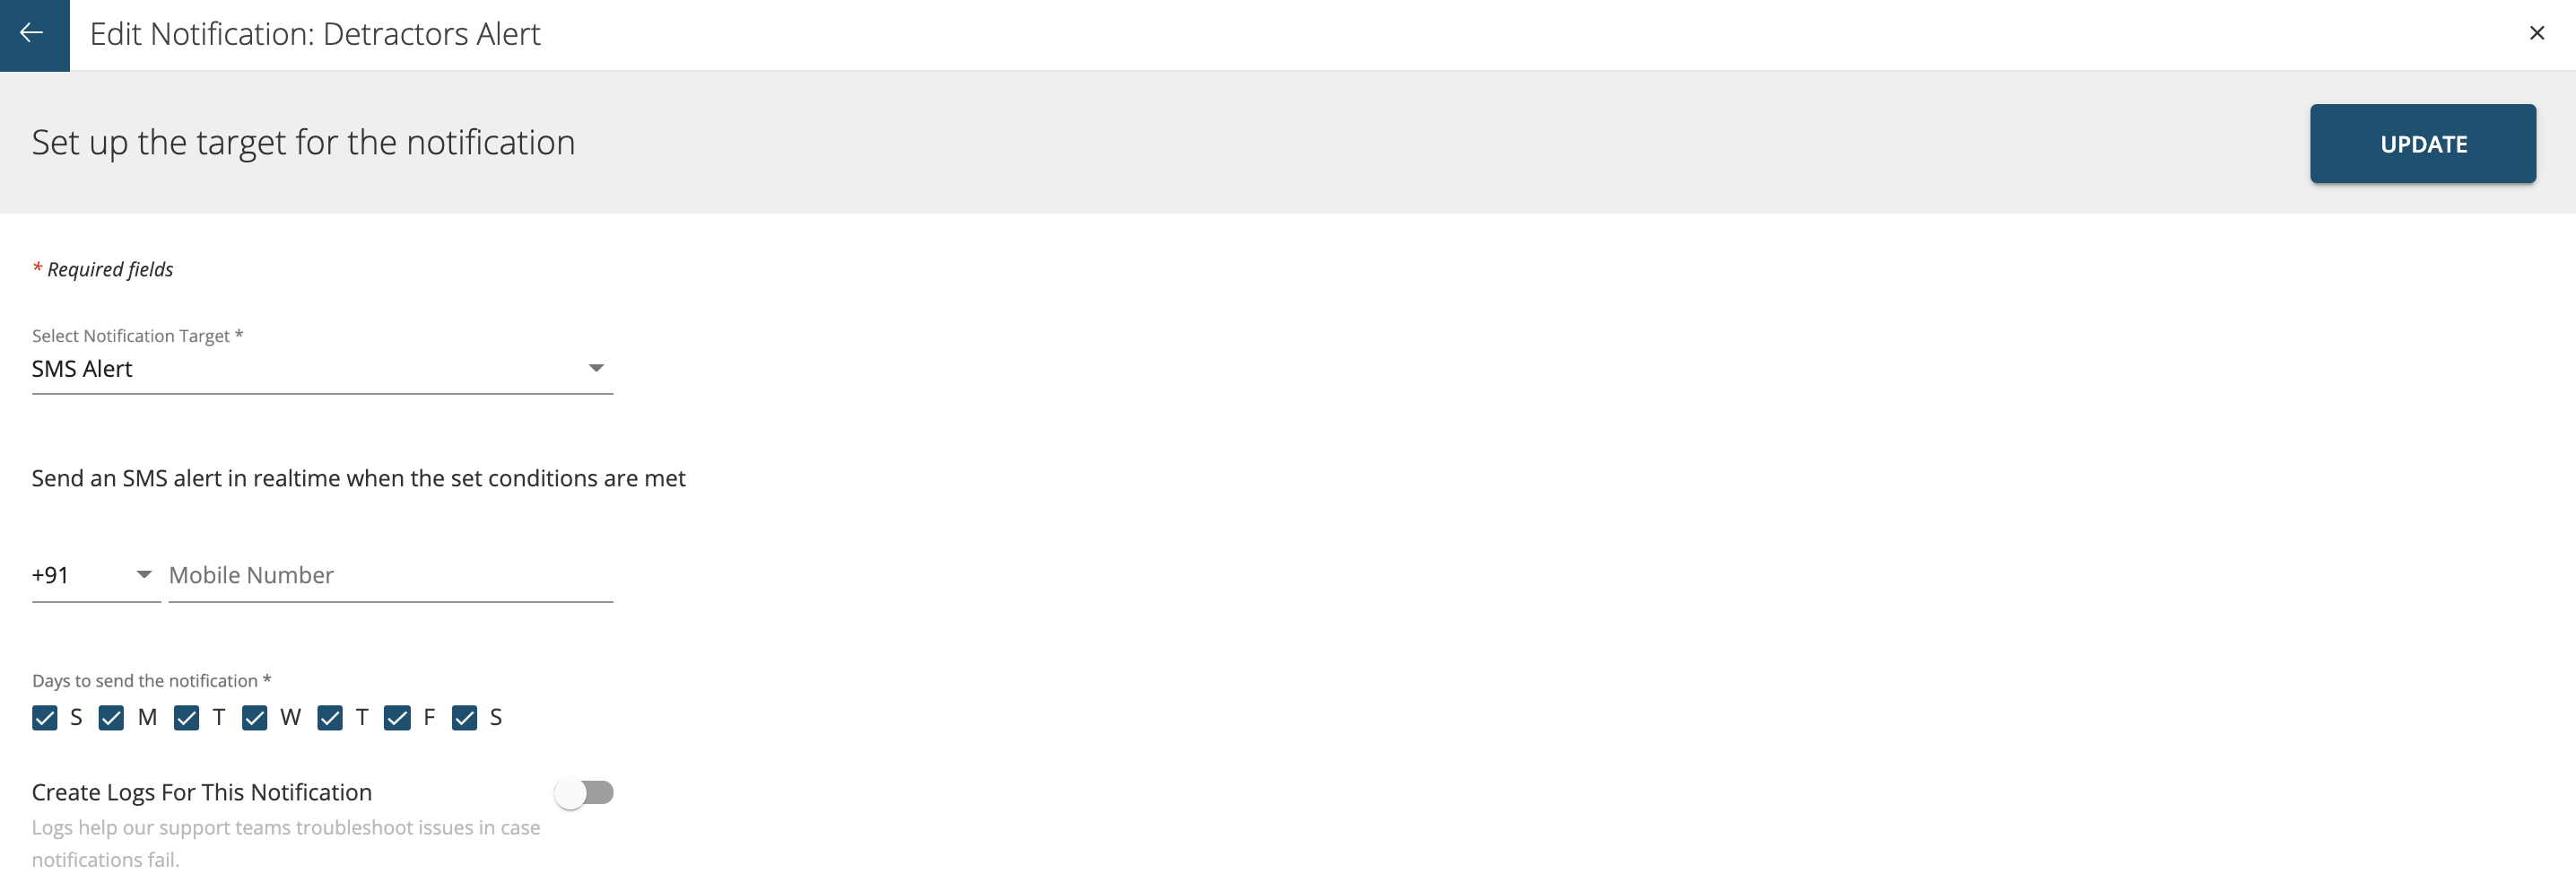
You can select the notification target to be SMS. In that case you need to enter the mobile number of the user who you want should receive the alerts via SMS. When the set conditions are met an SMS alert is send to the user in realtime.
Similar to Email Alert you can select which days of the week the SMS alert (notification) should go to the users as shown below.
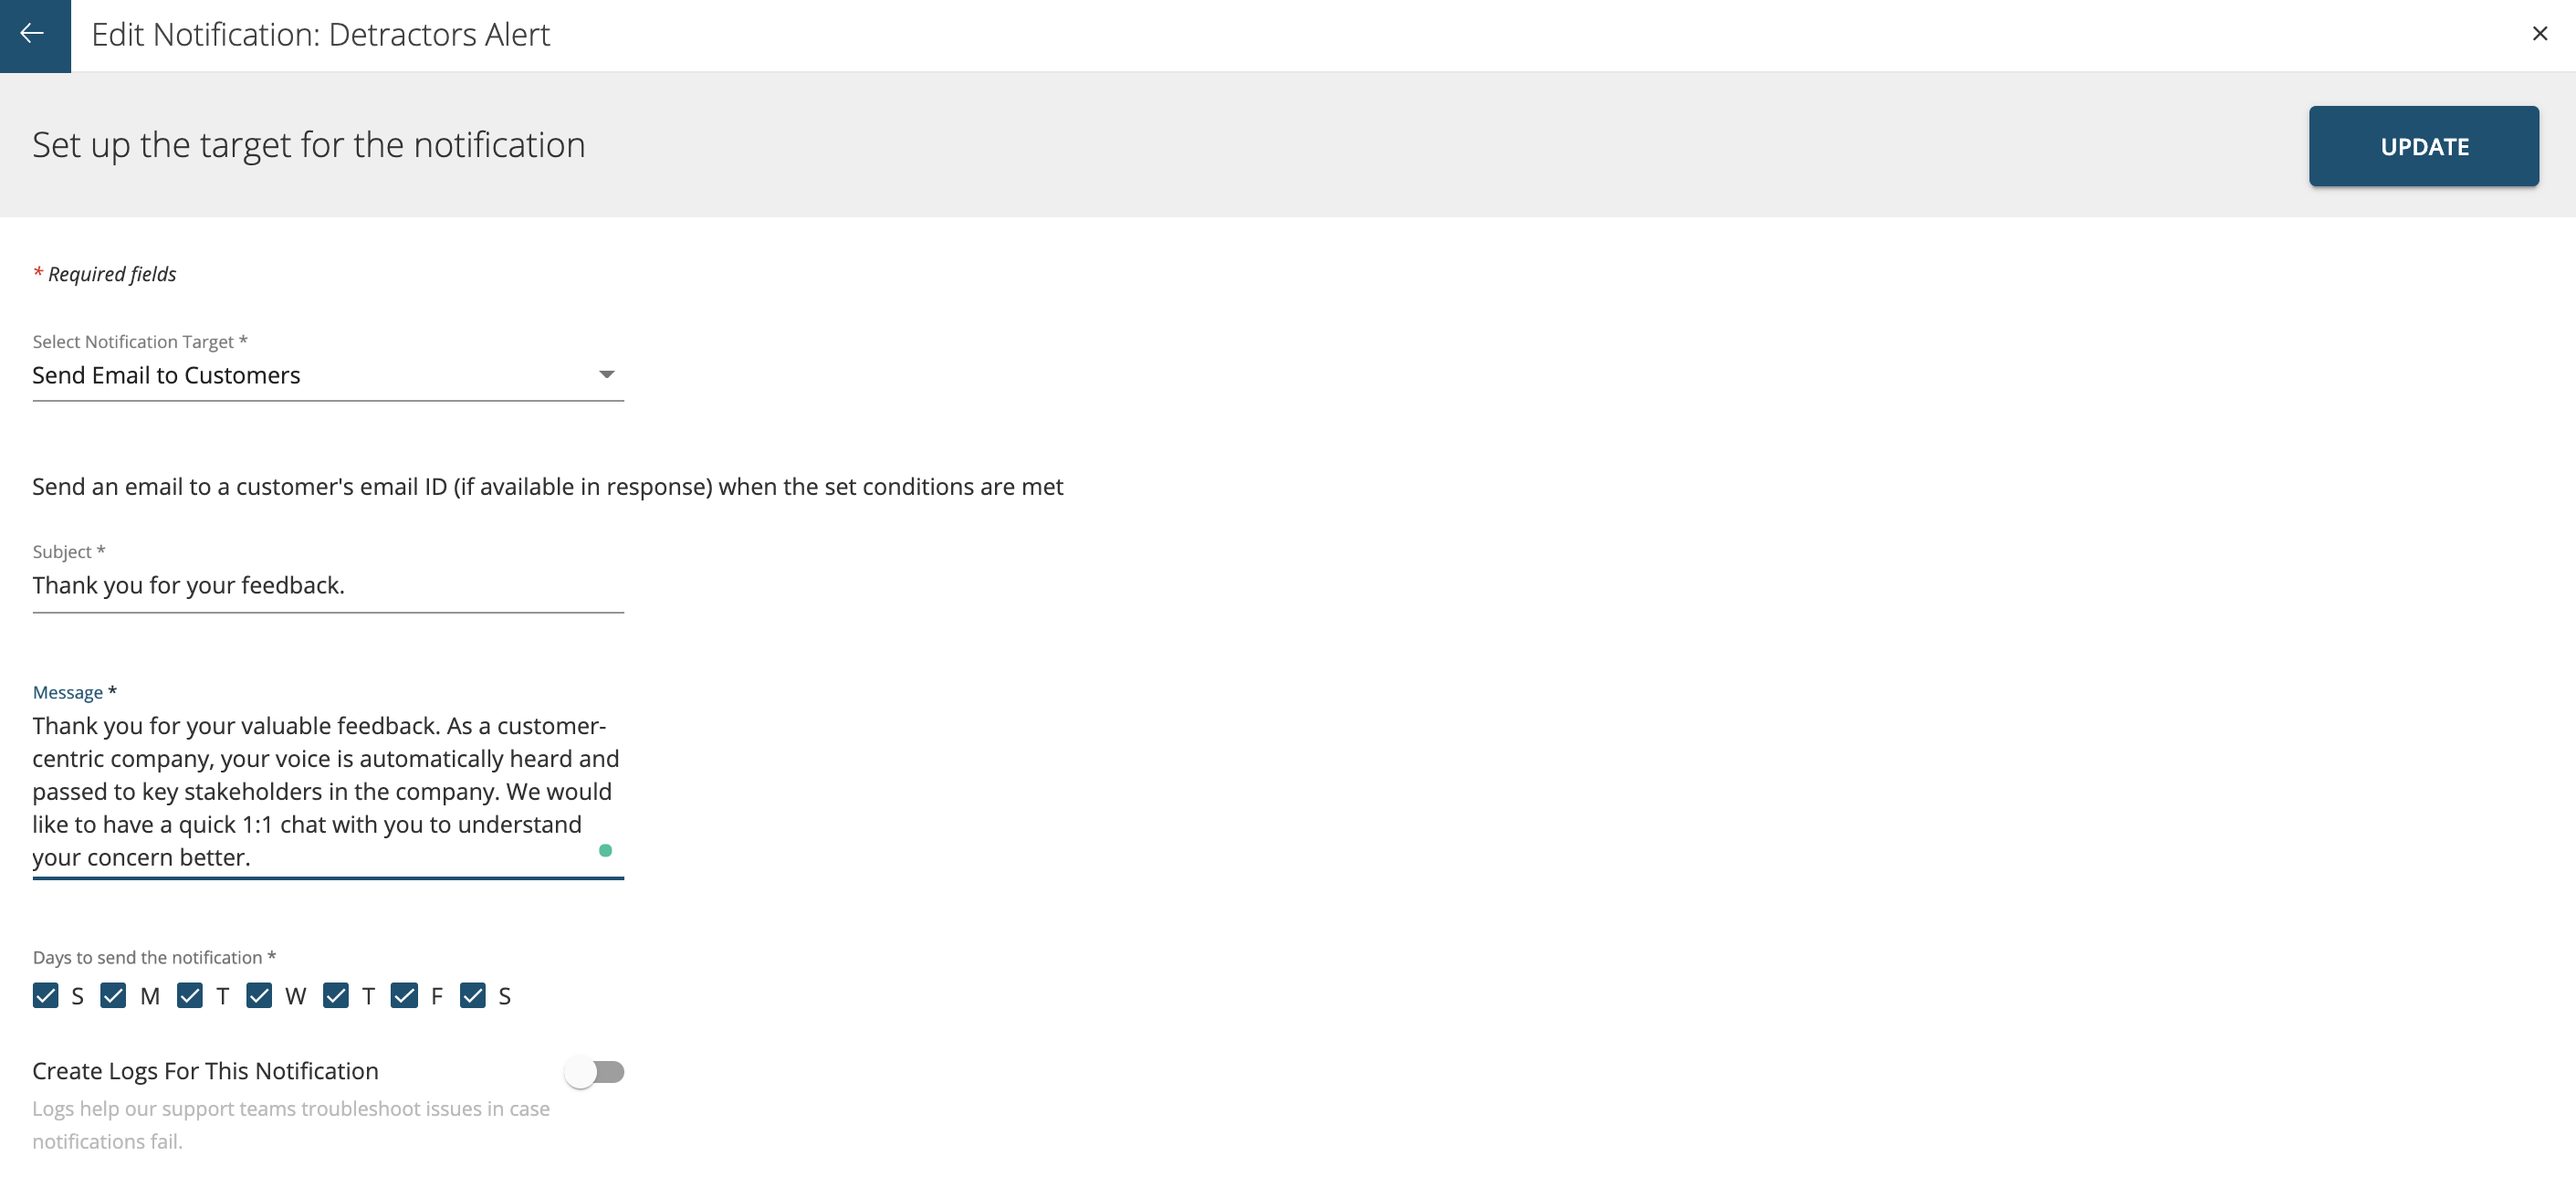
Send Email to Customers
You can set ‘Send an email to a customer’s email ID’ from the dropdown options as notification alert (if available in response) when the set conditions are met. This is an automatic email trigger.
Configure the ‘Subject’ and ‘Message’ body of the email as shown below along with that select which days of the week the automatic email should be send to teh customers.
There are other 3rd party notification targets which can be configured in the system too like:
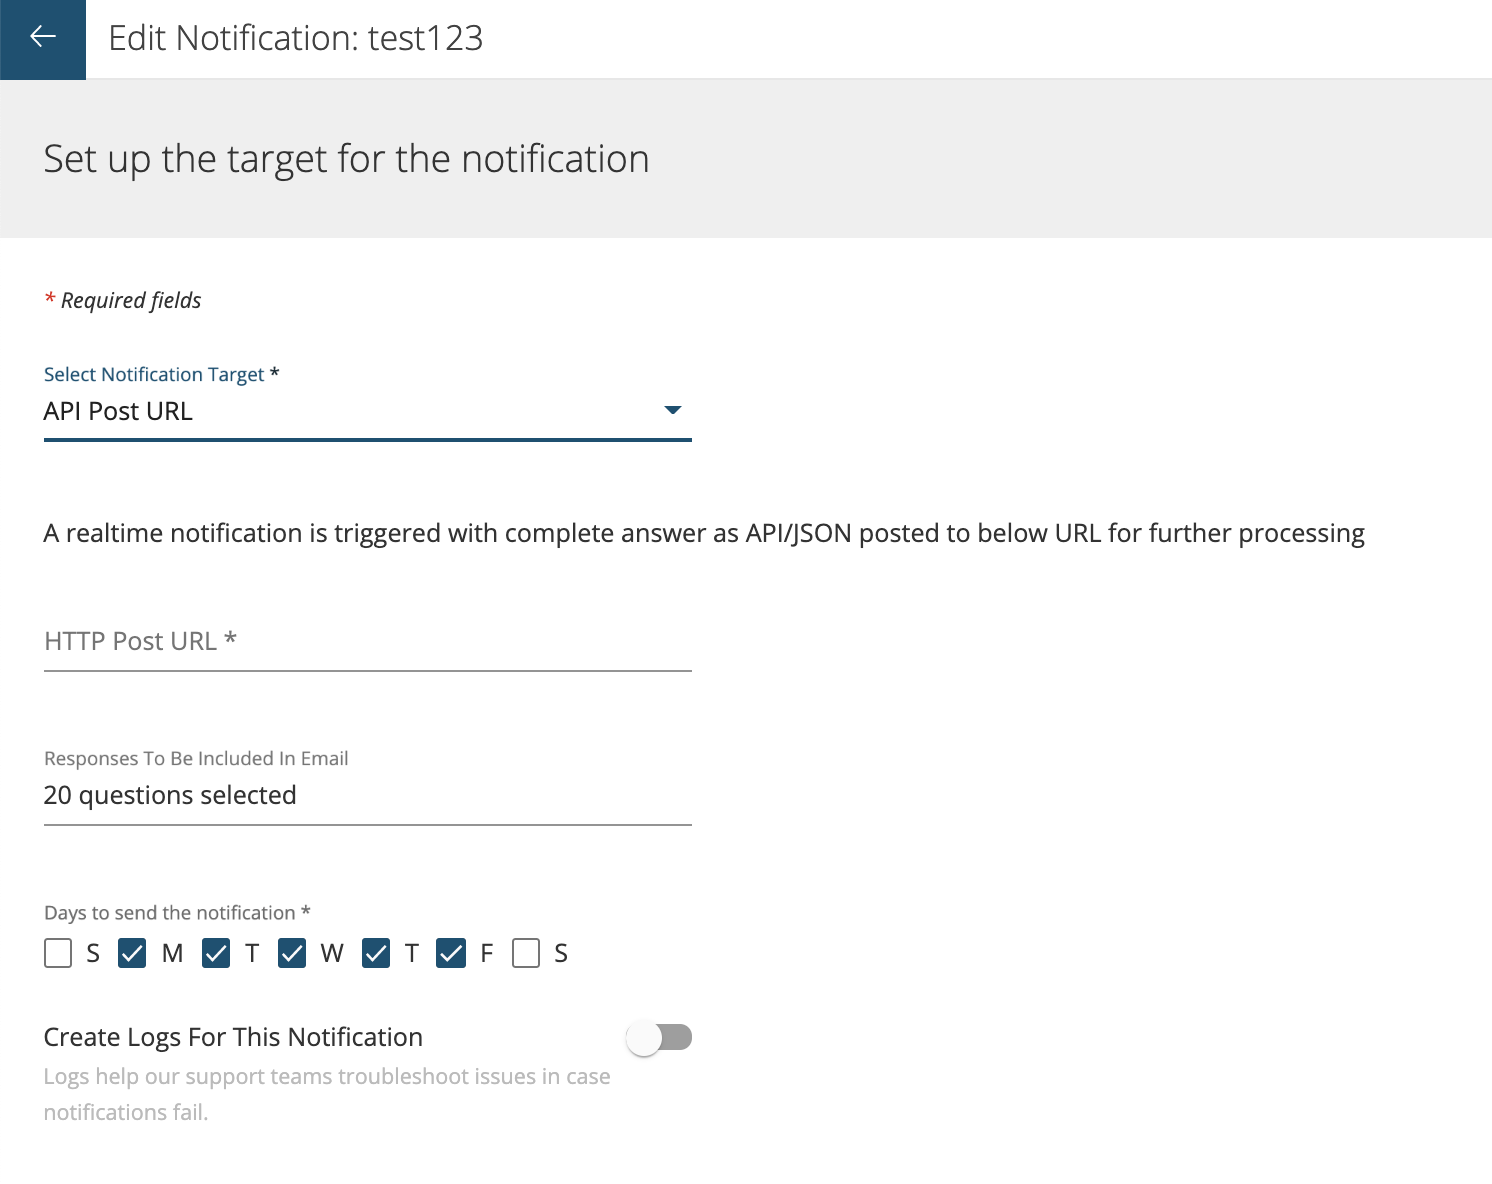
- API Post URL: A realtime notification can be triggered with complete answer as API/JSON posted to TTP Post URL for further processing.
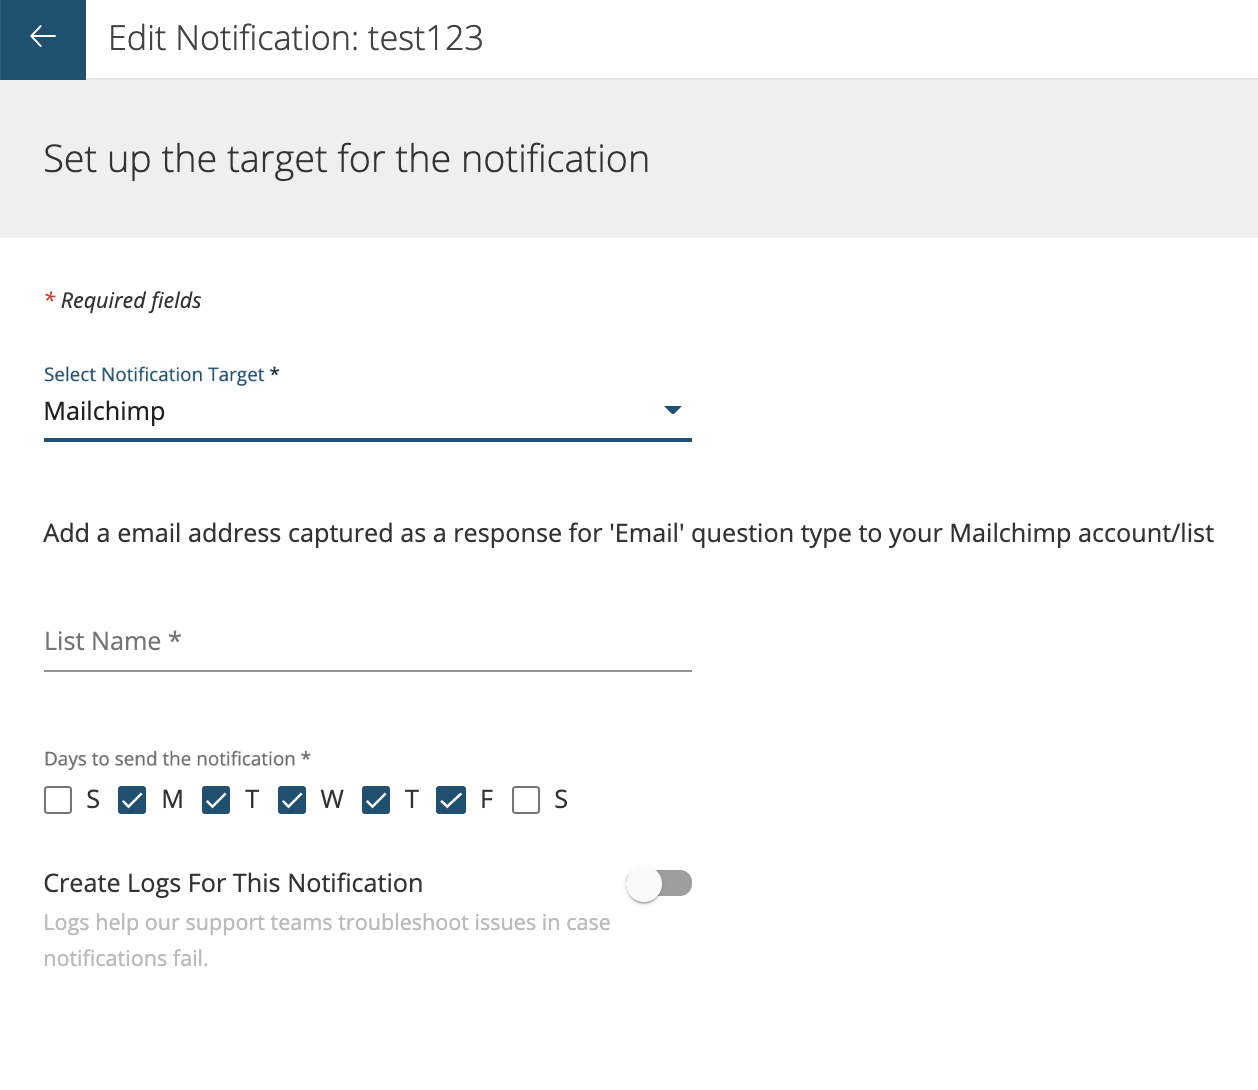
- Mailchimp: Add a email address captured as a response for ‘Email’ question type to your Mailchimp account/list.
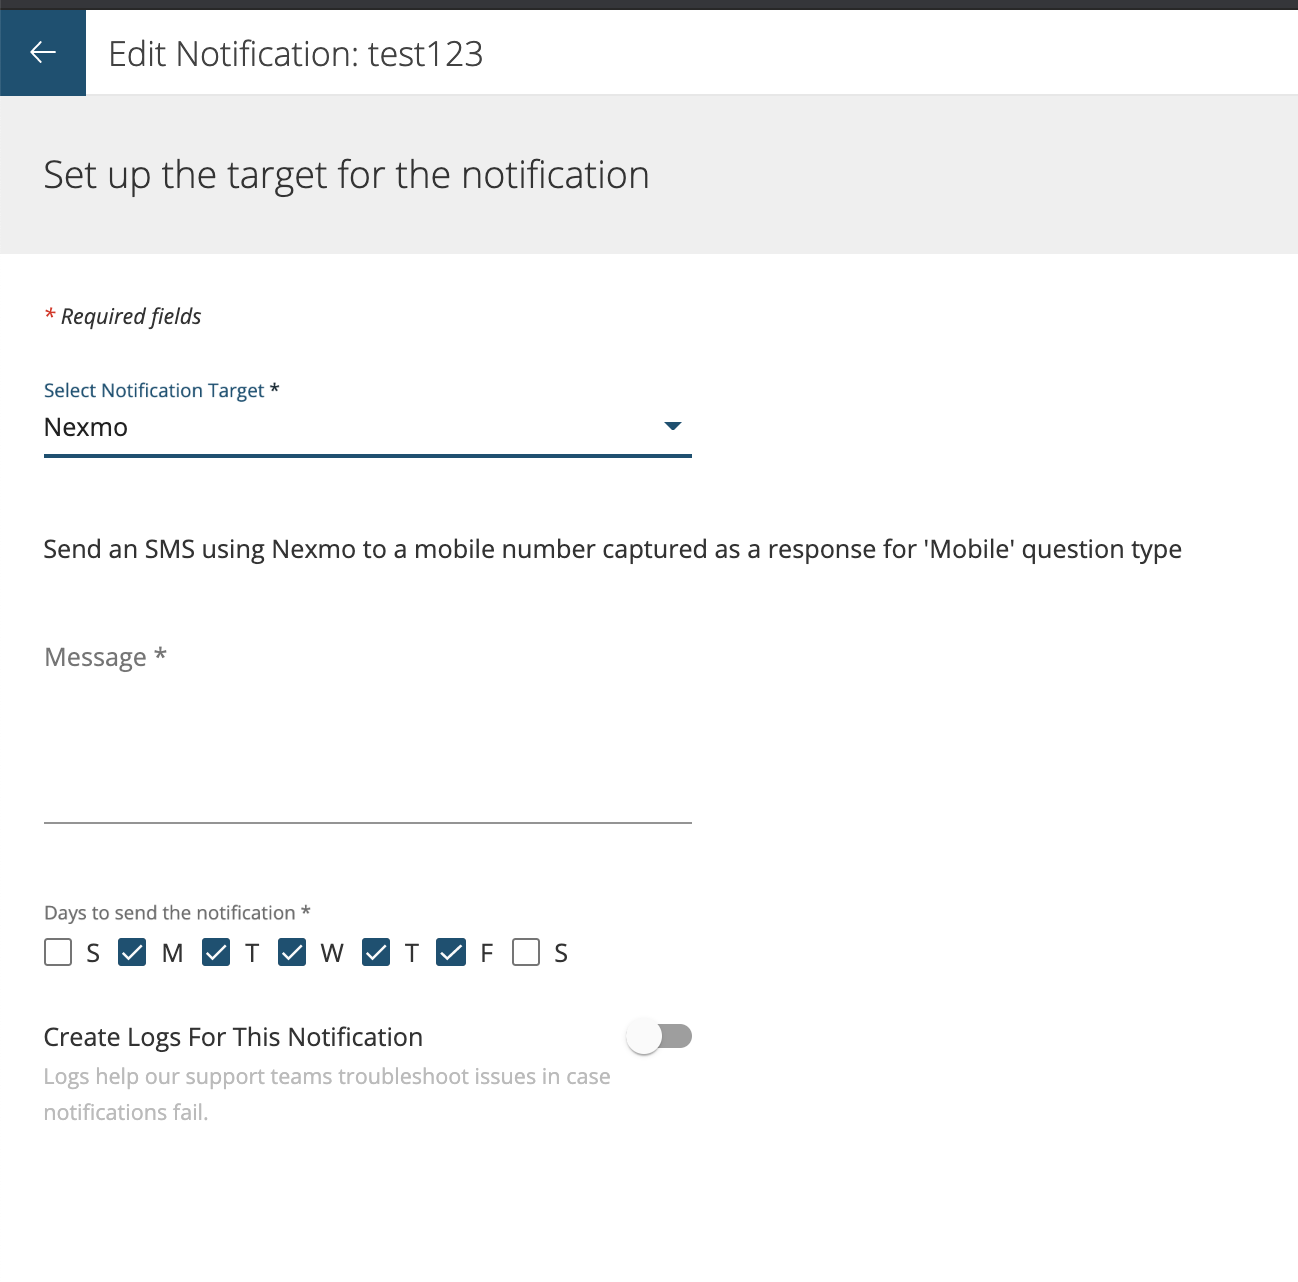
- Nexmo: An SMS can be send using Nexmo to a mobile number captured as a response for ‘Mobile’ question type.
- Kookoo: An SMS can be send using KooKoo to a mobile number captured as a response for ‘Mobile’ question type

- Exotel: SAn SMS can be send using Exotel to a mobile number captured as a response for ‘Mobile’ question type
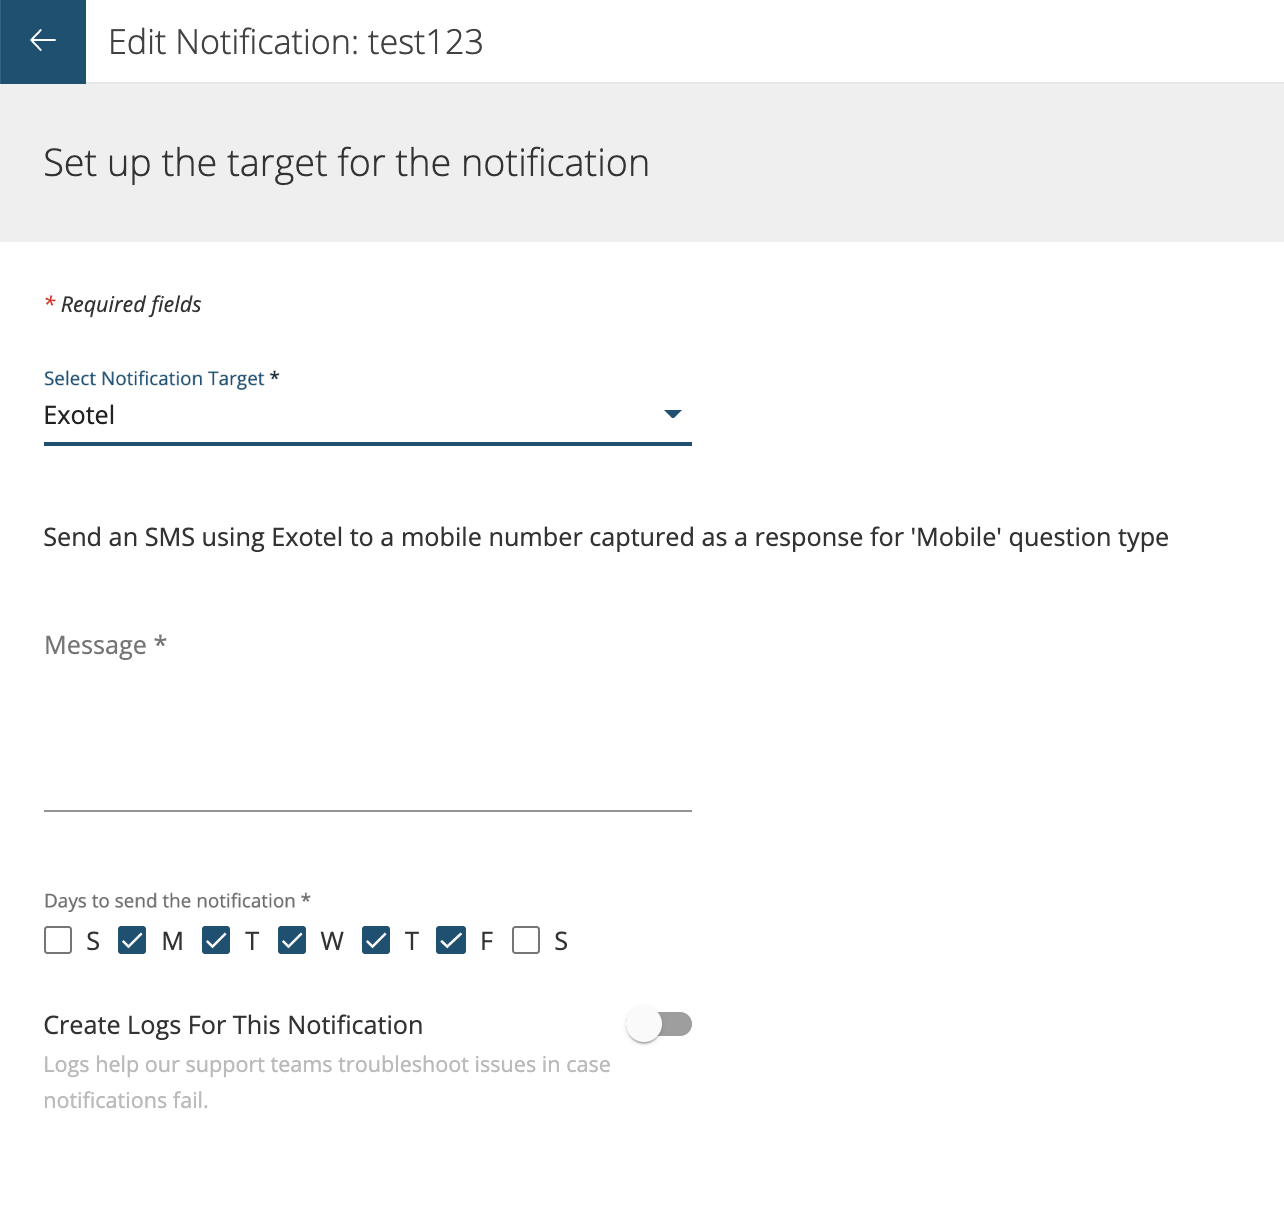
- Azure Queue: Push a queue notification to an Azure Storage Queue by configuring below information: a) Account Name b) Queue Name c) Key

To create a new Trend Notification click on New Trend Notification button as shown below.
A window will open where you can set the notification conditions. This can help the user(s) to get informed in case any trend changes across NPS or Response Rates
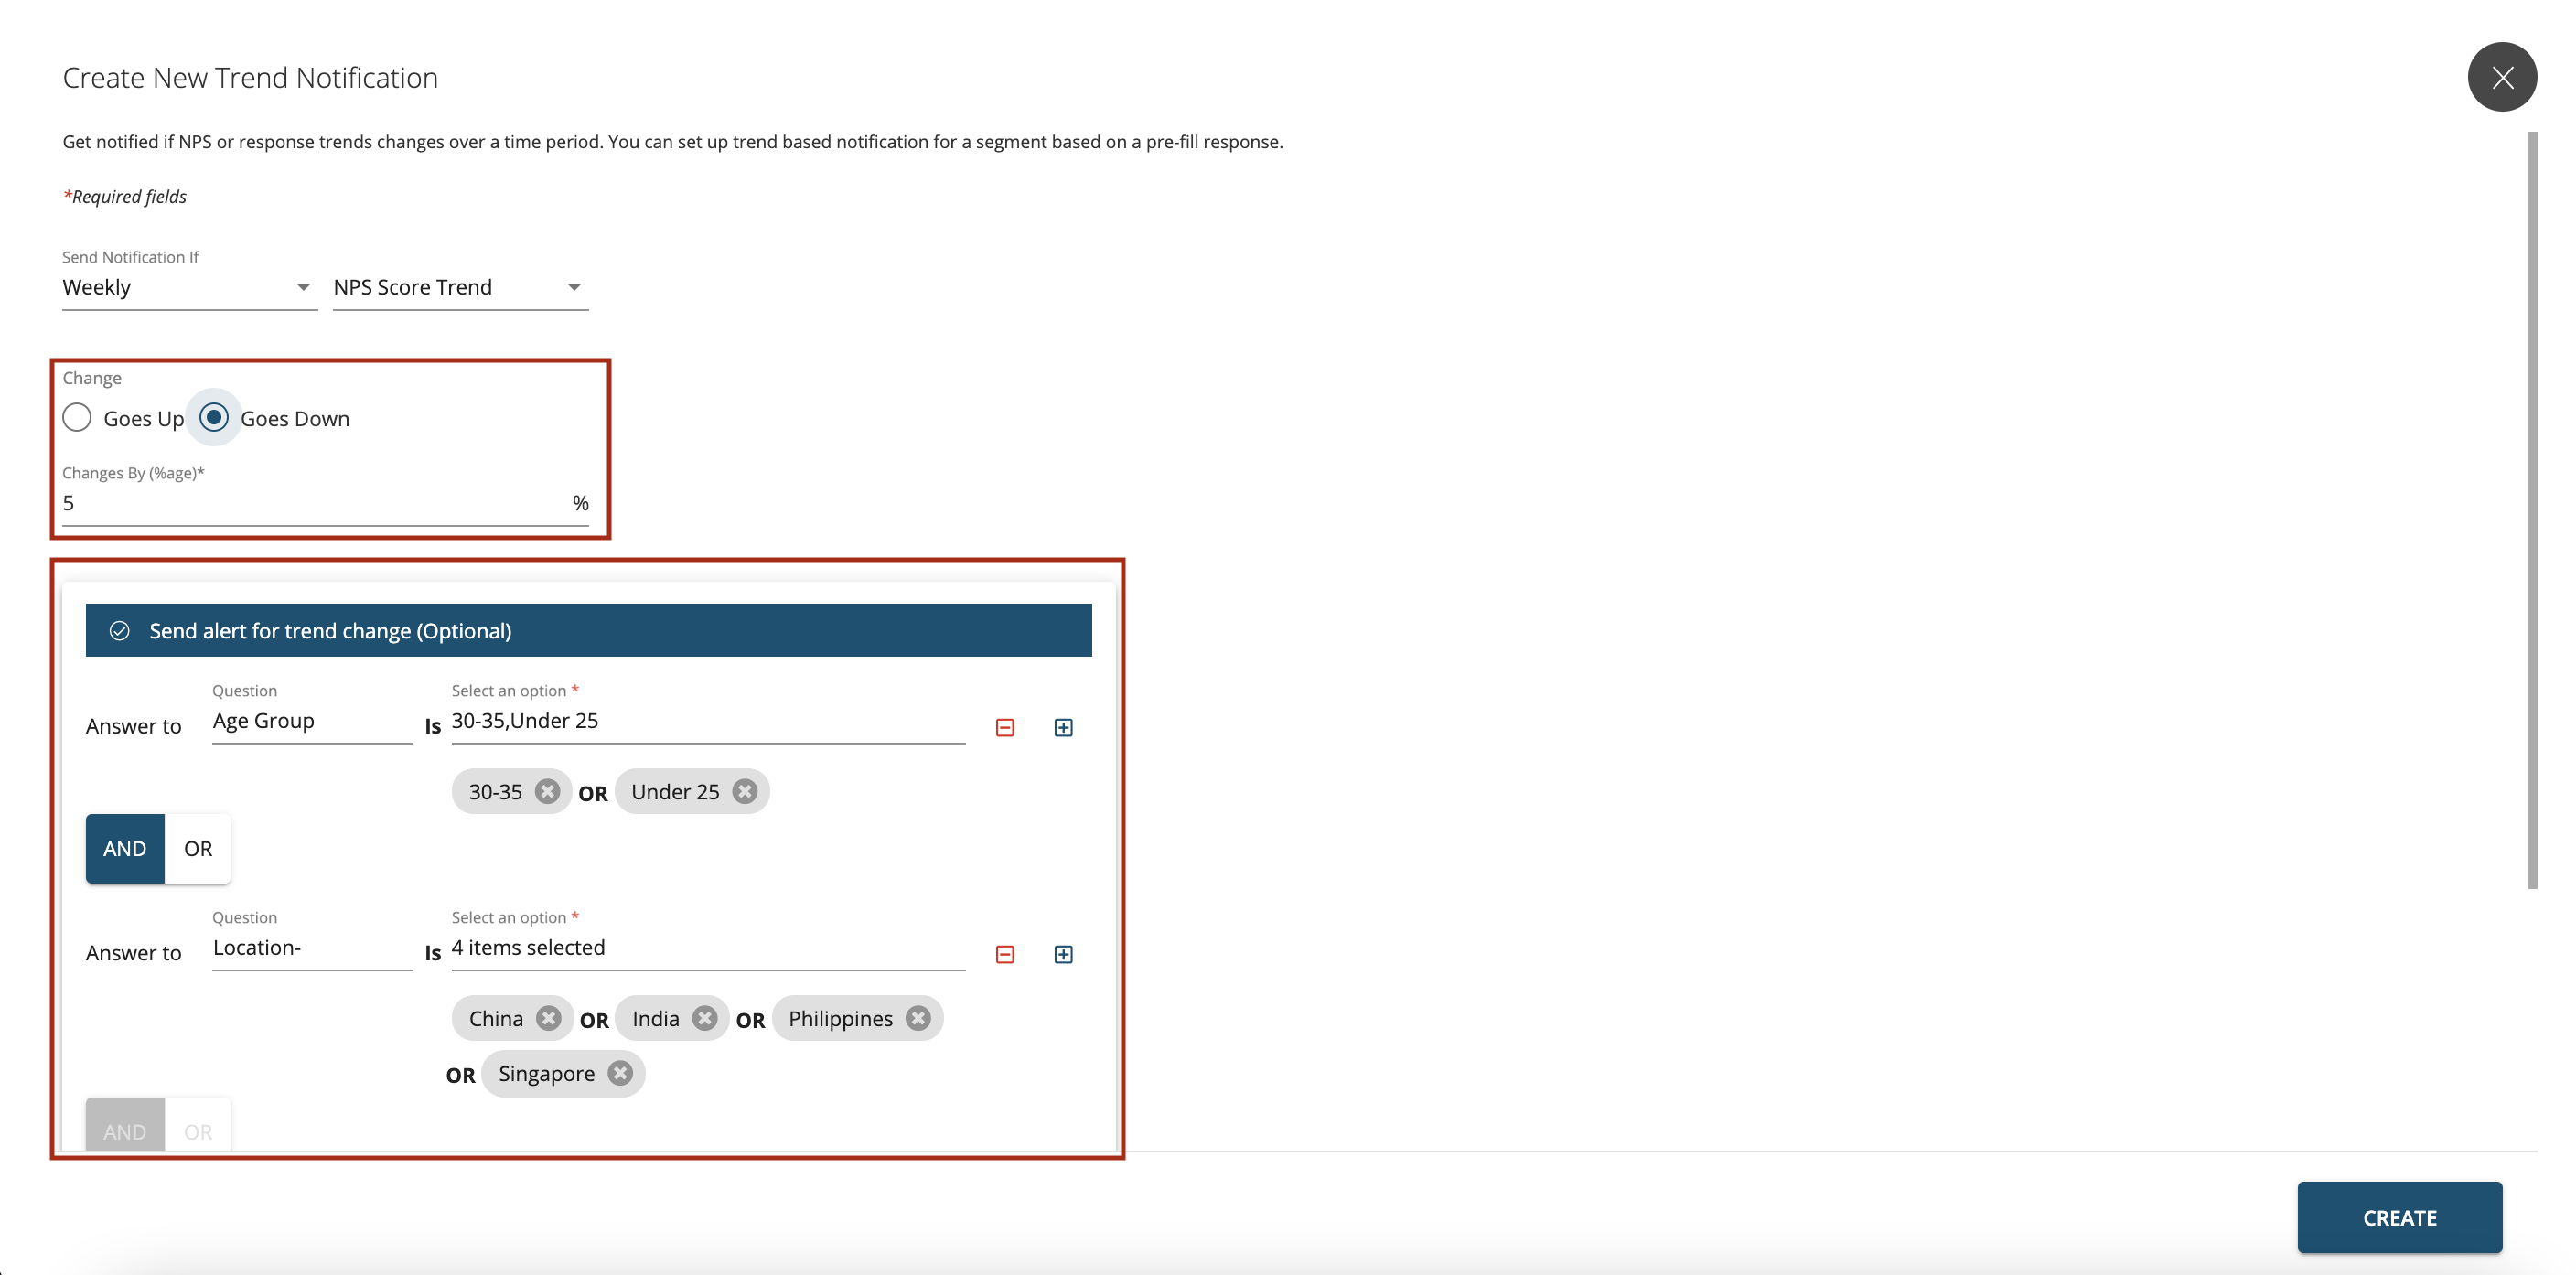
Get notified if NPS or response trends changes over a time period. You can set up trend based notification for a segment based on a pre-fill response.
Notifications will be sent to email ID(s) of the Recipient(s) configured in the notification.
You can setup notifications for the following trends:
- Daily NPS score trends
- Weekly NPS score trends
- Fortnightly NPS score trends
- Monthly NPS score trends
- Daily response trends
- Weekly response trends
- Fortnightly response trends
- Monthly response trends
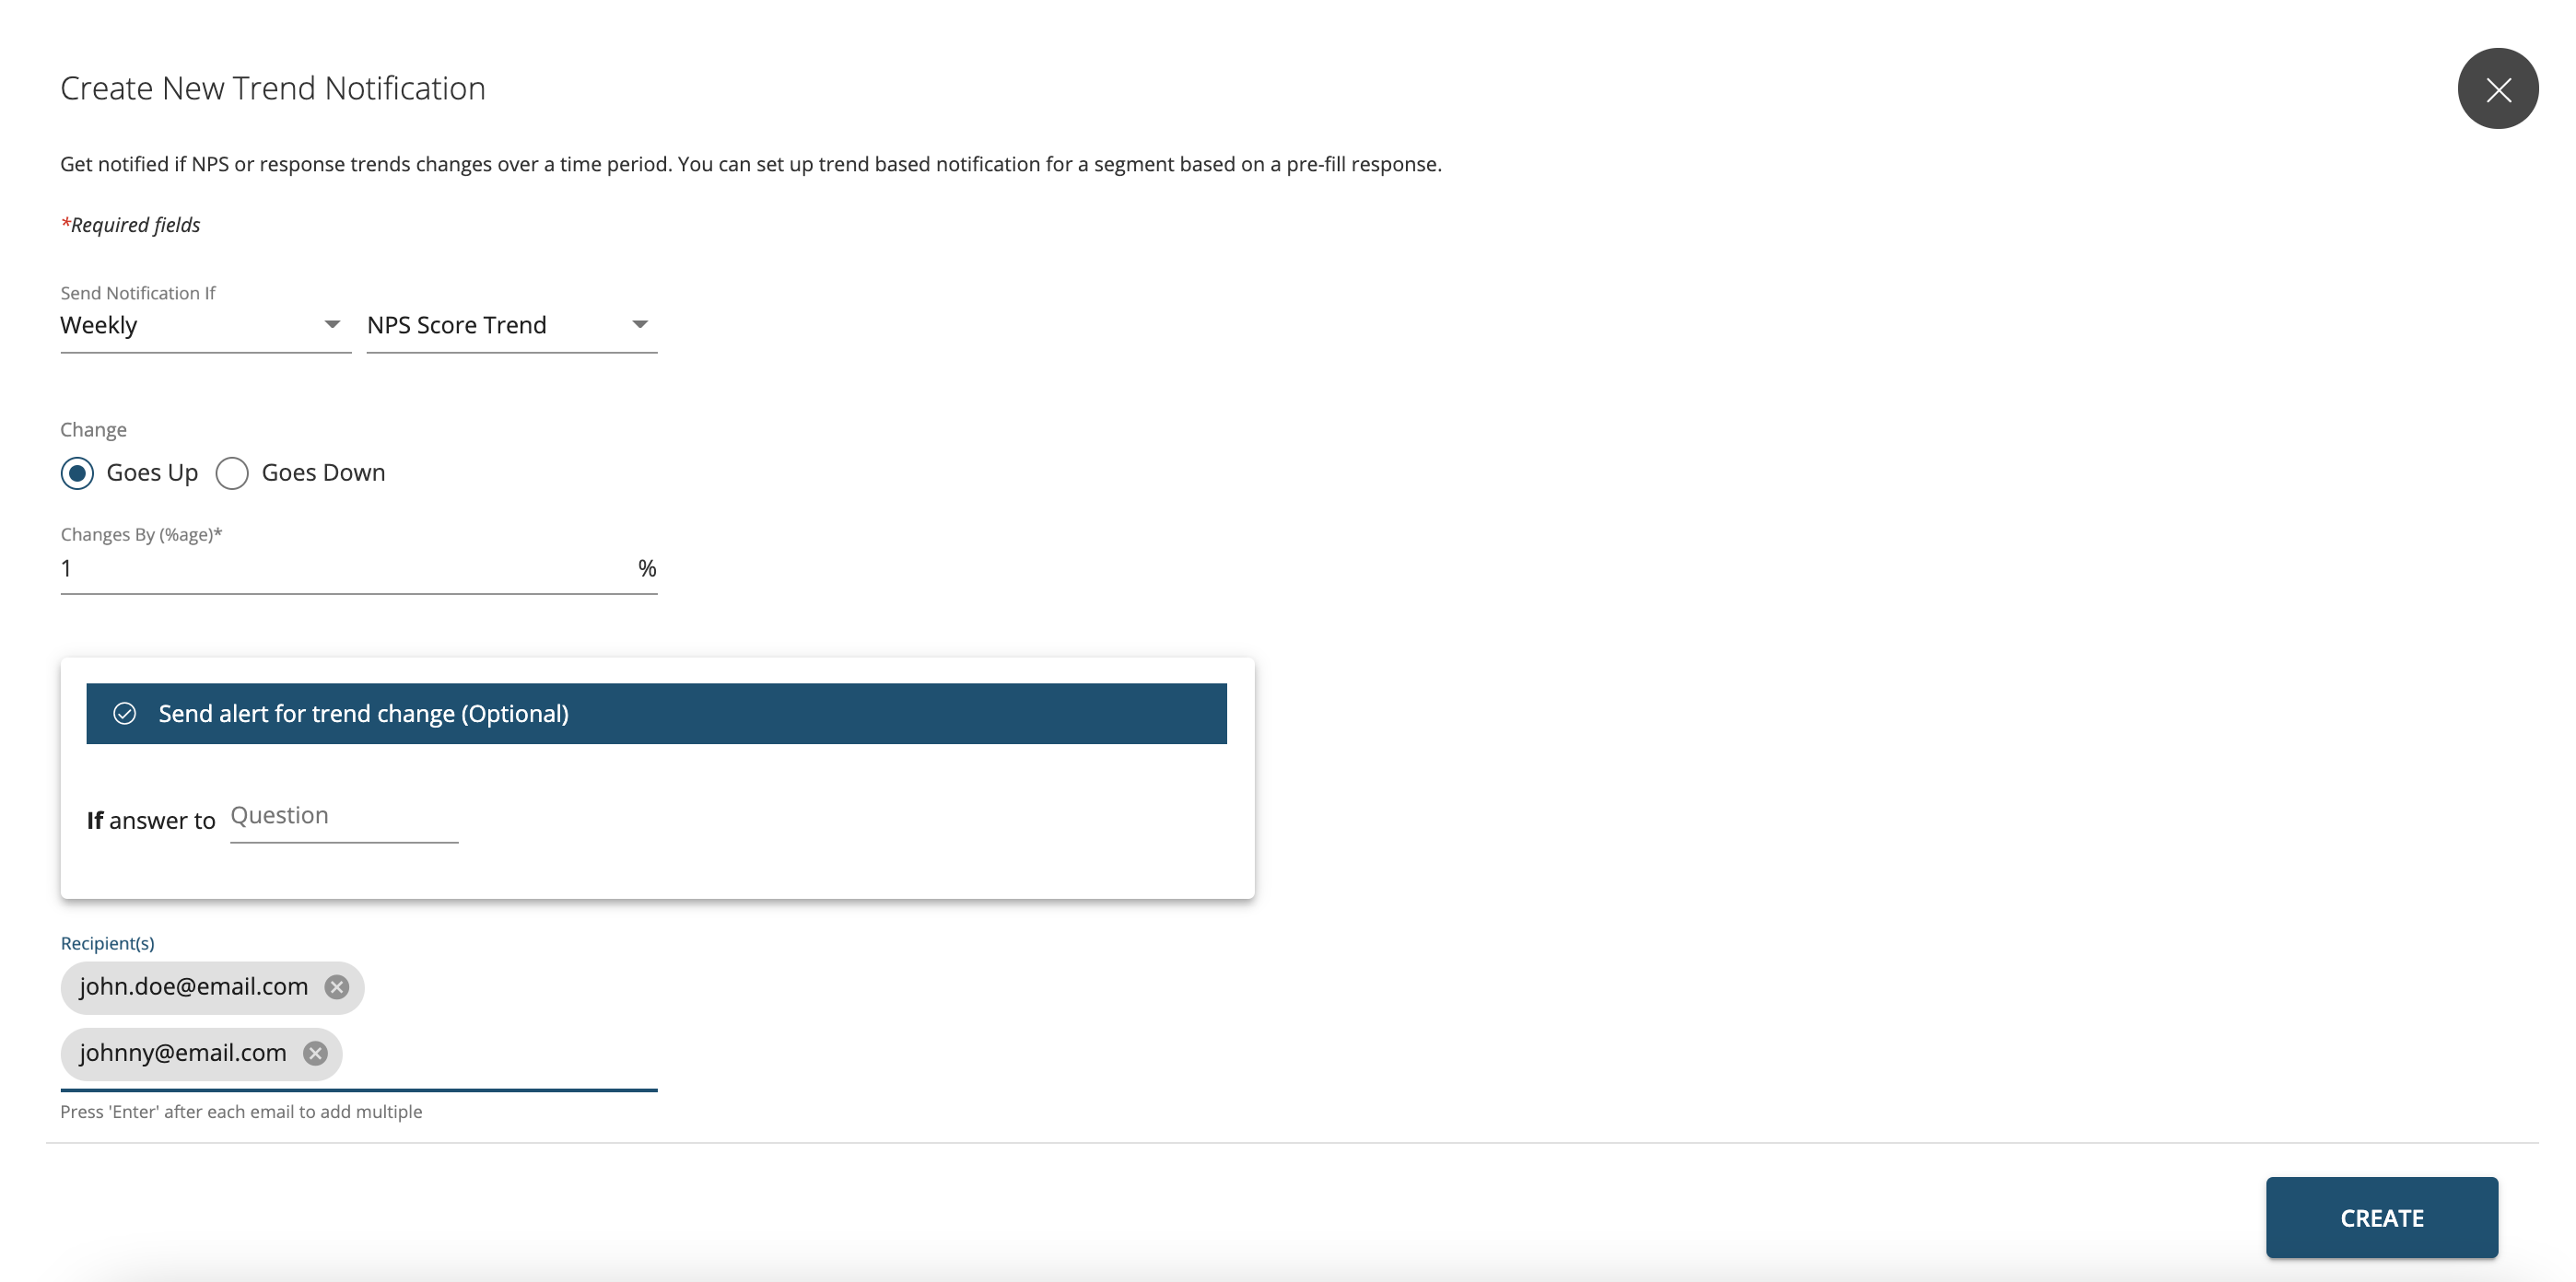
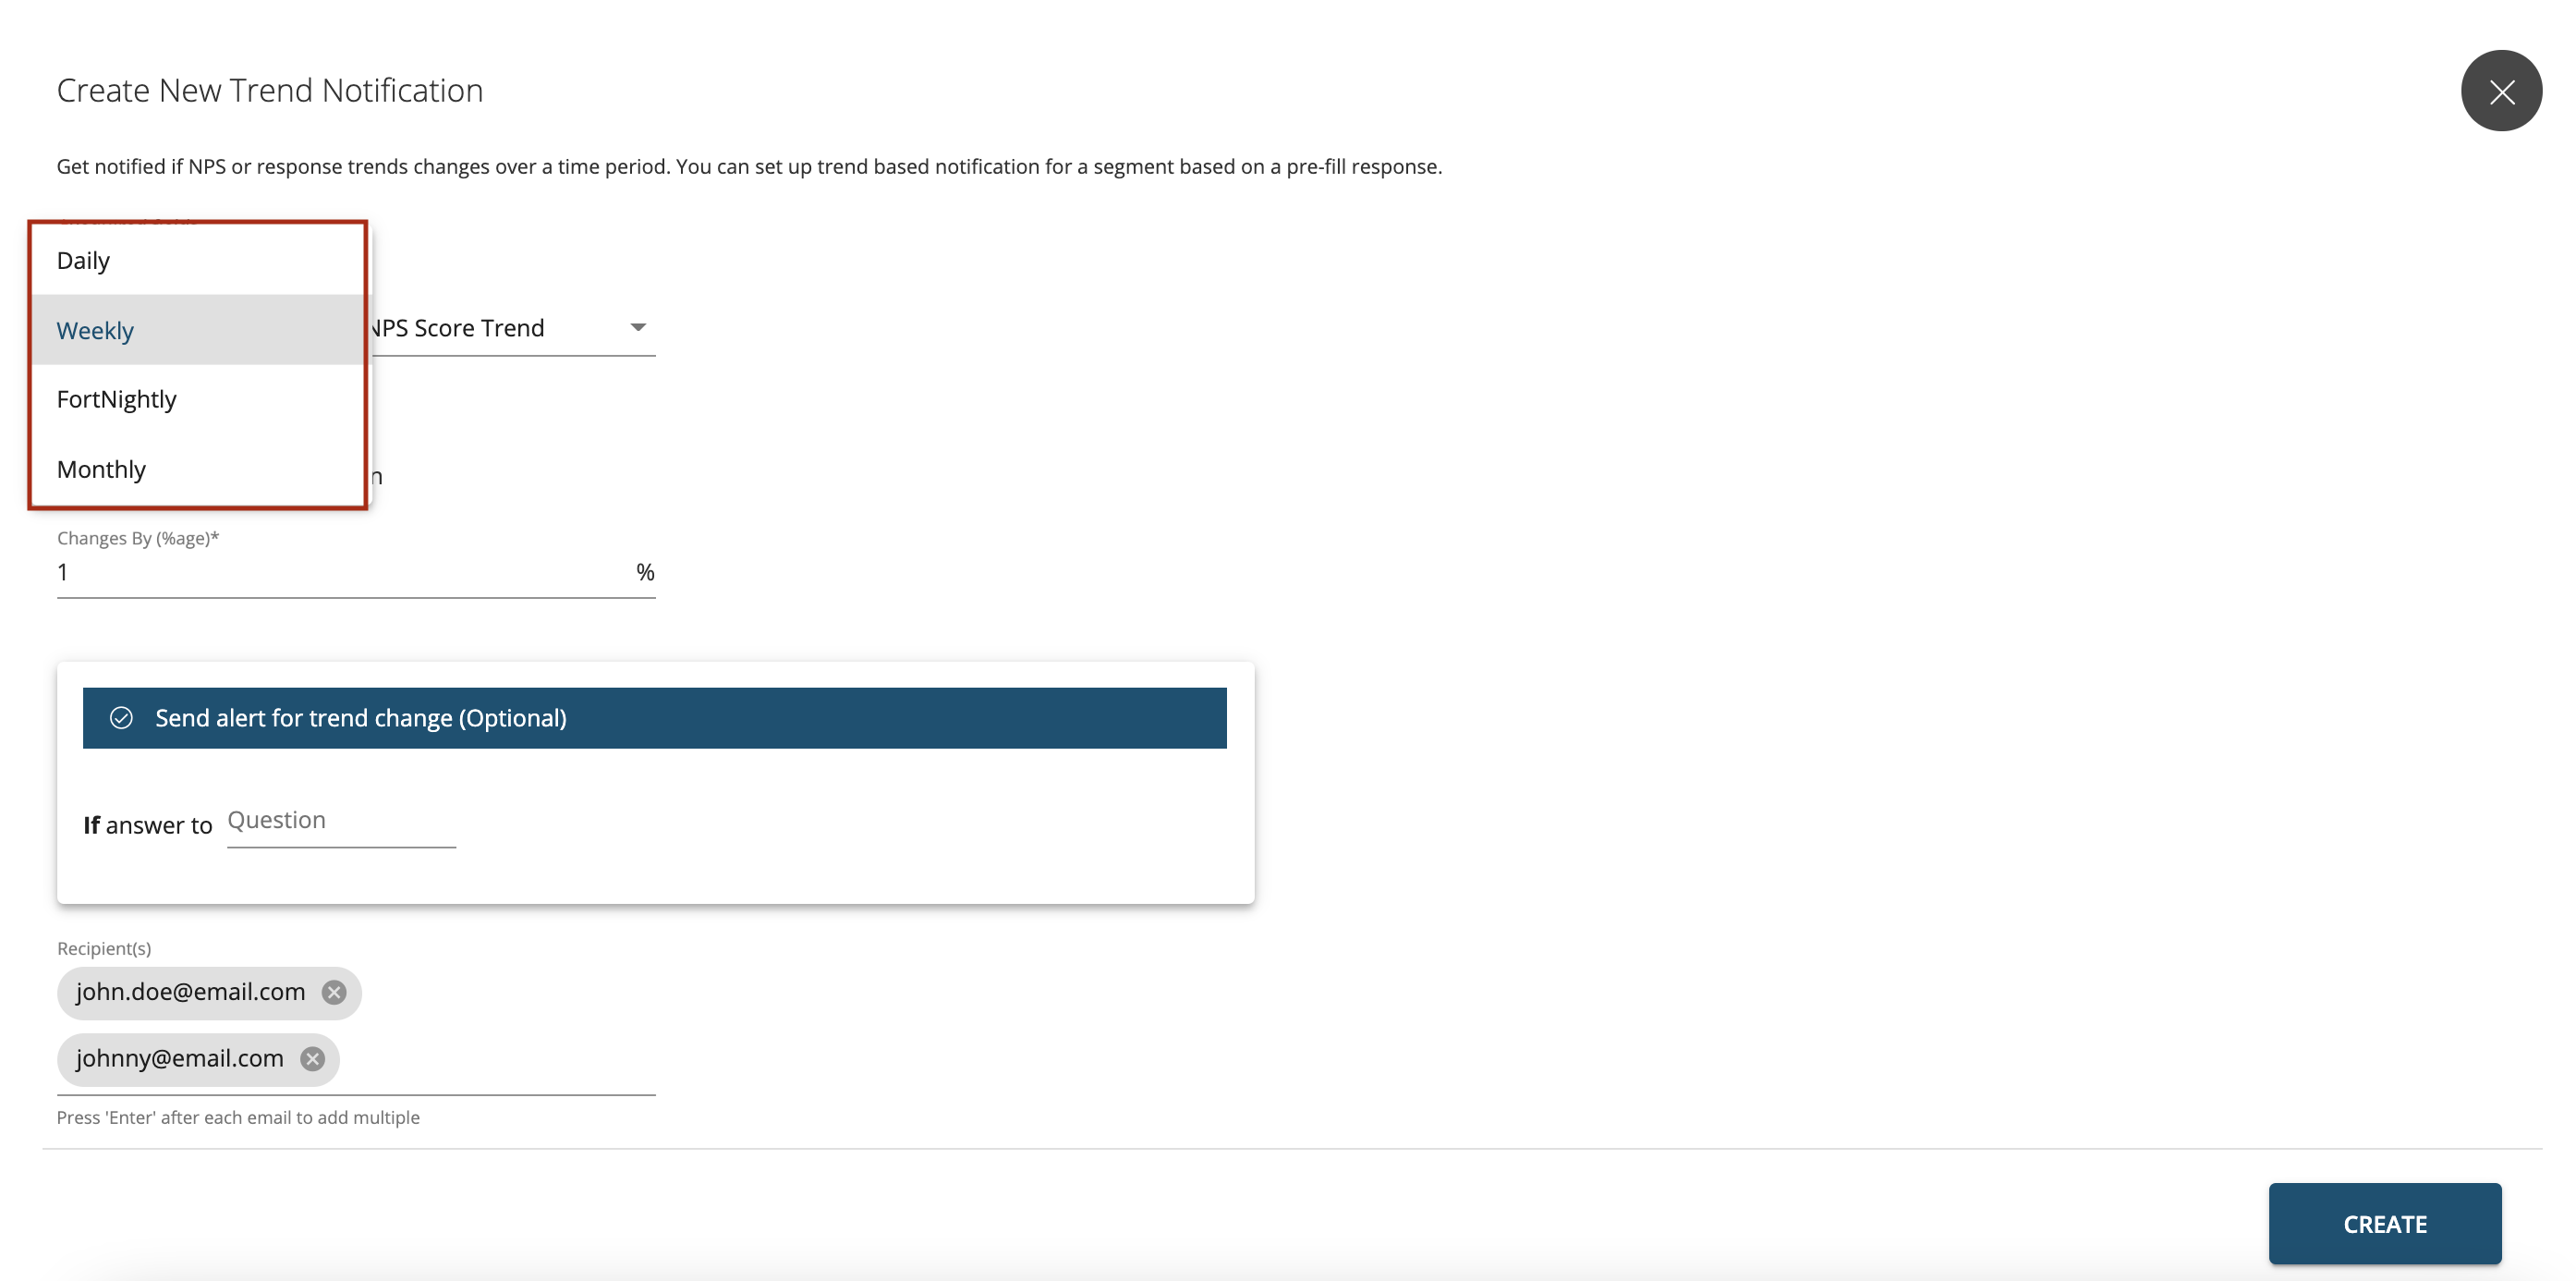
Select from the dropdown whether you want to set a Daily, Weekly, Fortnightly or Monthly Trend alert.
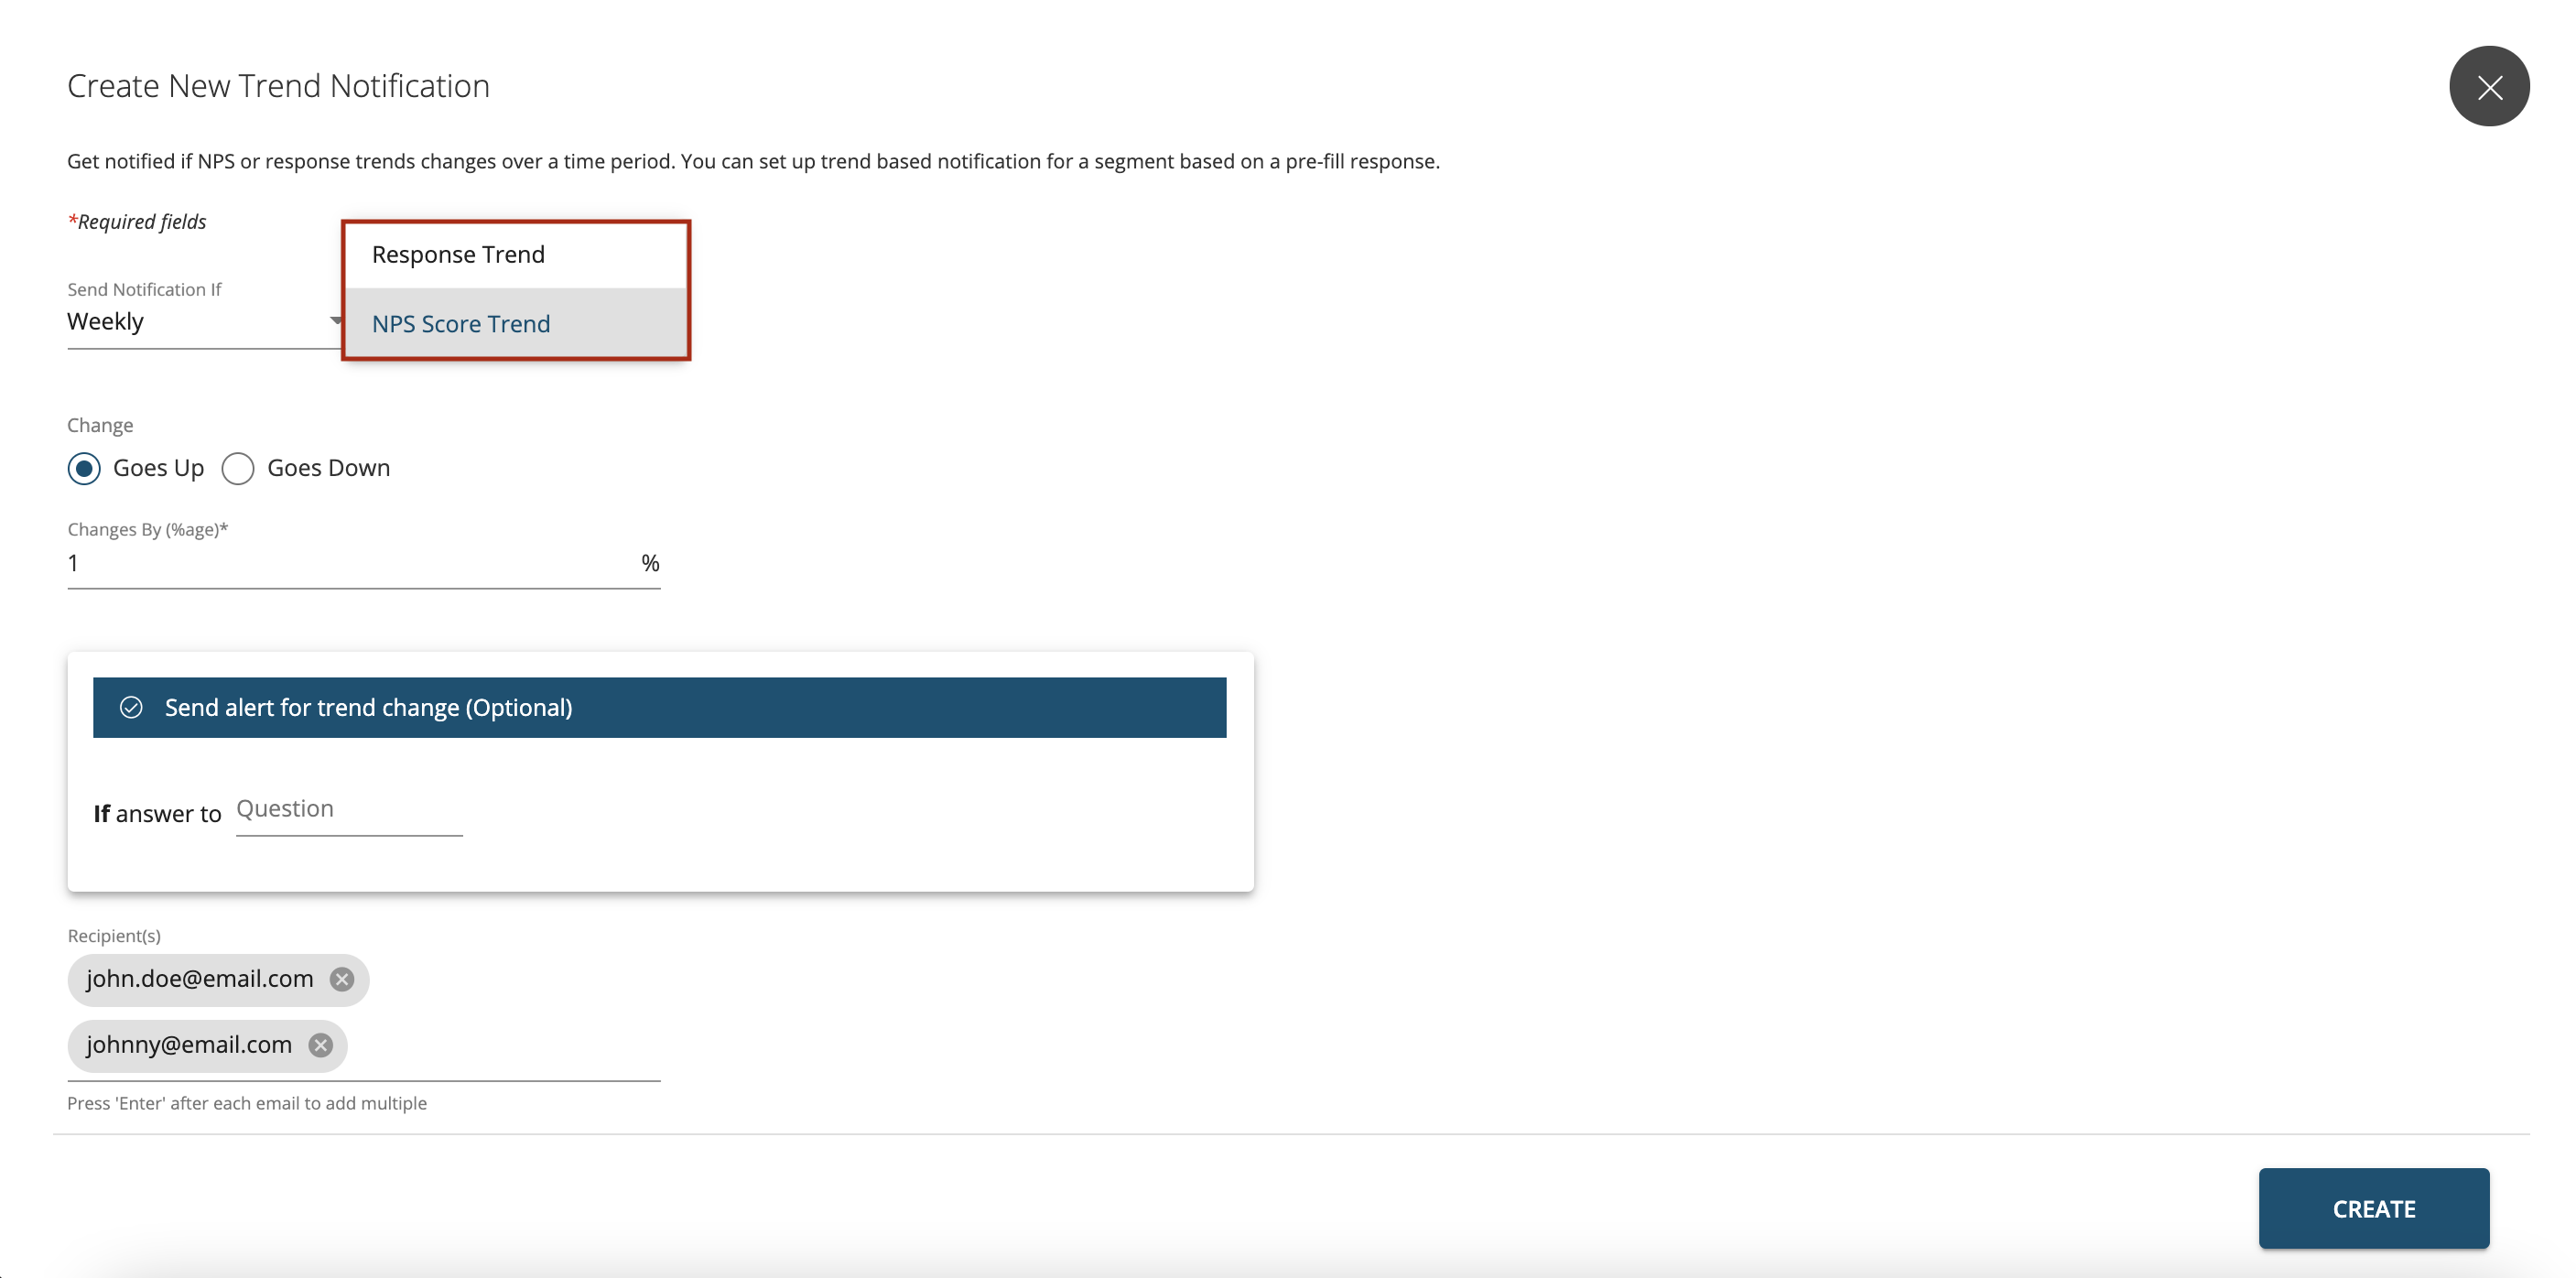
Then select from the dropdown whether you want to set a NPS Score Trend or Response Rate alert.
Enter the change by (%) percentage as to when the alert should be triggered. You can also configure other notification conditions along with the above for the Trend based notification. For example: if the NPS Score ‘Goes Down’ by 5% or trigger an alert if Response Rate ‘Goes Up’ by 5%
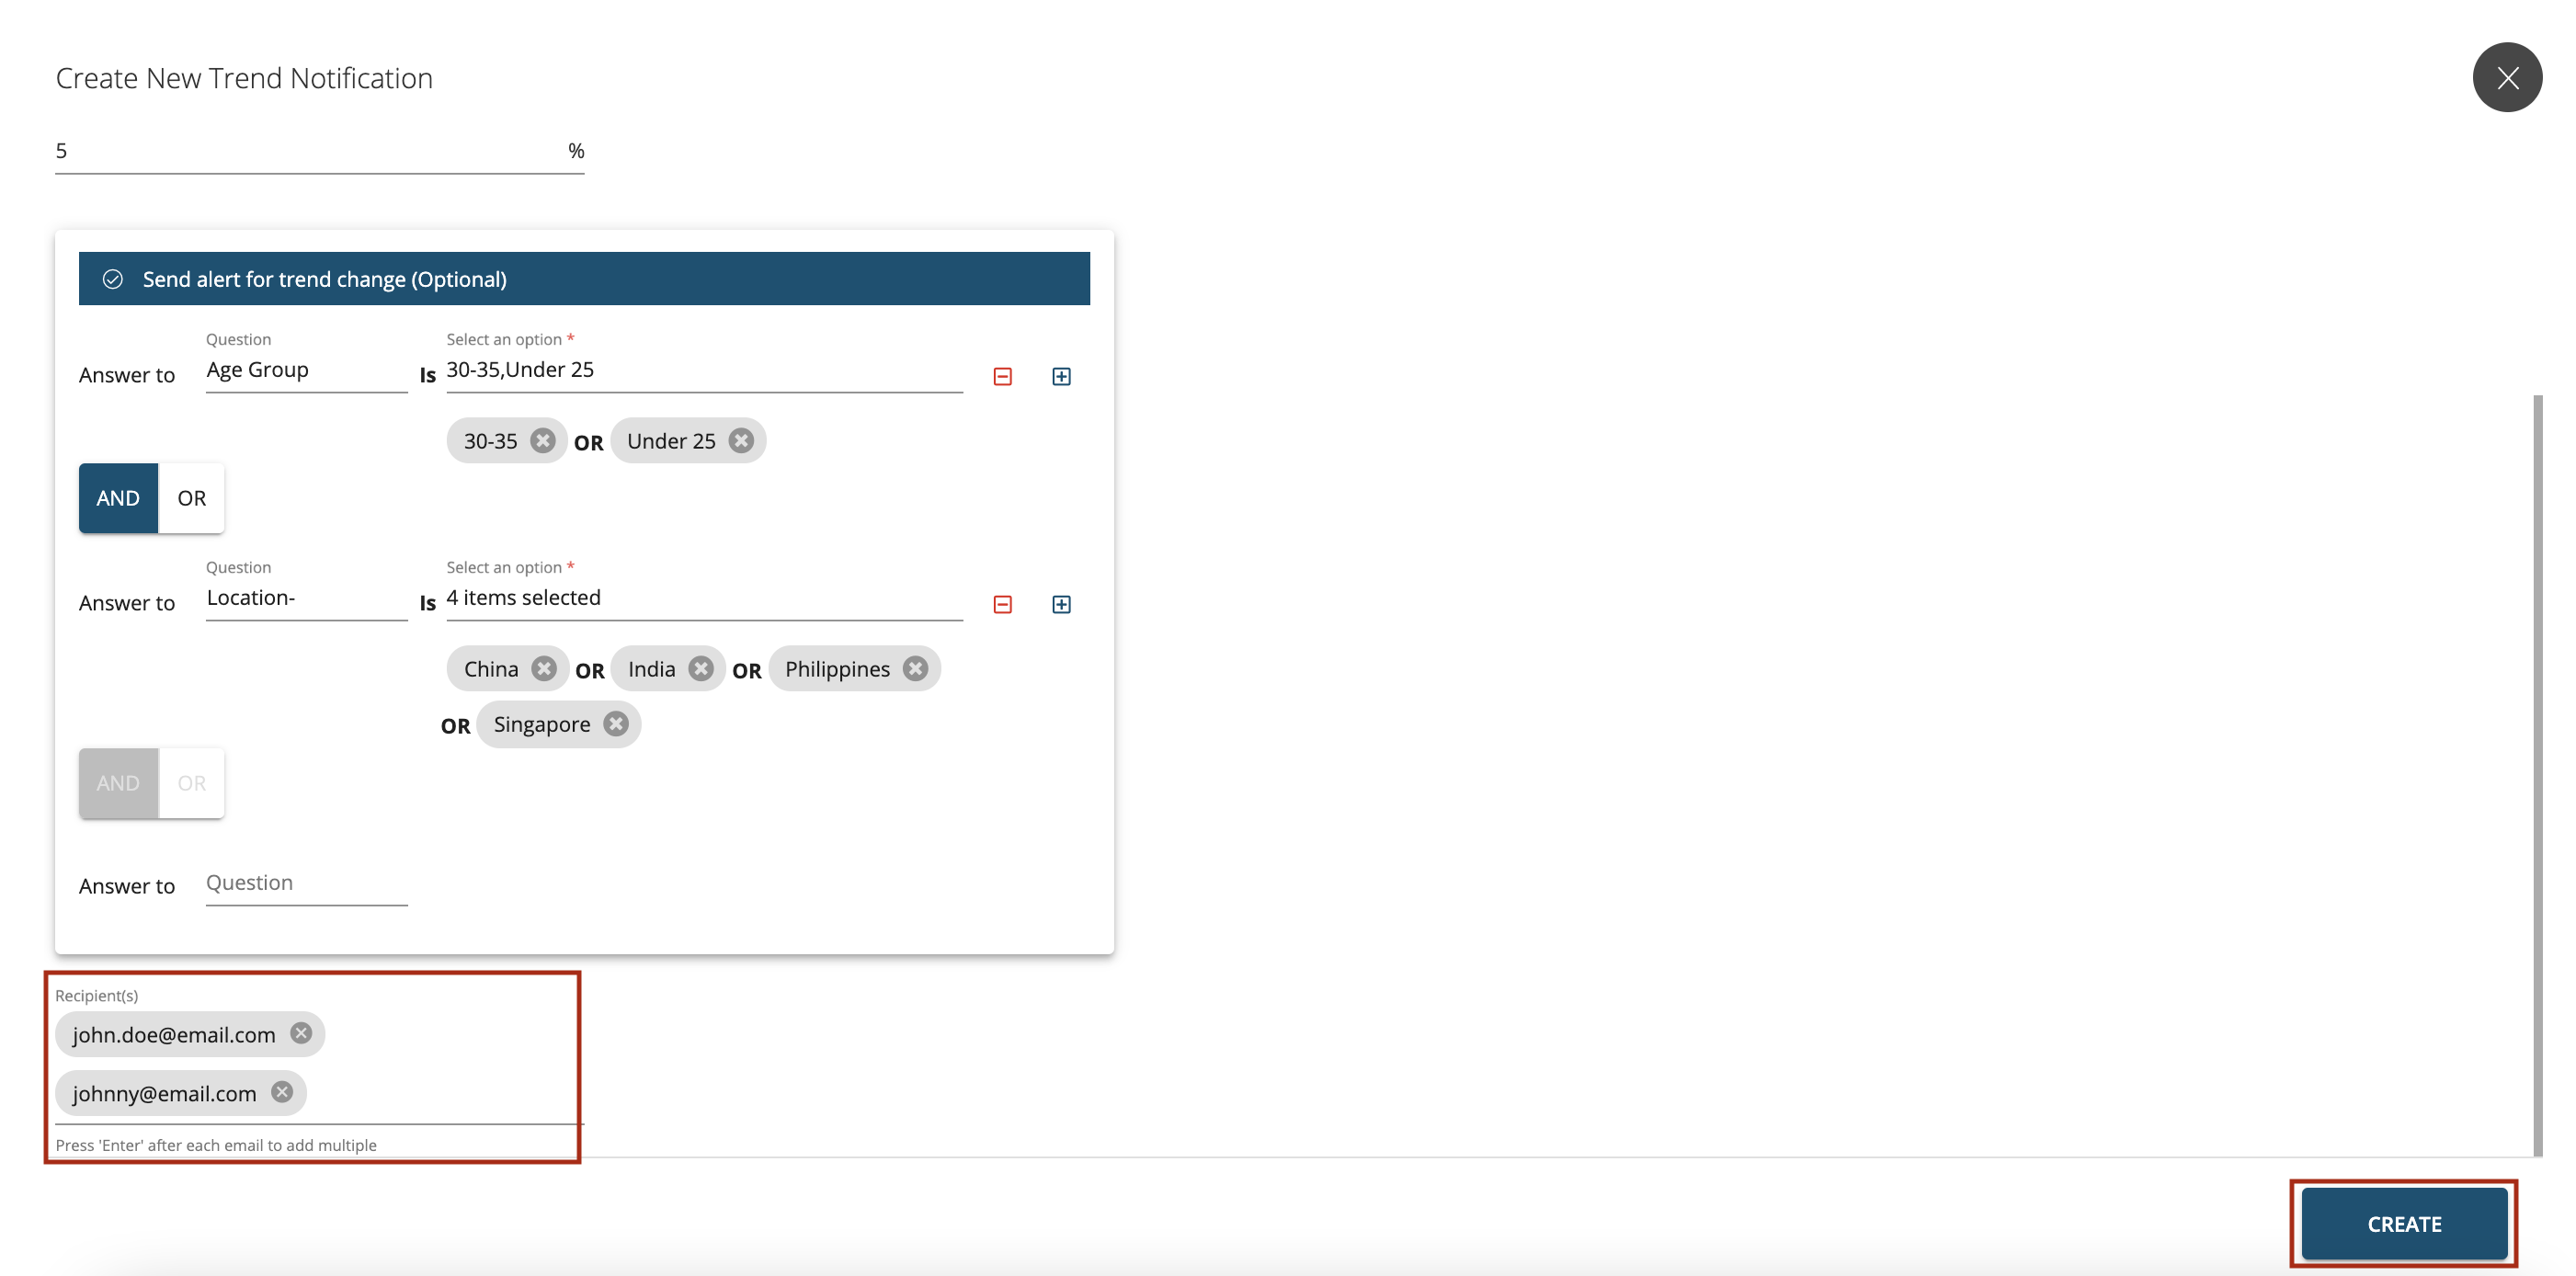
Another use case can be that a user(s) should be alerted **if the NPS Score ‘Goes Down’ by 5% AND the ‘Age Group’ is ‘Under 25 (or) 30-35years’ AND ‘Location’ is China, (or) India (or), Singapore (or) Philippines, (or) Singapore as shown below.
Enter the email addresses of the ‘Recipients’ that need to be alerted as shown below and press ‘Create’ button.
Aside from configuring the notifications you can also perform the below functions:
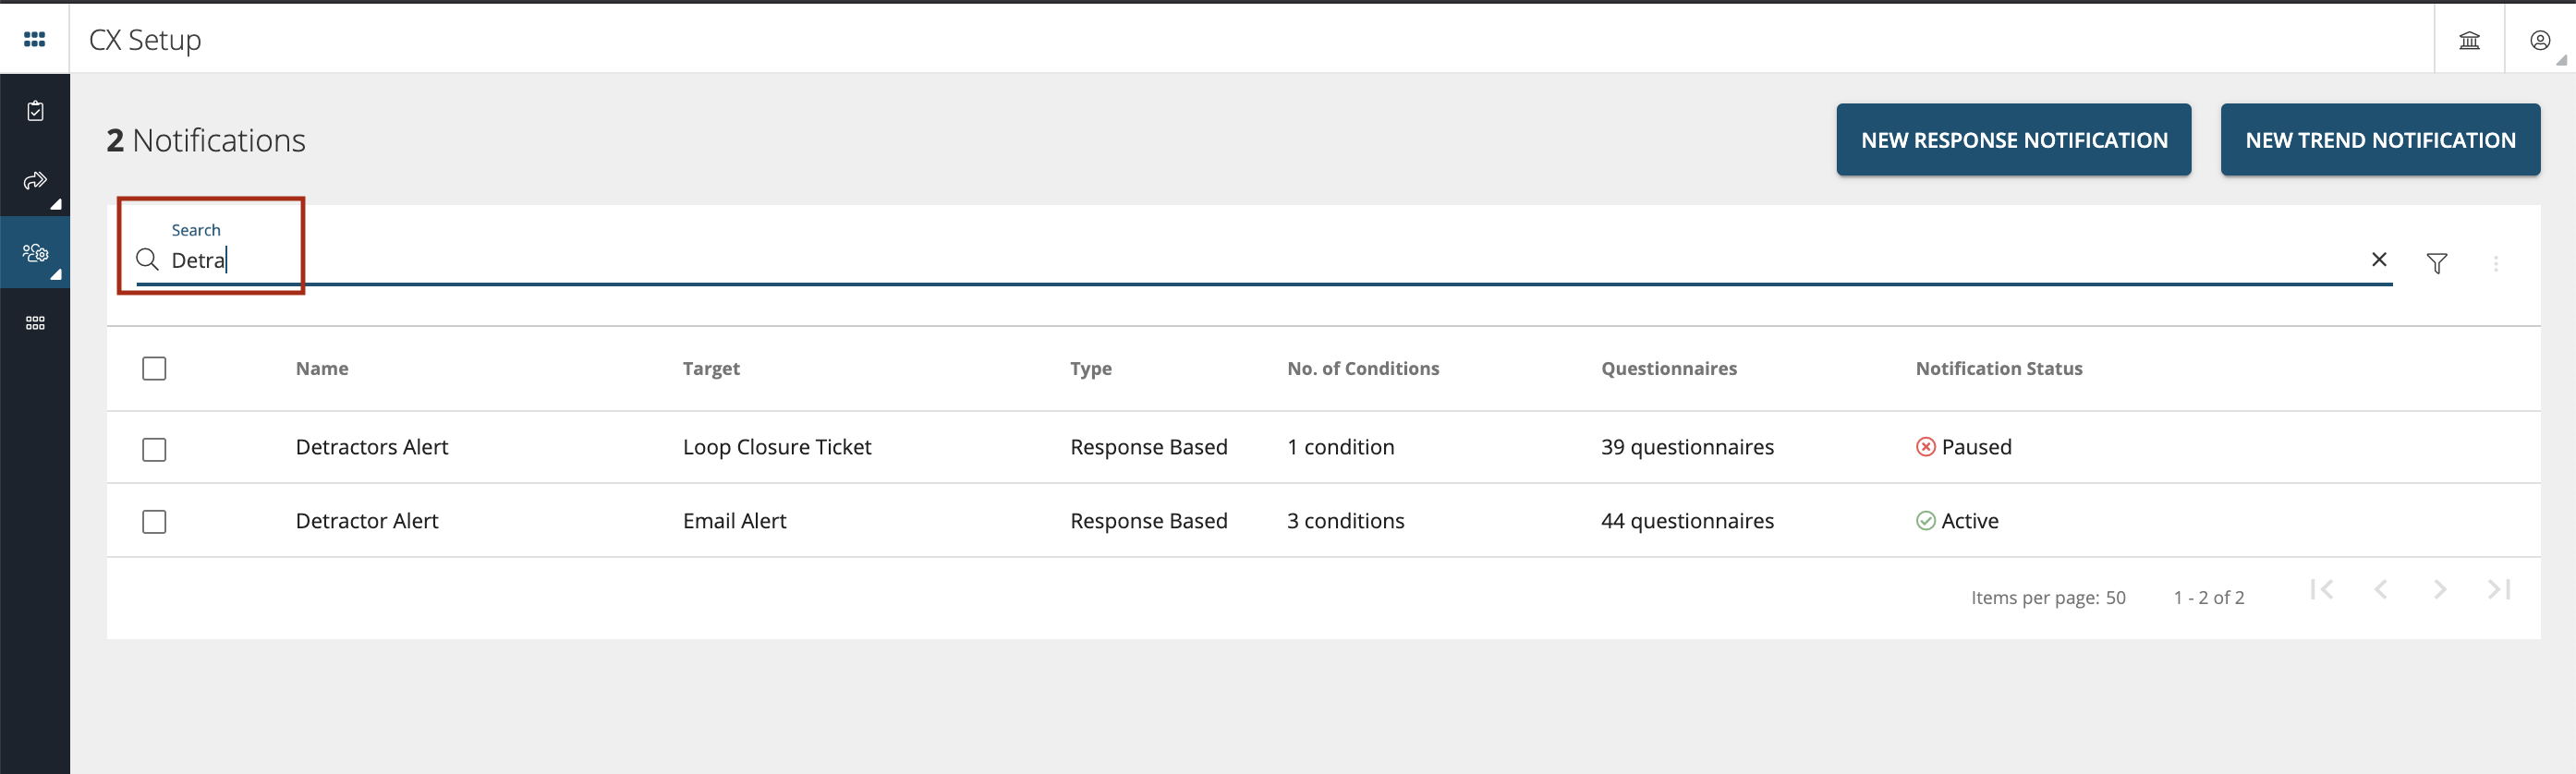
Search- You can do a wild card search in the notifications main window for a particular notification that you have created as shown below.
Editing Multiple Notifications
You can use the funnel icon to apply edit more than one notification together.
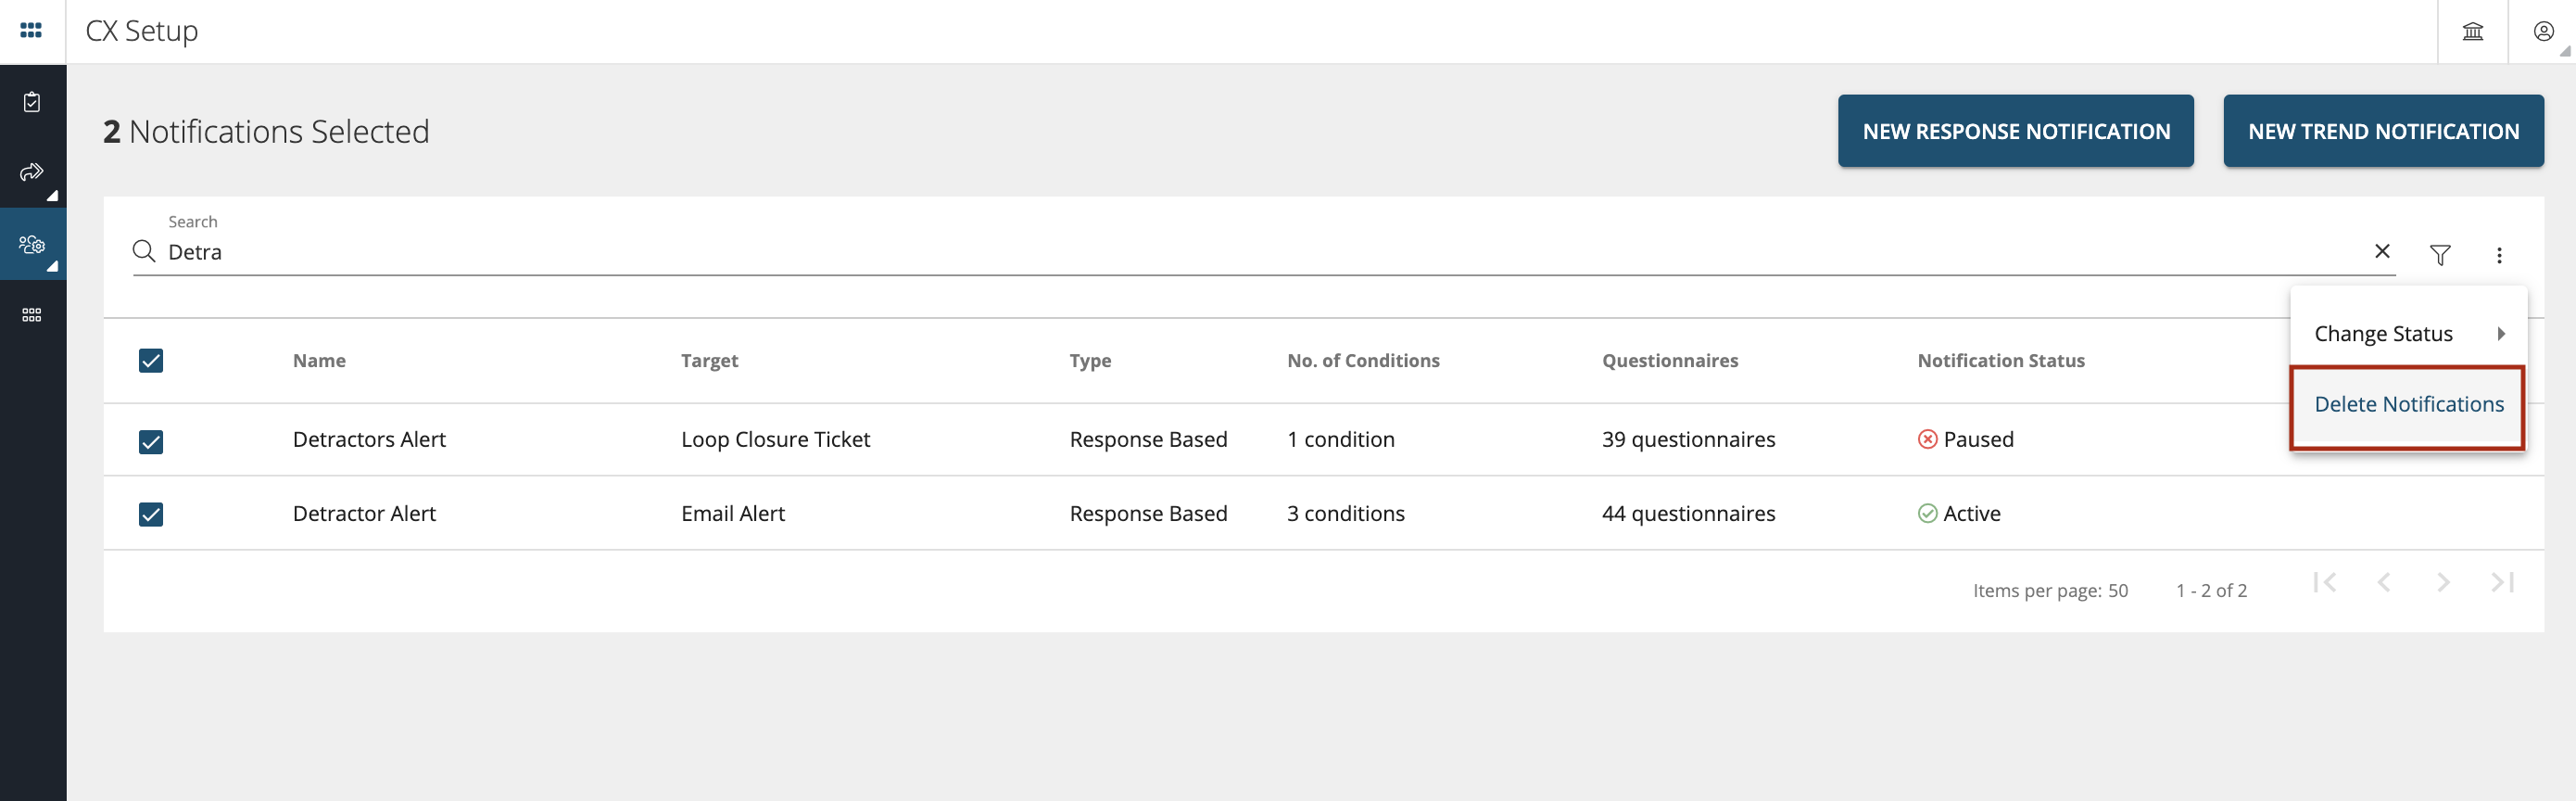
- Change Status-Select the notifications as shown below and then click on three dots icon to change the status of the notification from Active to Pause or Resume from Pause state.

Delete-Select more than one notification as shown below and then click on three dots icon to delete.
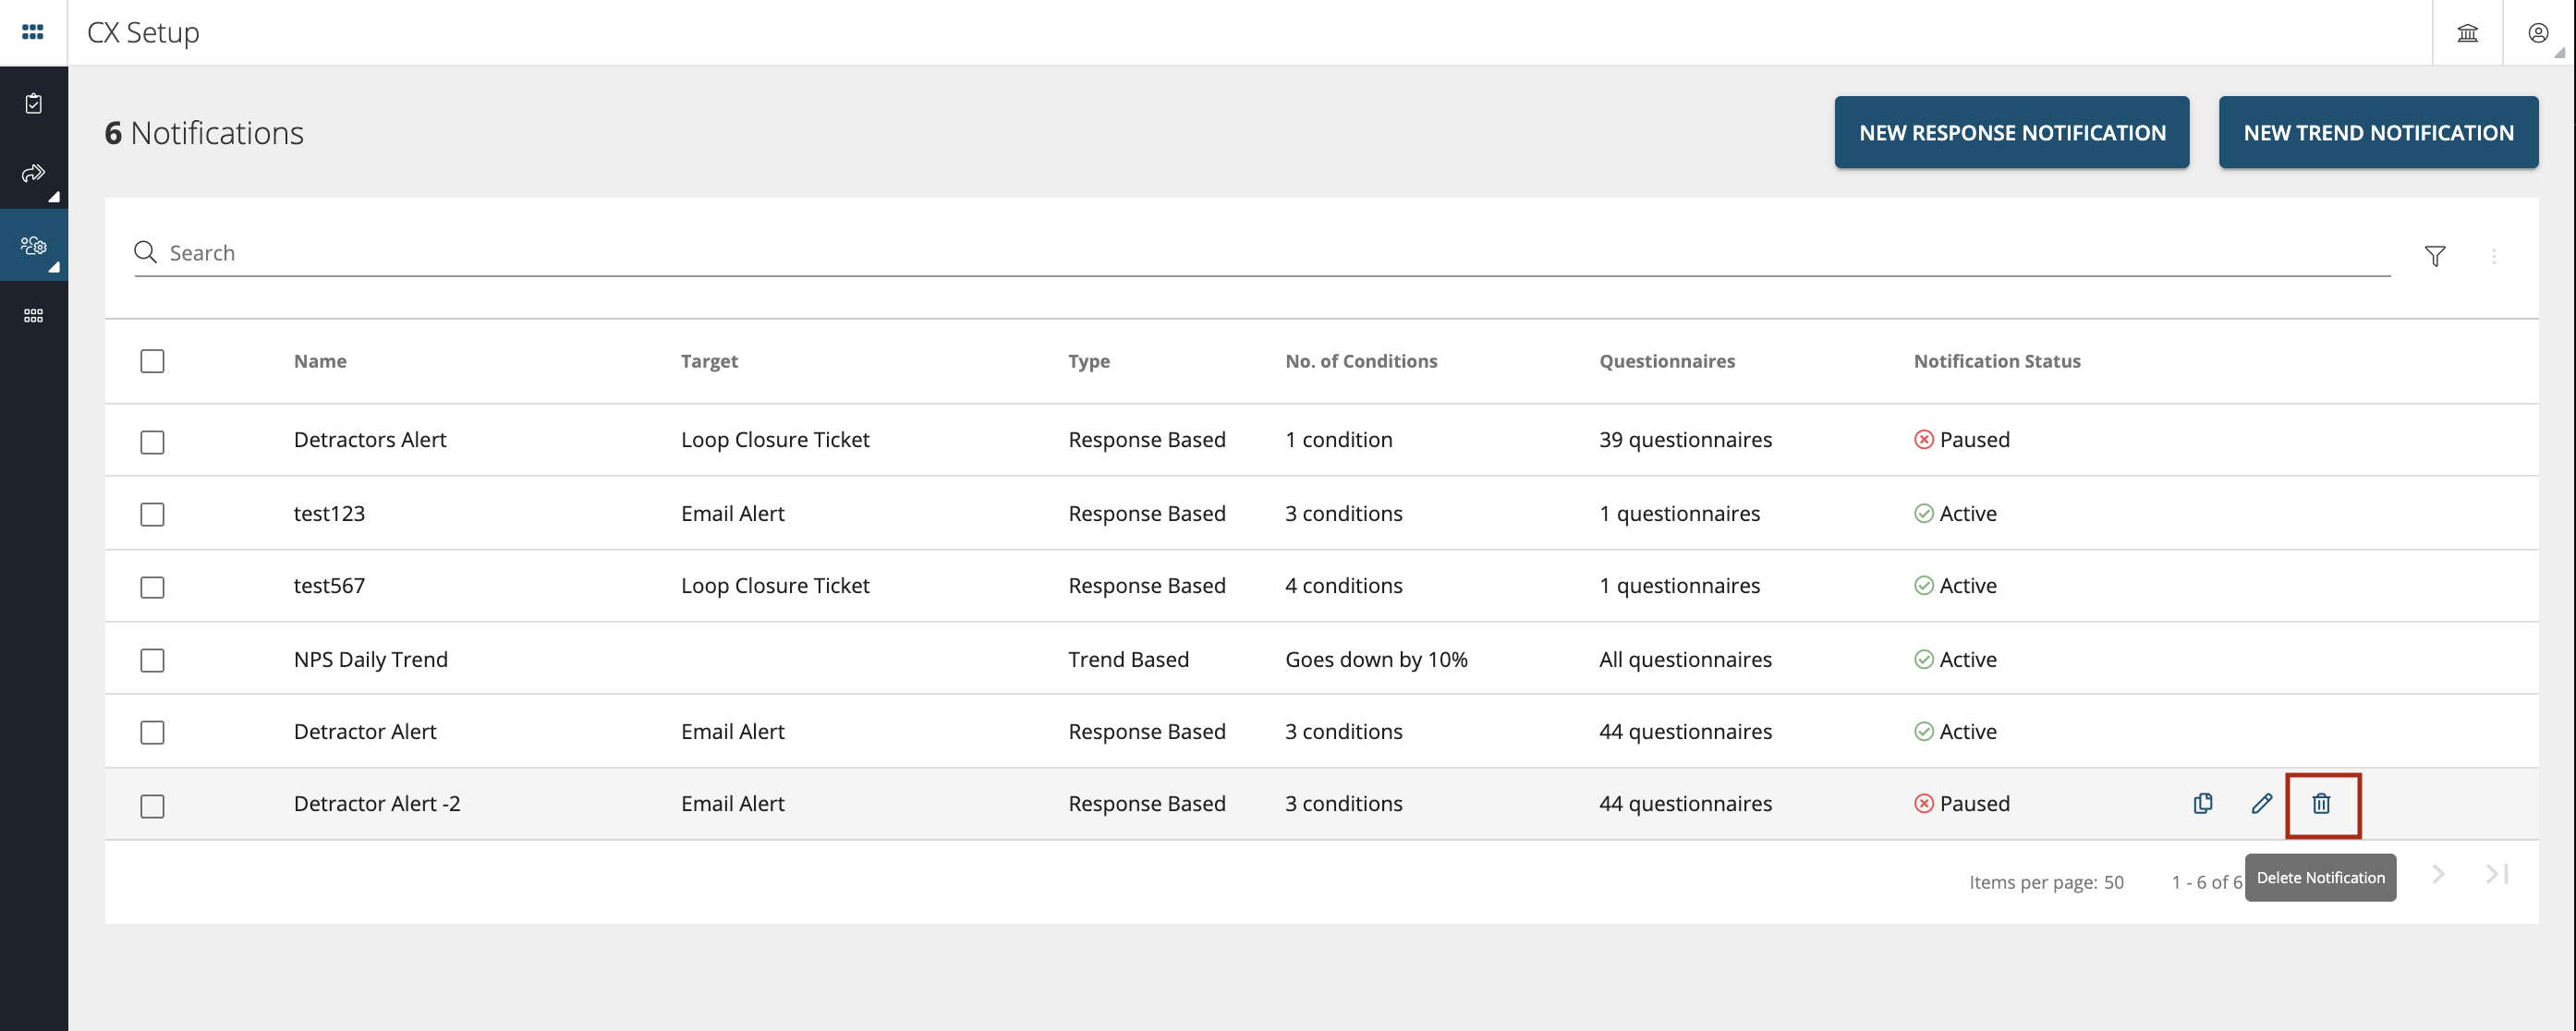
Or click on the delete icon to delete a particular notification as shown below.
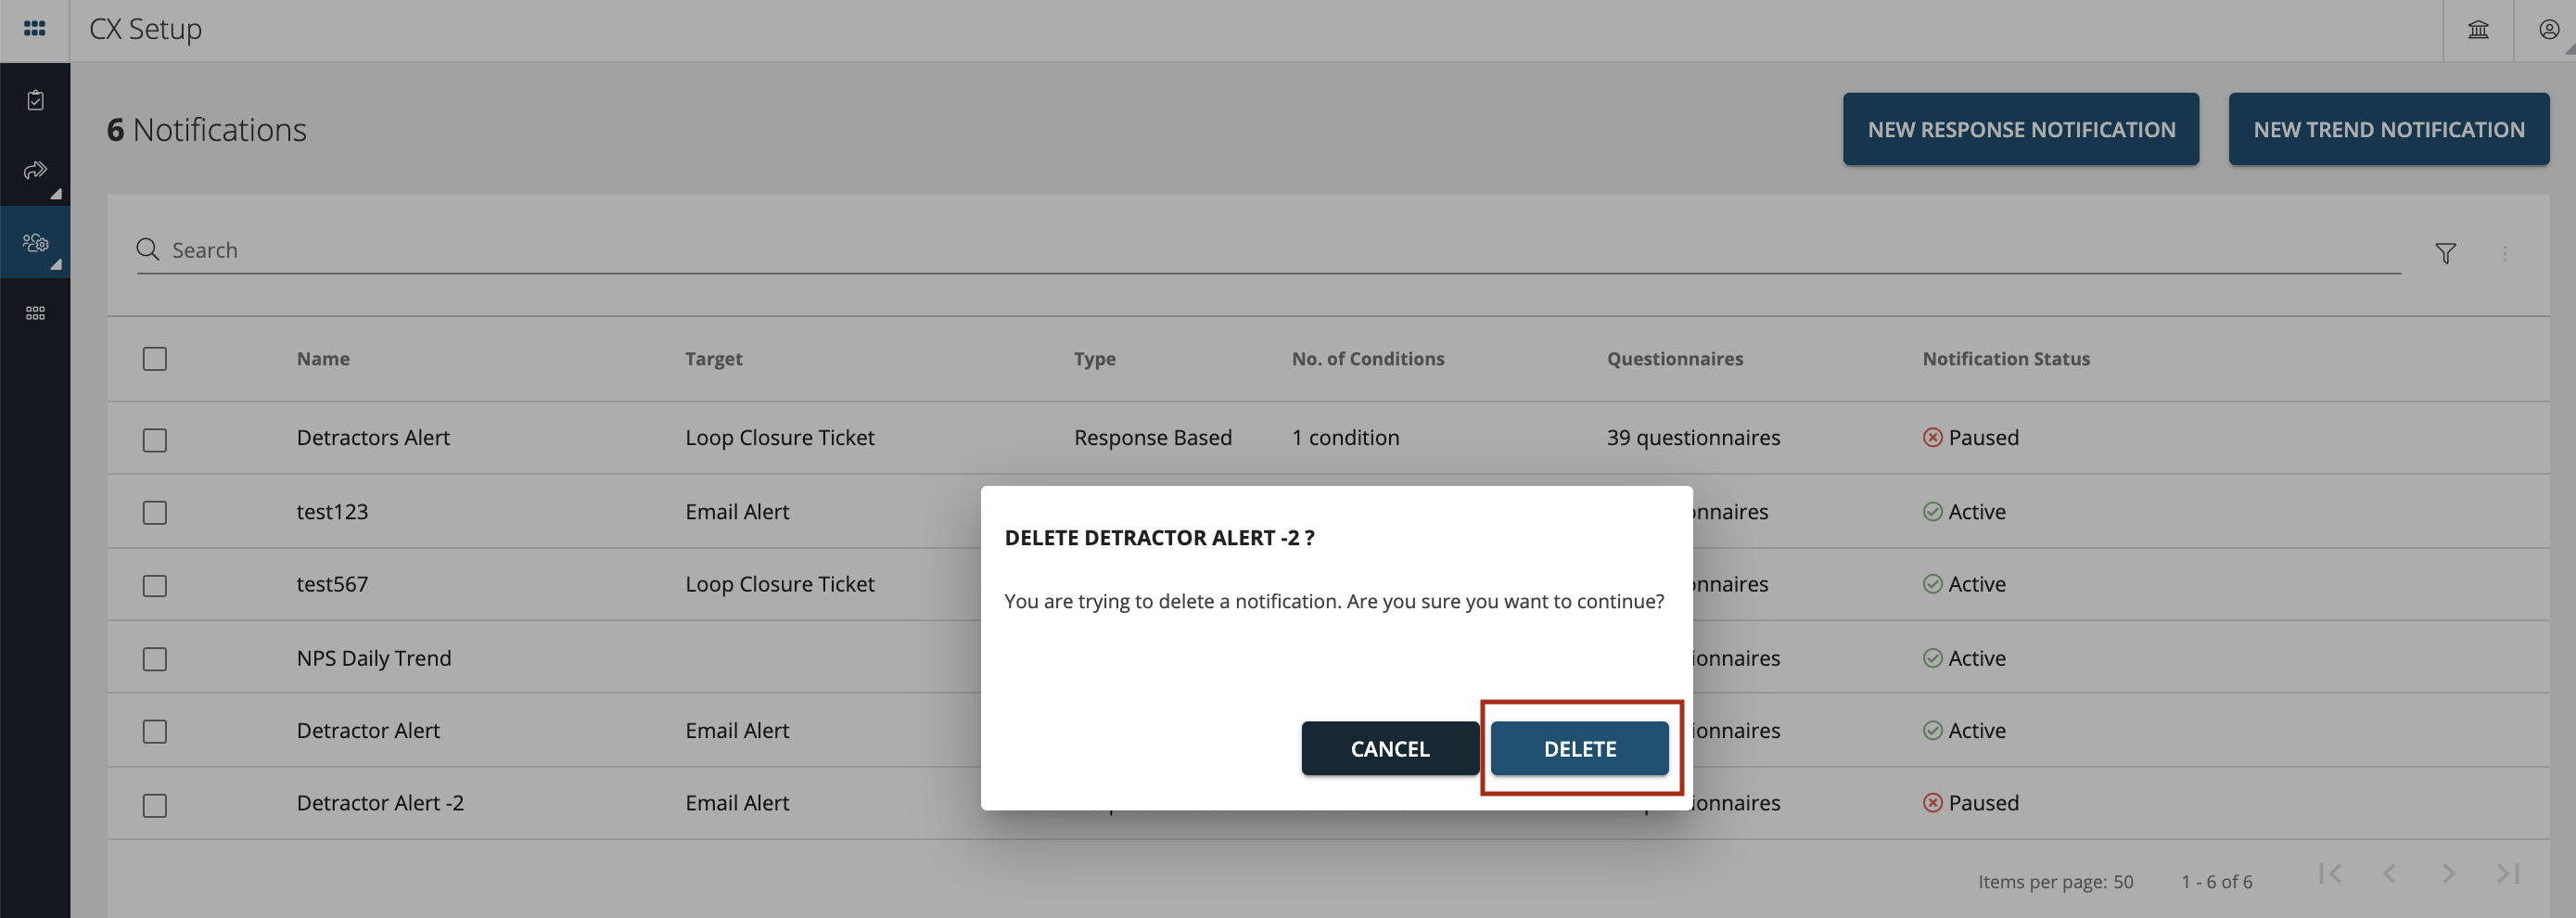
Press on ‘Delete’ button to delete the notification from the system as shown below.
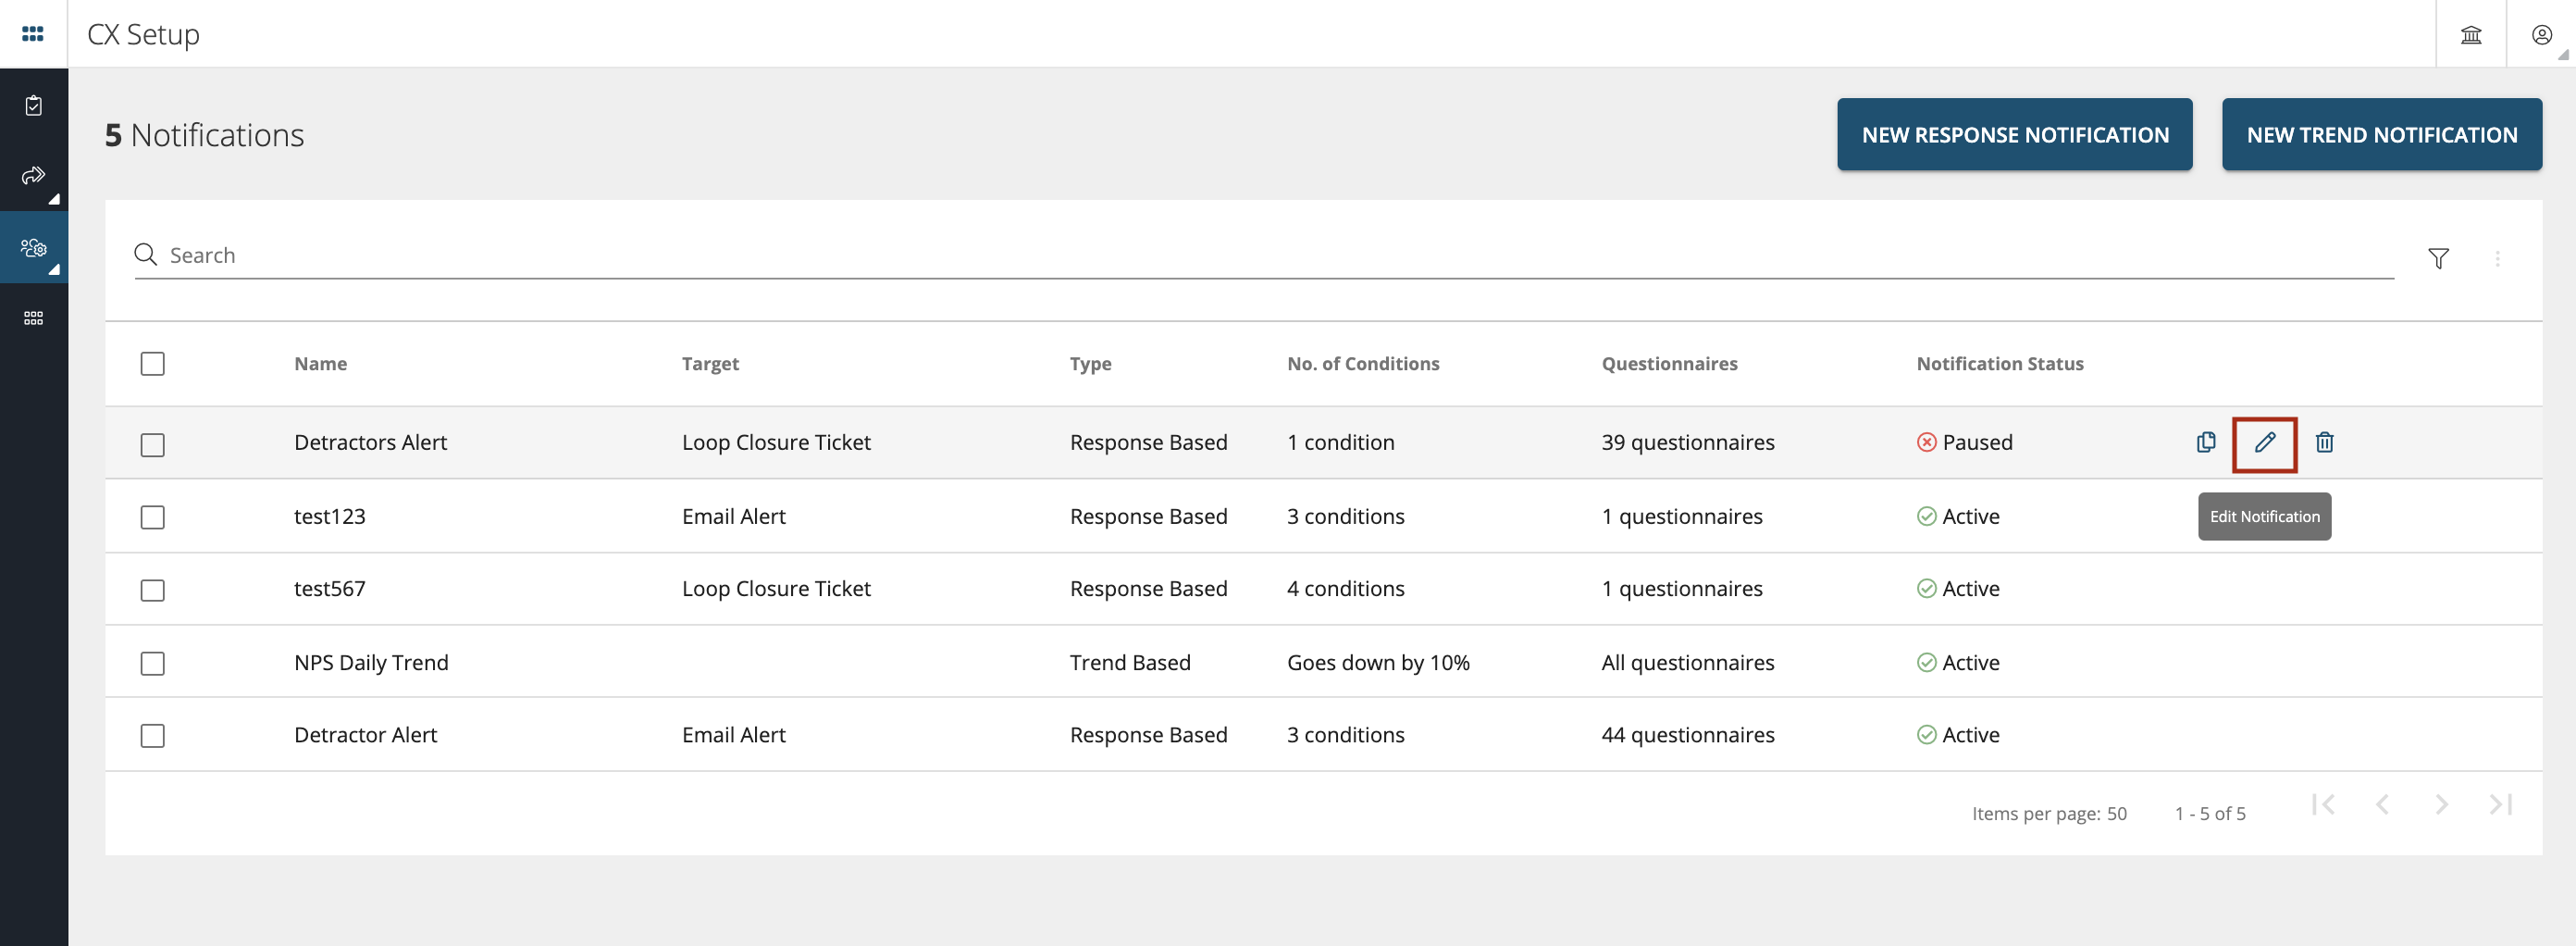
Edit- You can click on the pencil icon inorder to edit the existing notifications. Select the notification you want to edit and press on the pencil icon as shown below. Once all the amendments are done press ‘Update’ to secure the changes.
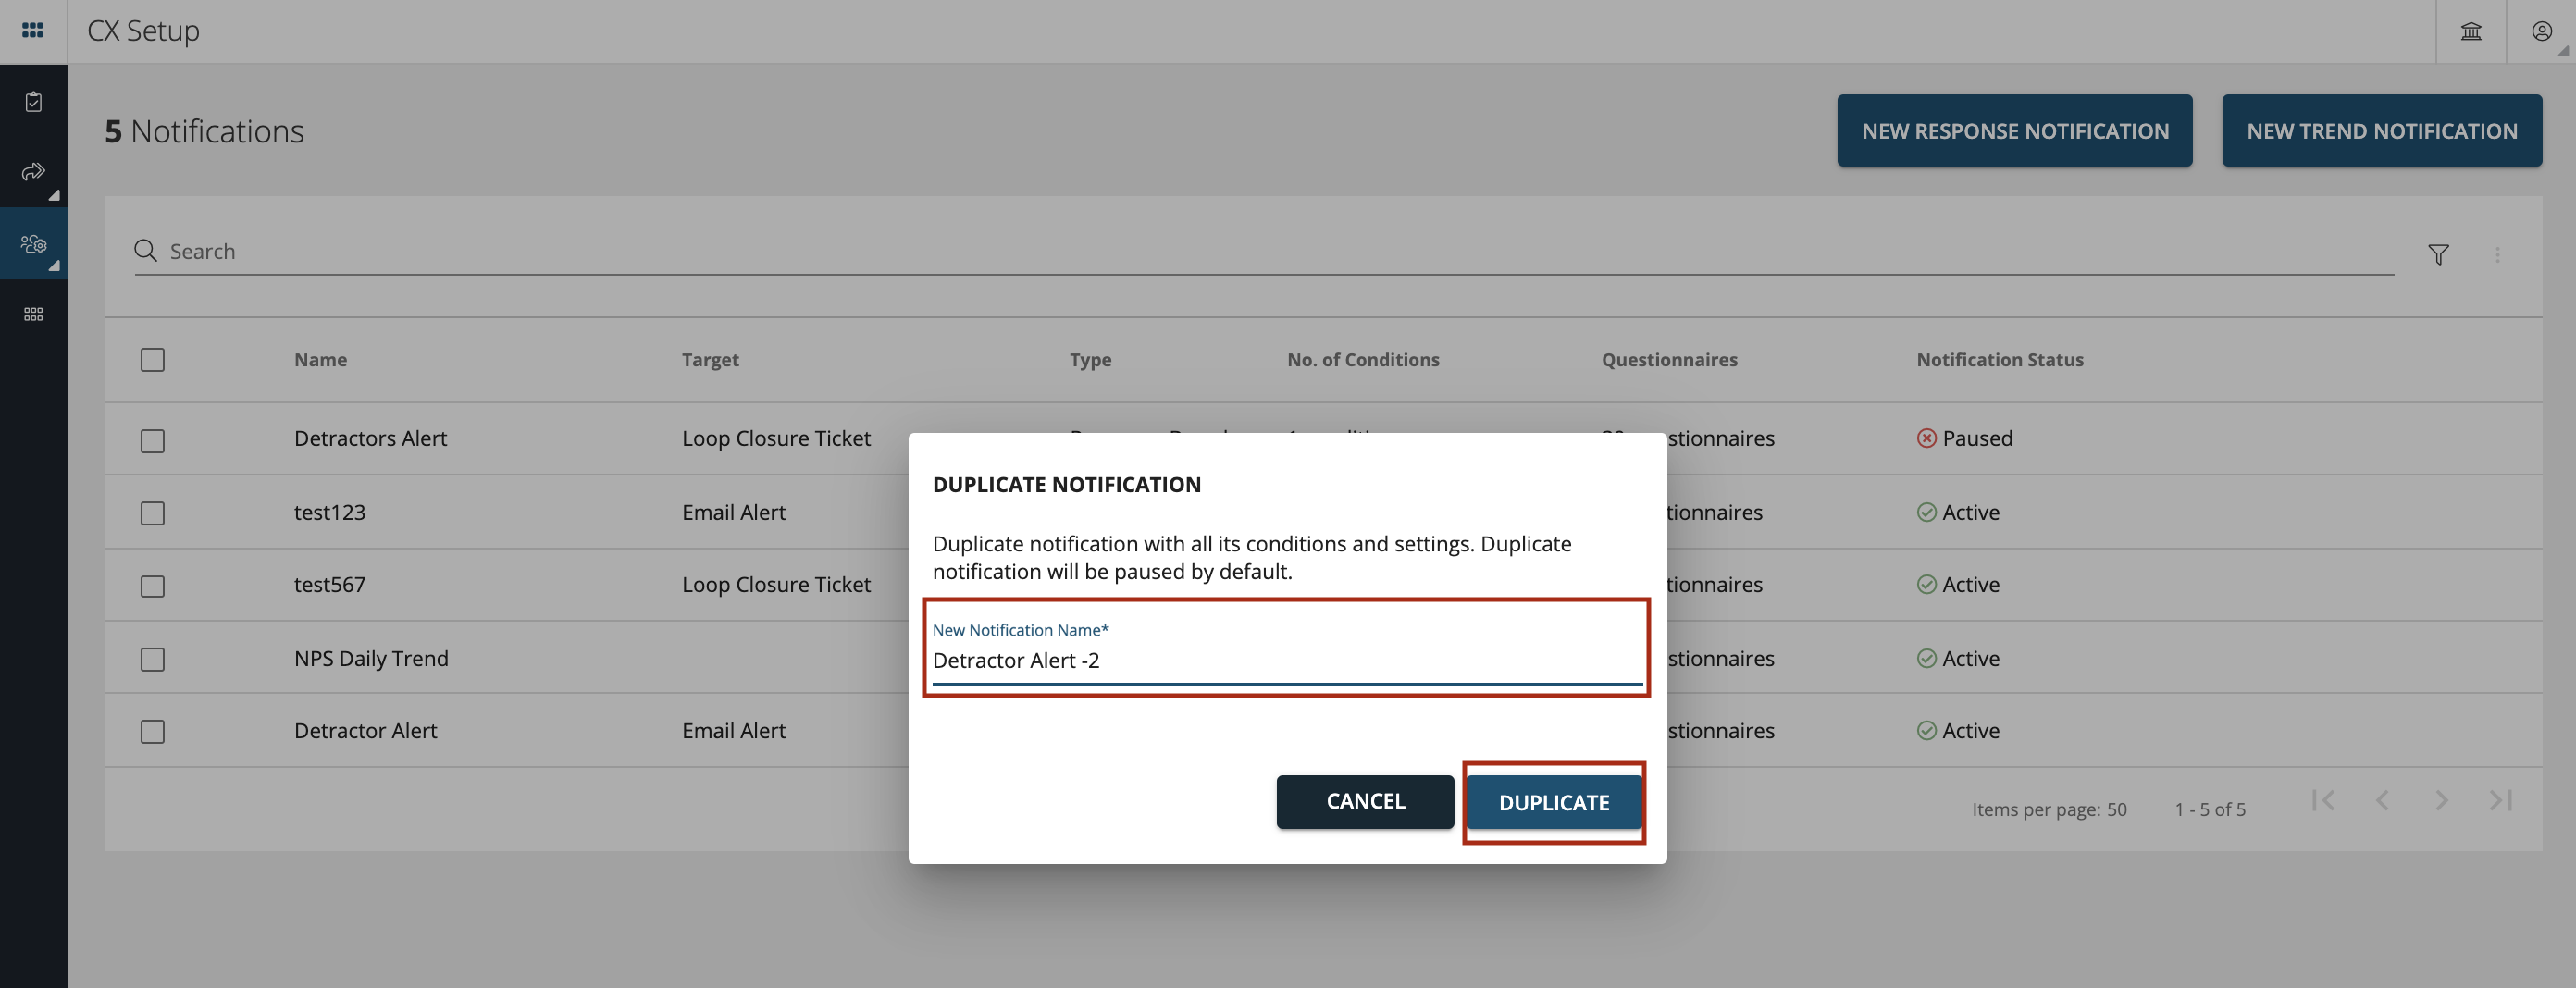
Duplicate- You can duplicate a Response based notification by clicking on the duplicate icon on the main screen as shown below.
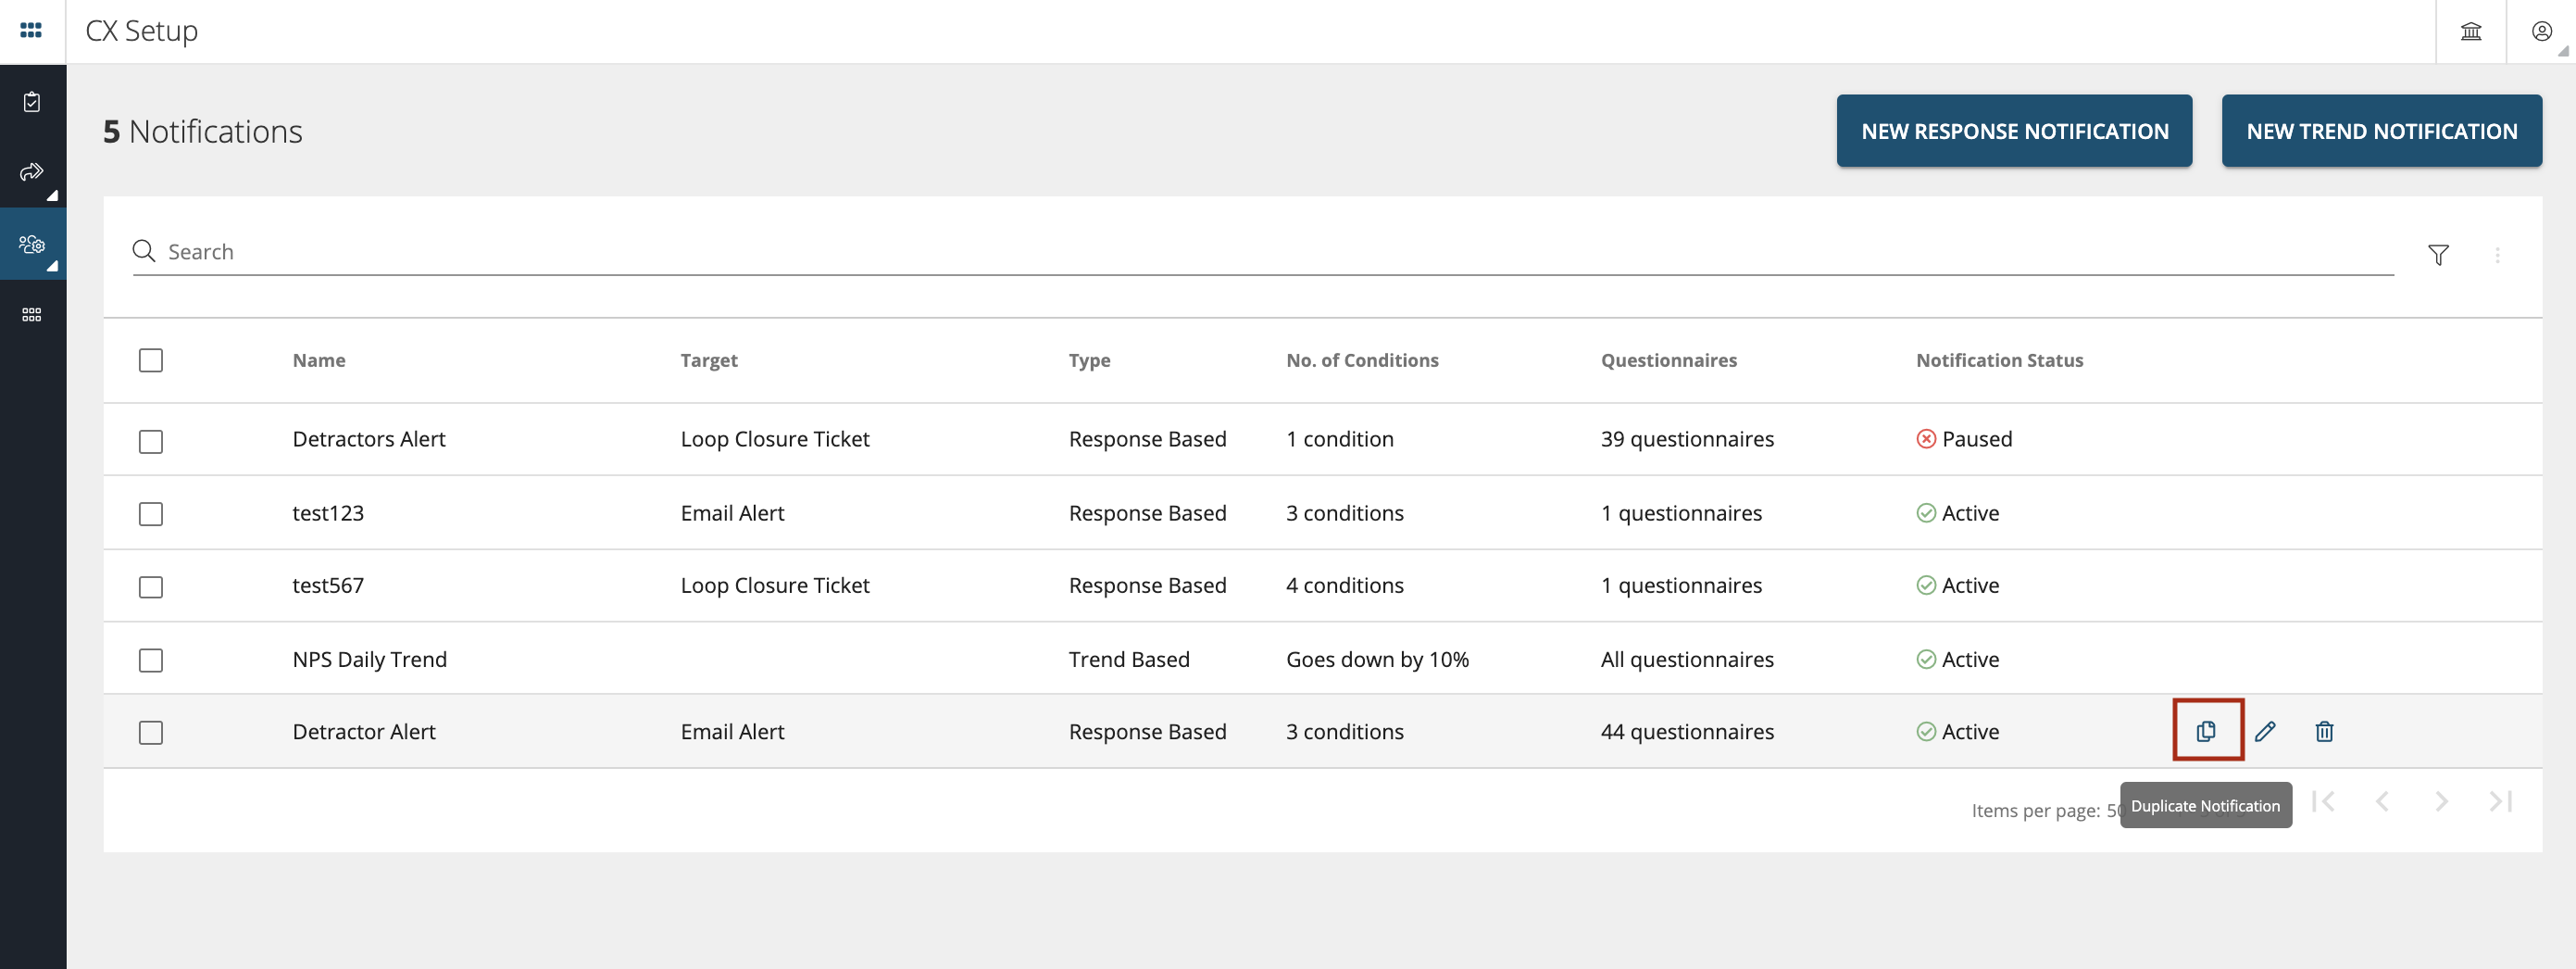
Duplicate notification functionality will copy all the original notifications conditions and settings and will be in Pause mode by default.