Global Metric Library
Content Outline
Overview
Global Metric Library module is where you can build and configure space/dashboard widgets. You can drag and drop to slice and dice data, apply math functions, and visualize it in different charting options. GML helps to mine the insights and export to popular image formats and share the findings with your team members and management.
There are different types of widgets that can be configured in GML. They are:
- Basic Widgets
- Composite Widgets
- Time Widgets
- Flat Table Widgets
Widgets Configuration
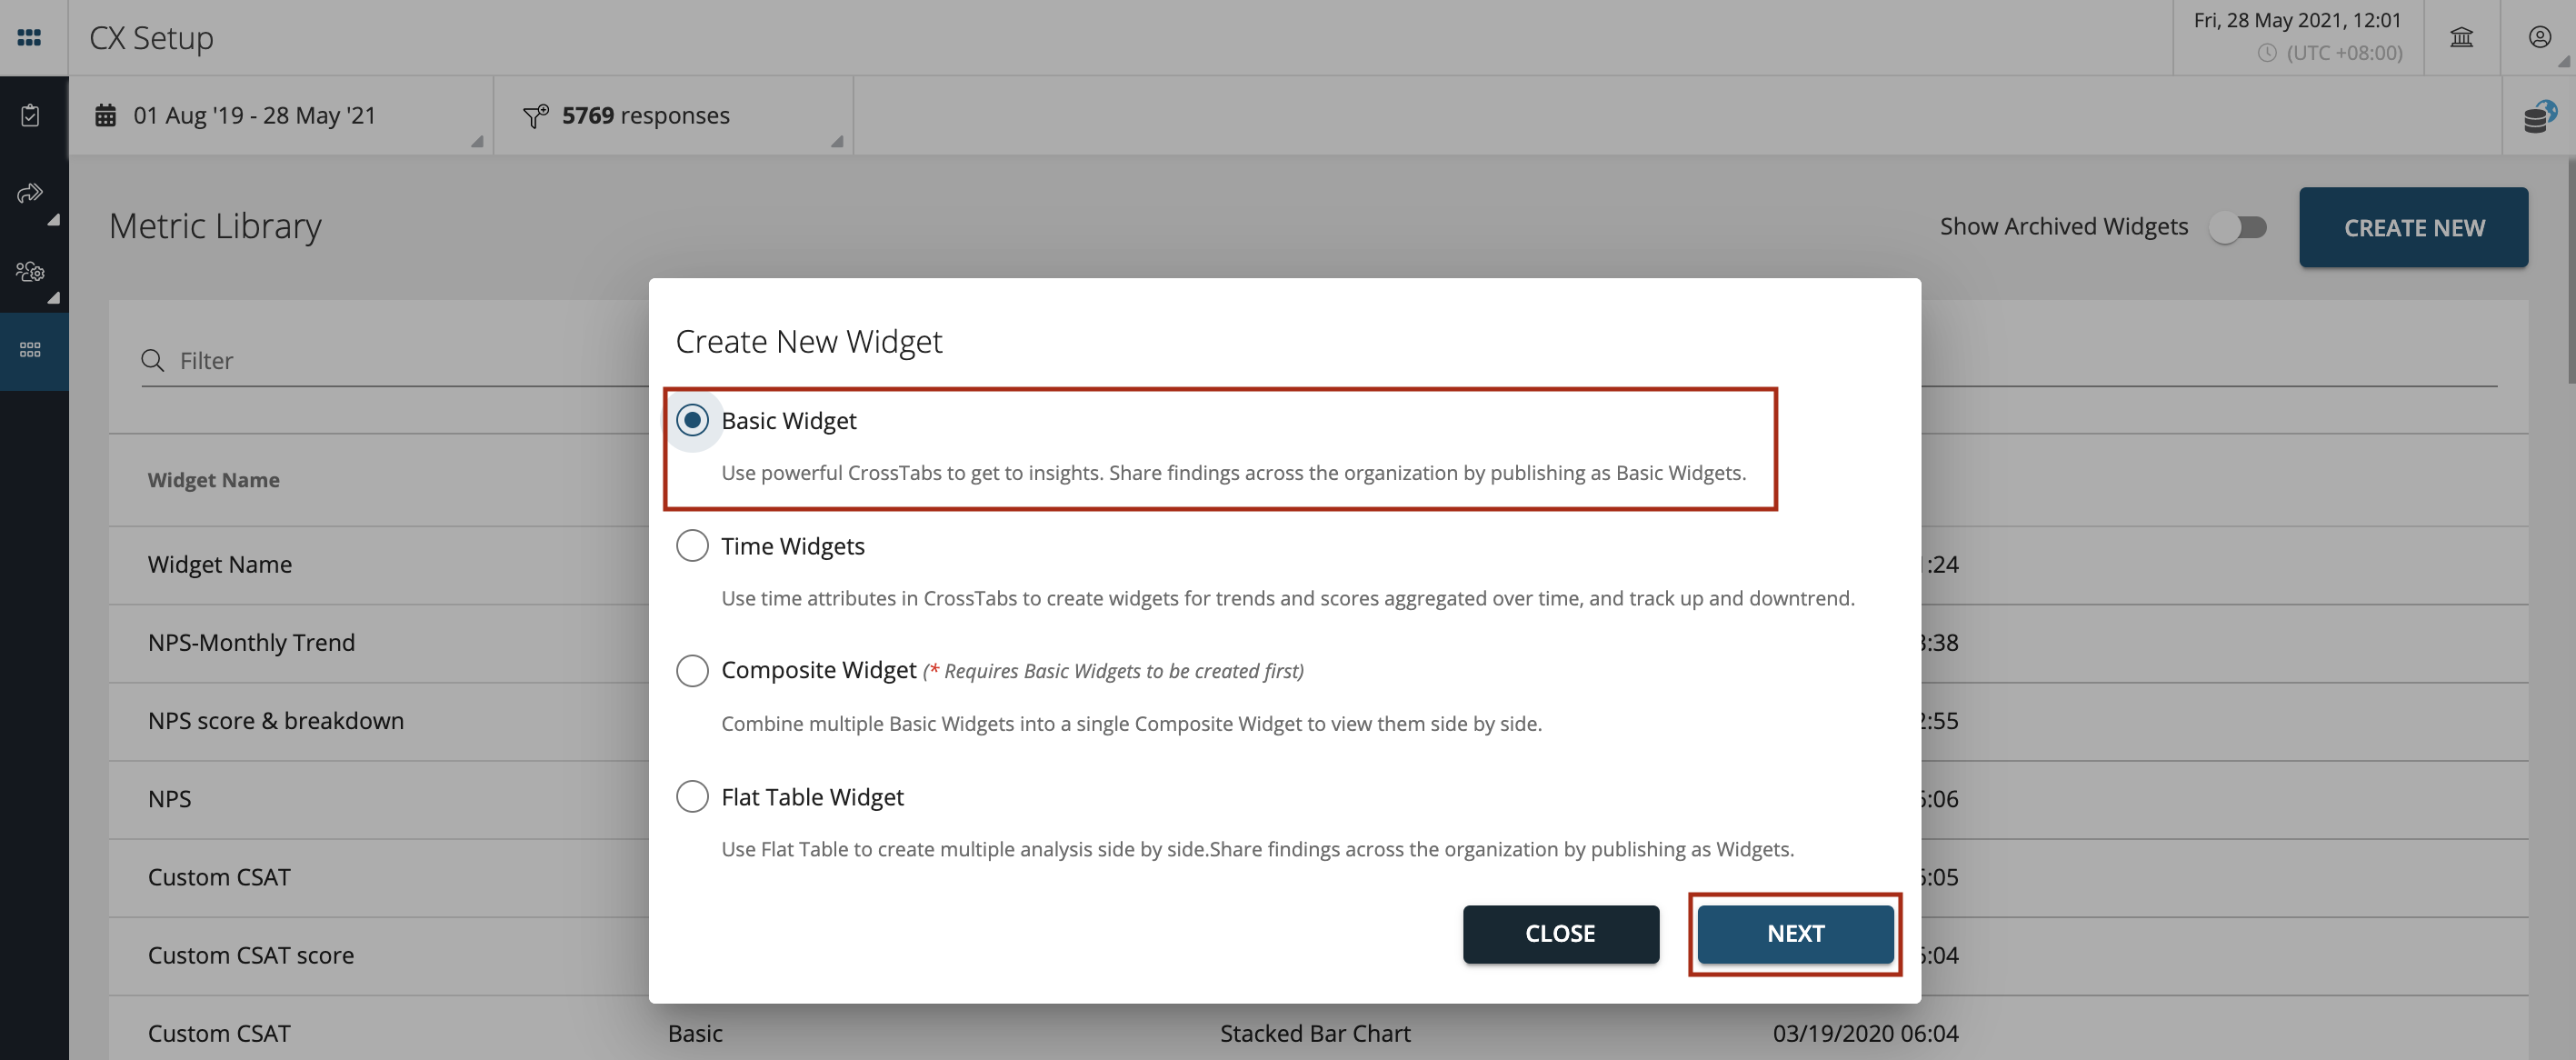
Basic Widget
You can create basic widgets by using powerful CrossTabs to get to insights and share the findings across the organization by publishing as Basic Widgets.
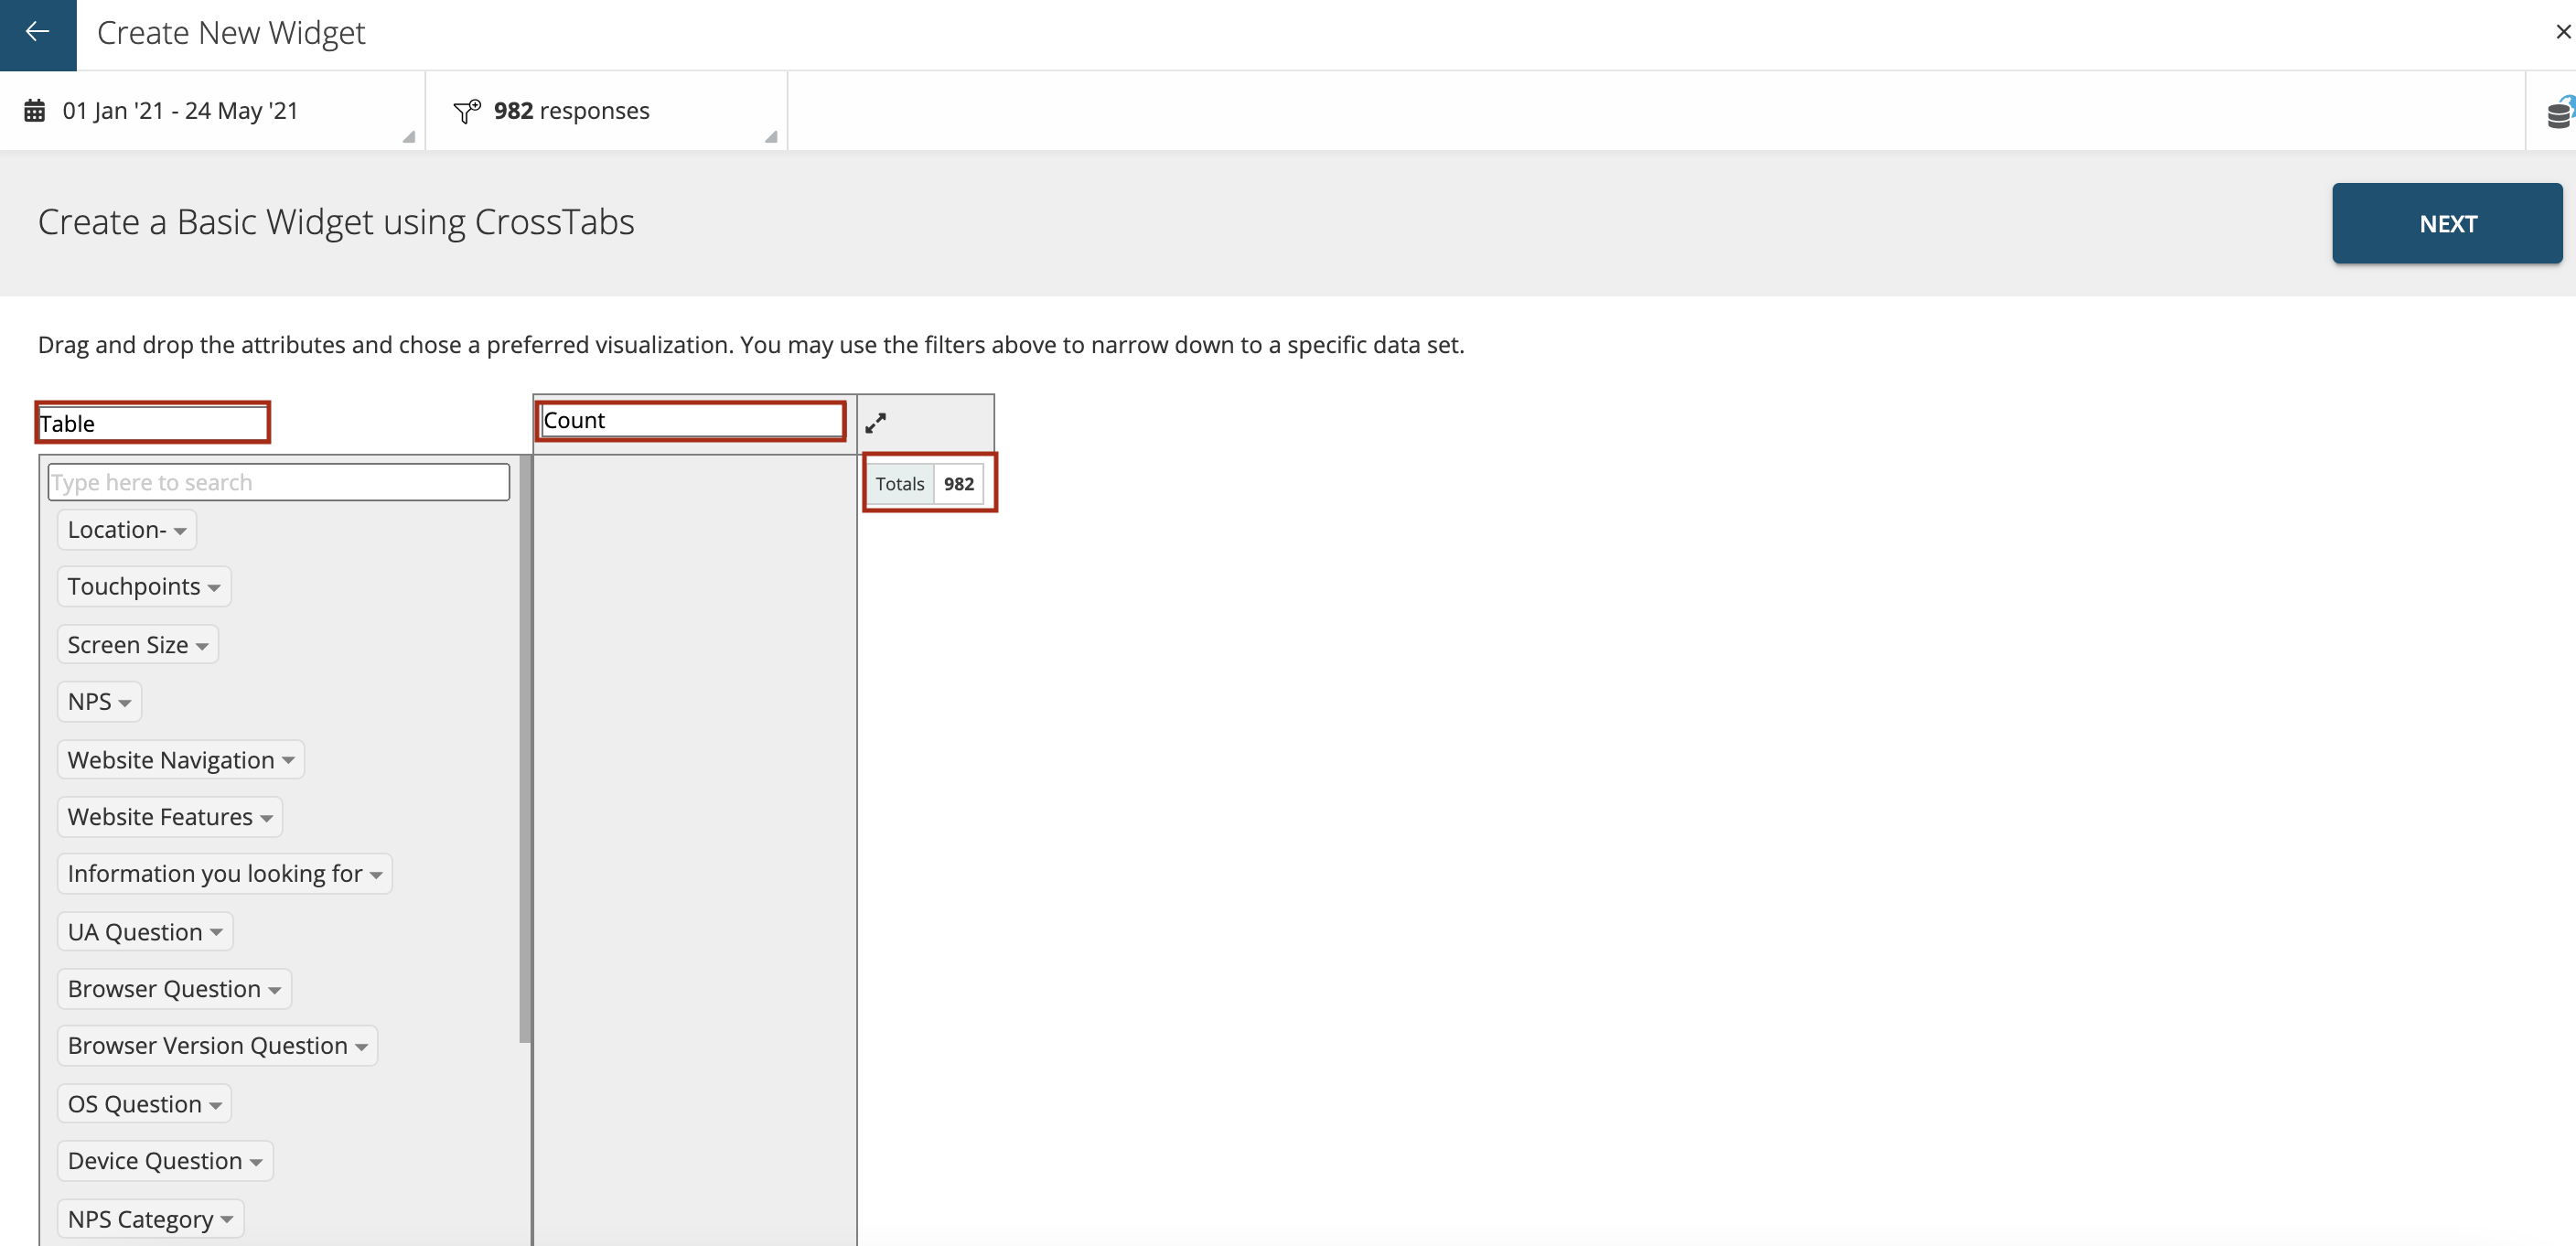
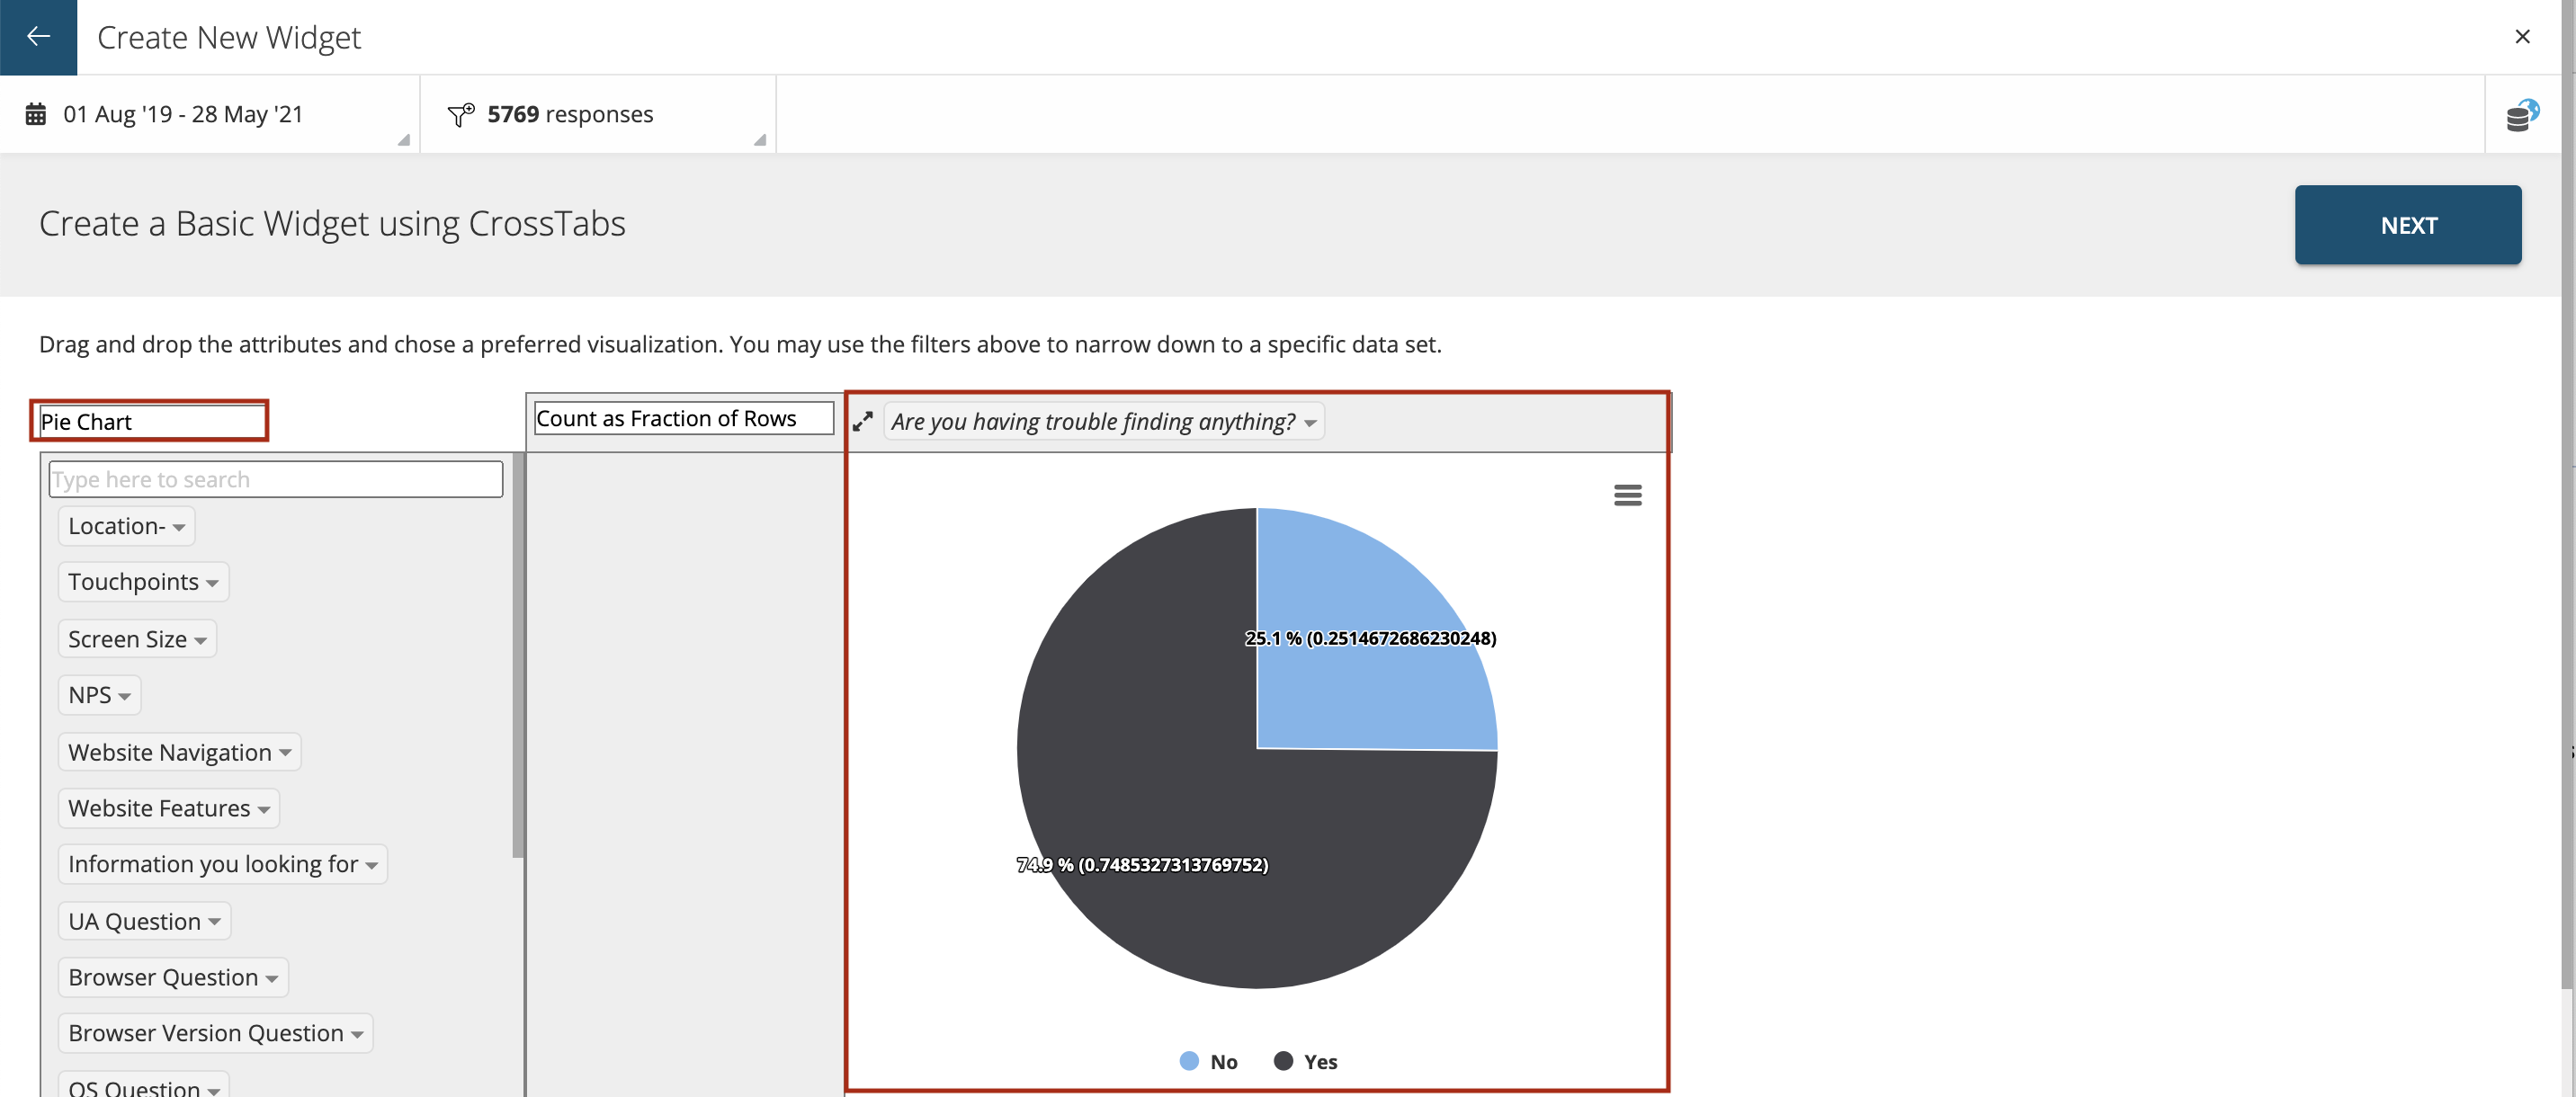
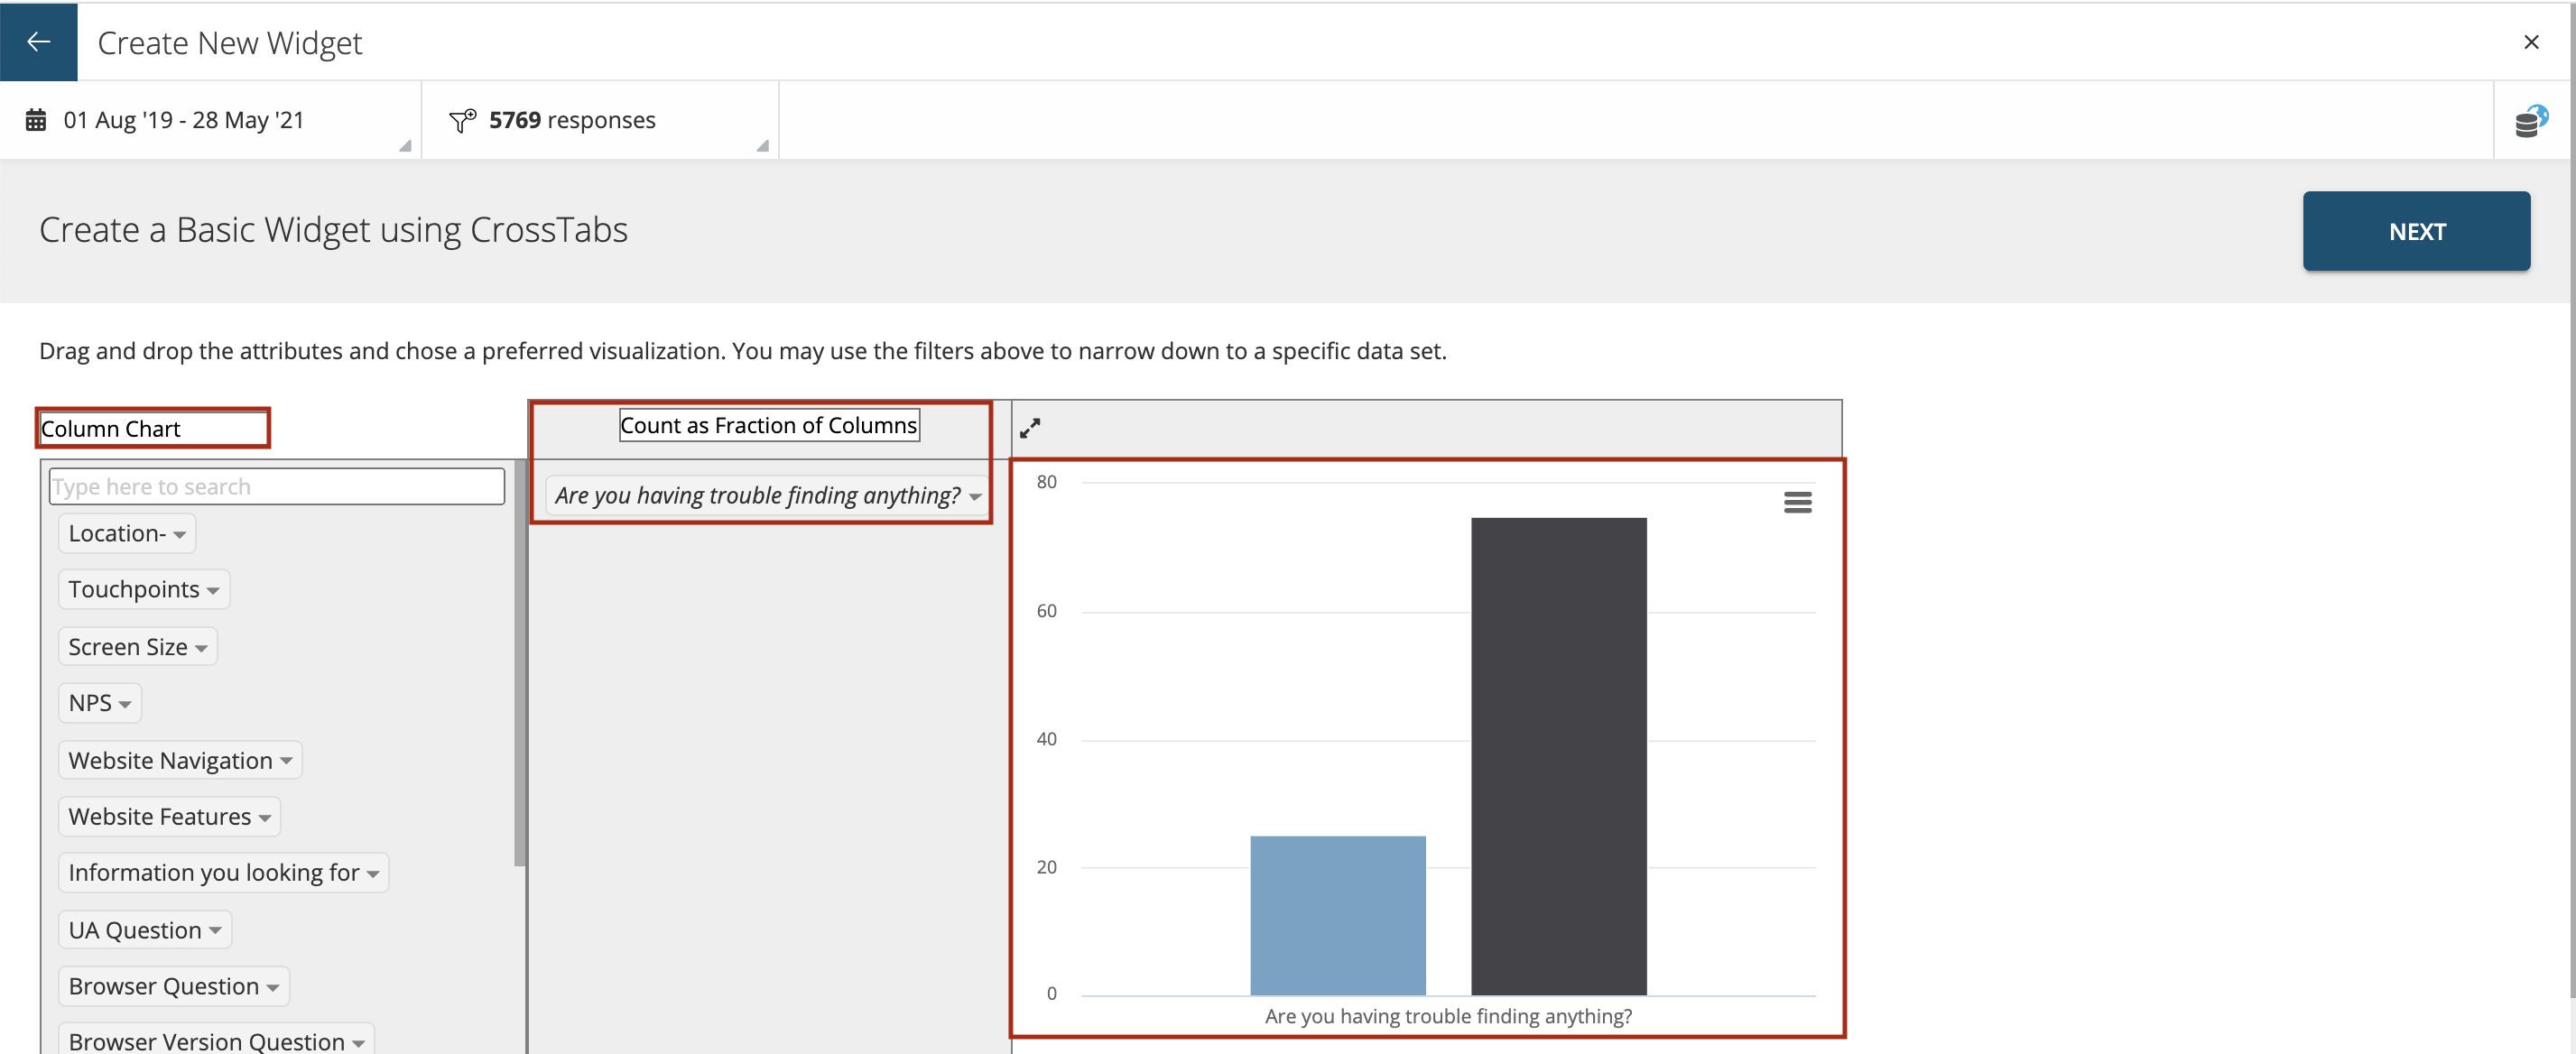
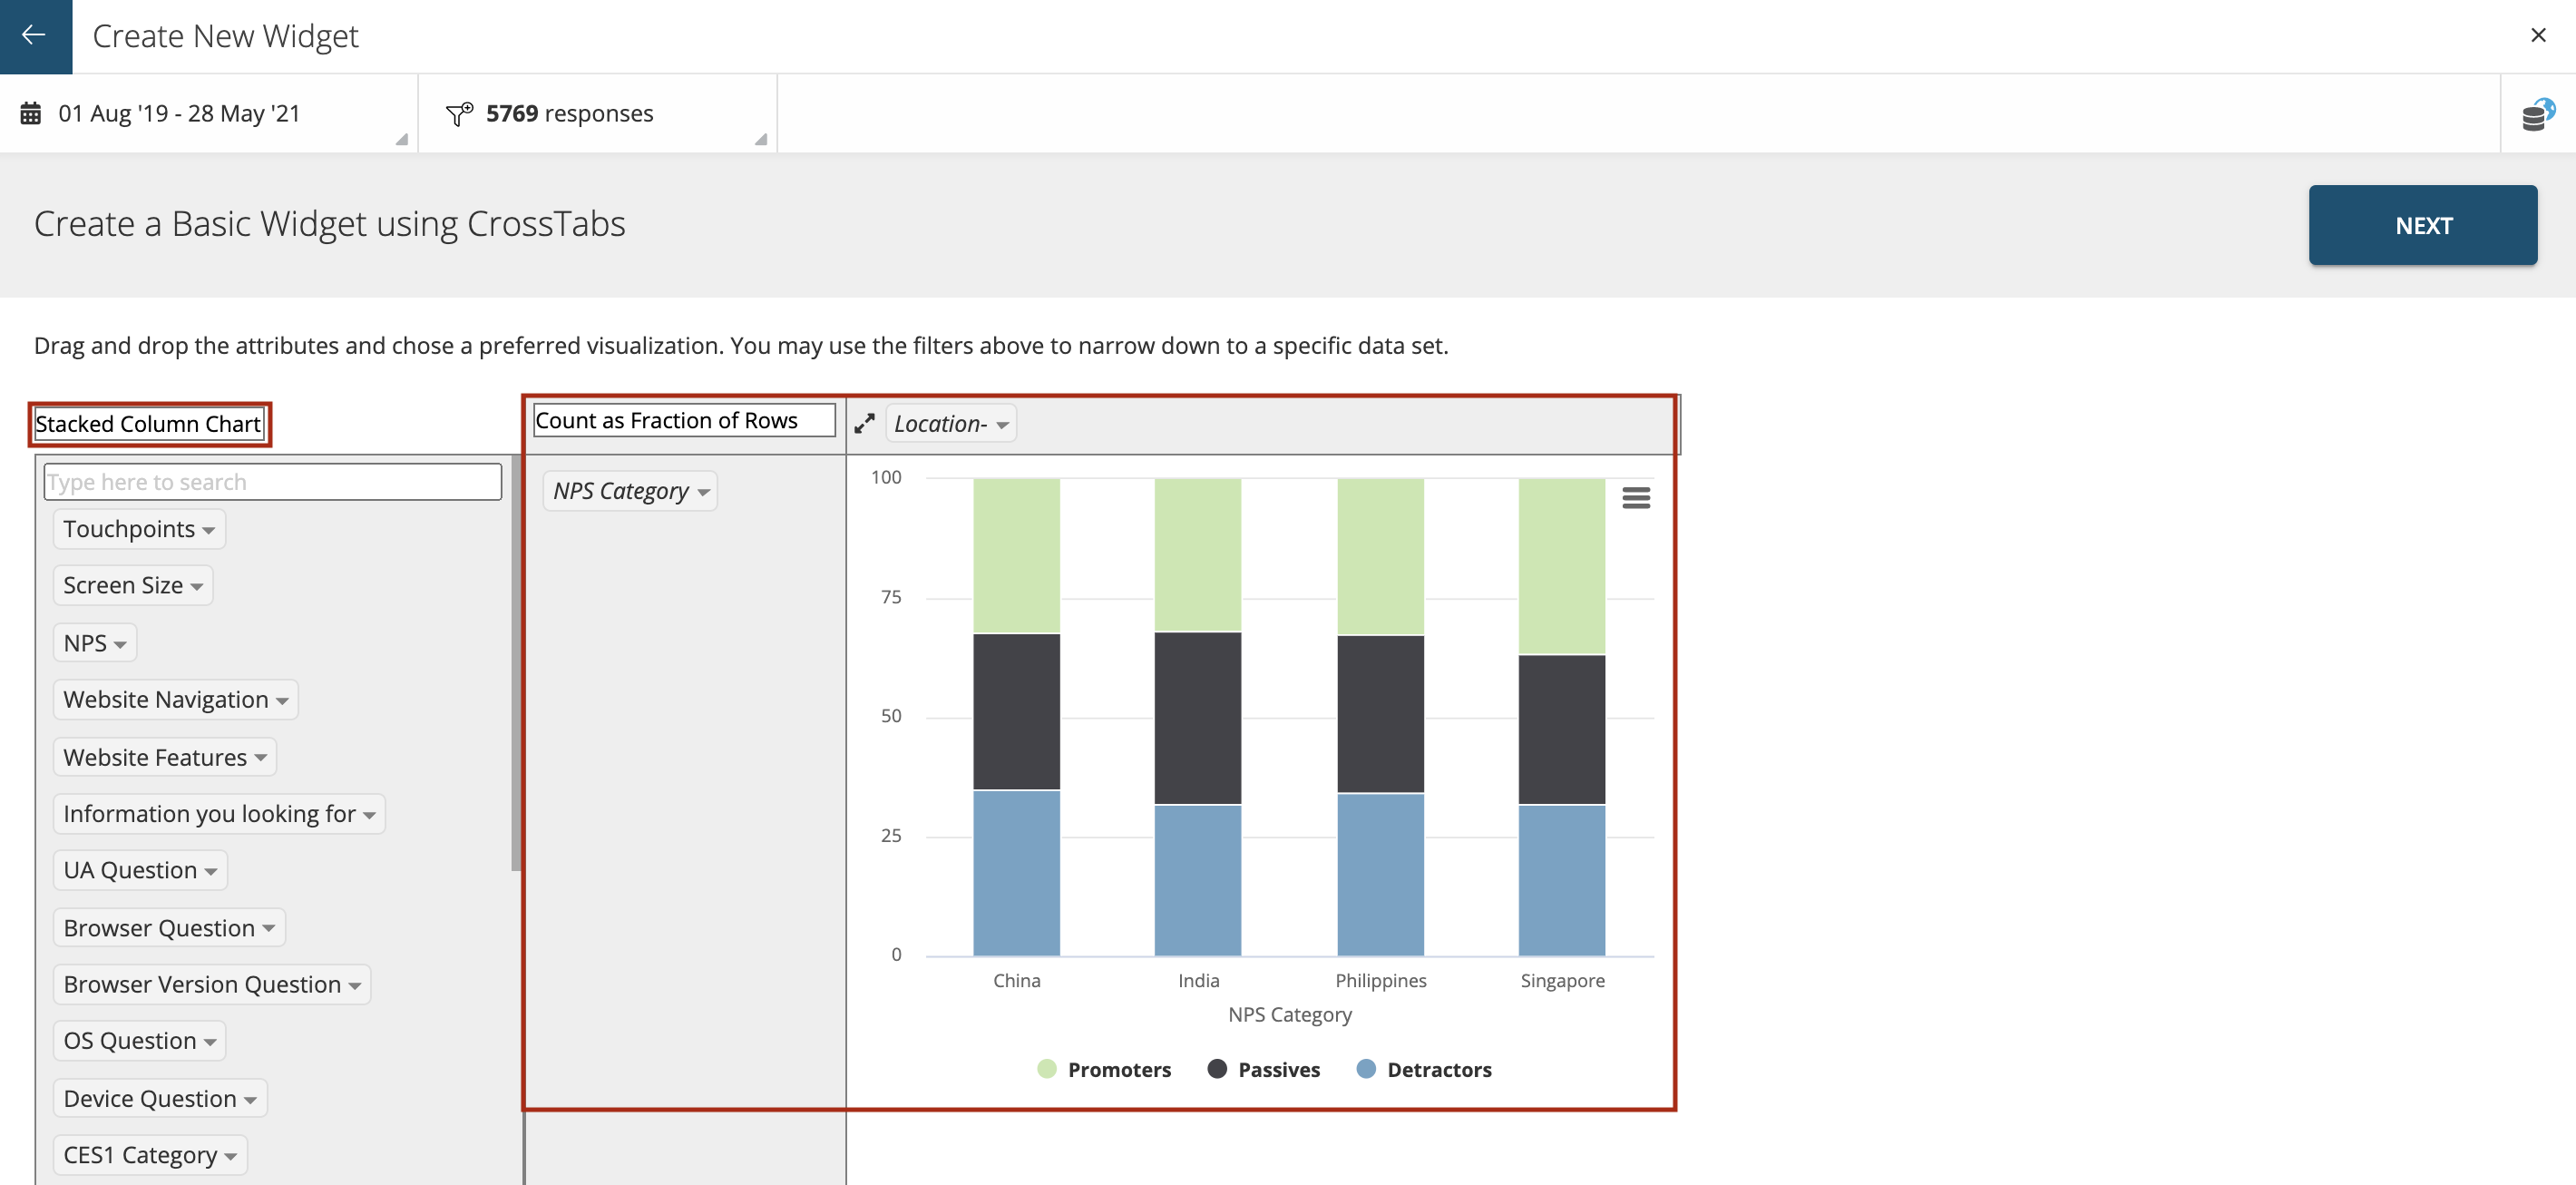
You can create a Basic Widget using CrossTabs.Drag and drop the attributes from the left panel which shows the list of questions and chose a preferred visualization. You can use the filters above to narrow down to a specific data set.
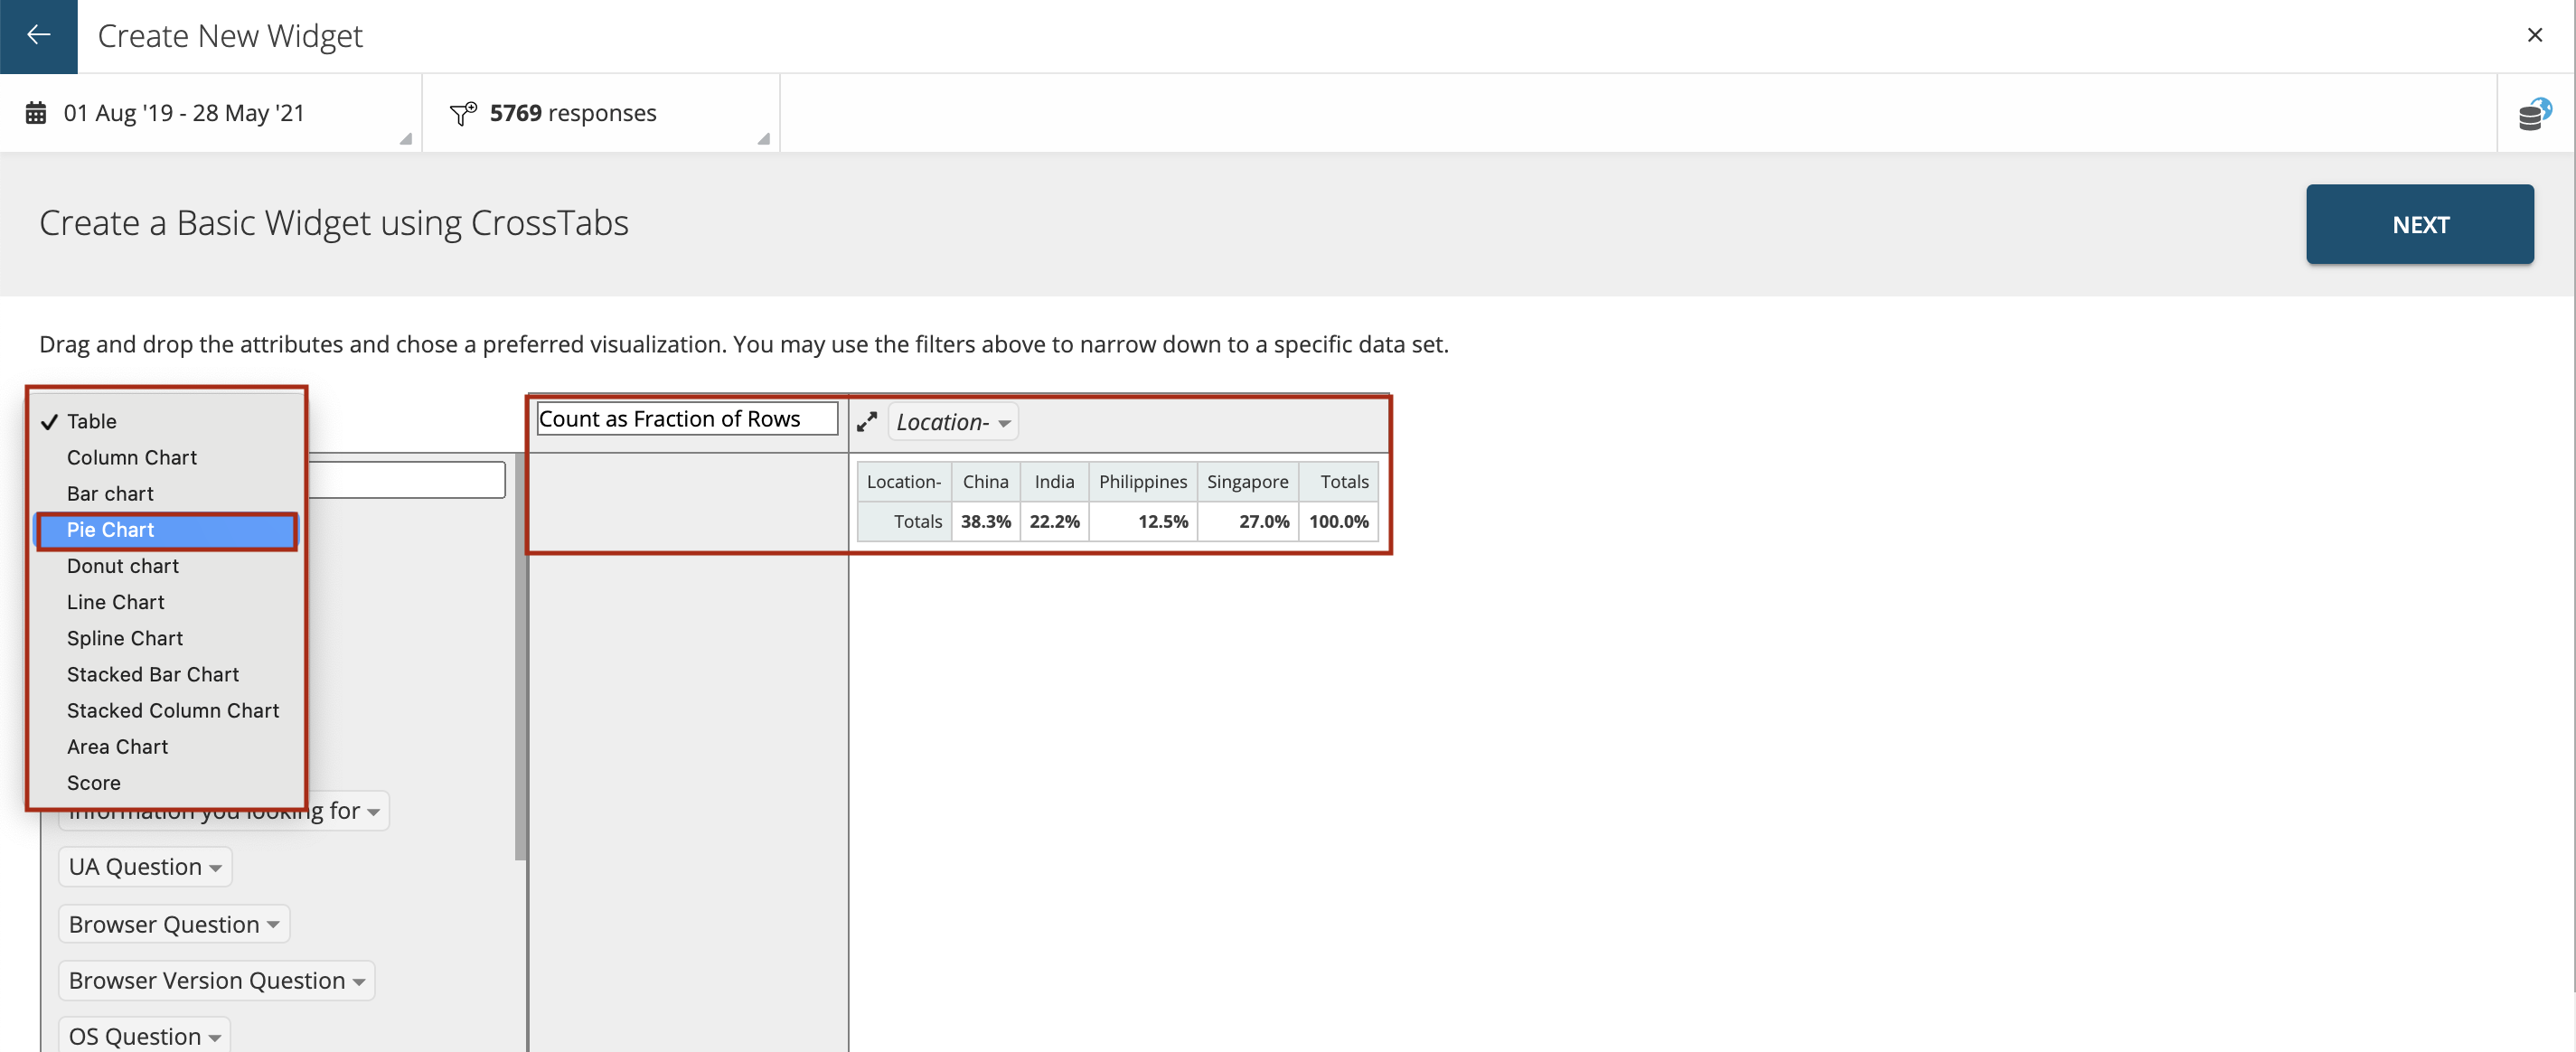
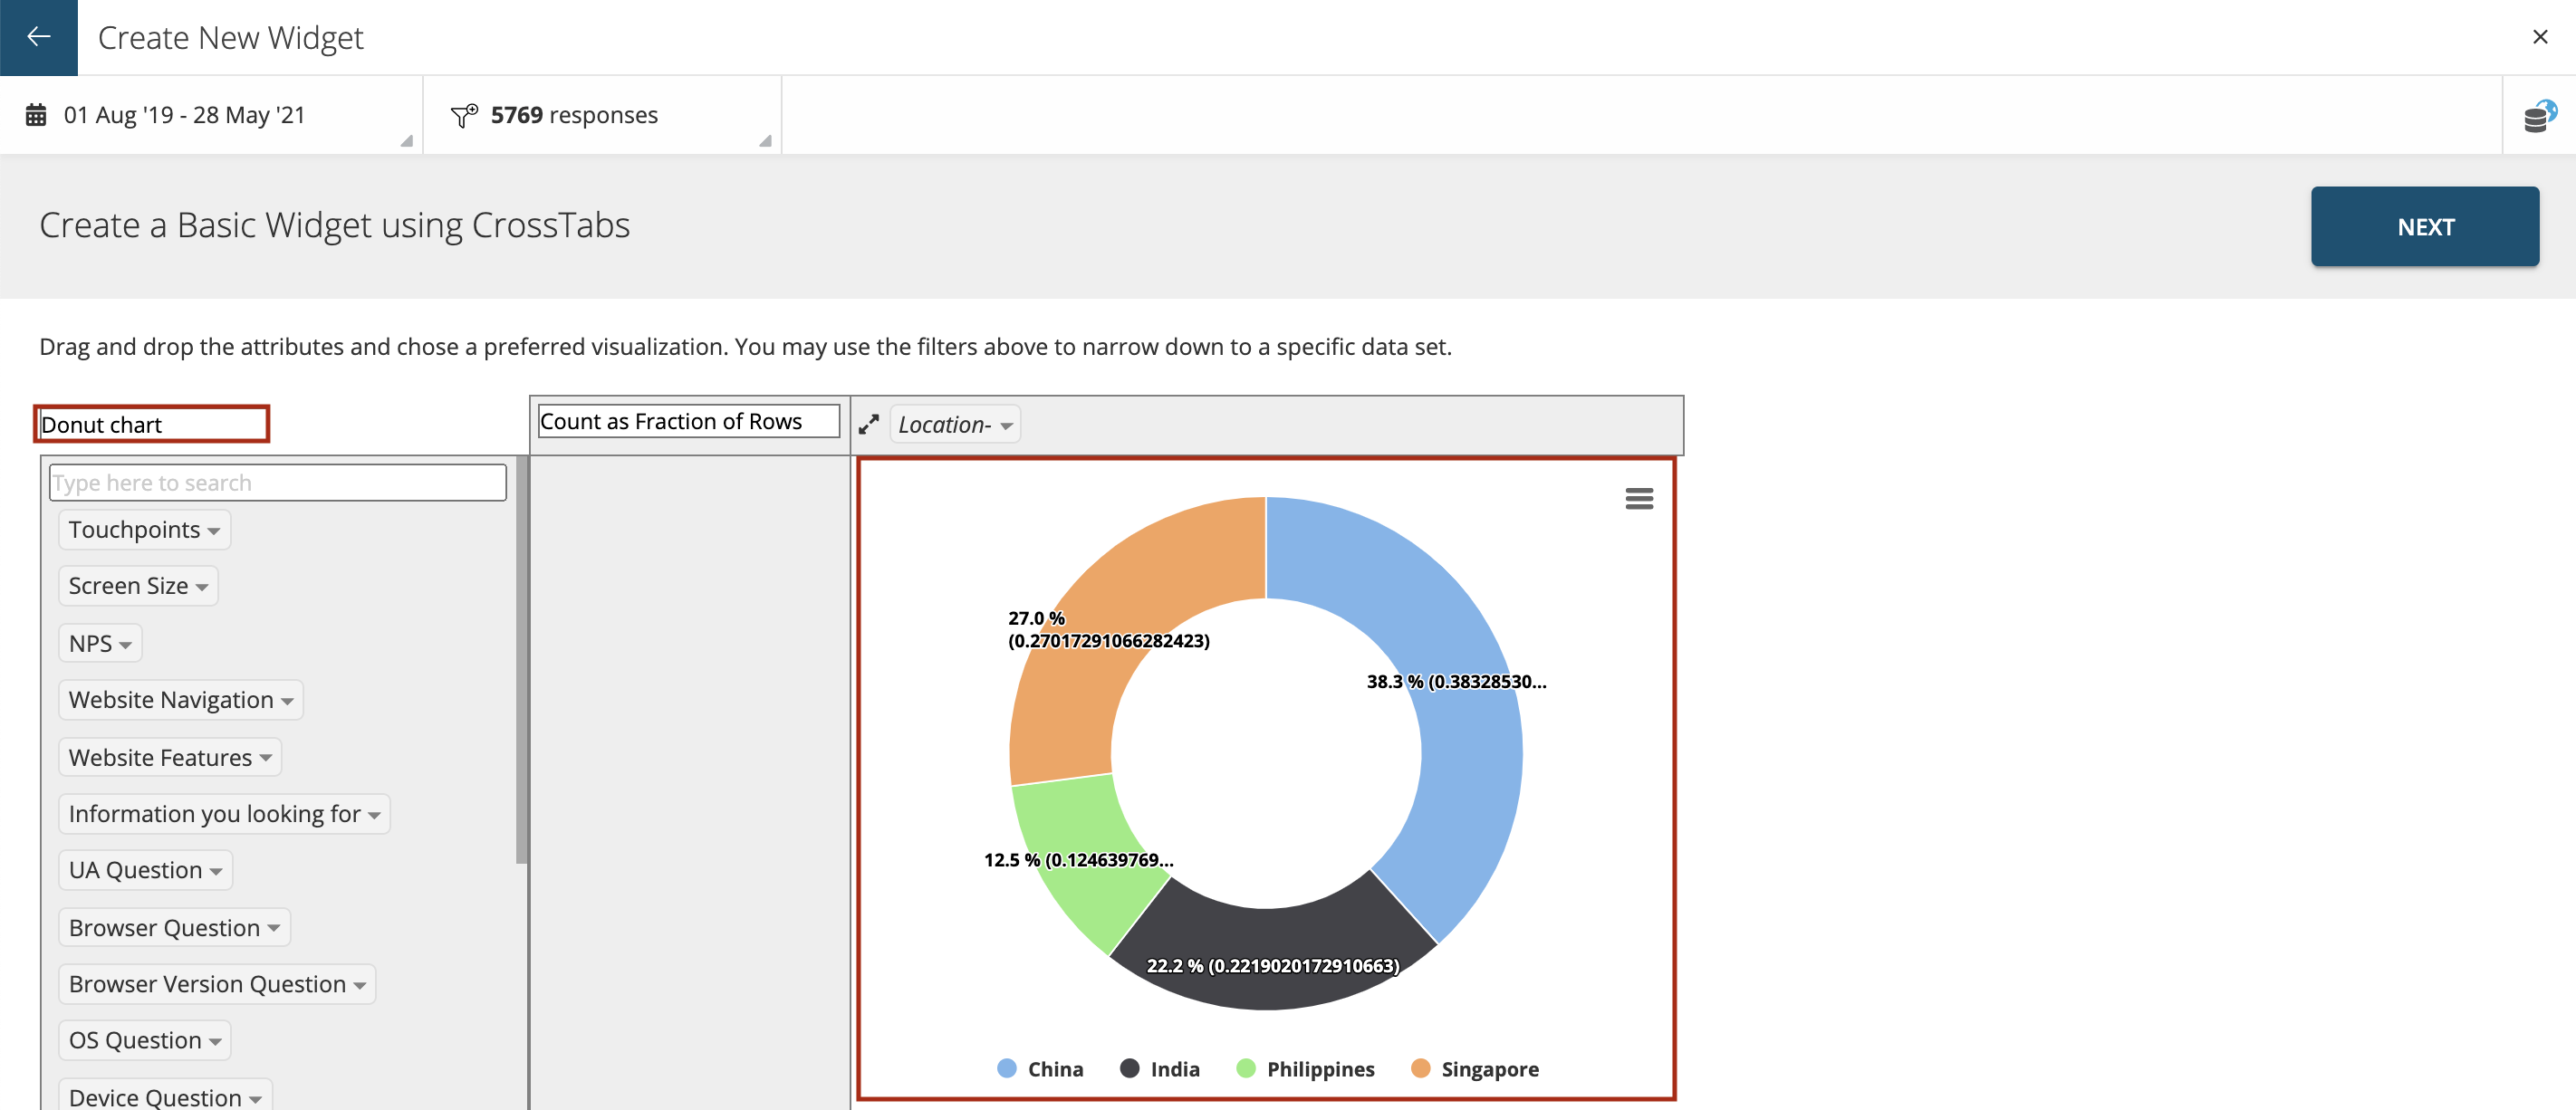
To create a Basic Widget click on ‘Create New’ as shown below. Also you can this data with different visualization like score widget, Pie Chart, Donut Chart, Column Chart, Stacked Column Chart, Bar Chart, Stacked Bar Chart, Line Chart, Spline Chart, etc.
Then select ‘Basic Widget’ and press ‘Next’ as shown.
By default the basic widget will show you count of Responses.
You can create different types of basic widgets by choosing from the list of preconfigured formulae.
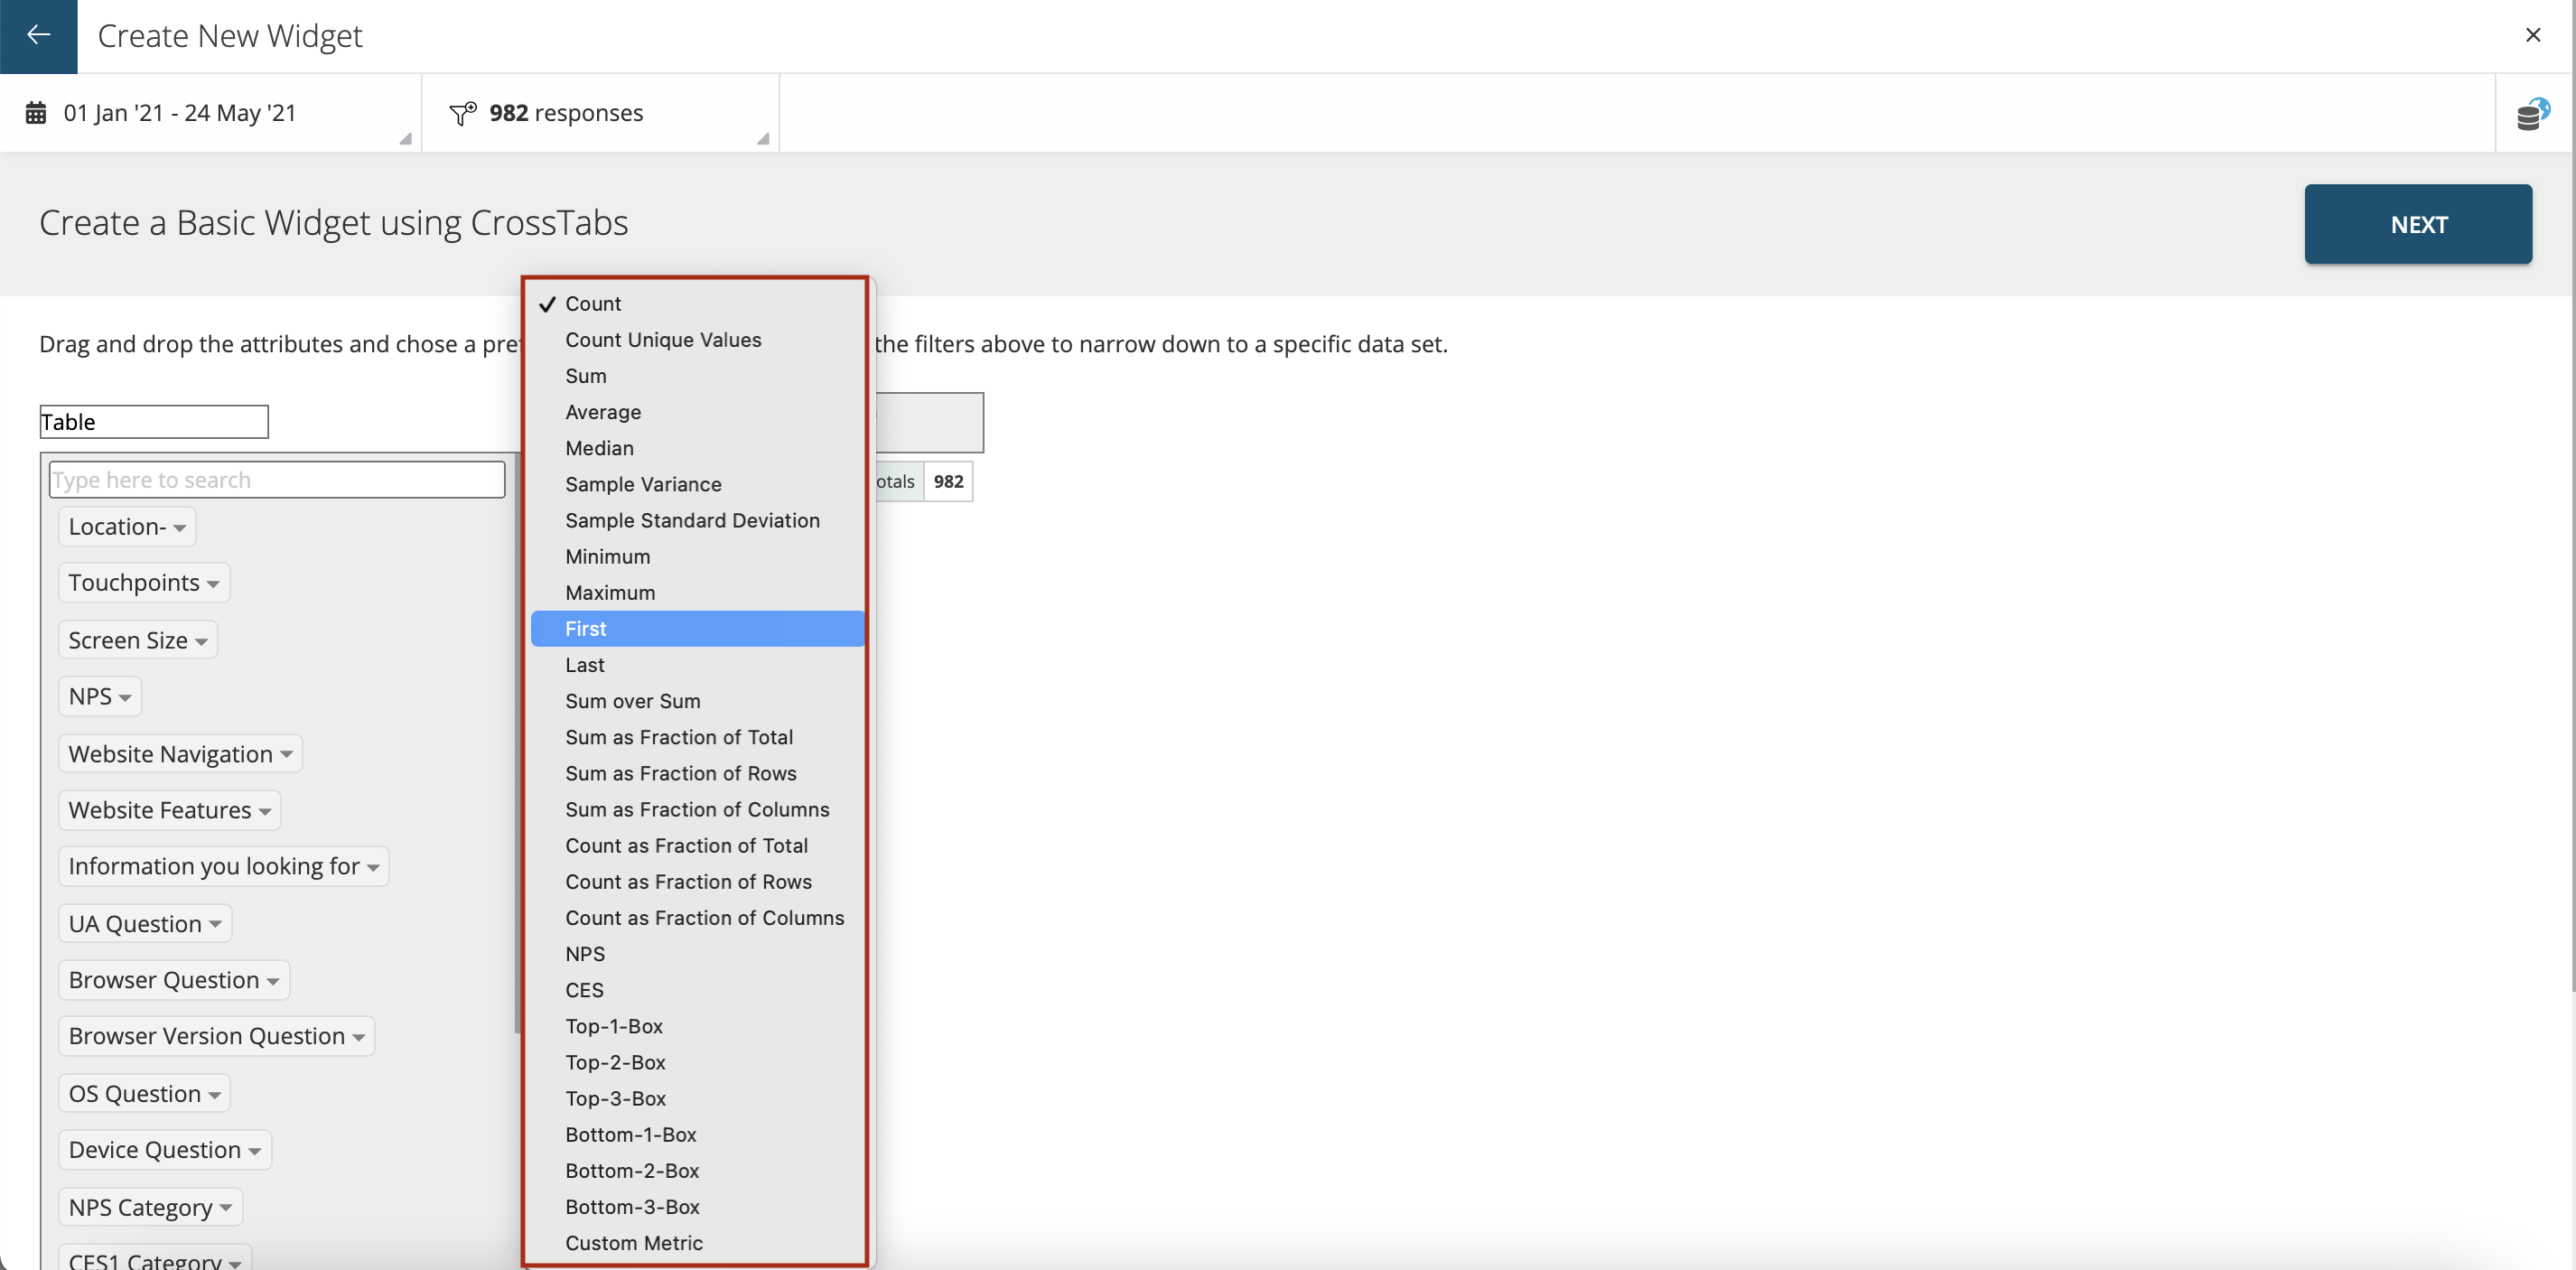
Most widely used types are:
- Count Shows the Response count data
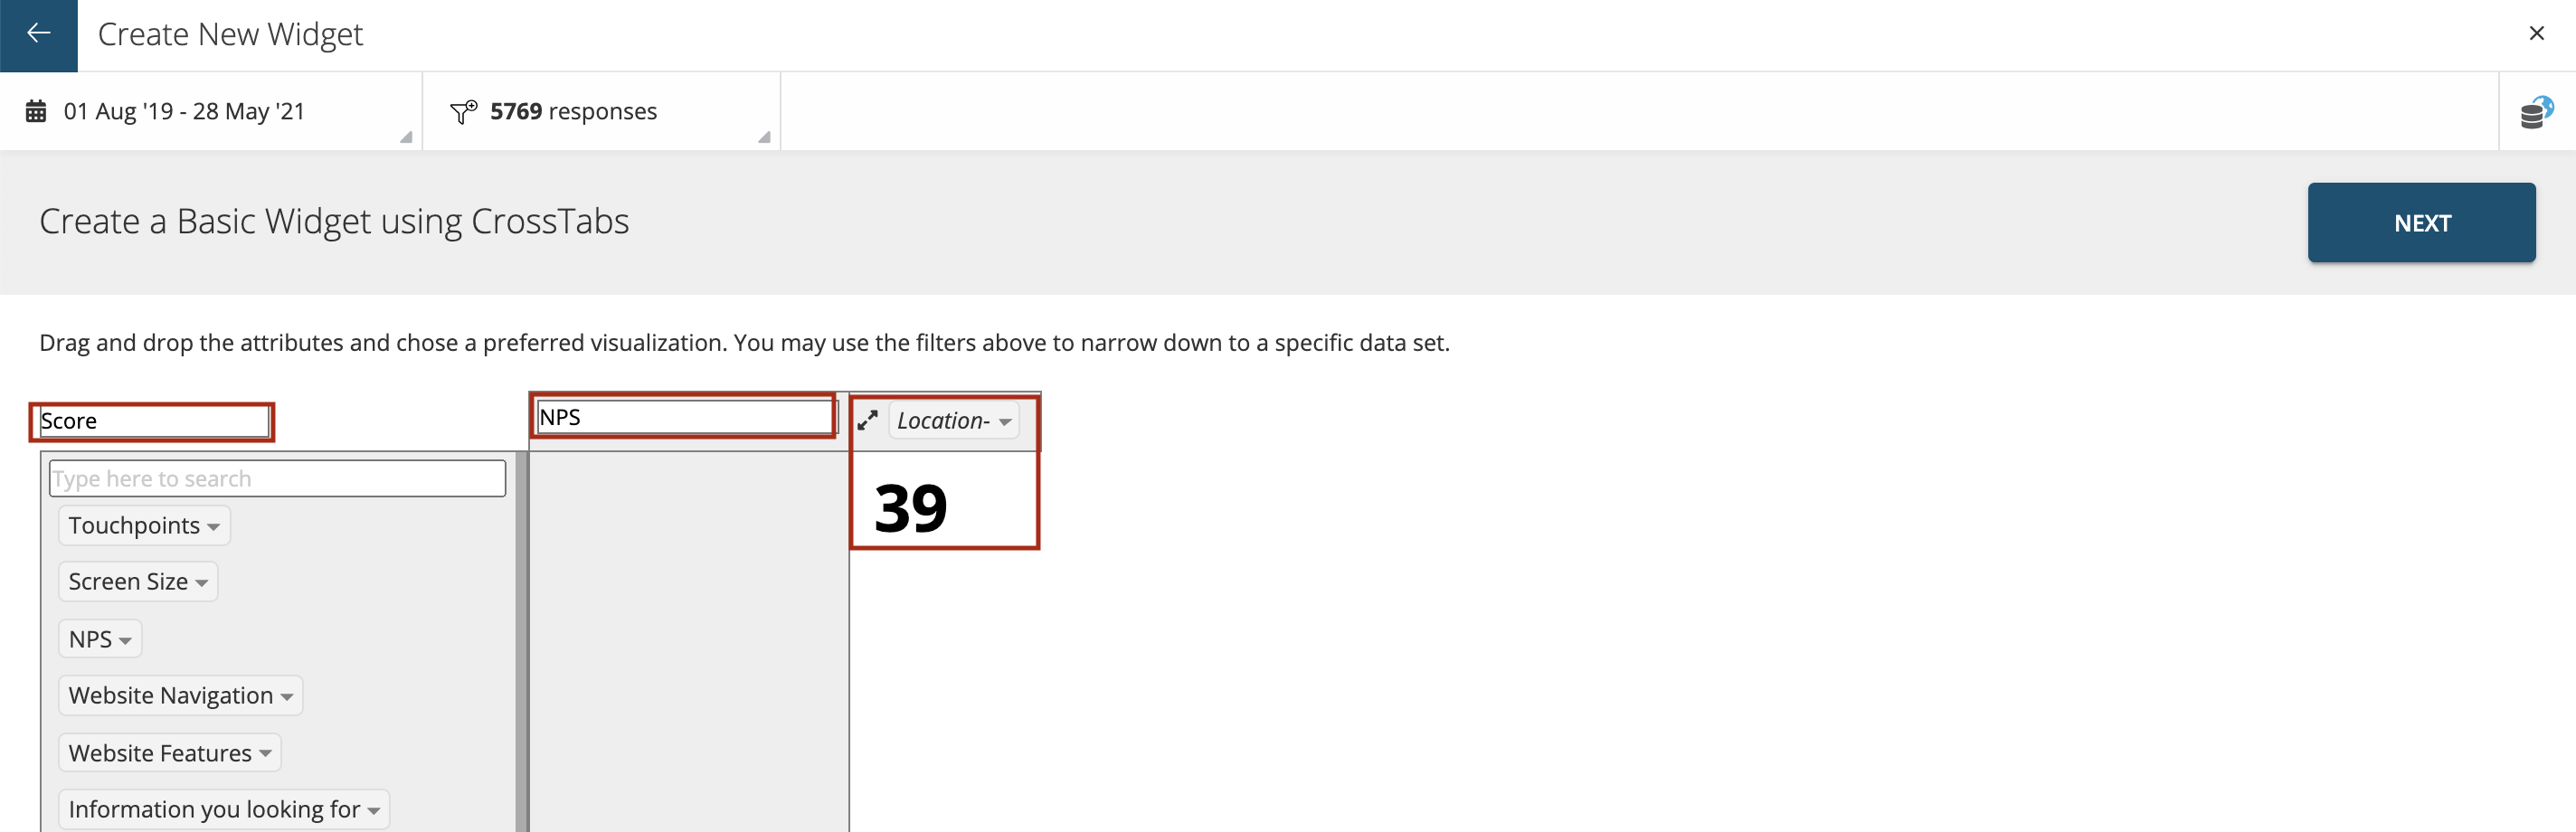
- Average You can show average acore for the attributes as shown

- NPS score Select the Metric and select to show as score widget as below
- Count as Fraction of Rows: Shows the data in percentage

- Count as Faction of Columns: Shows the data in percentage

-
Top Box: Shows the Top 1 Box (T1B),Top 2 Box (T2B) and Top 3 Box (T3B) scores. A Top Box score is a way of summarizing the positive responses from a Likert scale survey question. It combines the highest 1 (T1B) highest 2 (T2B) or highest 3 (T3B) responses of the scale to create a single number.
-
Bottom Box: The “Bottom Box” score is the sum of the percentages of the bottom two most negative or least favourable responses on a 5-point scale or the bottom three on a 7-point scale. The “Neutral Box” score is the neutral response.
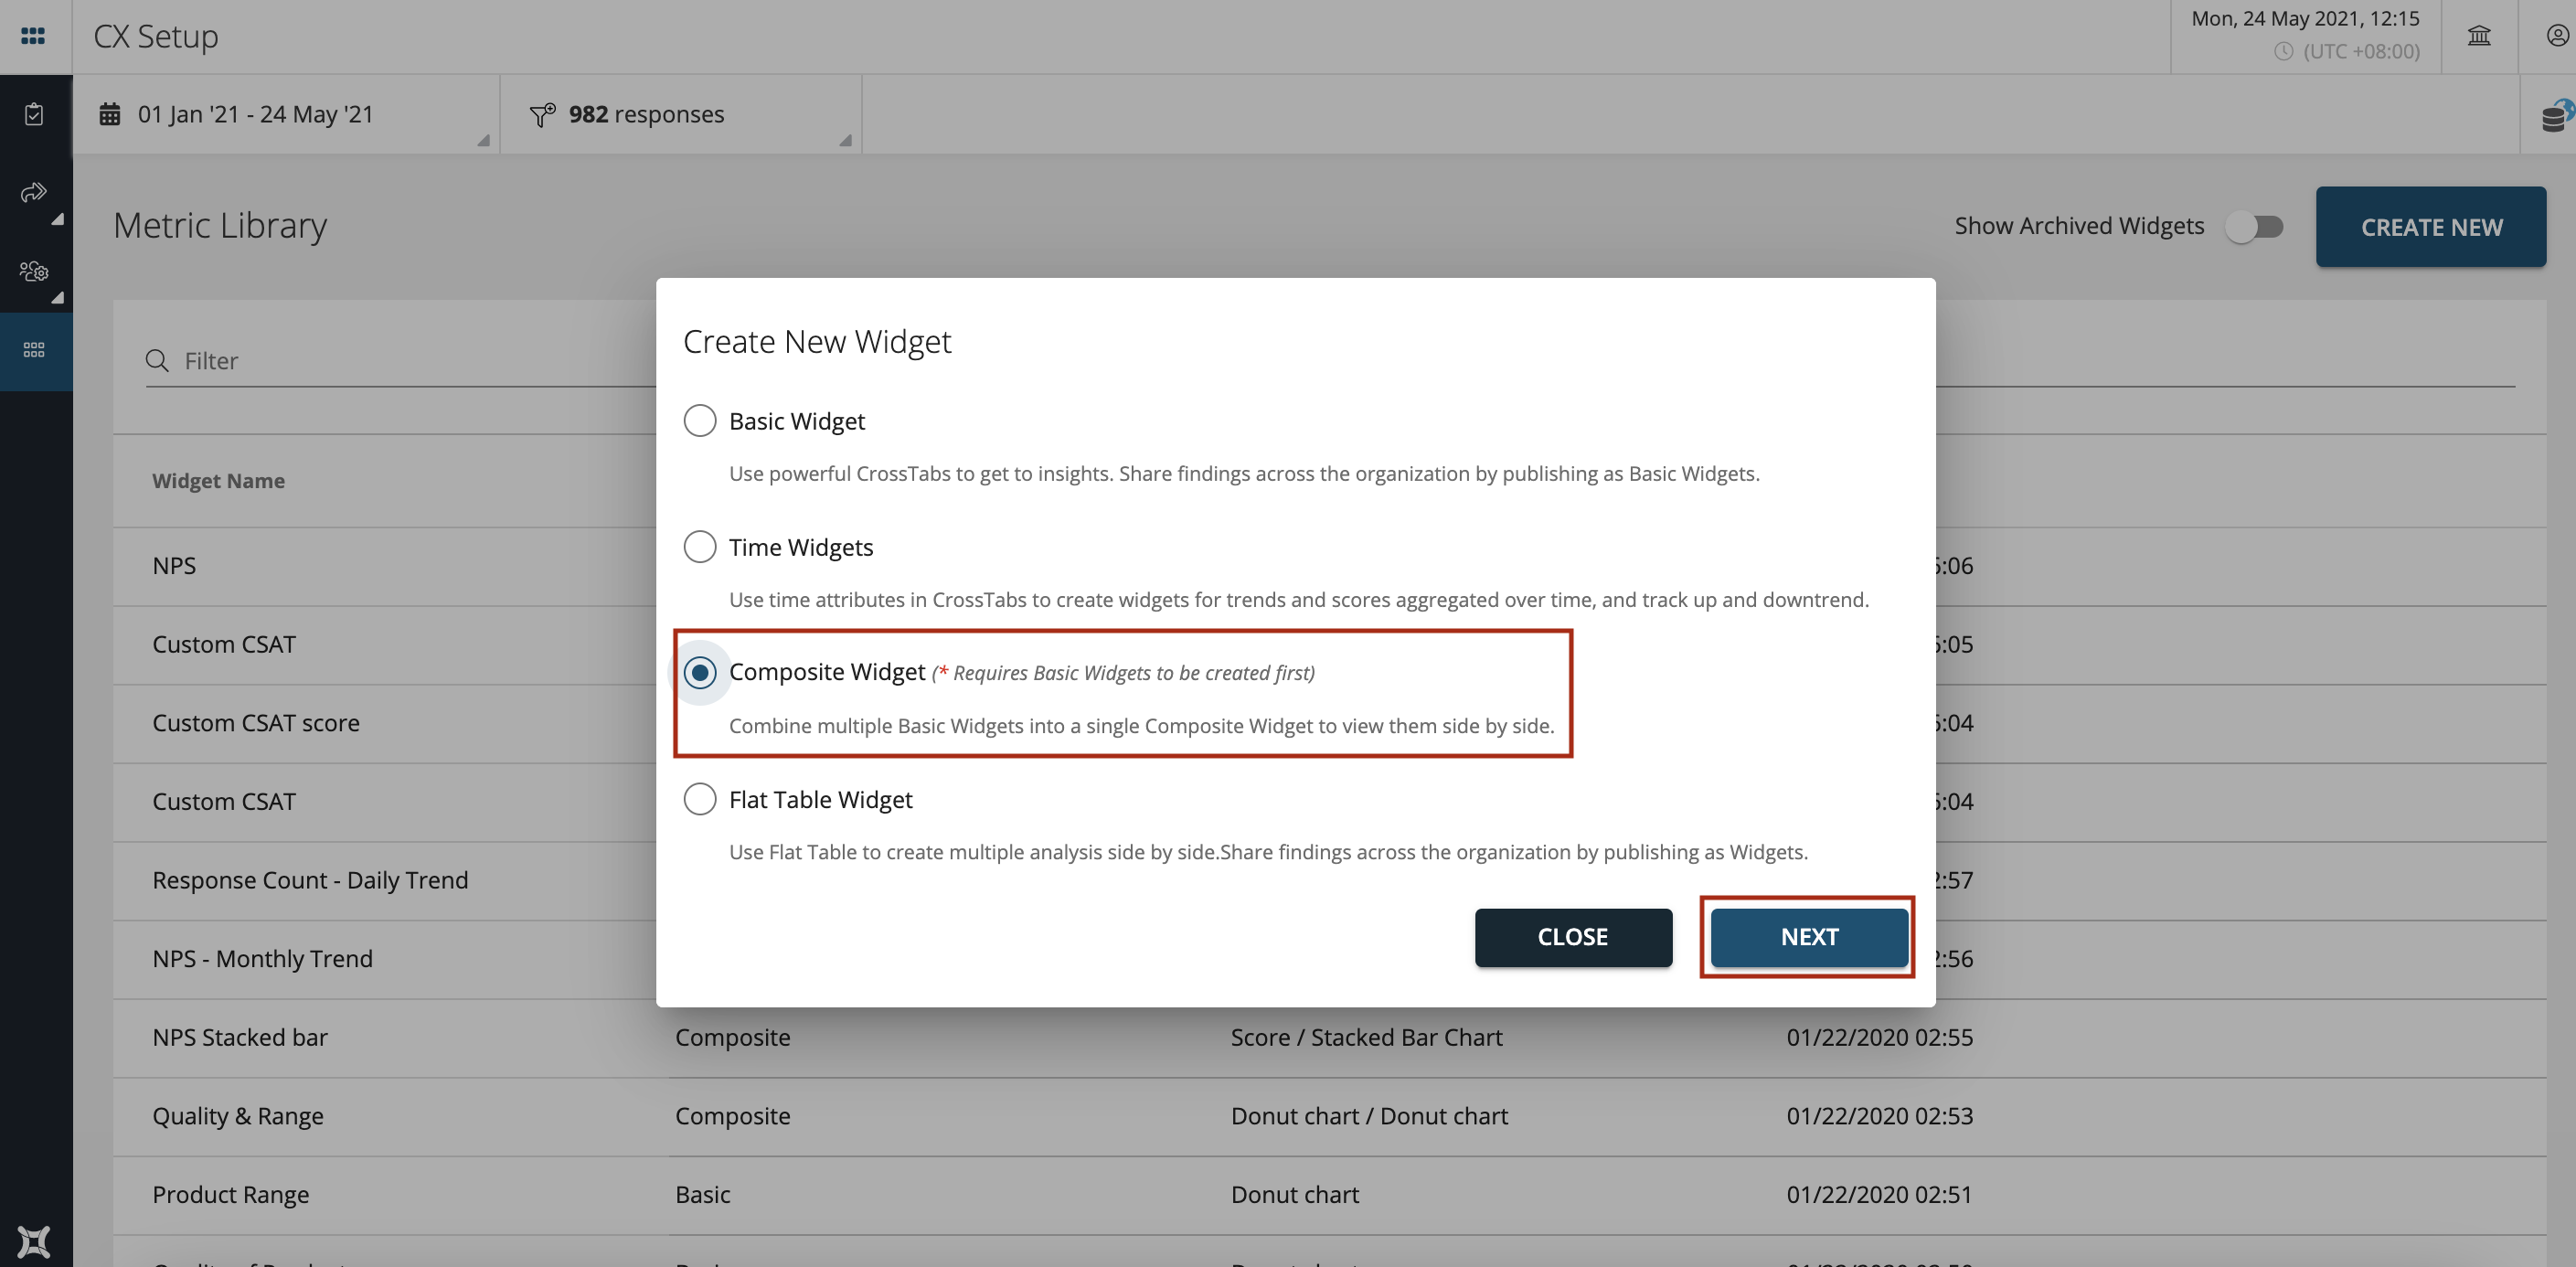
Composite Widget
In order to create a composite widget its mandatory to create Basic Widgets first. You can combine multiple Basic Widgets into a single Composite Widget and view them side by side. There are 3 types of widgets layouts that can be configured, they are:
Combine 2 Basic Widgets: You can have two different layouts when combining 2 basic widgets. - Equal Split: Use this layout to place 2 Basic Widgets such as Pie or Donut charts next to each other. - 20:80 Split: Use this layout for a 20:80 split of a numeric score and a chart next to each other
This kind of composite widget is suitable for two similar sized charts side by side, such as two pie or donut charts next to each other excluding Trend widgets and it is best used with charts that have the same Y-Axis together
The types of widgets that are support in this combination are:
- Score
- Pie
- Donut
- Bar
- Column
To create a Composite Widget click on ‘Create New’ as shown below.
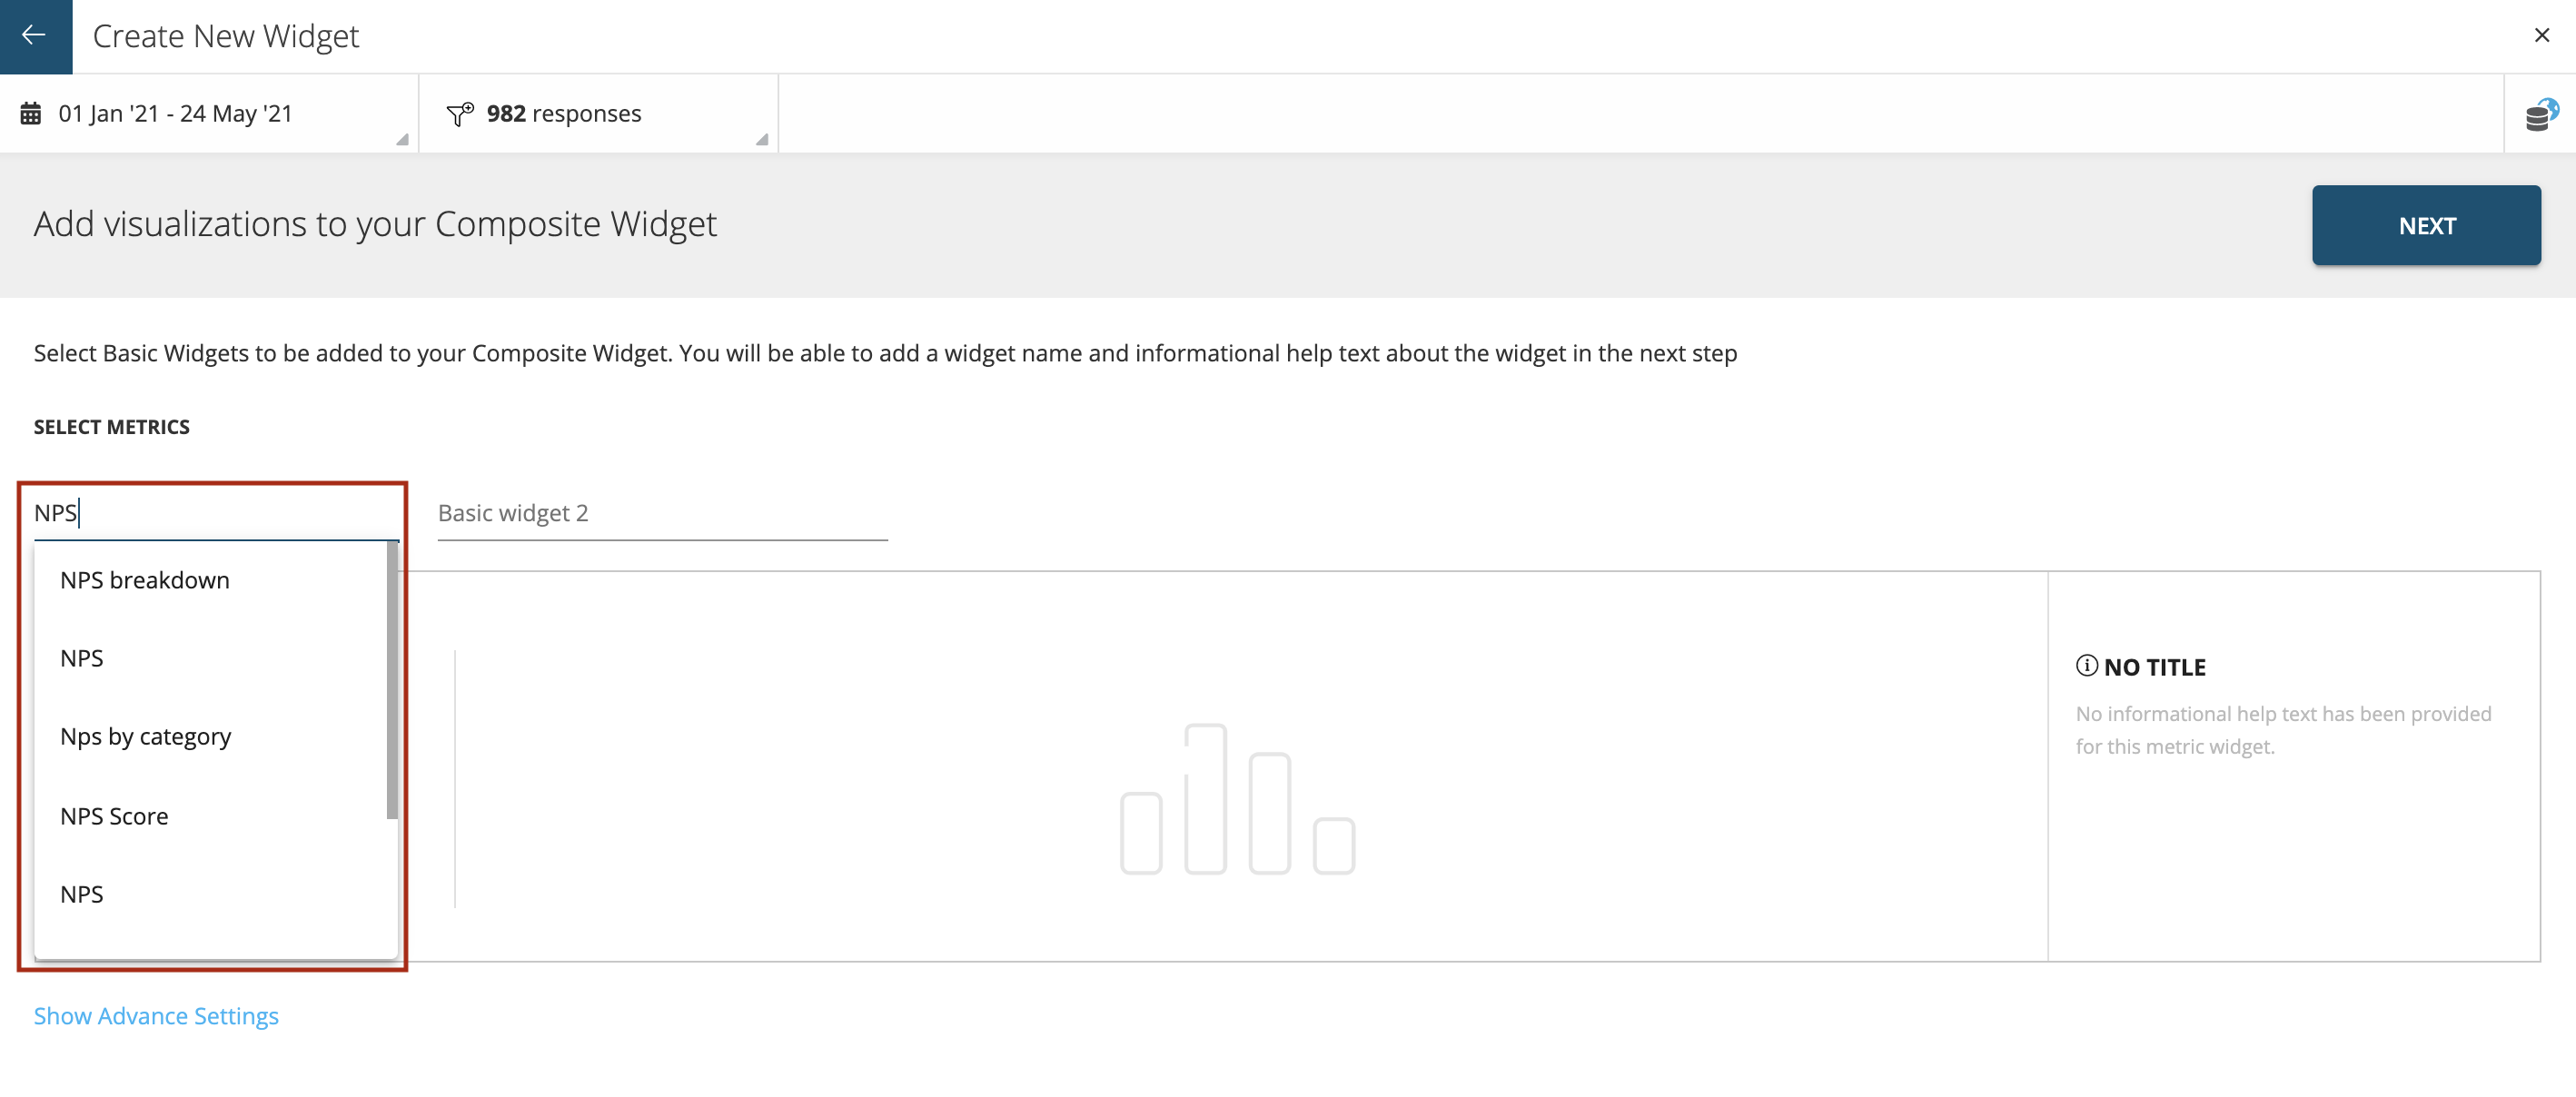
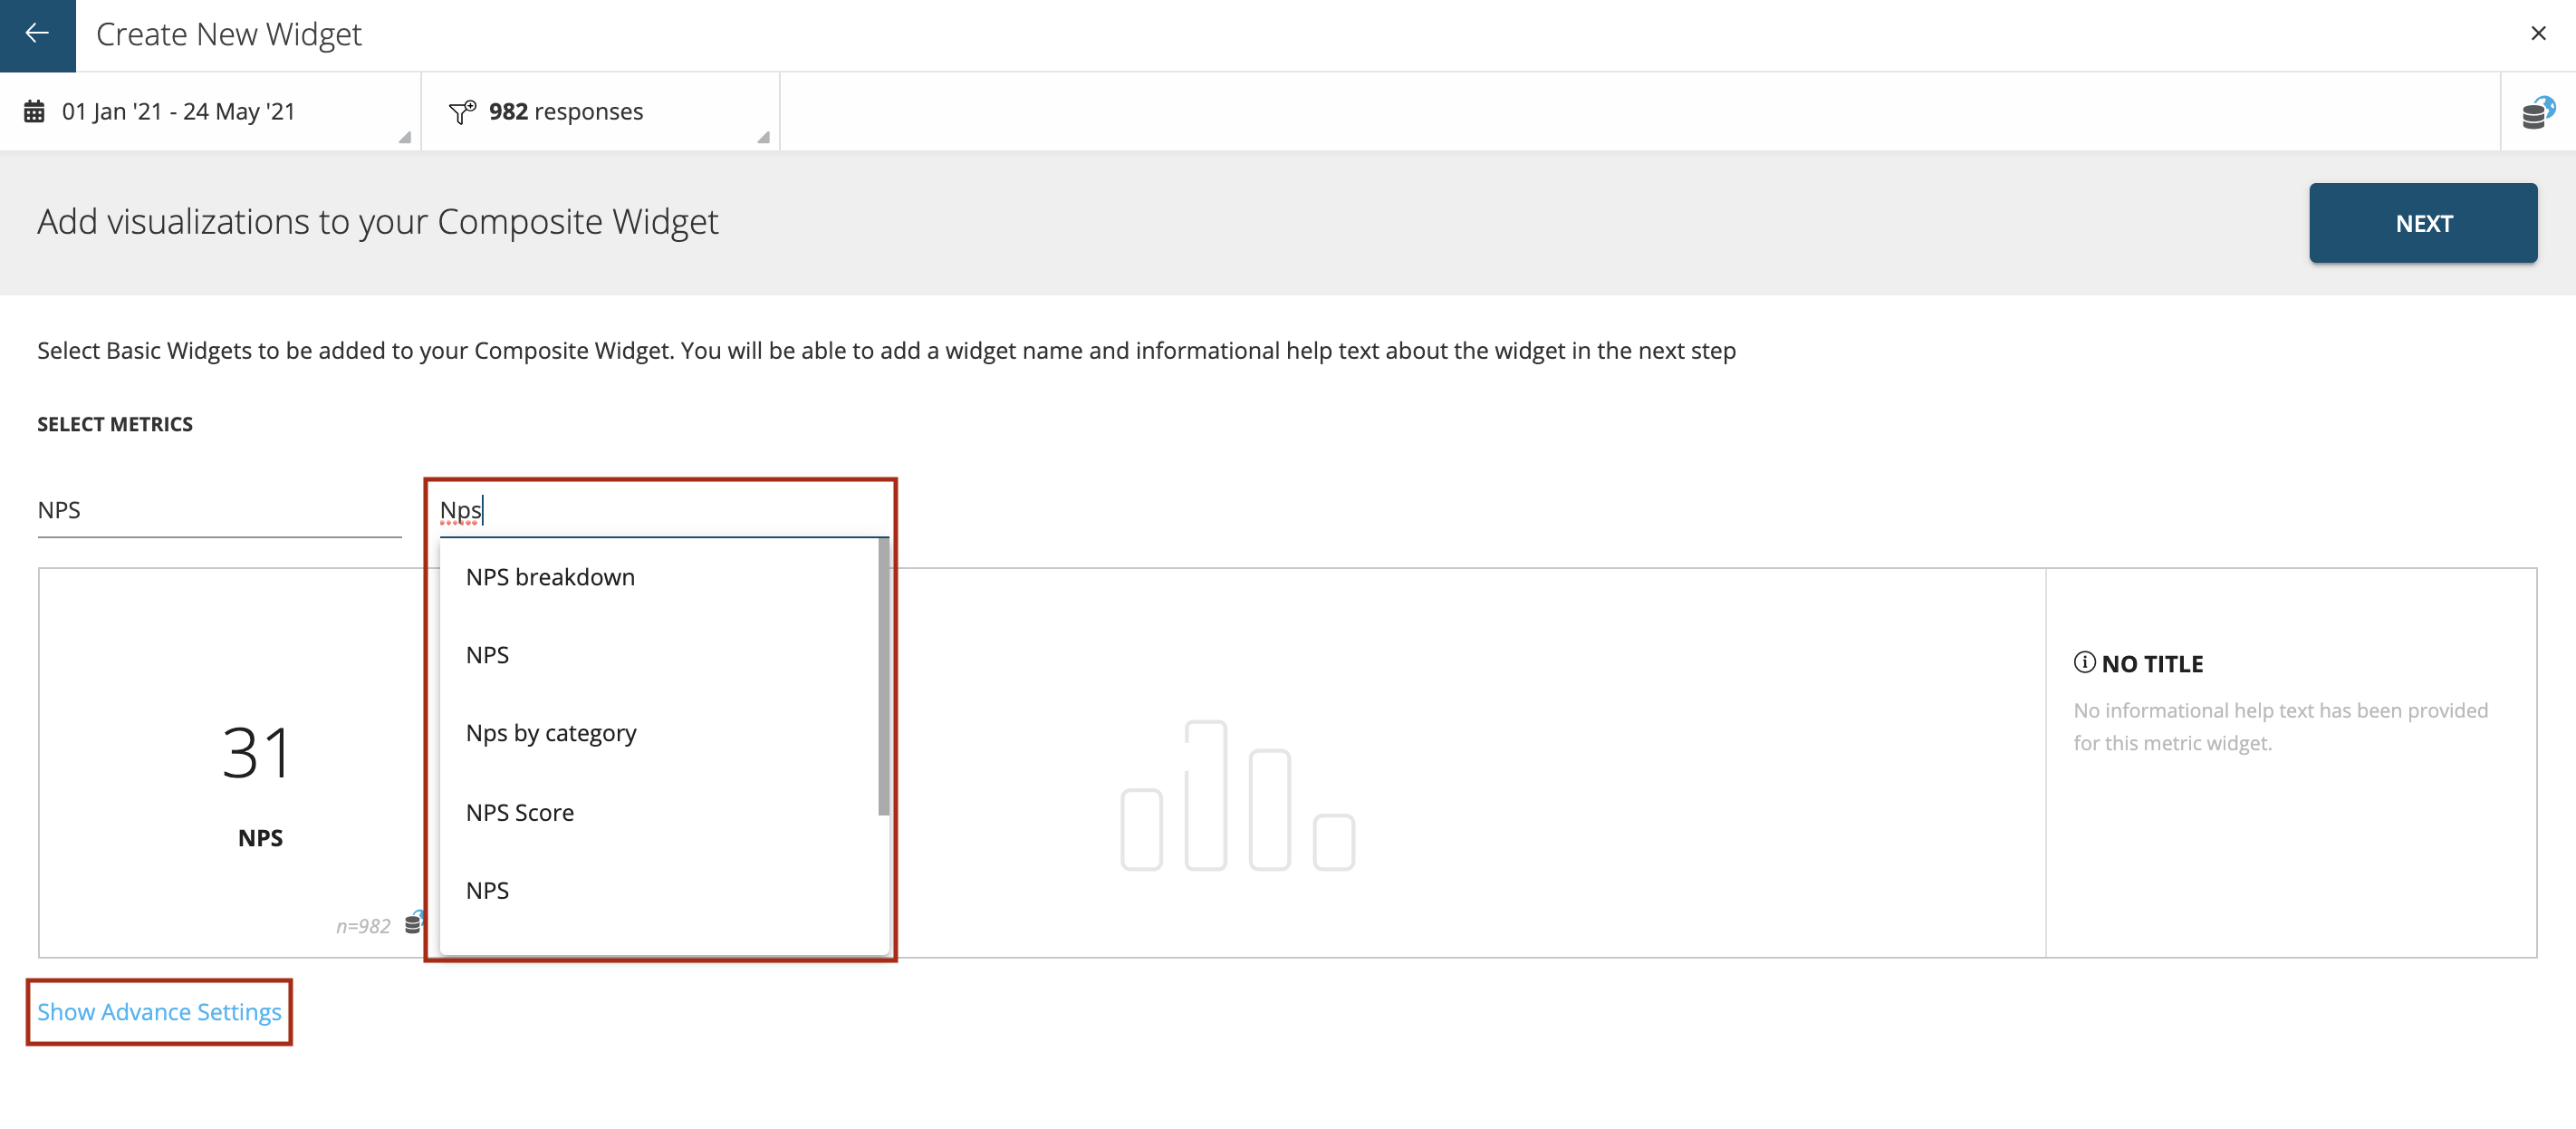
Then select Composite Widget from the list as shown. Select two Basic Widgets to create a Composite Widget. You can add widget name and informational help text about the widget as well. Select the basic widgets from the dropdown as shown.
Select teh basic widgets from the dropdown list as shown.
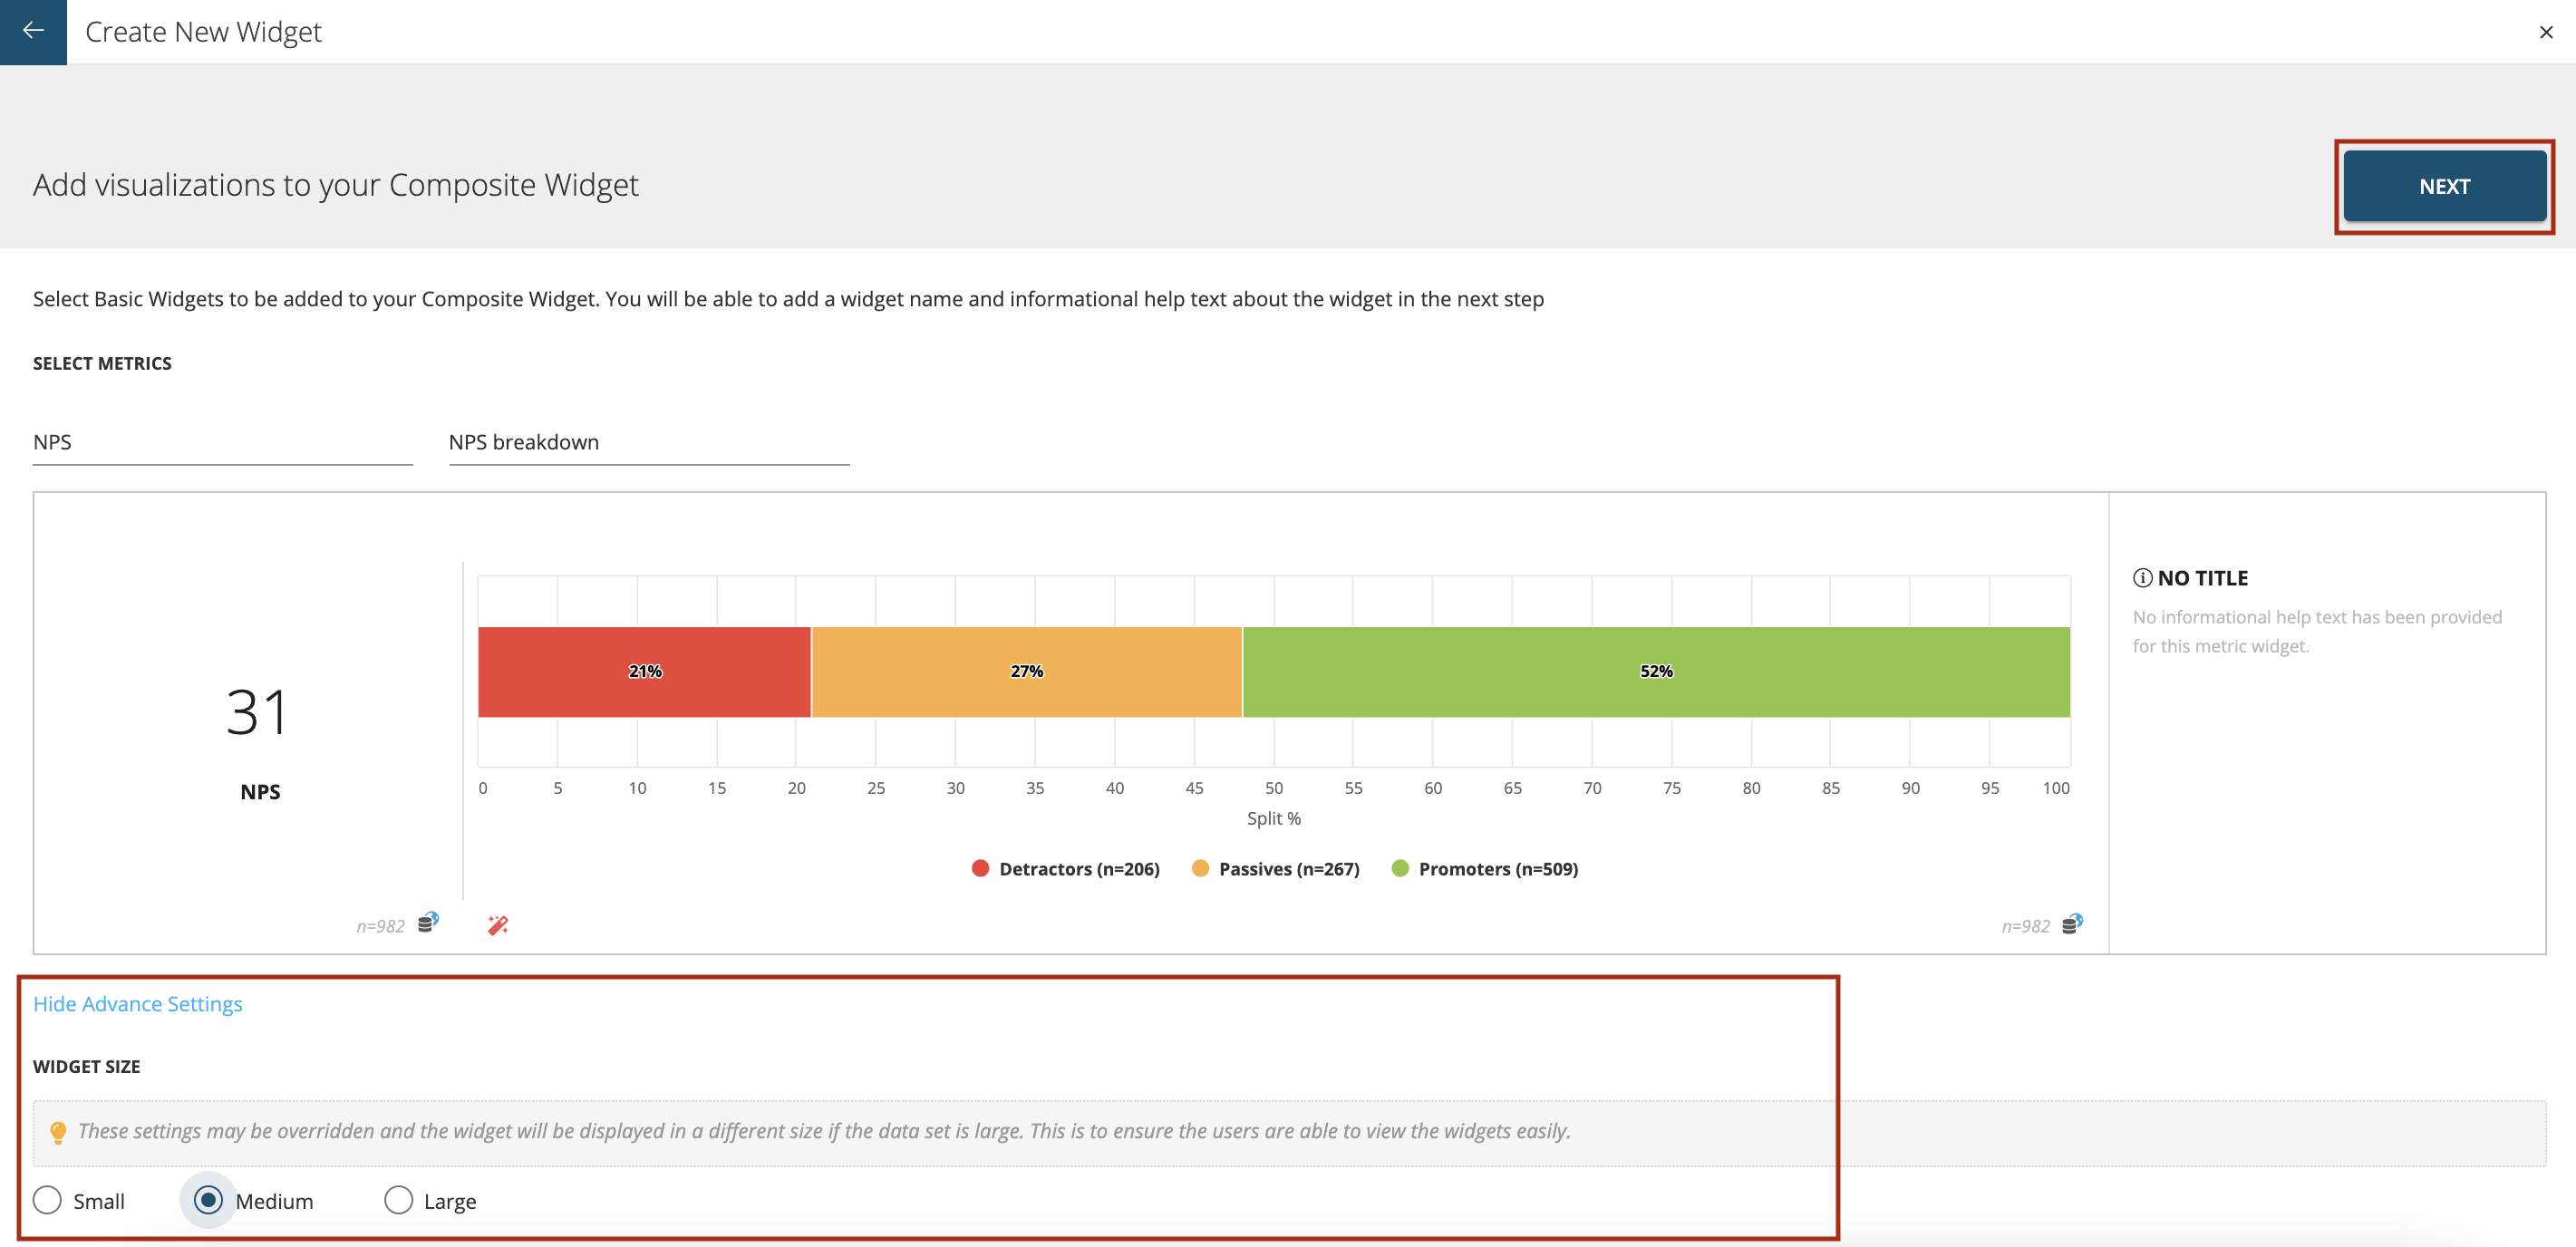
Once both the basic widgets are selected click on the ‘Show Advance Settings’ as shown below.
In ‘Show Advance Settings’ you can select the widget size to be:
- Small
- Medium
- Large These settings may be overridden and the widget will be displayed in a different size if the data set is large. This is to ensure the users are able to view the widgets easily.
Once advanced settings are done press ‘Next’ as shown.
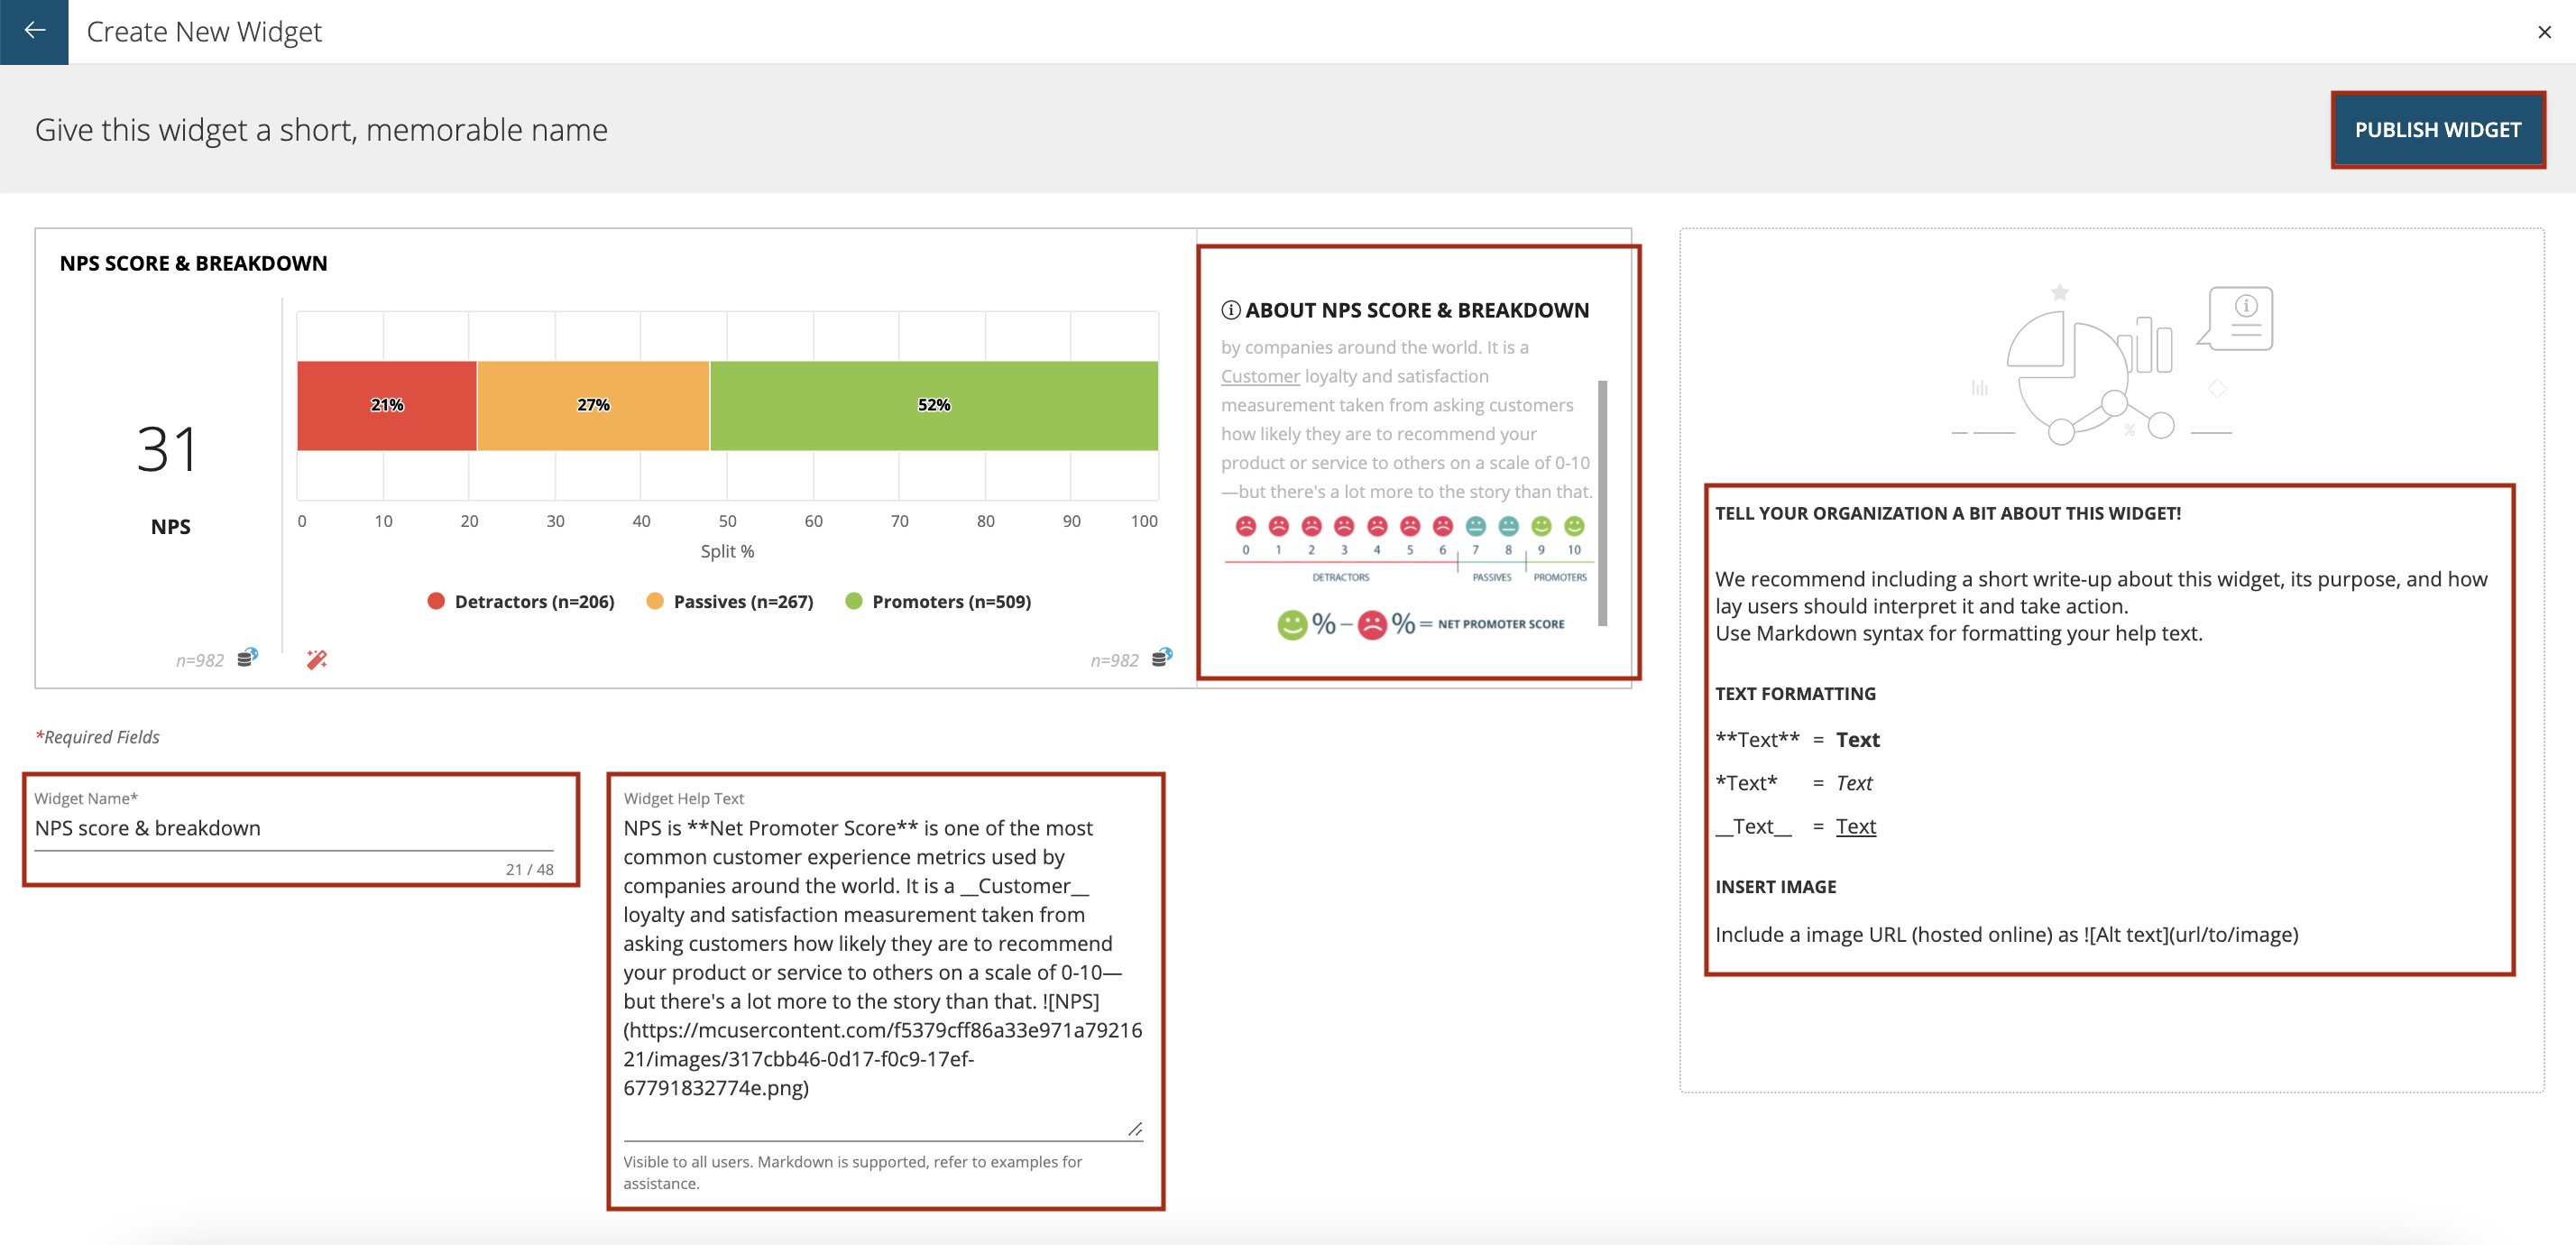
After clicking on ‘Next’ you can see the composite widget preview. You can also enter ‘Widget Name’ and ‘Widget Help Text’. This help text is visible to all users. Markdown is supported for help text.The instructions on how to use markdown can be seen on the right hand side of the screen as shown below
Use Markdown syntax for formatting your help text.
For Text Formatting:
Text = Text
Text = Text
Text = Text
INSERT IMAGE
Include a image URL (hosted online) as
Then press ‘Publish Widget’ to save and later publish it on the dashboard/space.
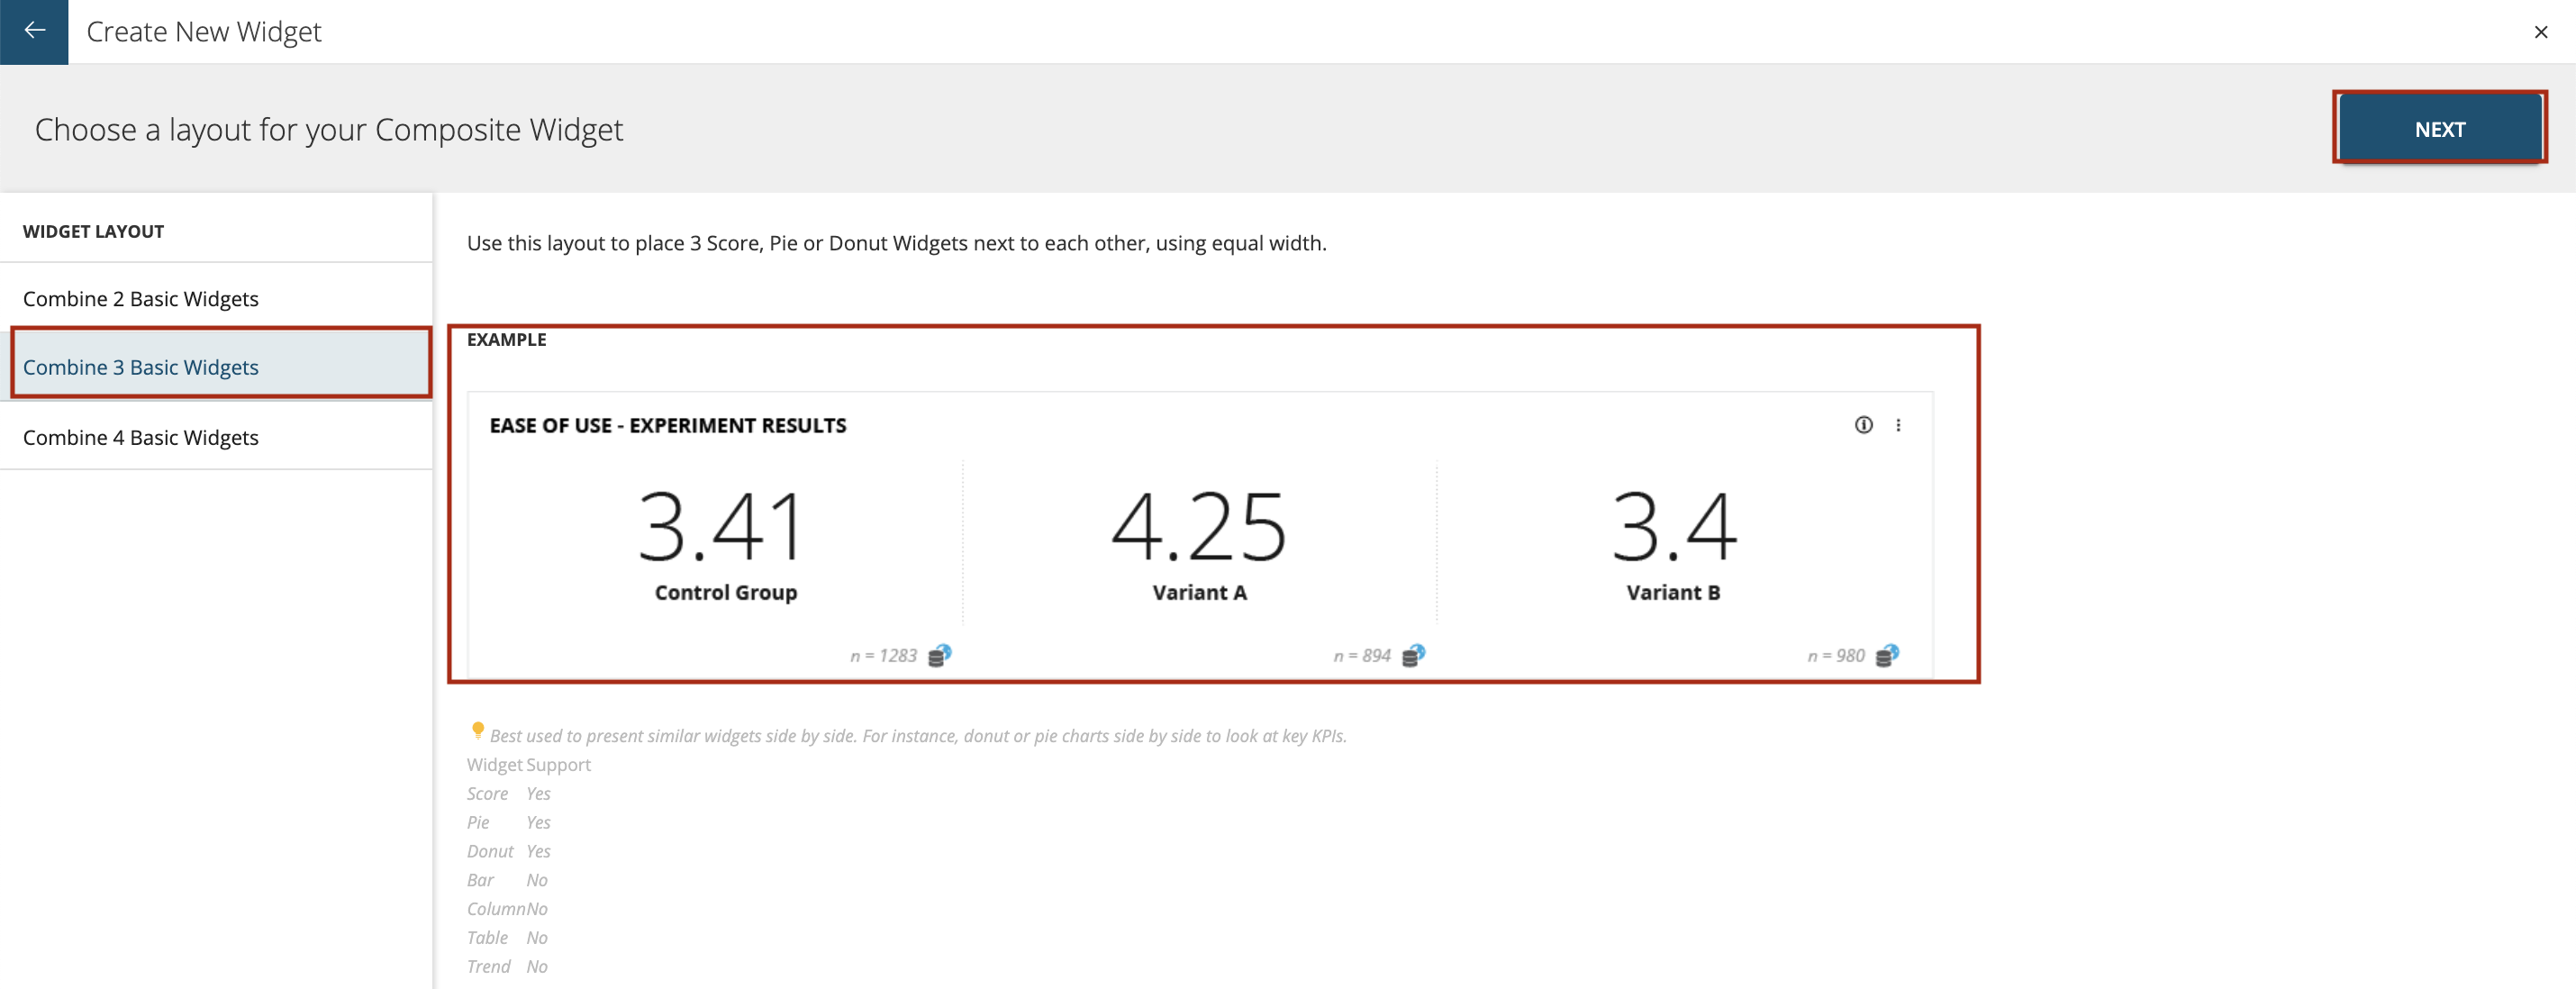
Combine 3 Basic Widgets You can use this layout to place 3 Score, Pie or Donut Widgets next to each other, using equal width.This is best used to present similar widgets side by side. For instance, donut or pie charts side by side to look at key KPIs.
The types of widgets that are support in this combination are:
- Score
- Pie
- Donut
Similar to how you create Composite widgets using 2 basic widgets you can create composite widget using 3 basic widgets as shown below.
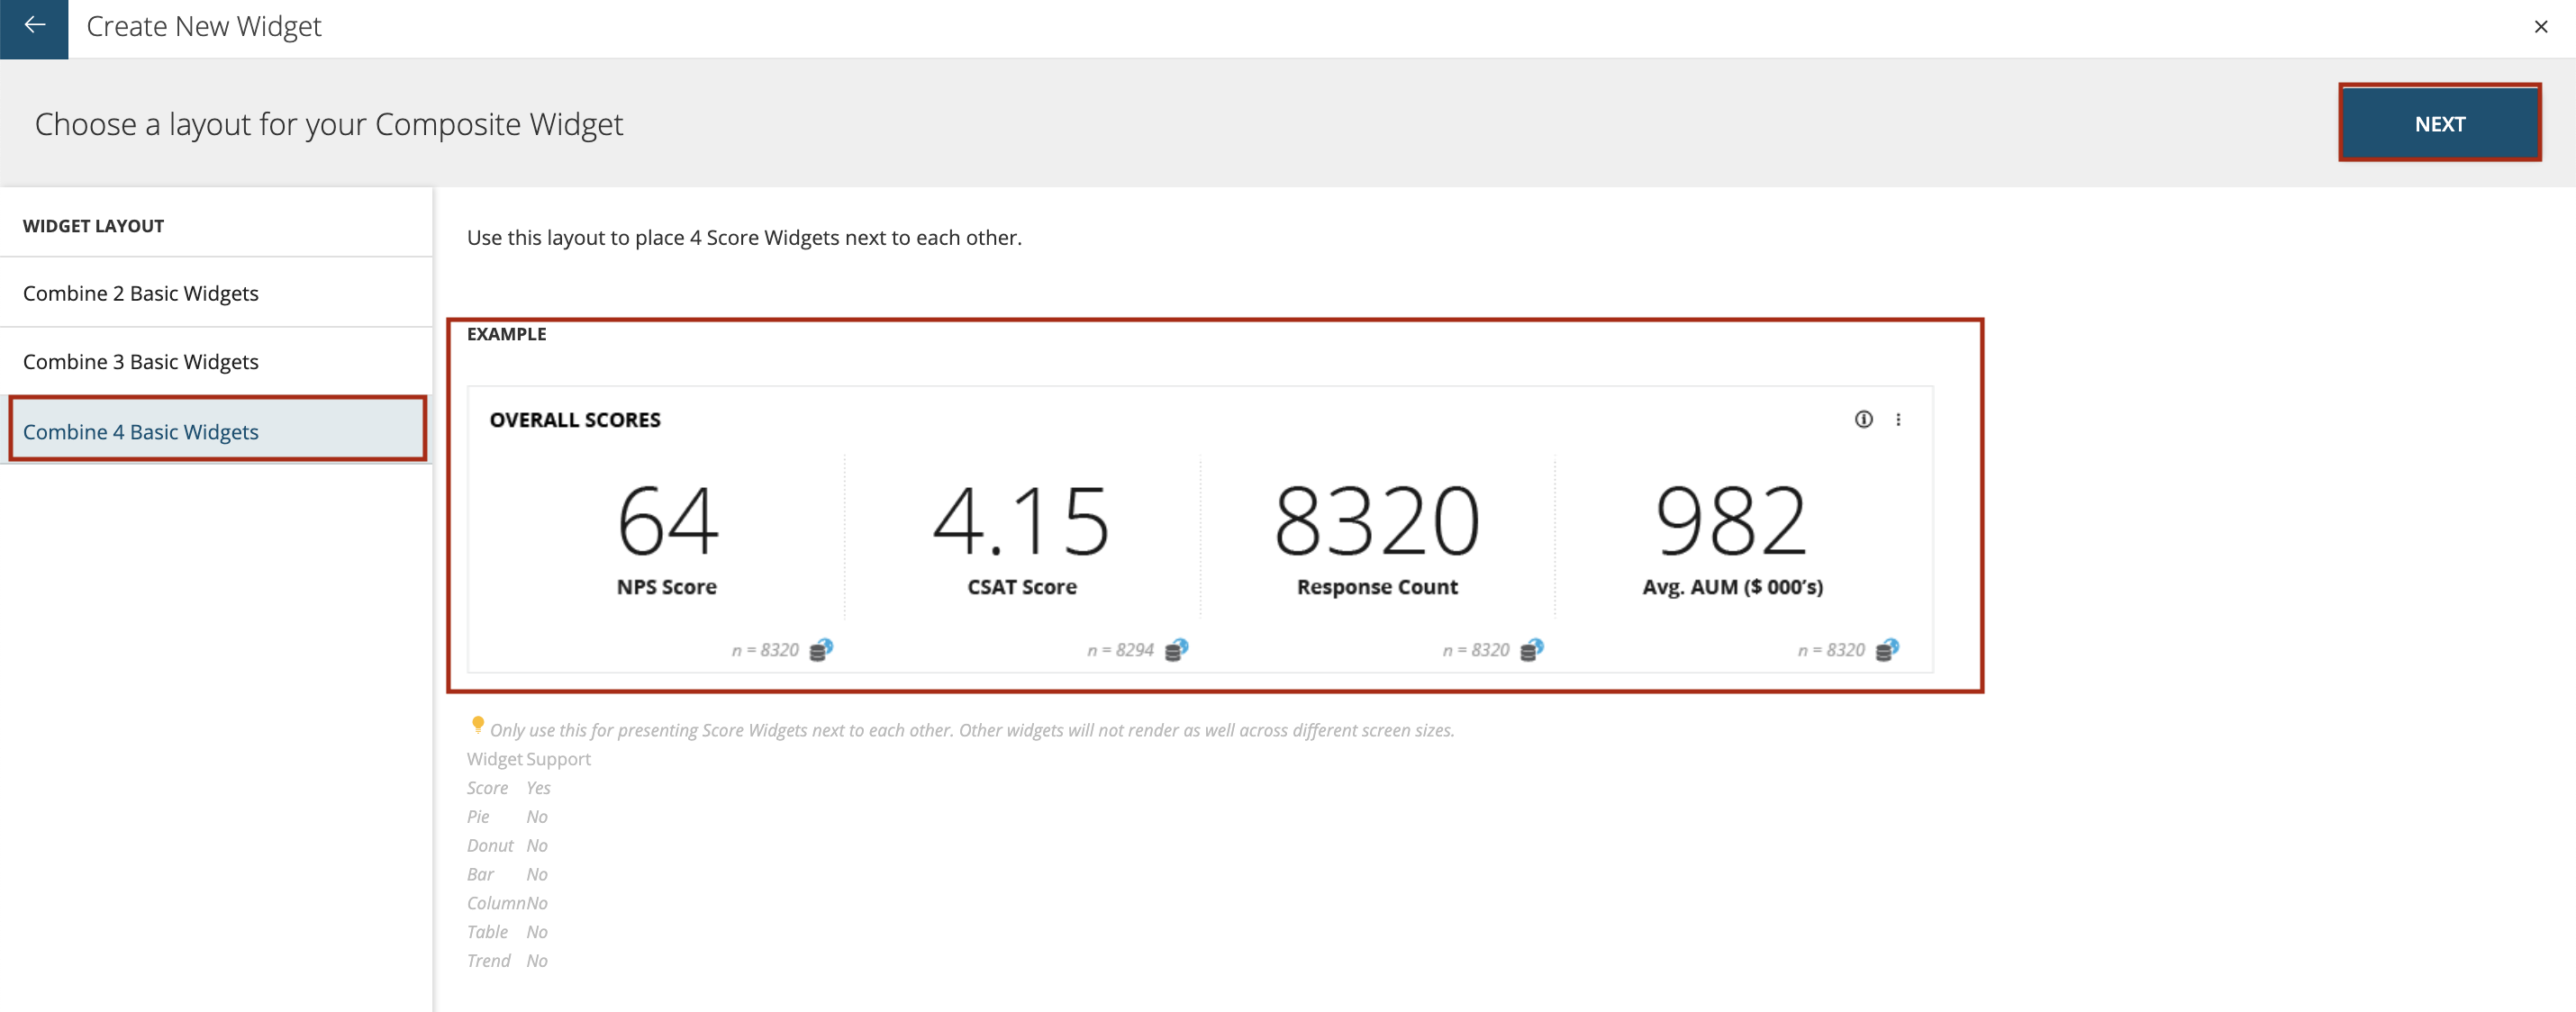
Combine 4 Basic Widgets You can use this layout to place 4 Score Widgets next to each other. This layout is only used for presenting Score Widgets next to each other. The other widgets will not render as well across different screen sizes.
The types of widget supported in this combination is:
- Score
Similar to how you create Composite widgets using 3 basic widgets you can create composite widget using 4 basic widgets as shown below.
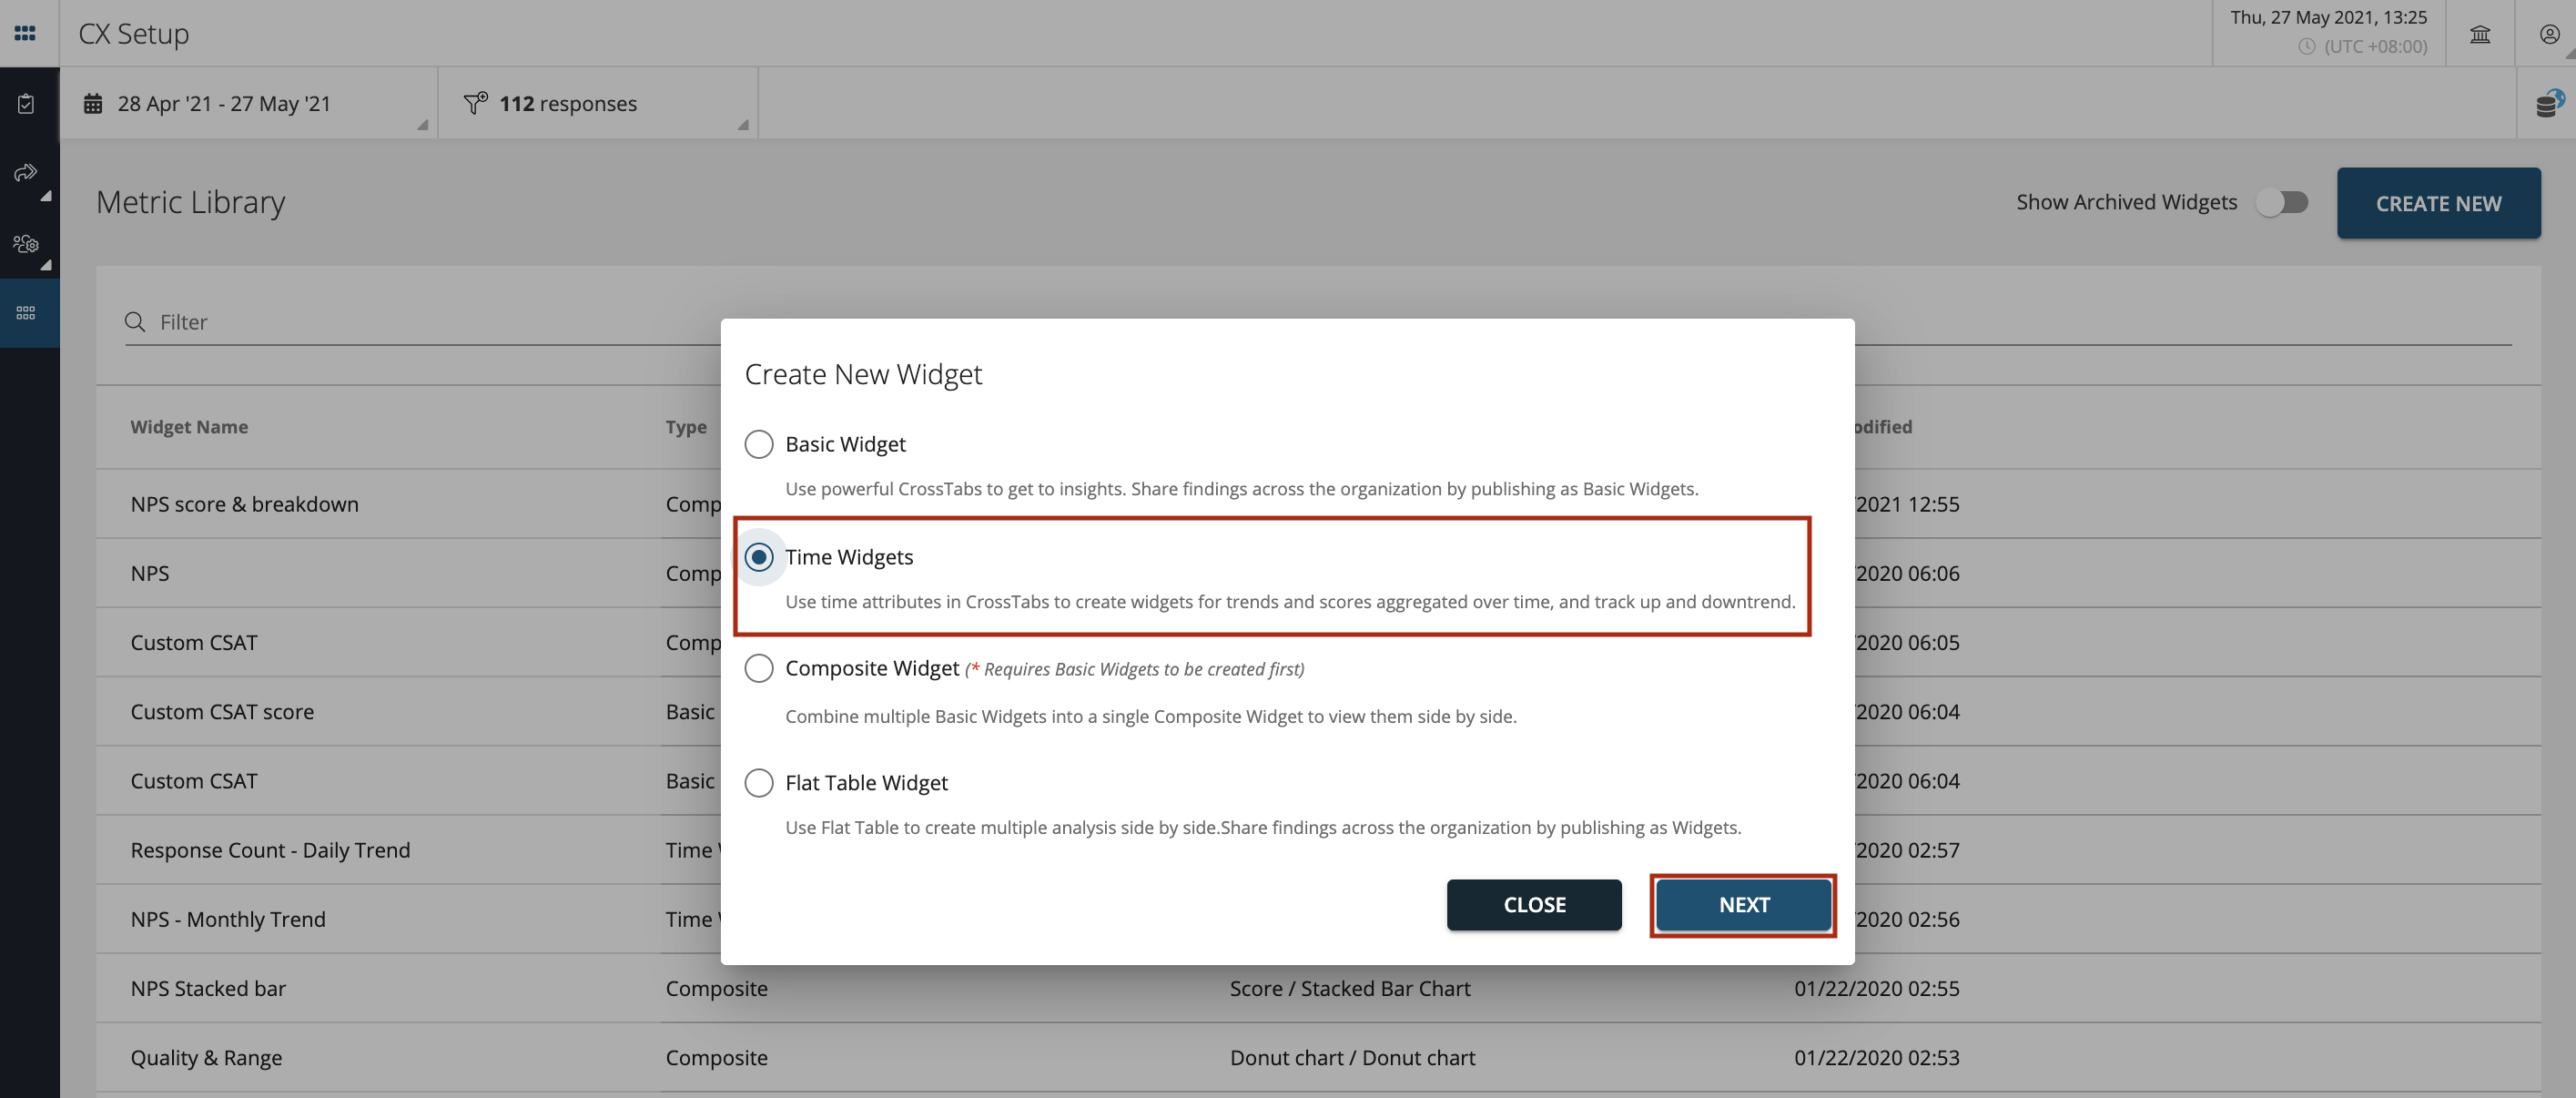
Time Widgets
You can use time attributes in CrossTabs to create widgets for trends and scores aggregated over time, and track up and downtrend.You can configure Daily, Weekly, Monthly, Quarterly and Yearly trend charts using time based widgets.
To create a Time Widget click on ‘Create New’ as shown below.
Then select ‘Time Widget’ and press ‘Next’ as shown.
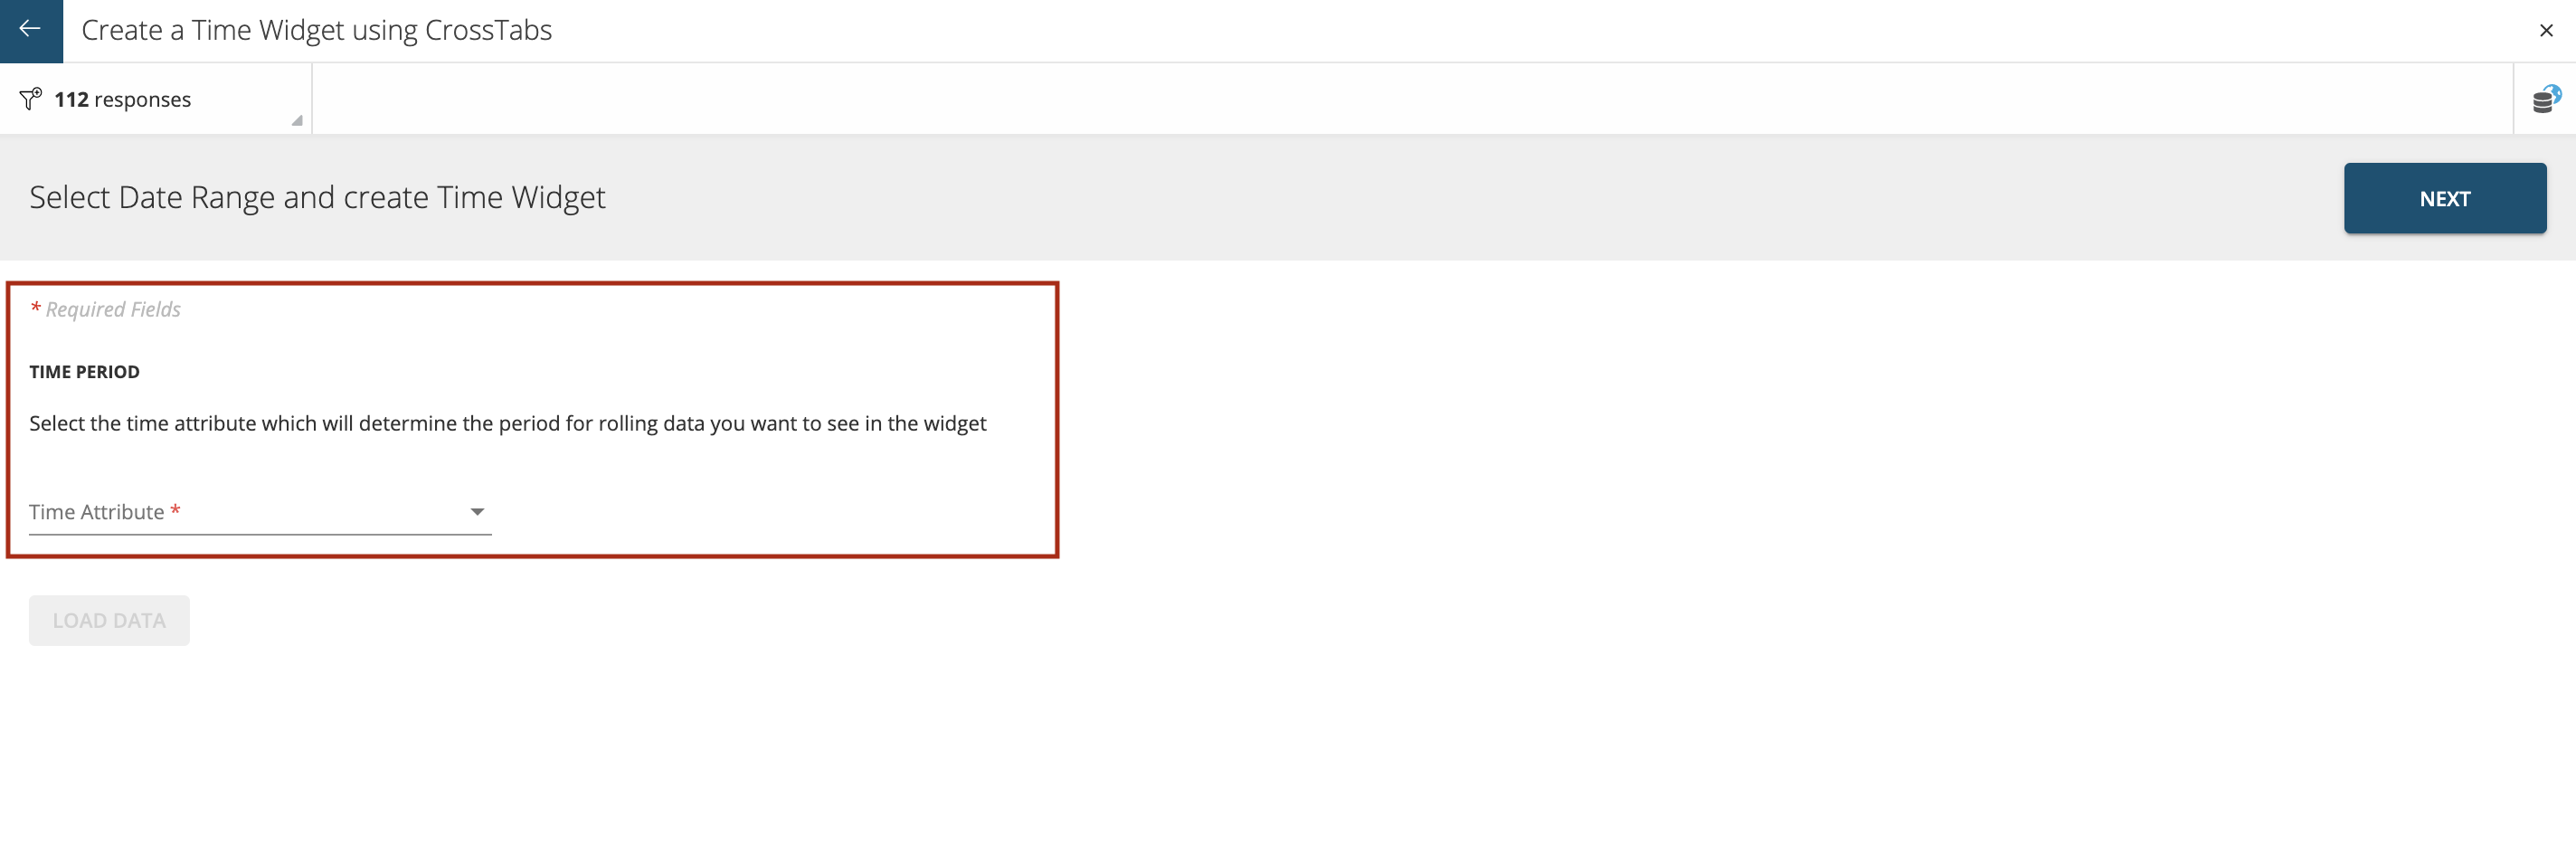
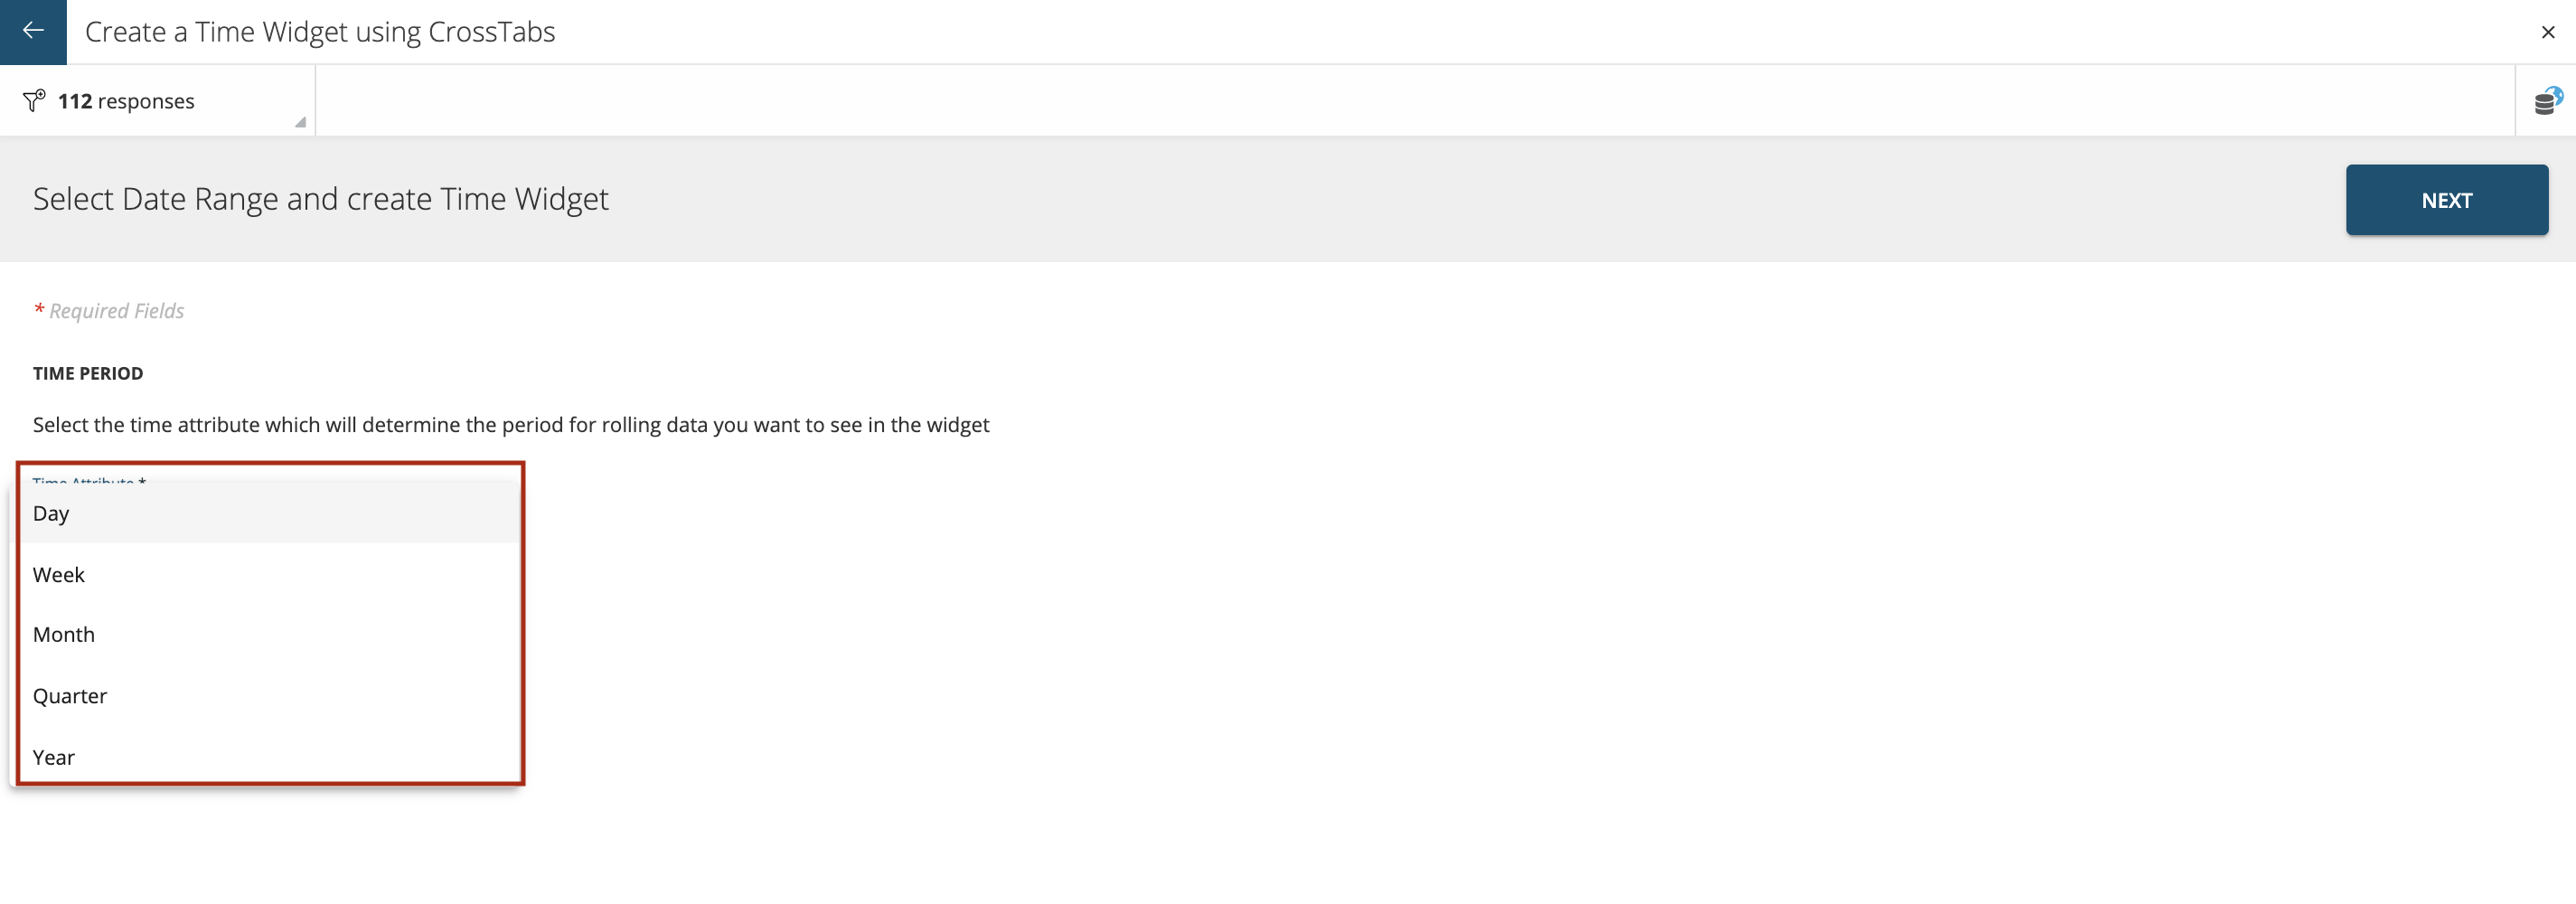
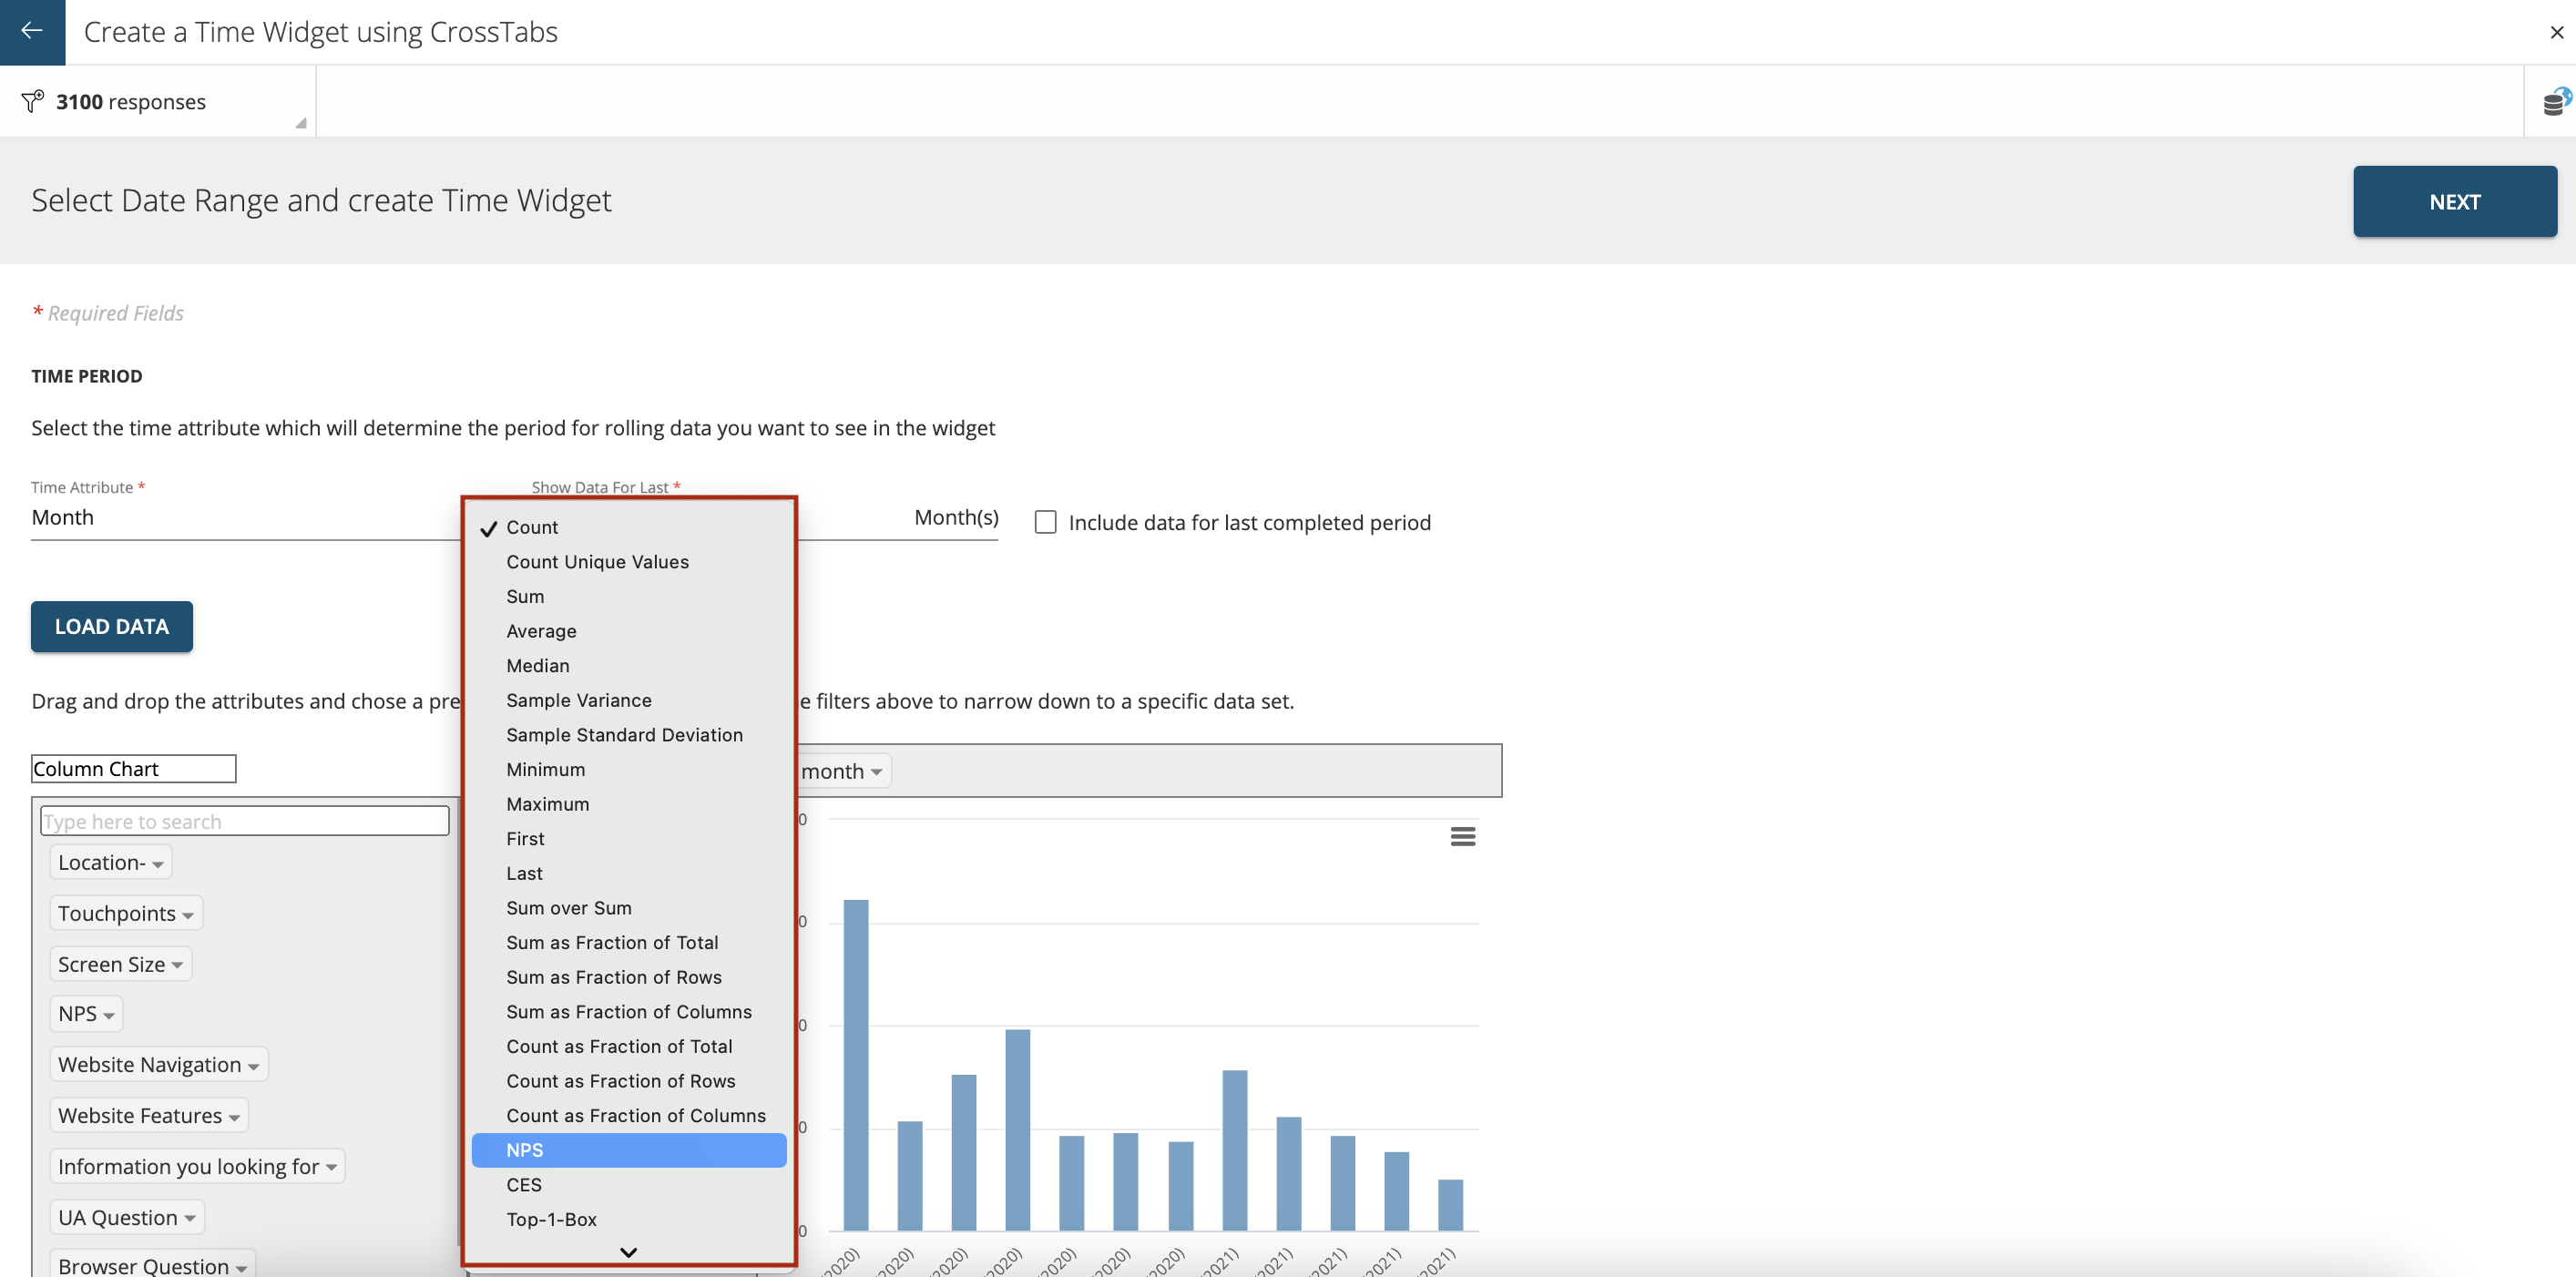
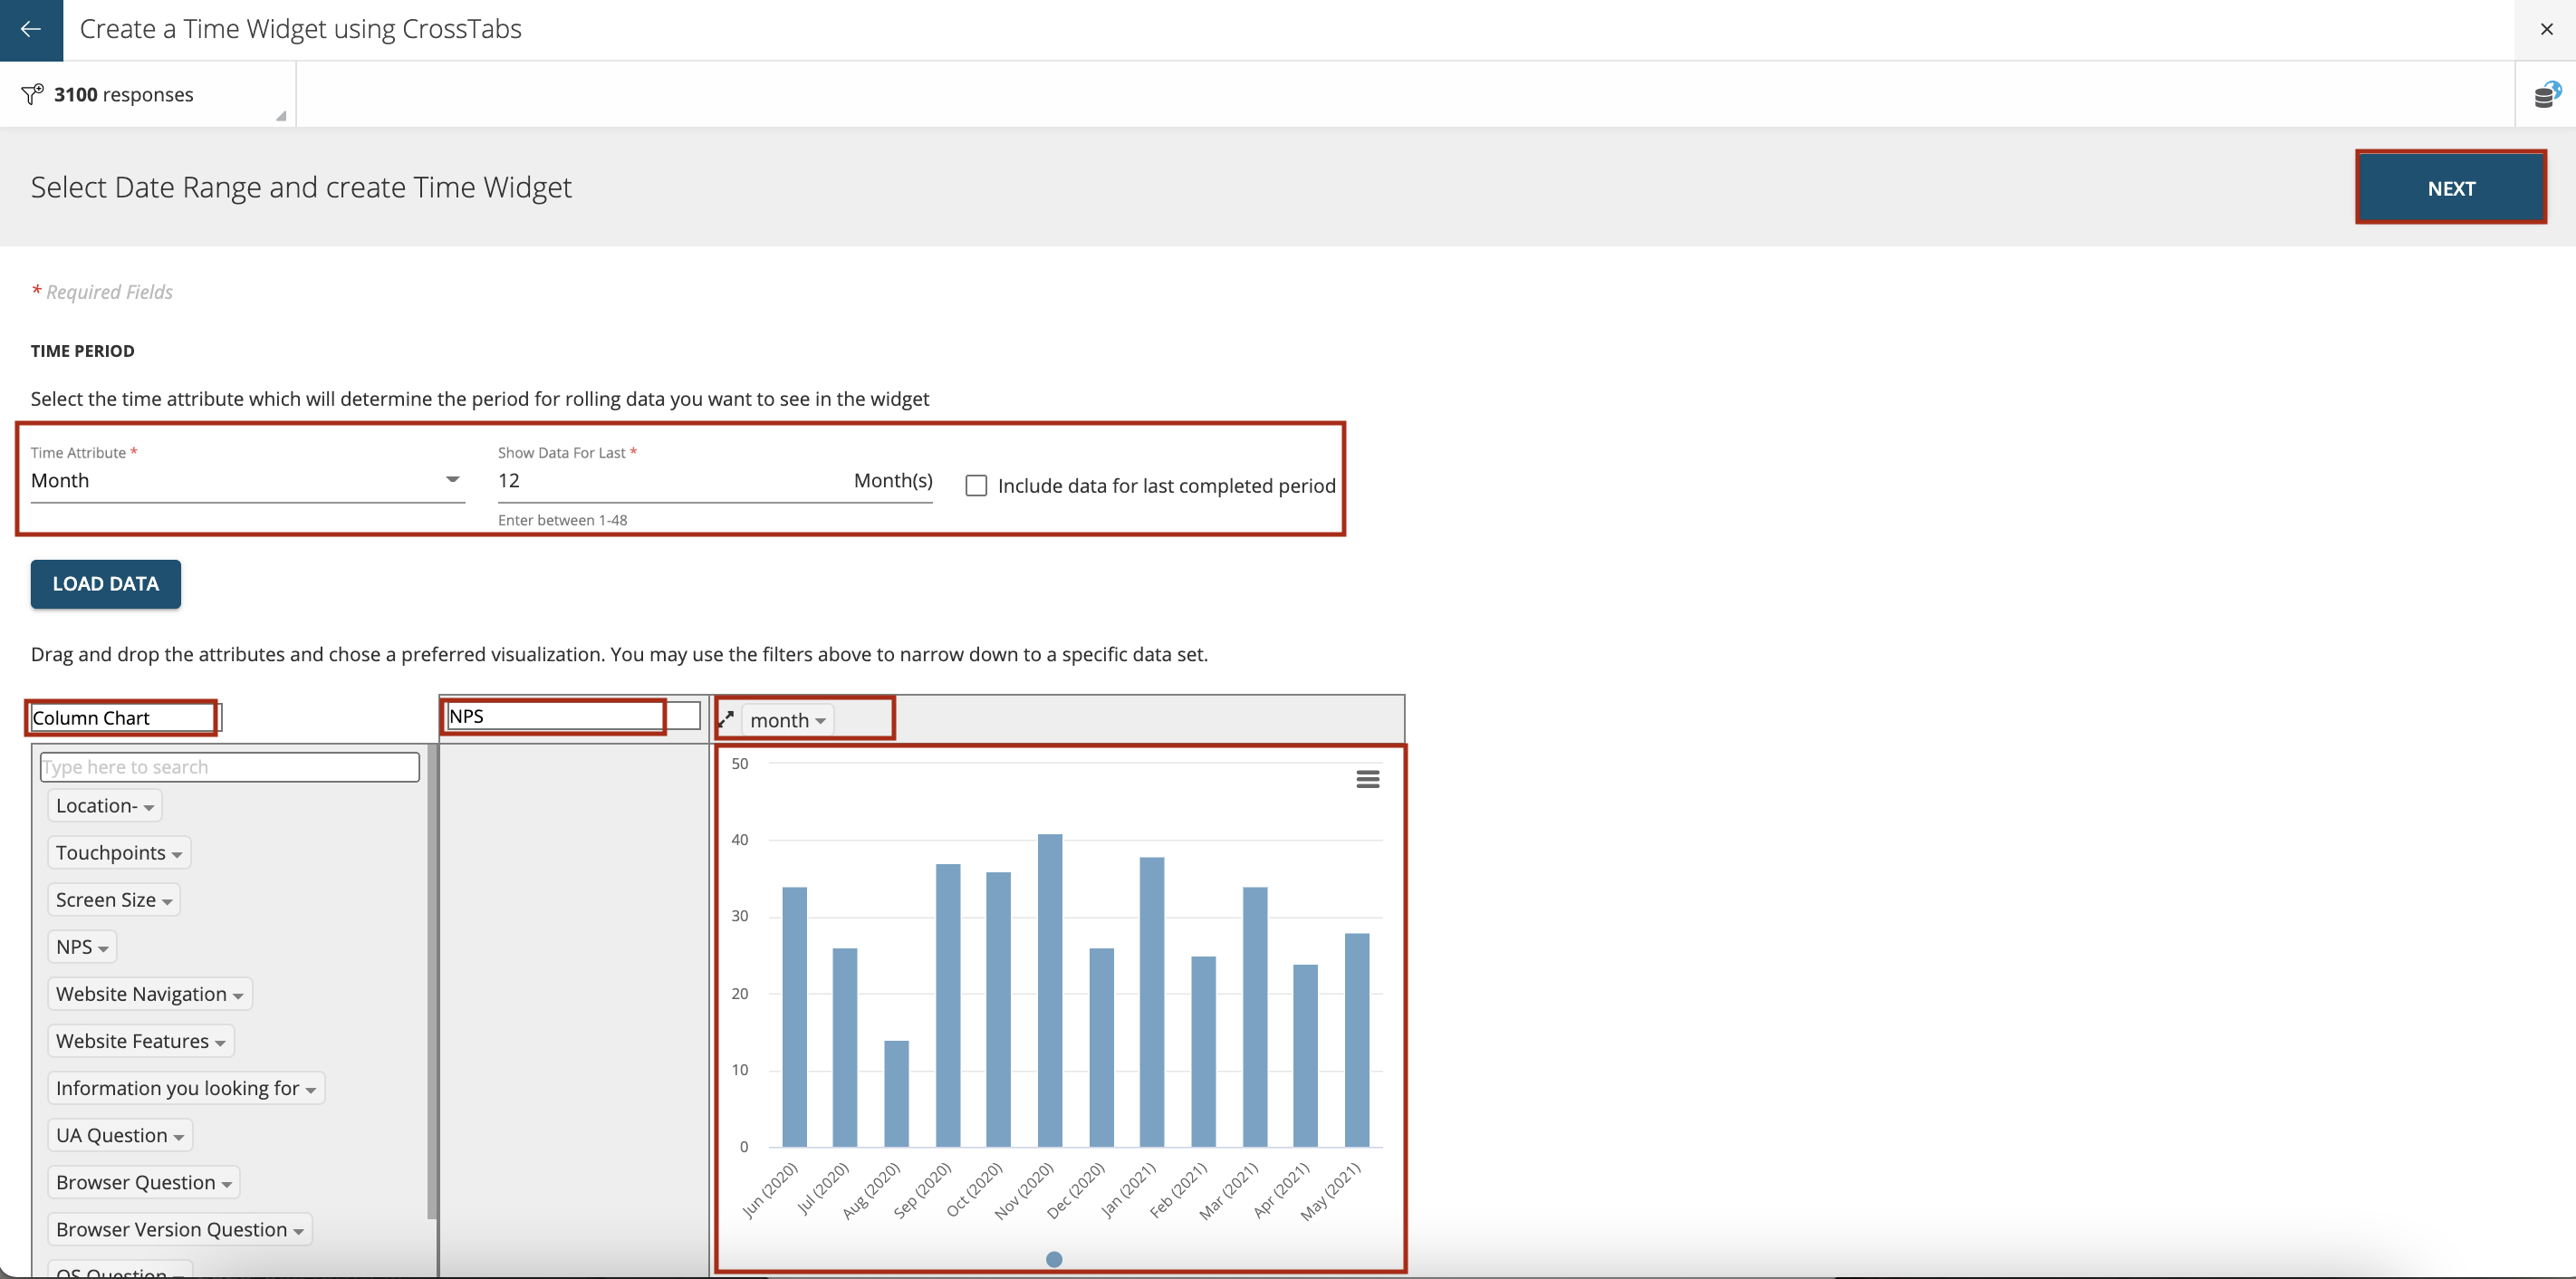
Select the time period/attribute from the dropdown which will determine the period for rolling data you want to see in the widget i.e. Day, Week, Month, Quarter or Year.
After selecting the number of Days/Weeks/Months/Quarters/Years you can also select ‘Include data for last completed period’ incase you want the widget to show data only for the completed period. For instance; if you selecting 6months and the current date is 15th May'21, upon selecting ‘Include data for last completed period’ the time widget will show data from Nov'20-Apr'21 and not for the incomplete month of May'21.
Press ‘Load Data’ as shown below.
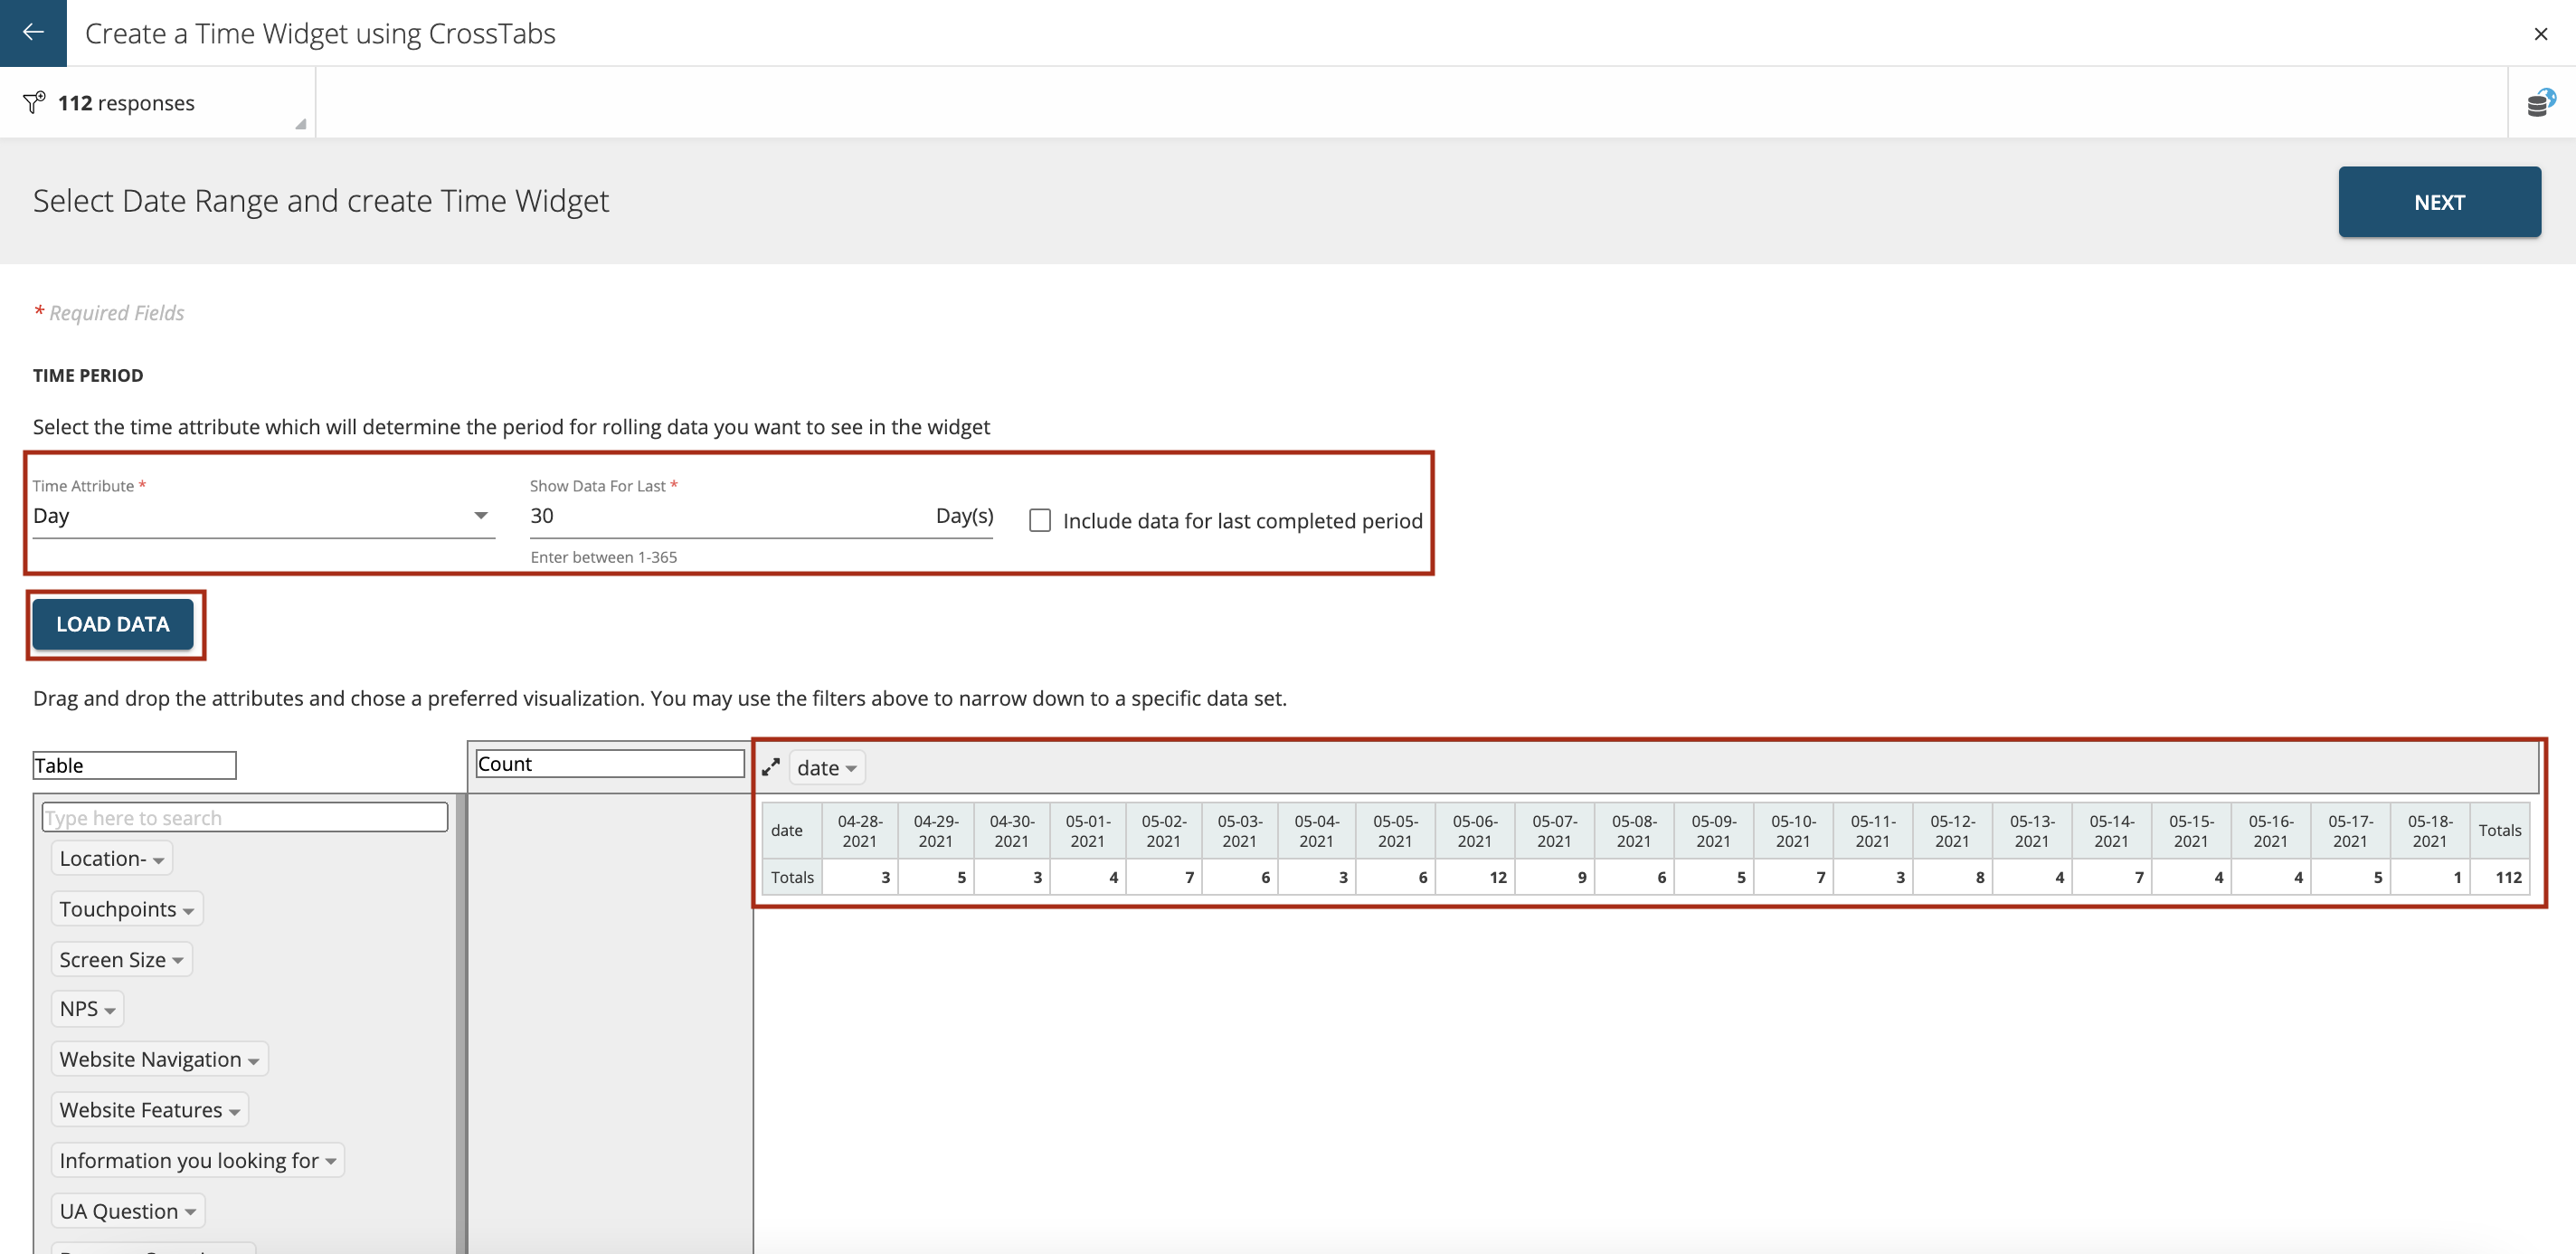
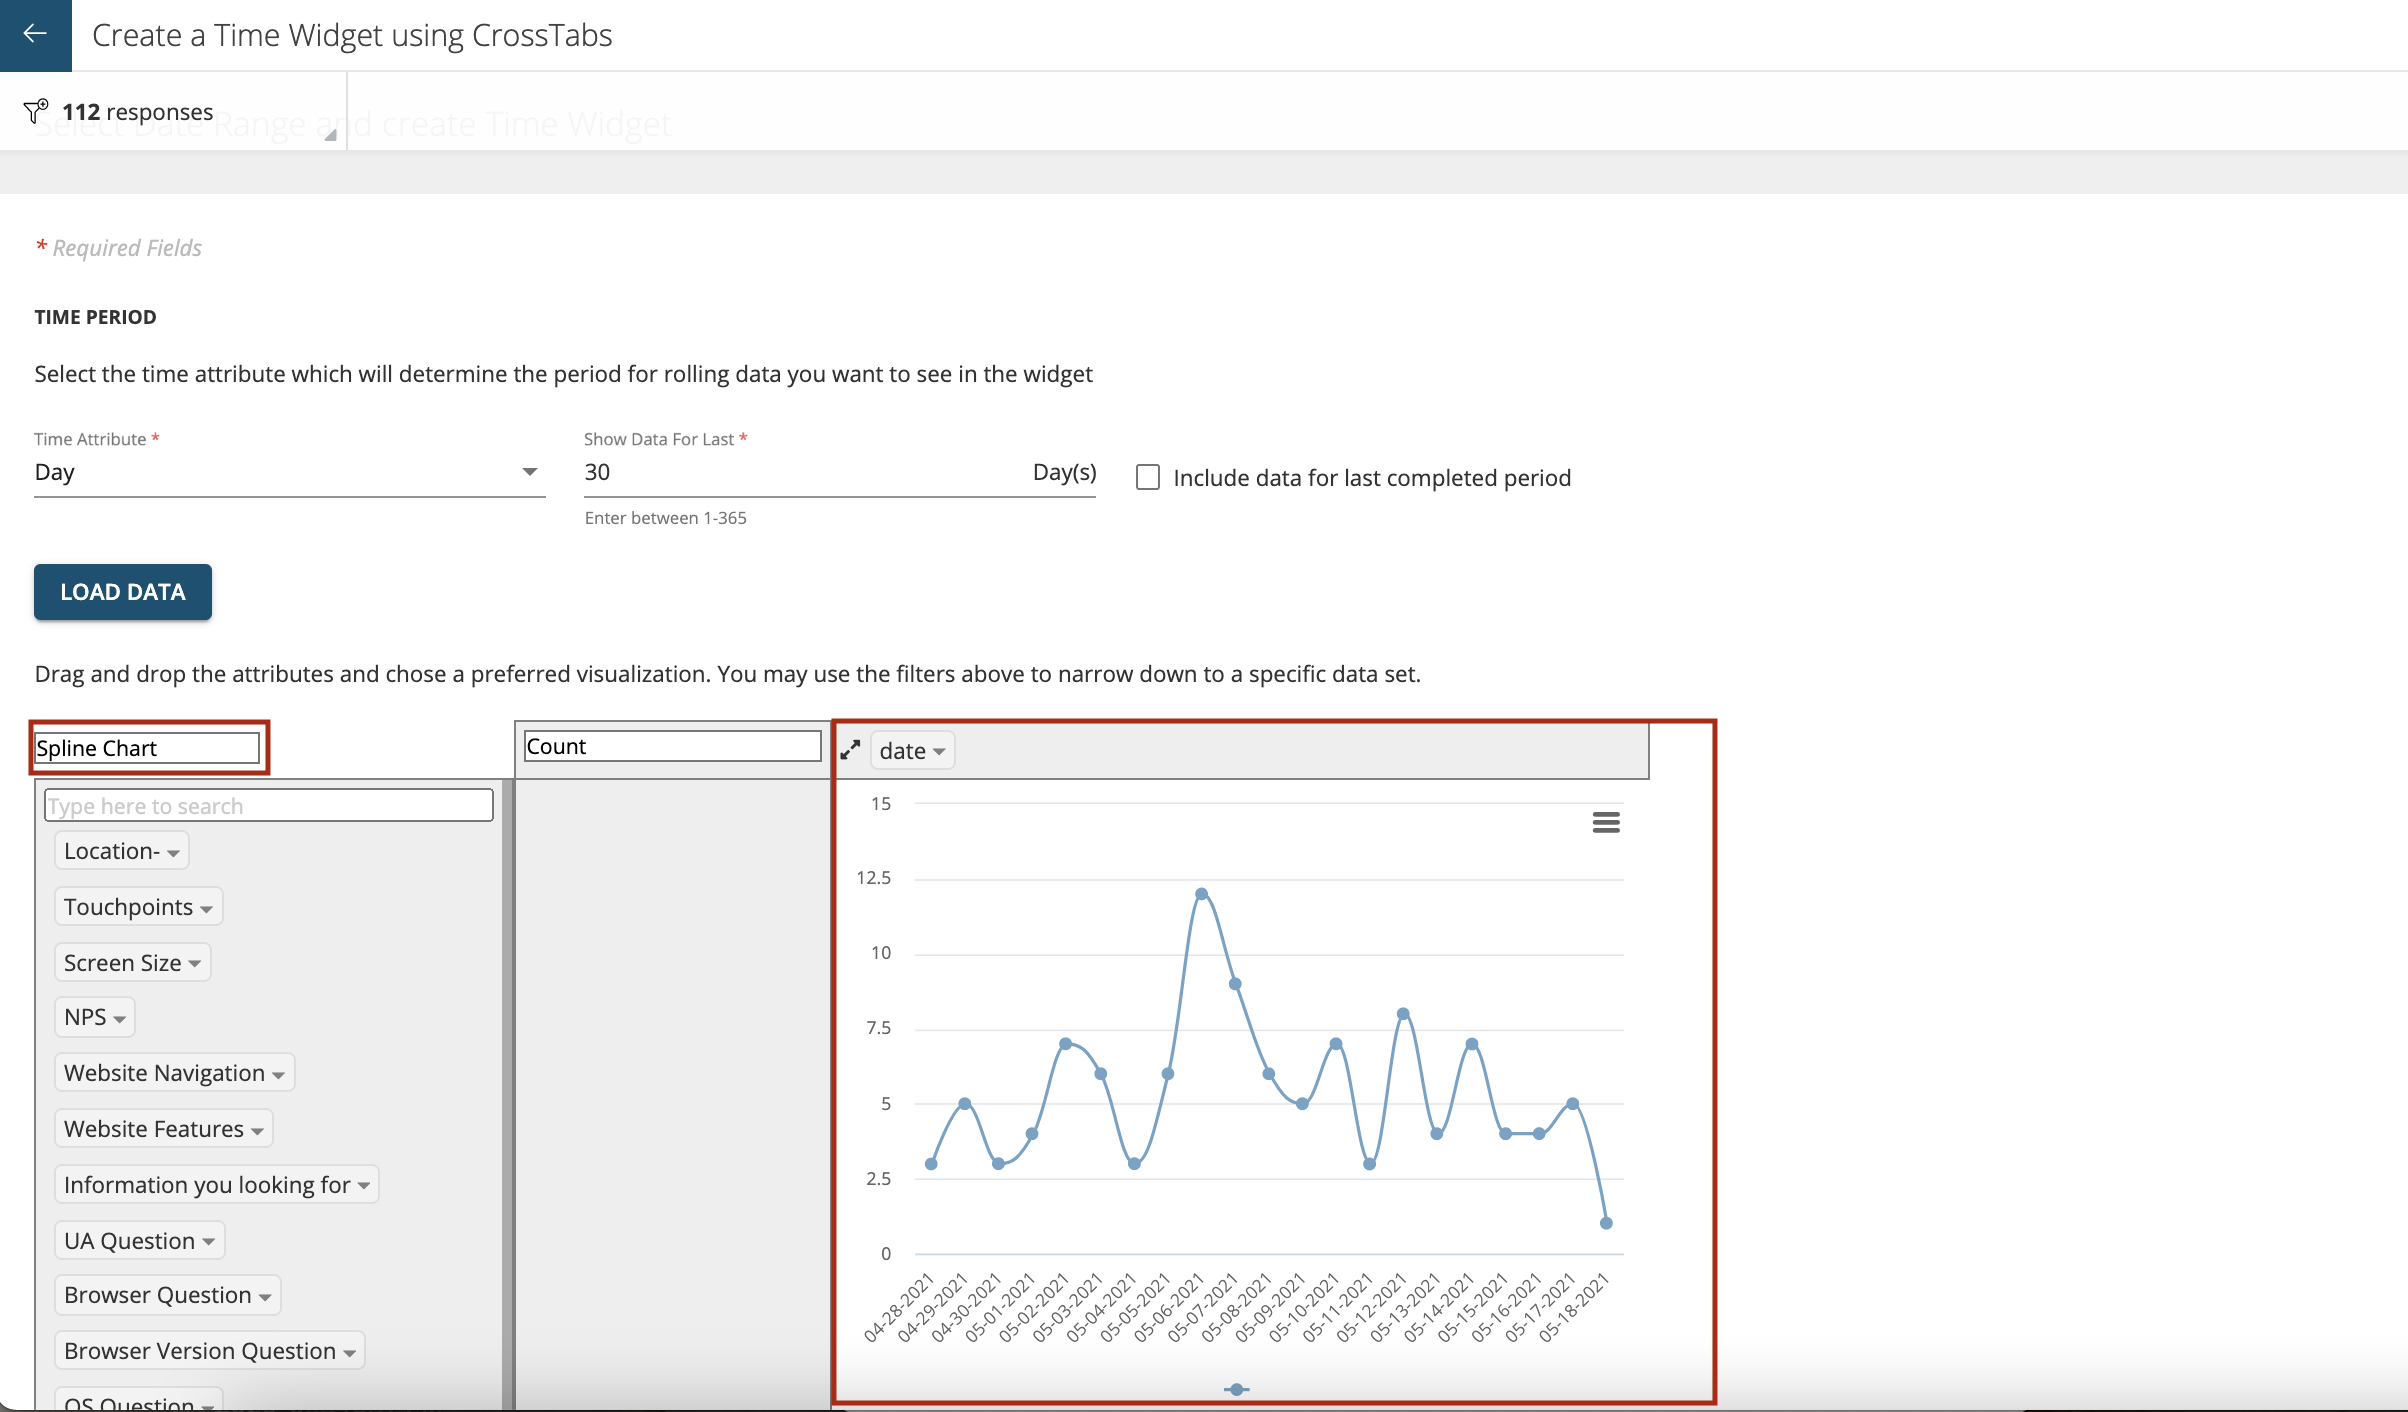
Then select the type of chart in which you want to show the data, e.g.: Spline chart, Column Chart, Bar Chart, Line Chart etc.
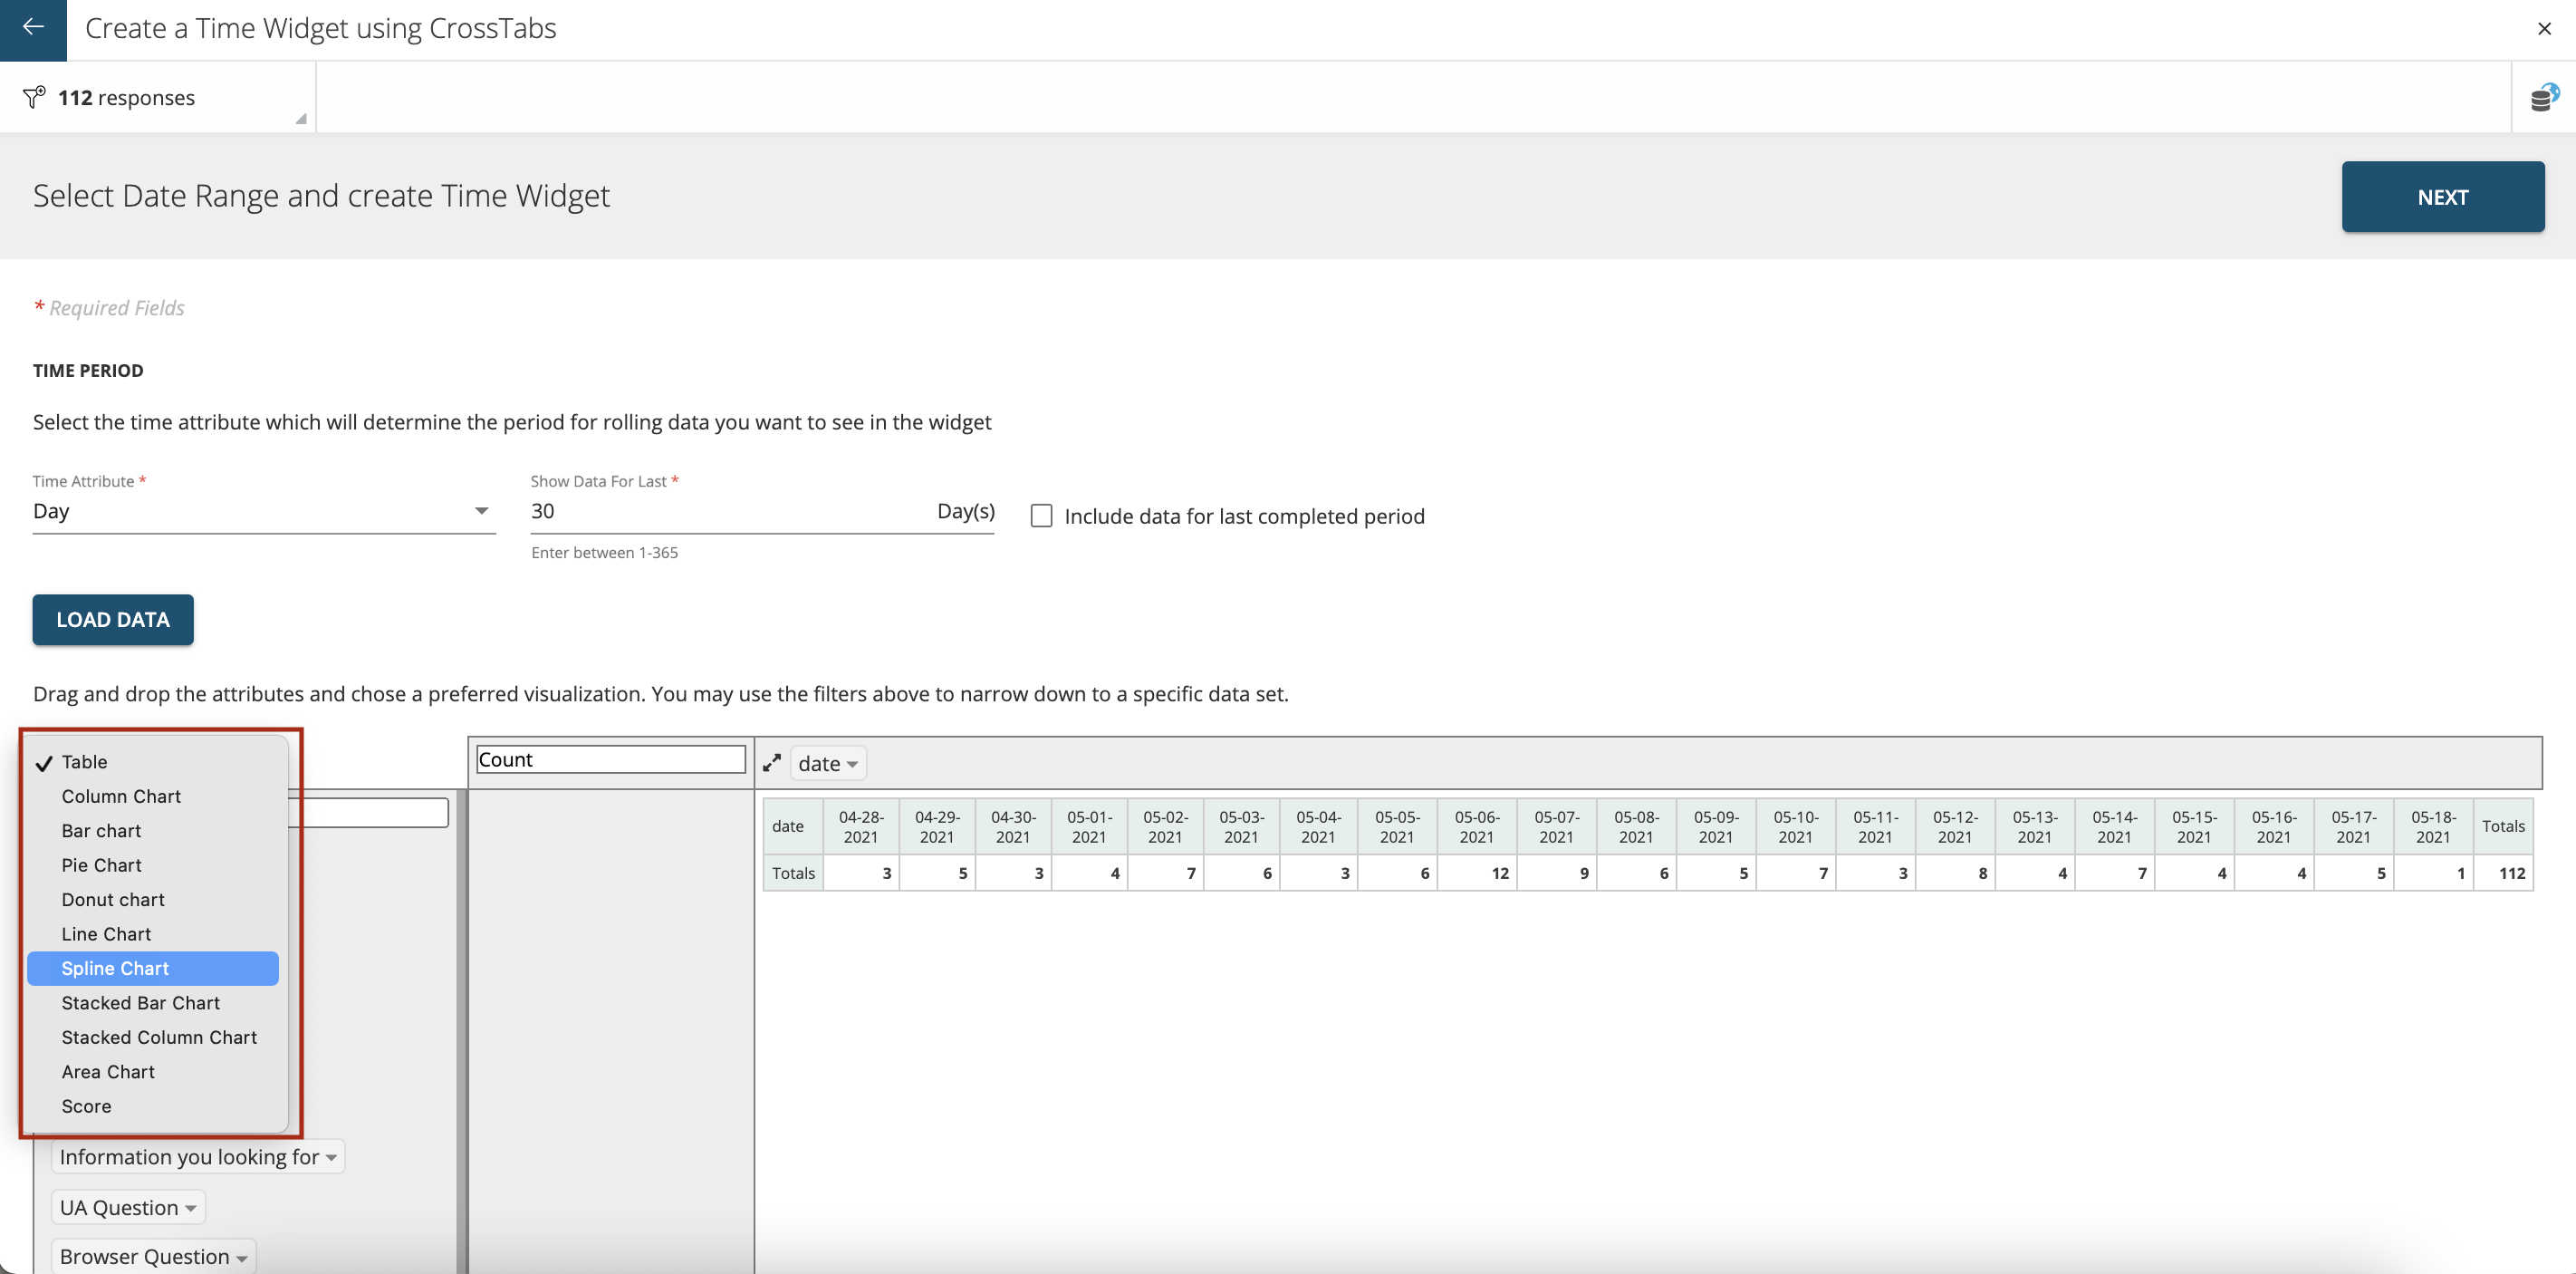
Line or spline charts are mostly used to show Daily Trend for Responses or NPS score etc.
You can also choose NPS from the dropdown to display NPS Trend month on month as shown below. Most widely used charts for depicting monthly trends are Column charts.
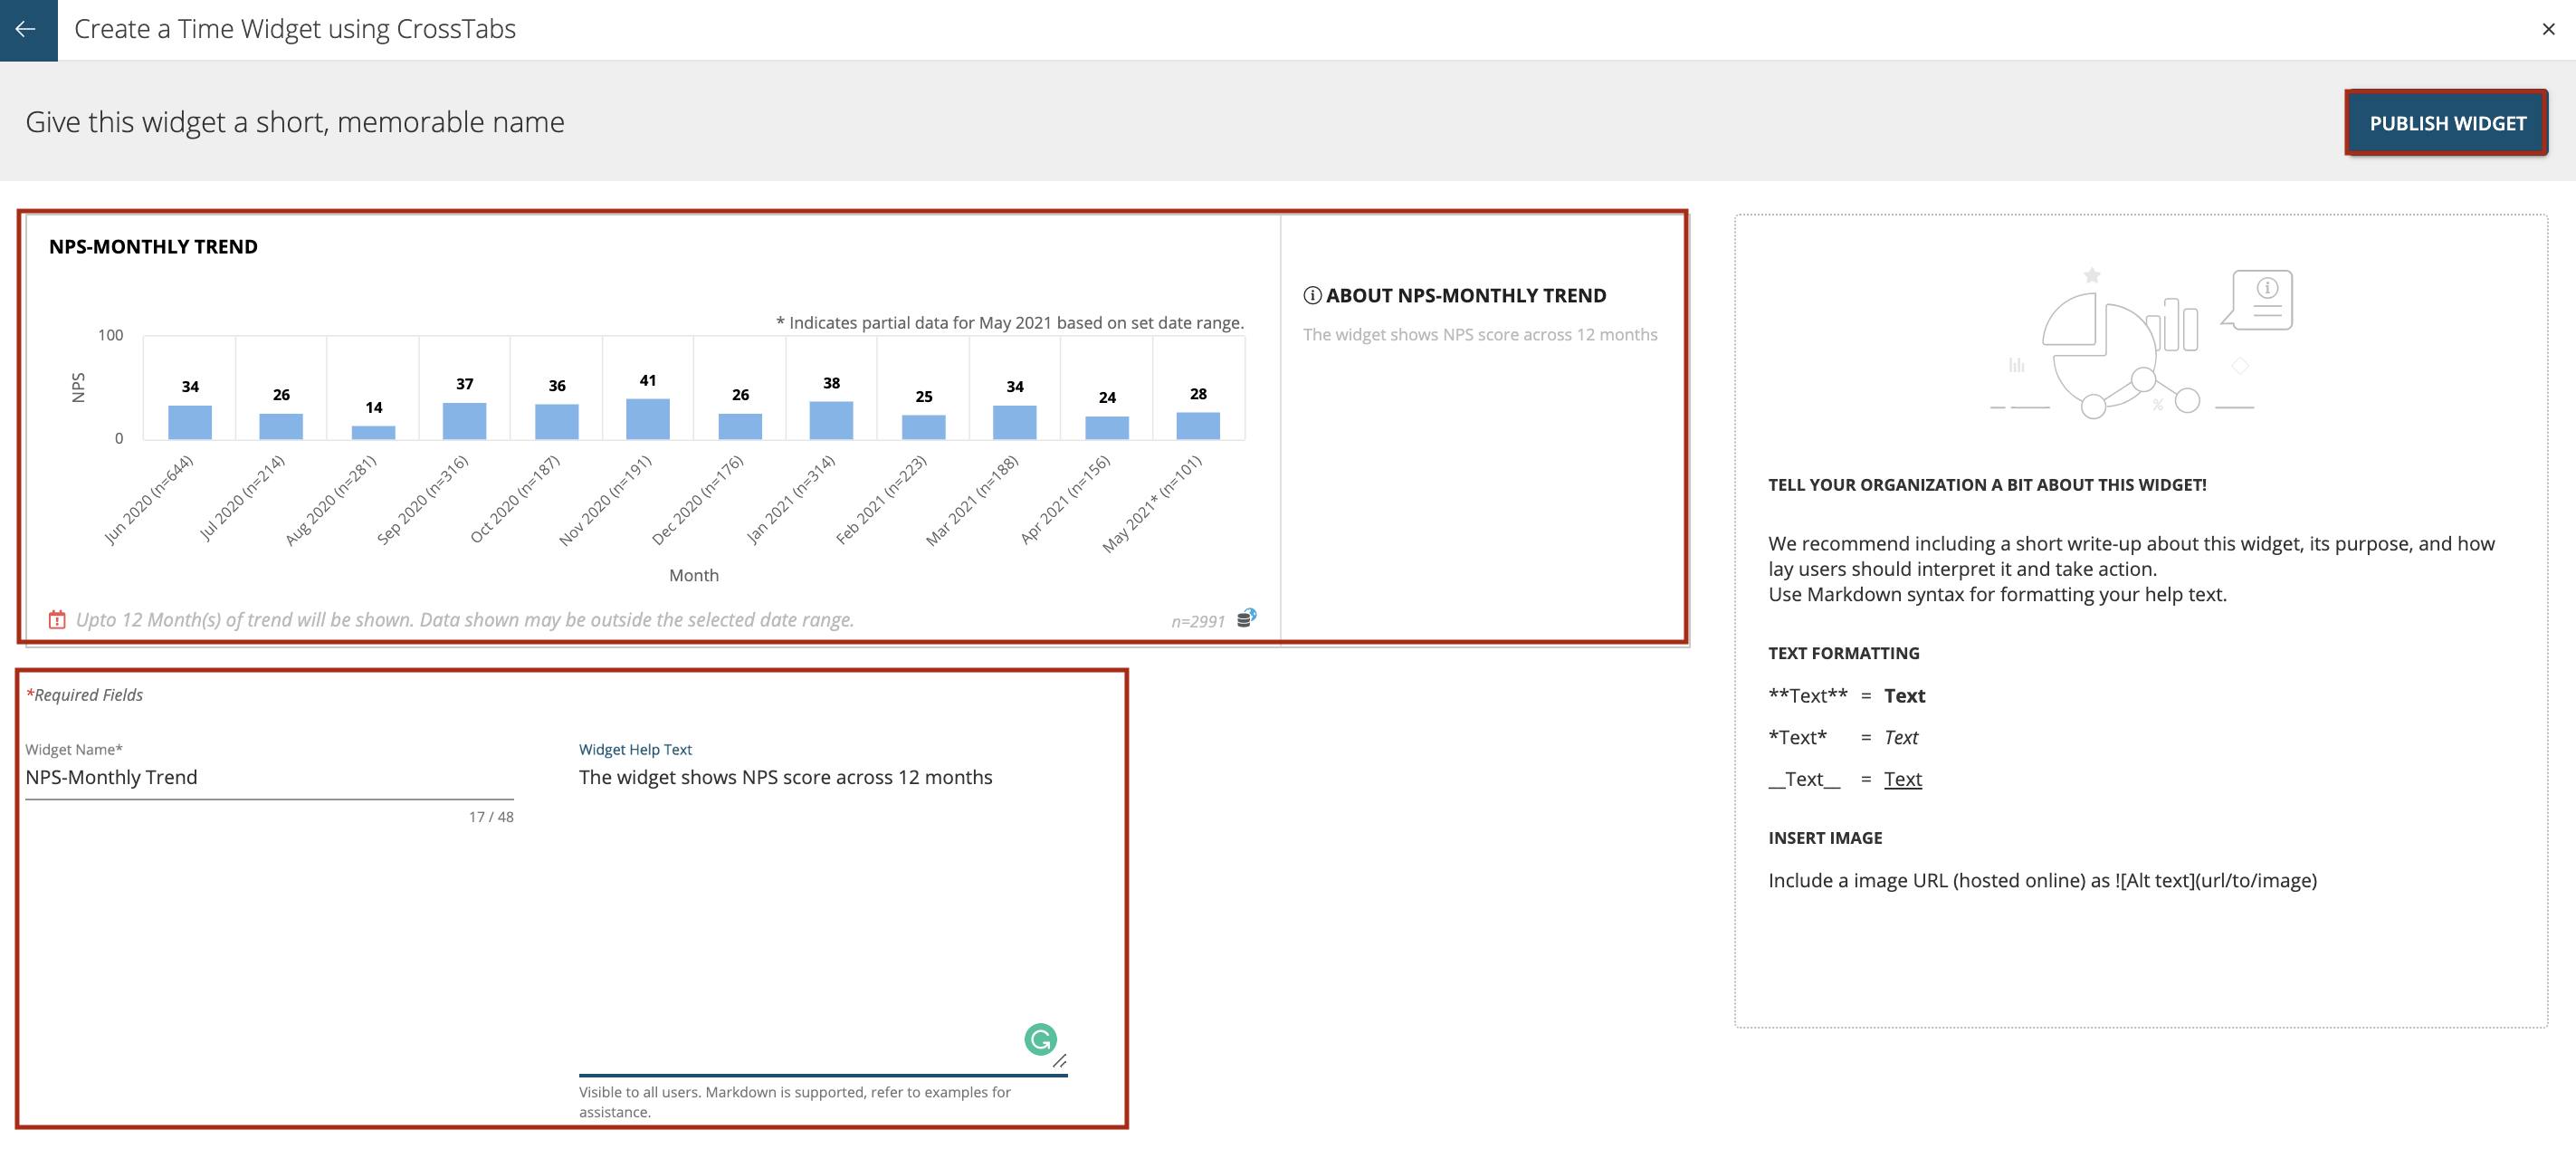
After clicking on ‘Next’ you can see the Time widget preview. You can also enter ‘Widget Name’ and ‘Widget Help Text’. This help text is visible to all users. Markdown is supported for help text.The instructions on how to use markdown can be seen on the right hand side of the screen as shown below
Use Markdown syntax for formatting your help text.
For Text Formatting:
Text = Text
Text = Text
Text = Text
INSERT IMAGE
Include a image URL (hosted online) as
Then press ‘Publish Widget’ to save and later publish it on the dashboard/space.
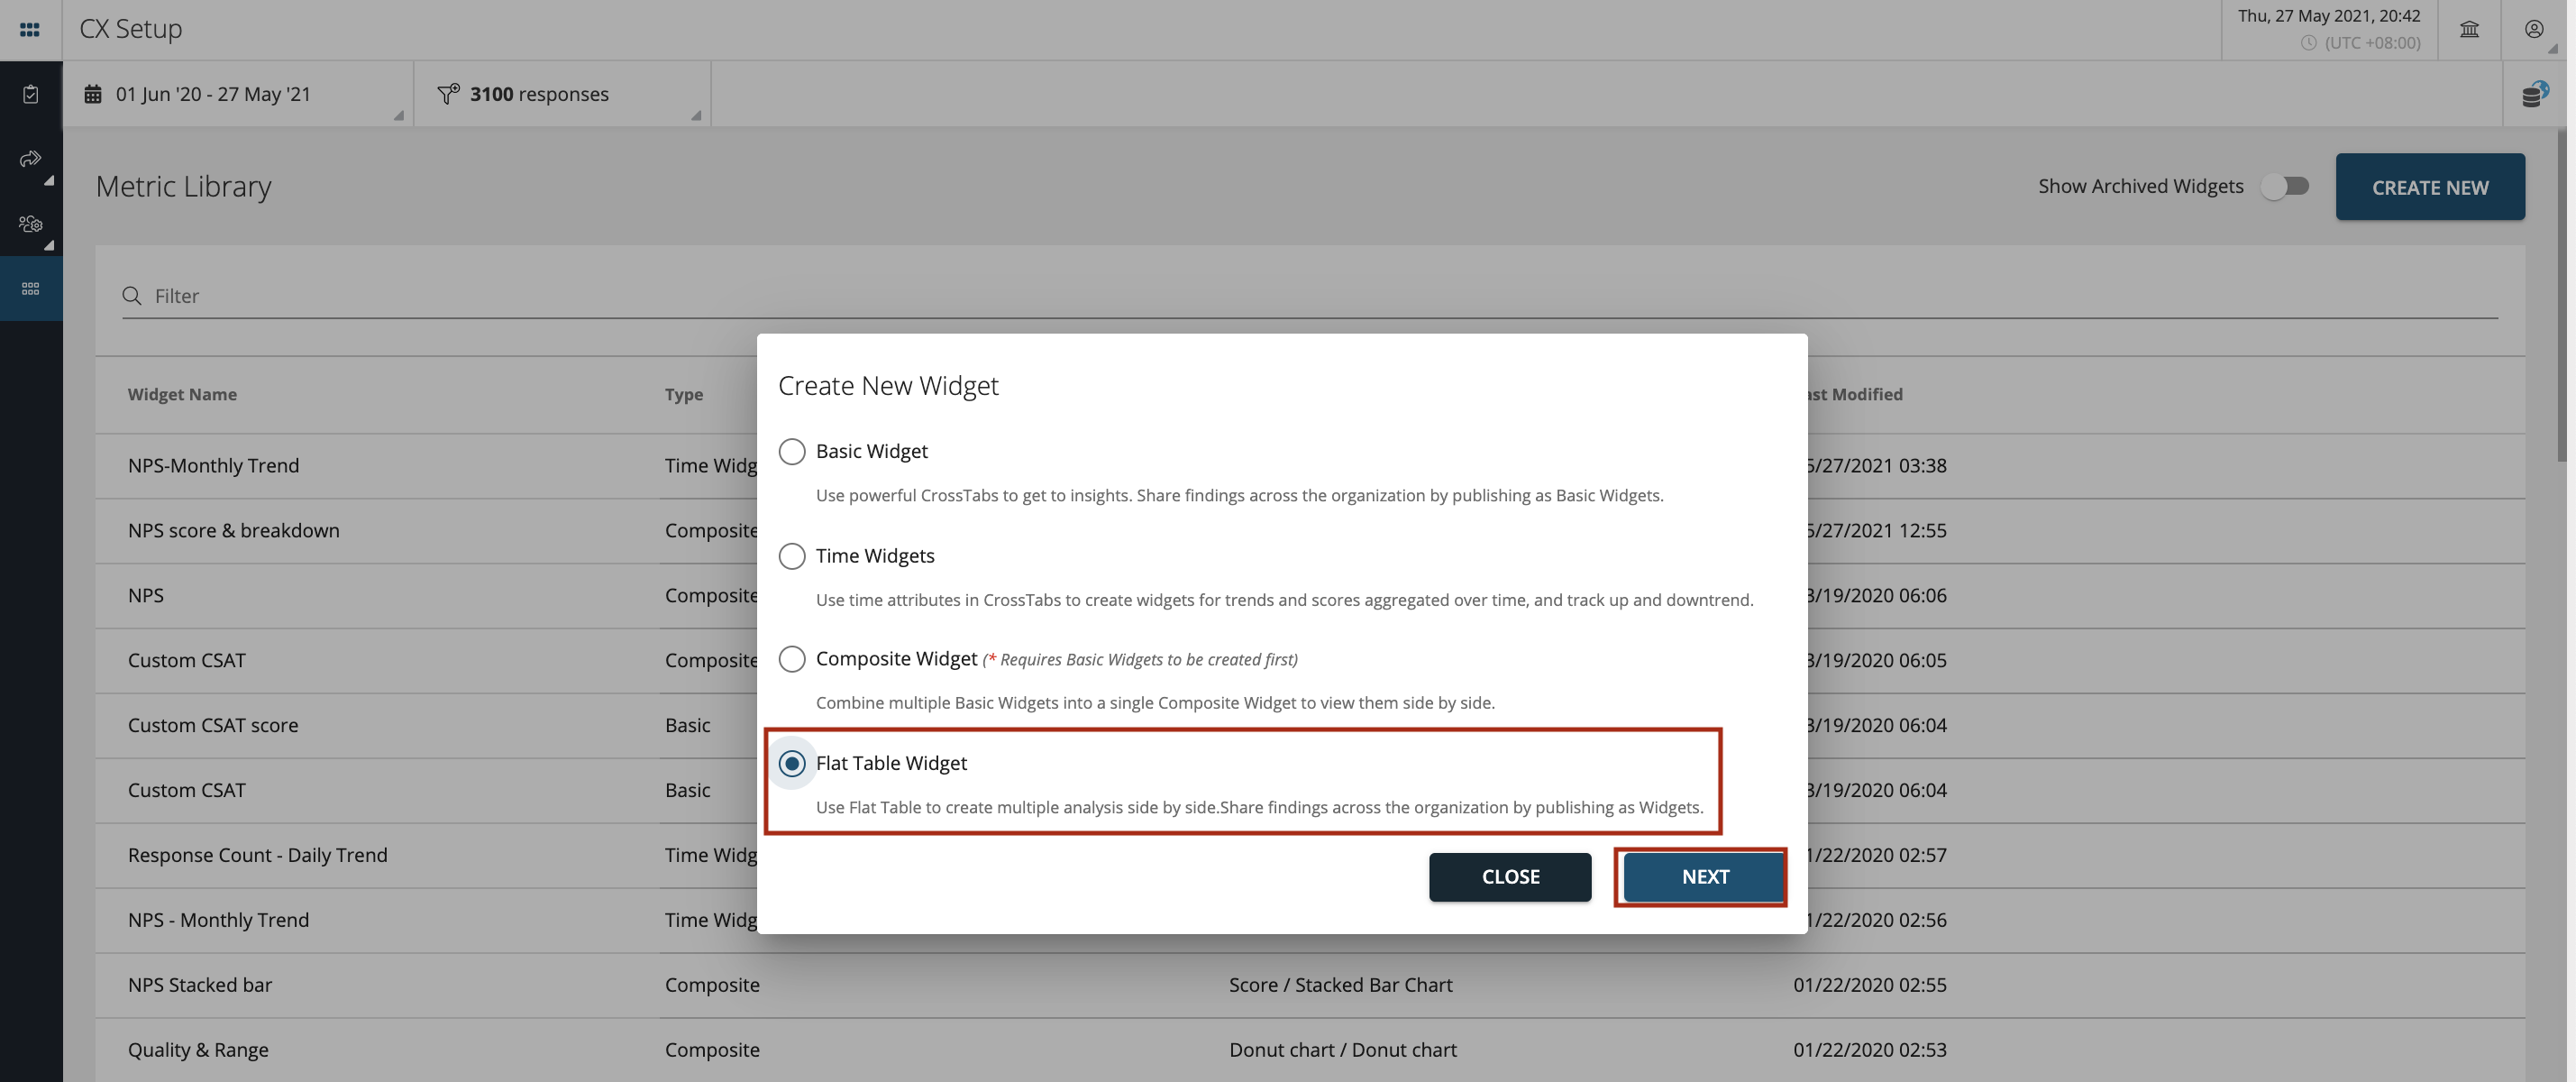
Flat Table Widgets
Use Flat Table to create multiple analysis side by side.Share findings across the organization by publishing as Widgets.
To create a Flat Table Widget click on ‘Create New’ as shown below.
Then select ‘Flat Table Widget’ and press ‘Next’ as shown.
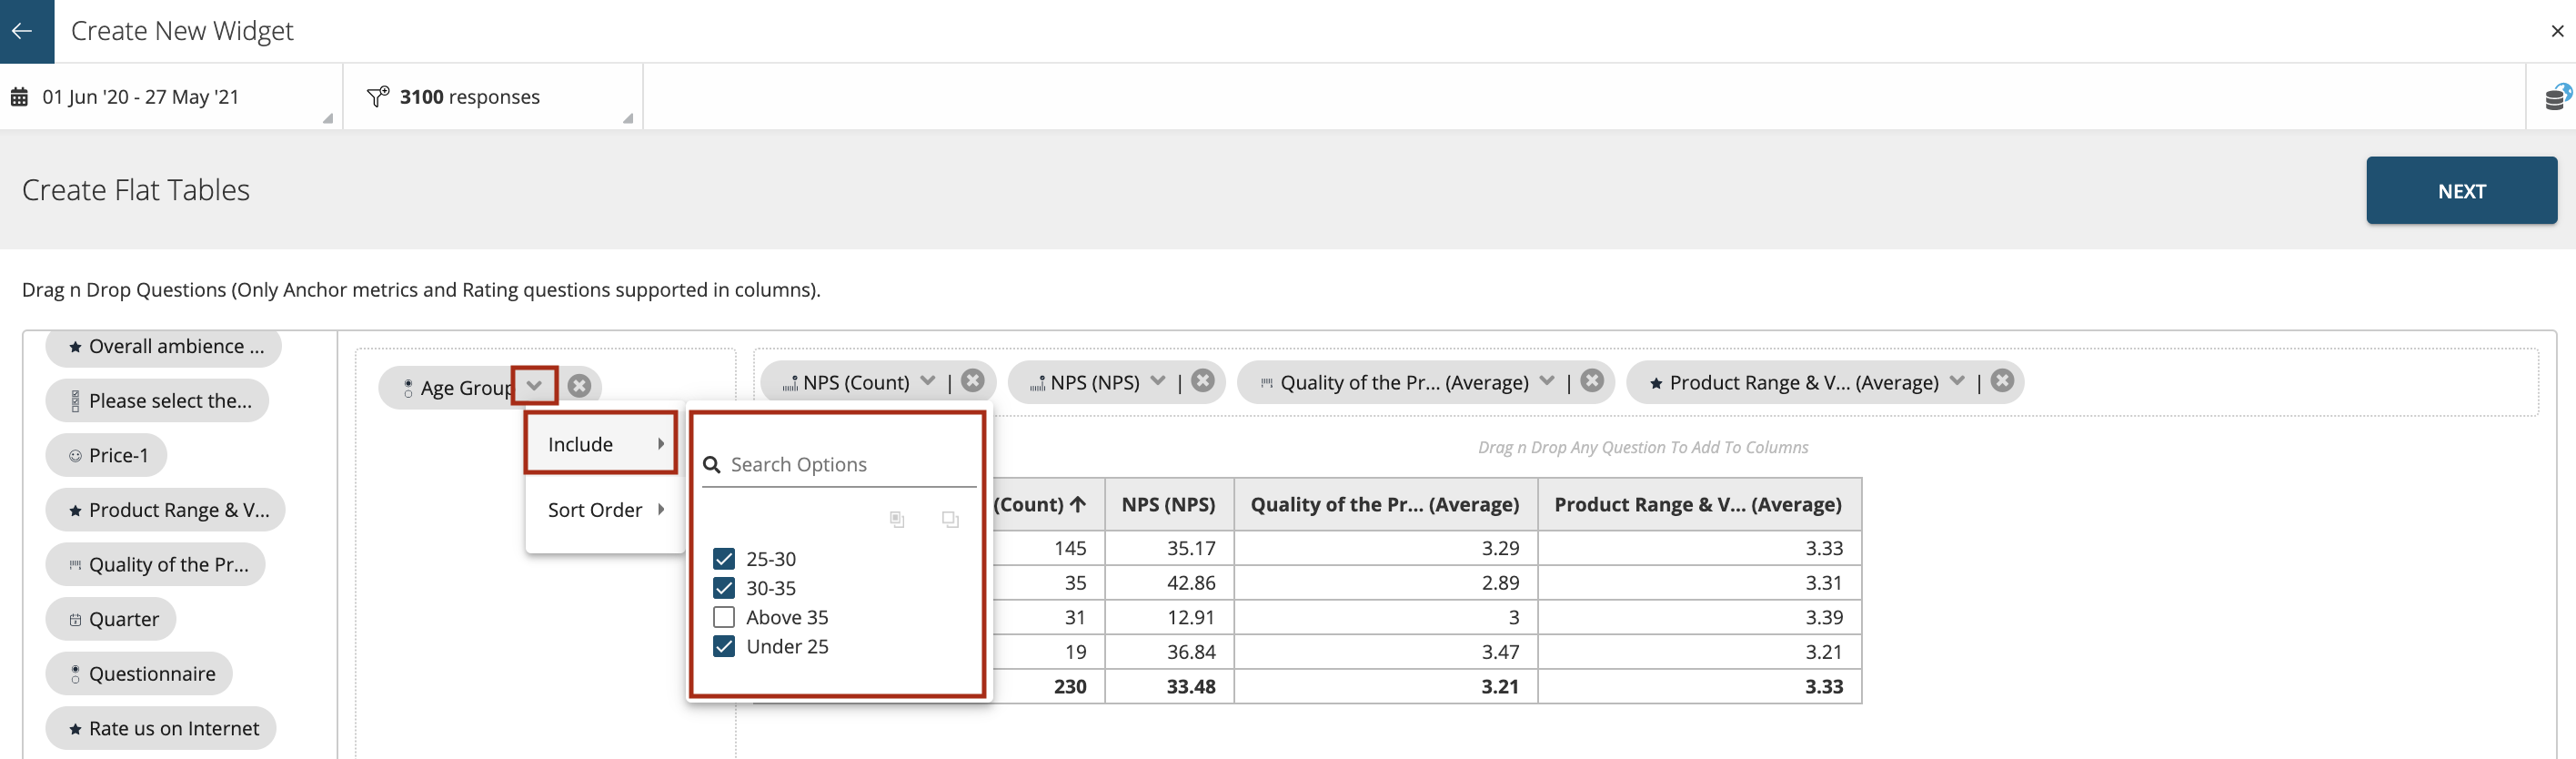
Drag n Drop Questions on X and Y axis by searching from the list of questions from the left hand side panel as shown (Only Anchor metrics and Rating questions supported in columns). Also note that only one attribute can be added to the row.
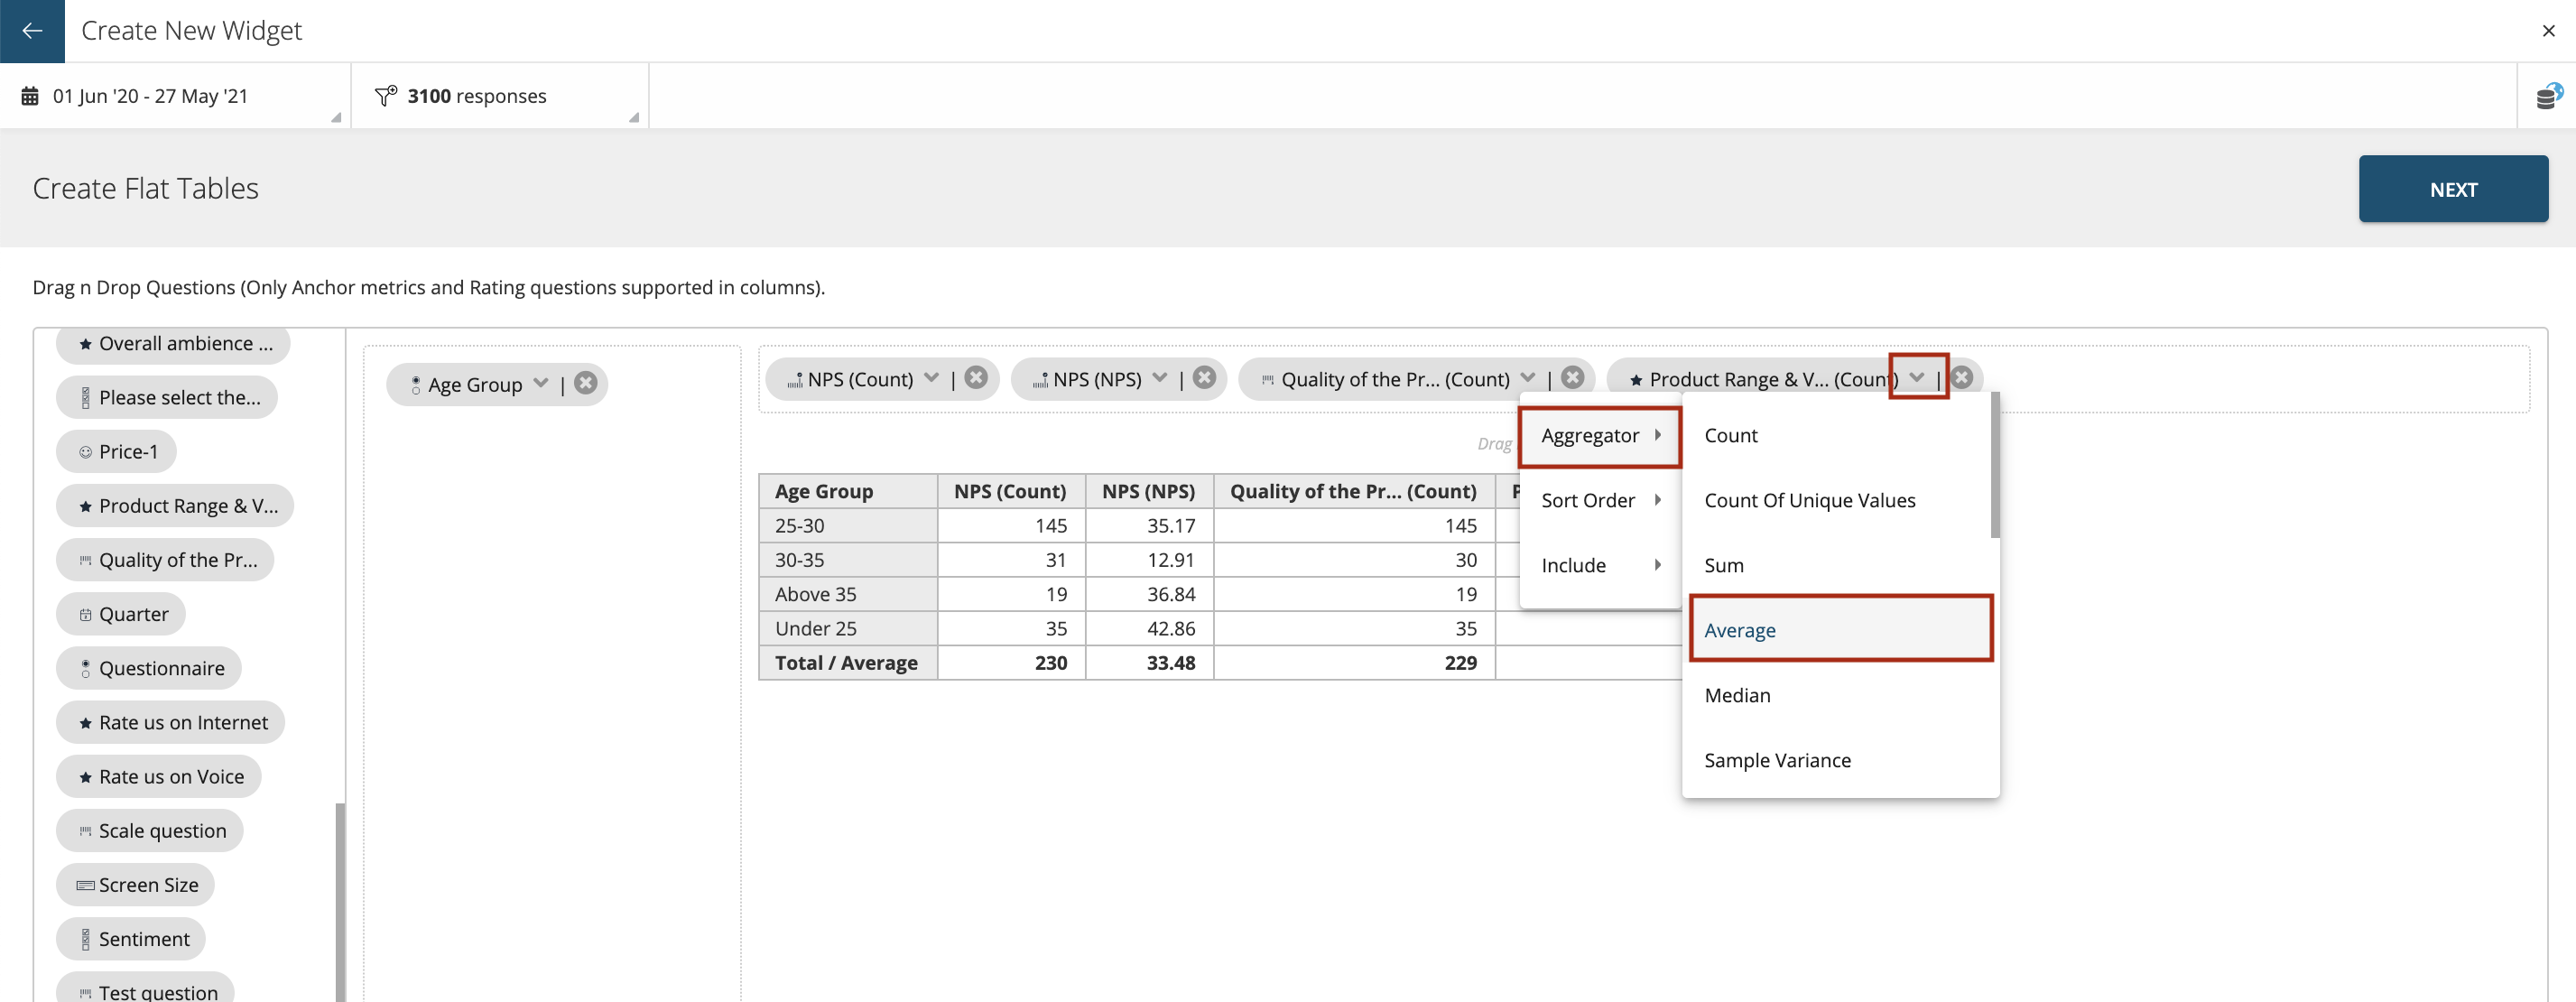
You can drag same question multiple times to show different aggregators. For instance; NPS Count & NPS score OR Product Range Count & Product Range Average etc by clicking on the arrow and then selecting the desired ‘Aggregator’ from the dropdown list as shown below.
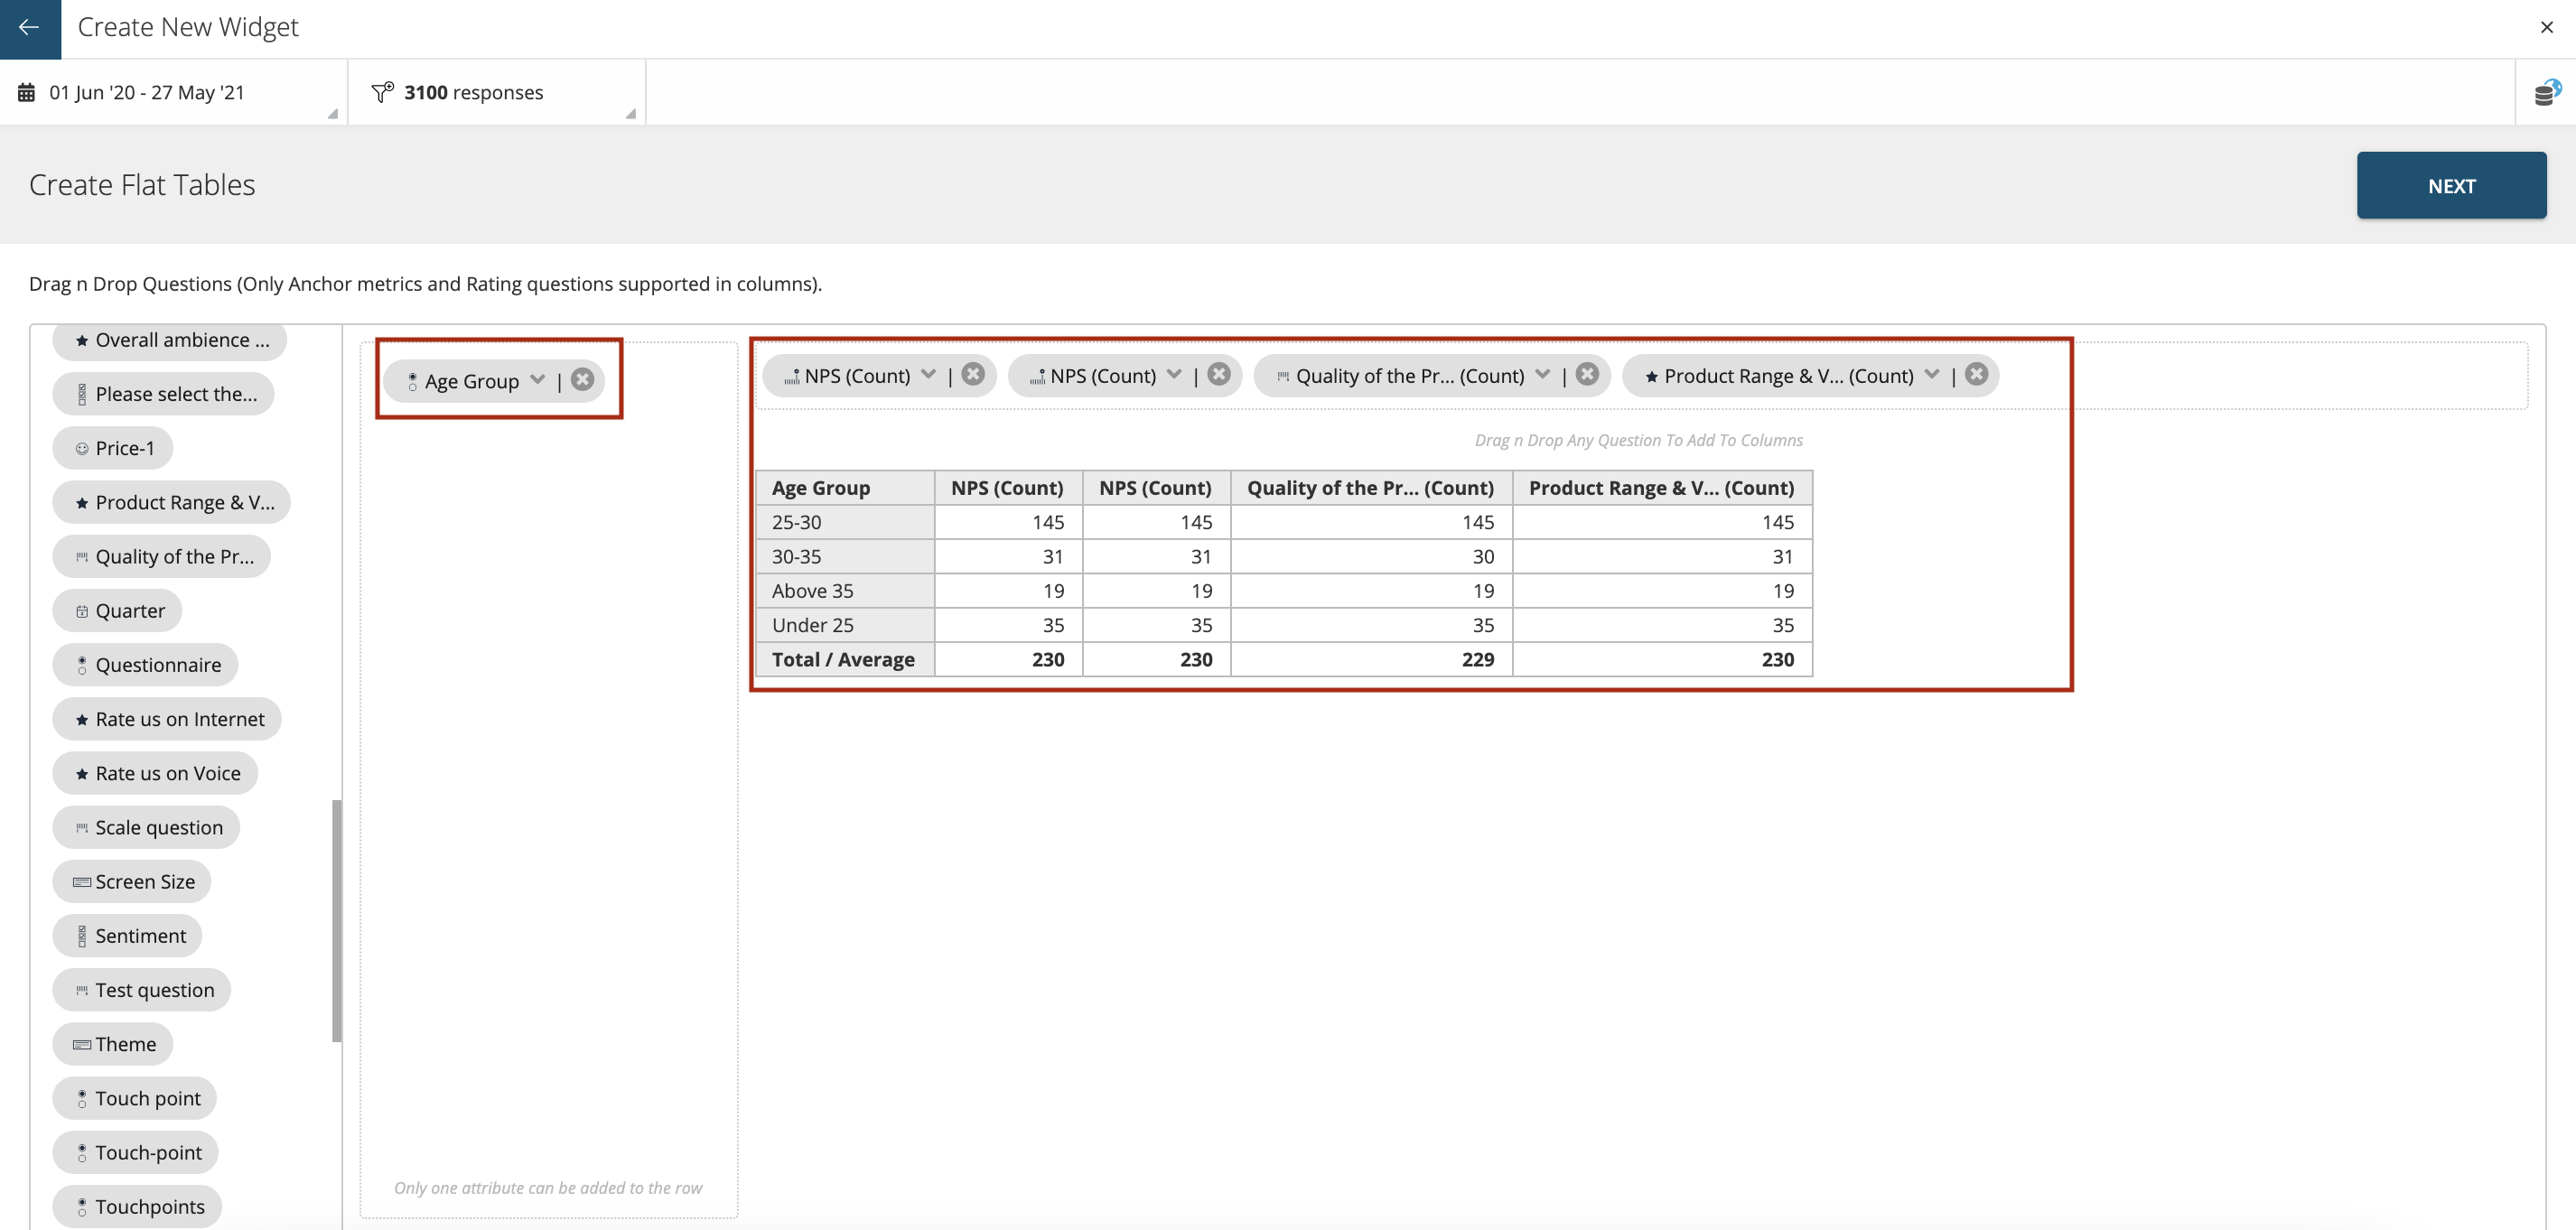
You can select Count, Average, Count as Fraction of Rows, Count as Fraction of Columns, Score, Top-2, Top-3, Bottom-2, Bottom-3 etc.

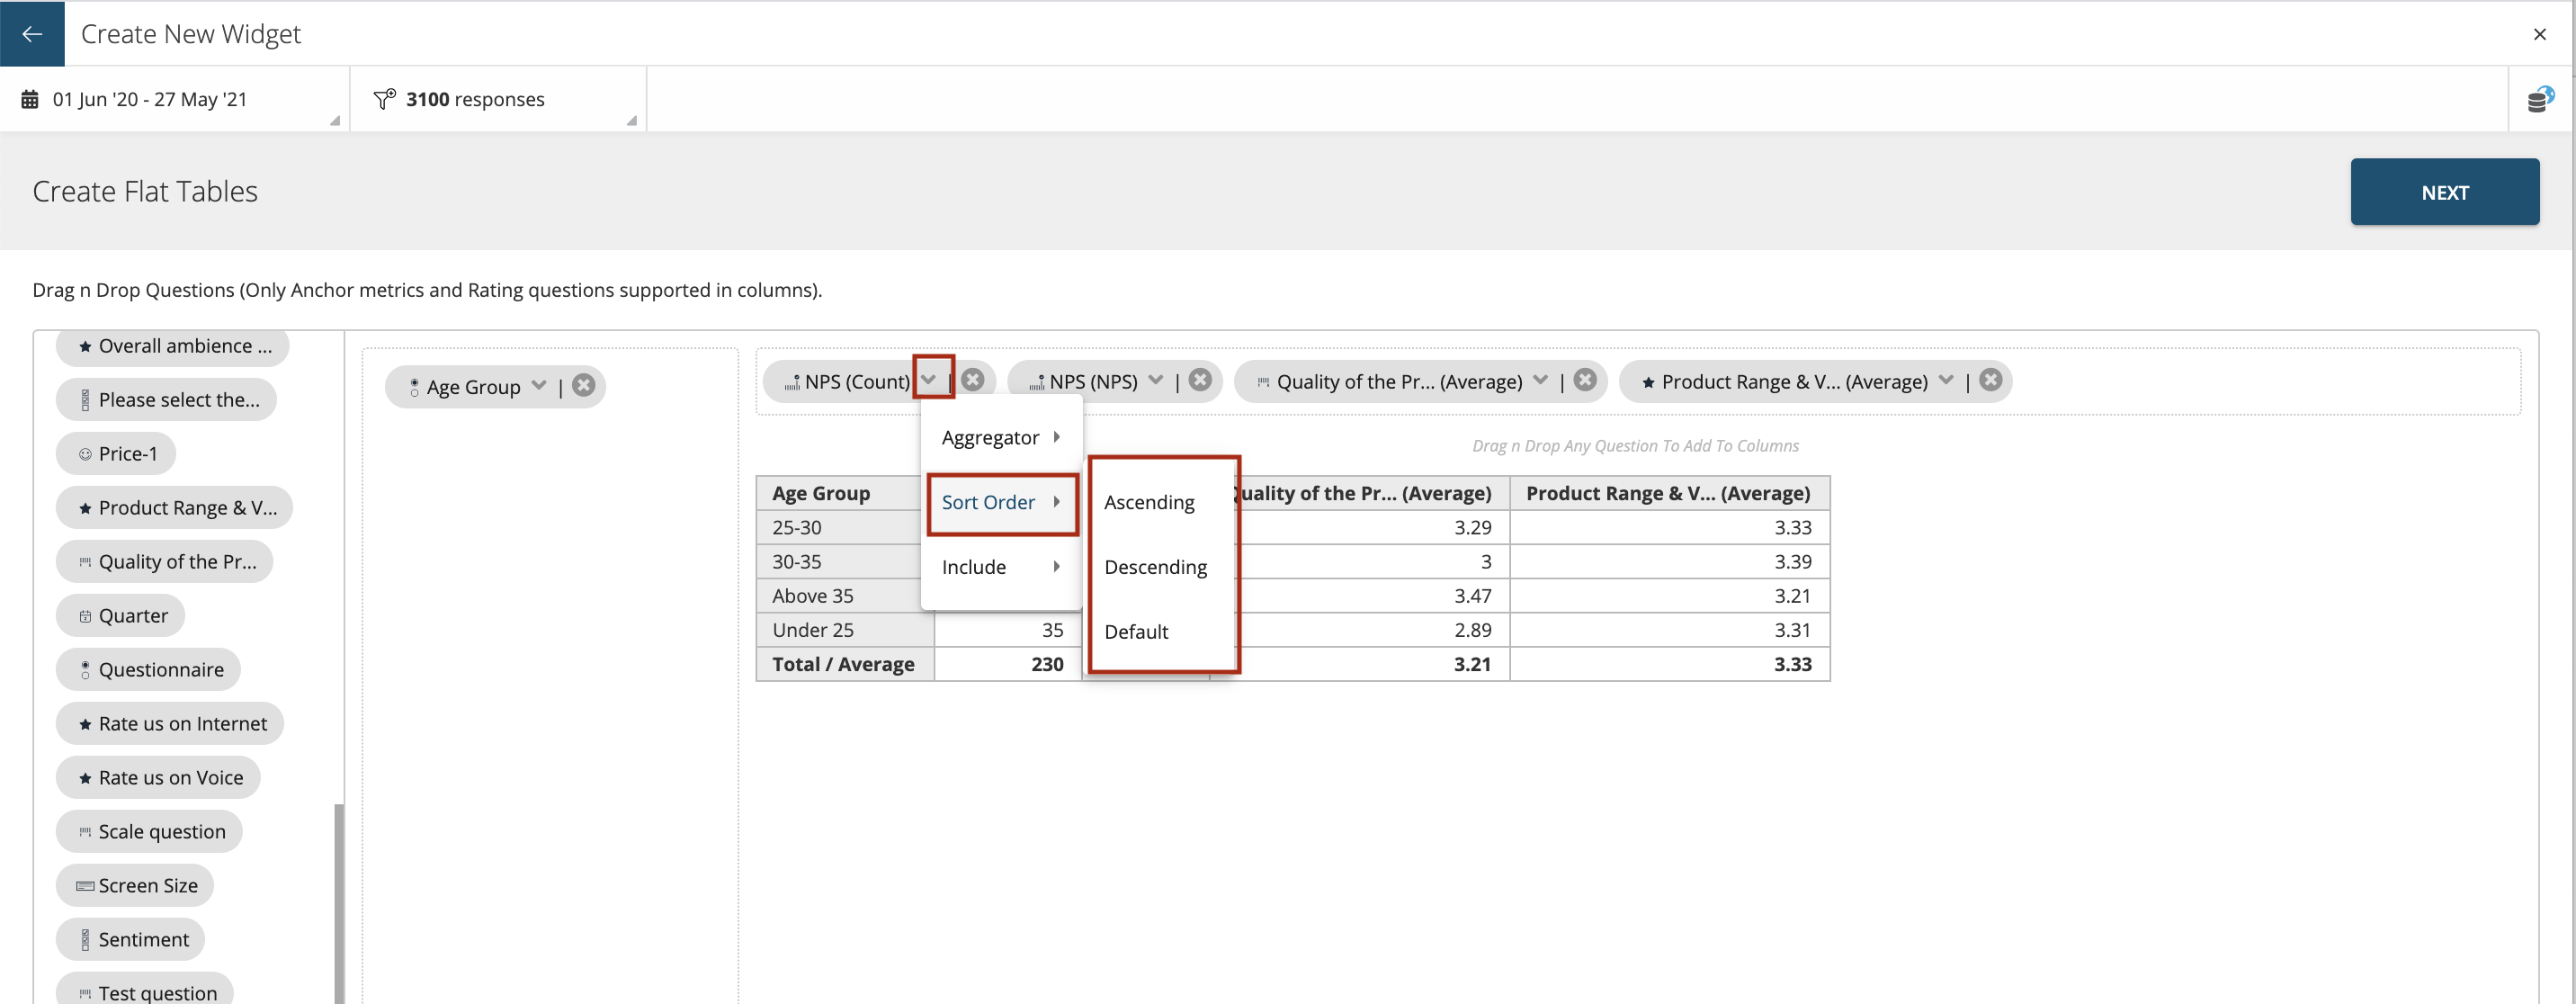
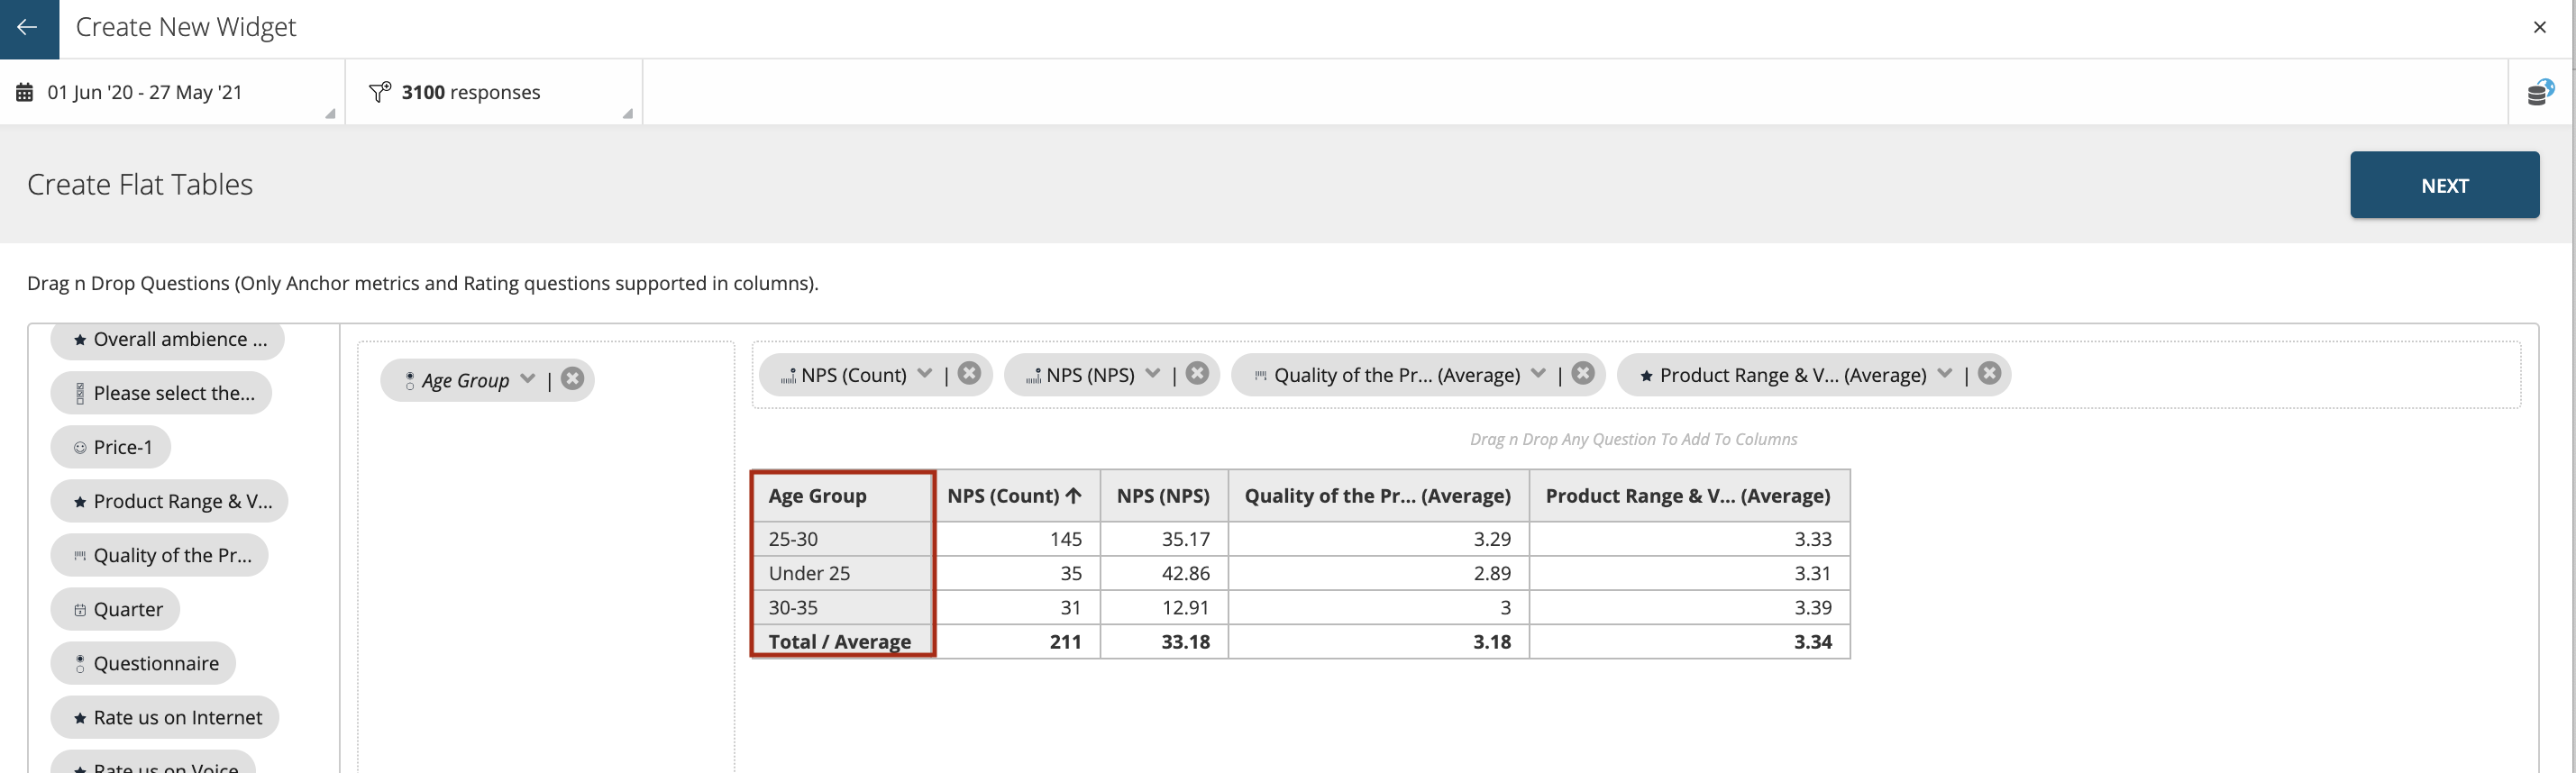
You can also choose to sort the data by Ascending, Descending or Default order by selecting the ‘Sort Order’ as shown. Once the sorting the applied an upward or downward arrow appears on that column depending on what you selected.
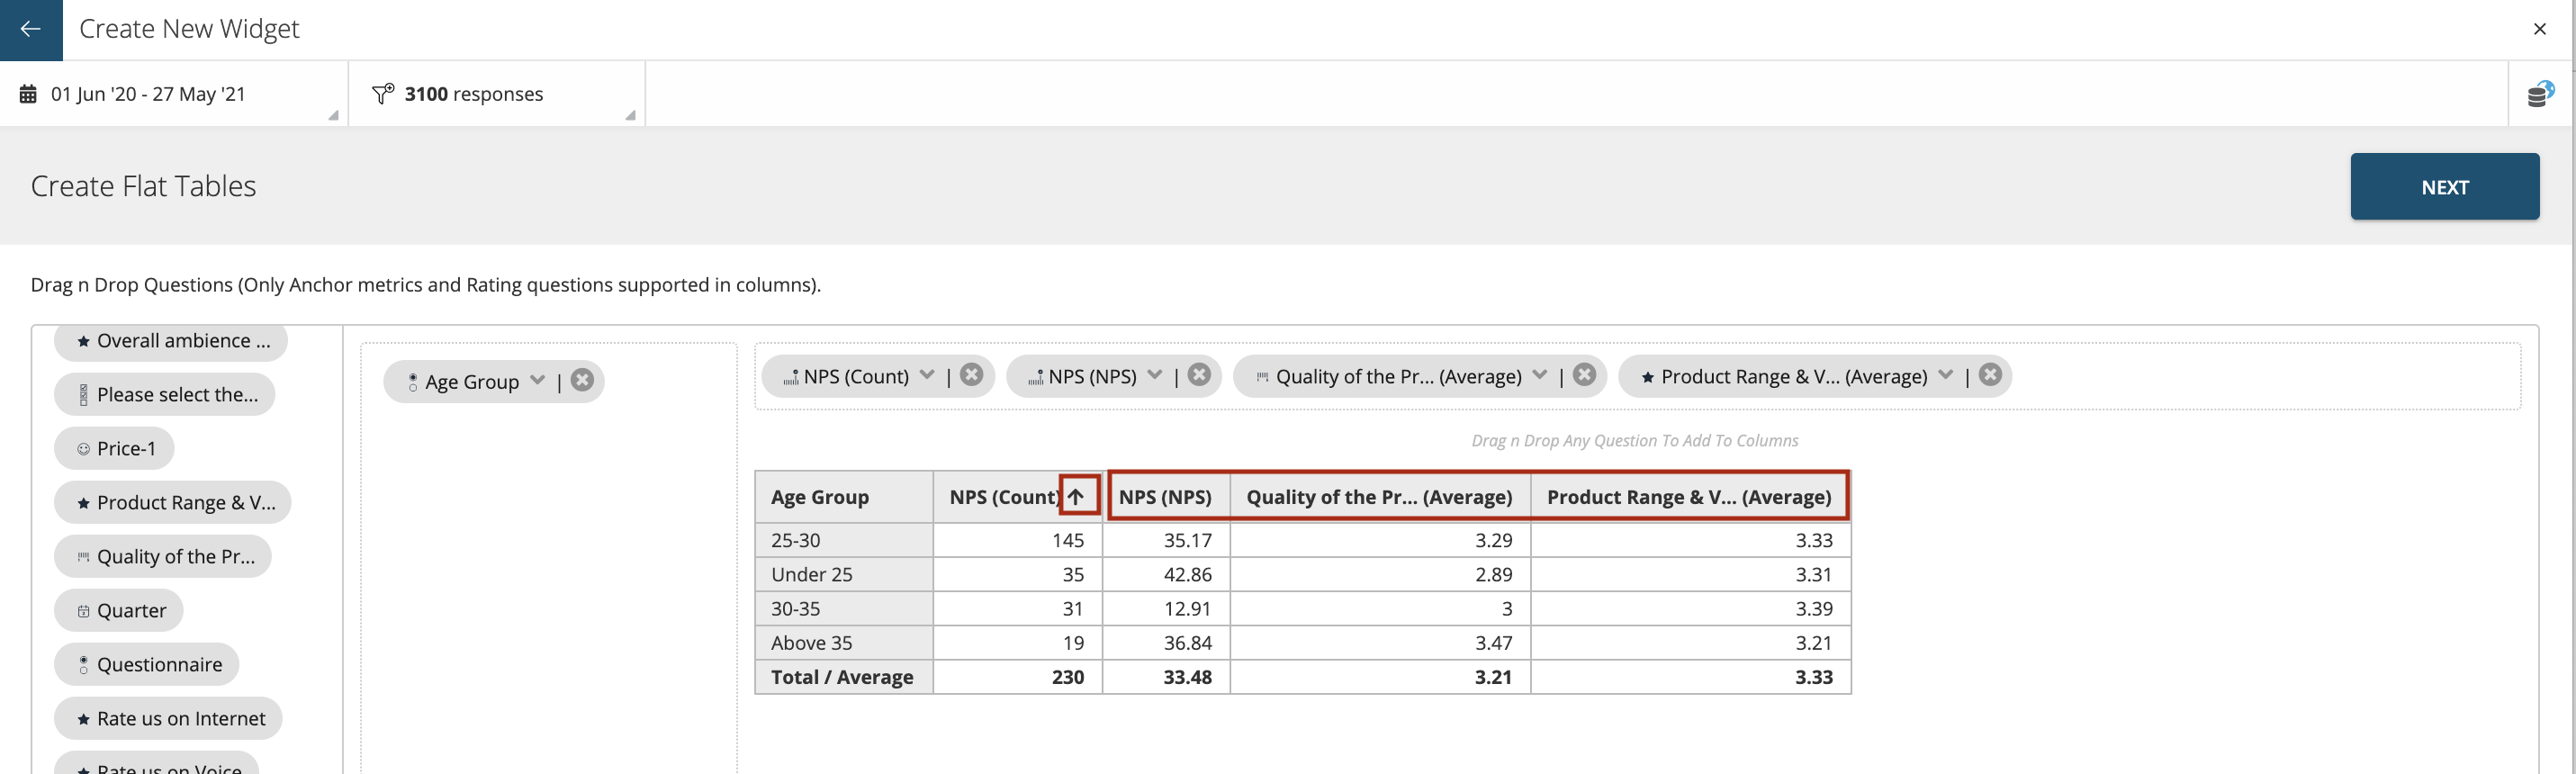
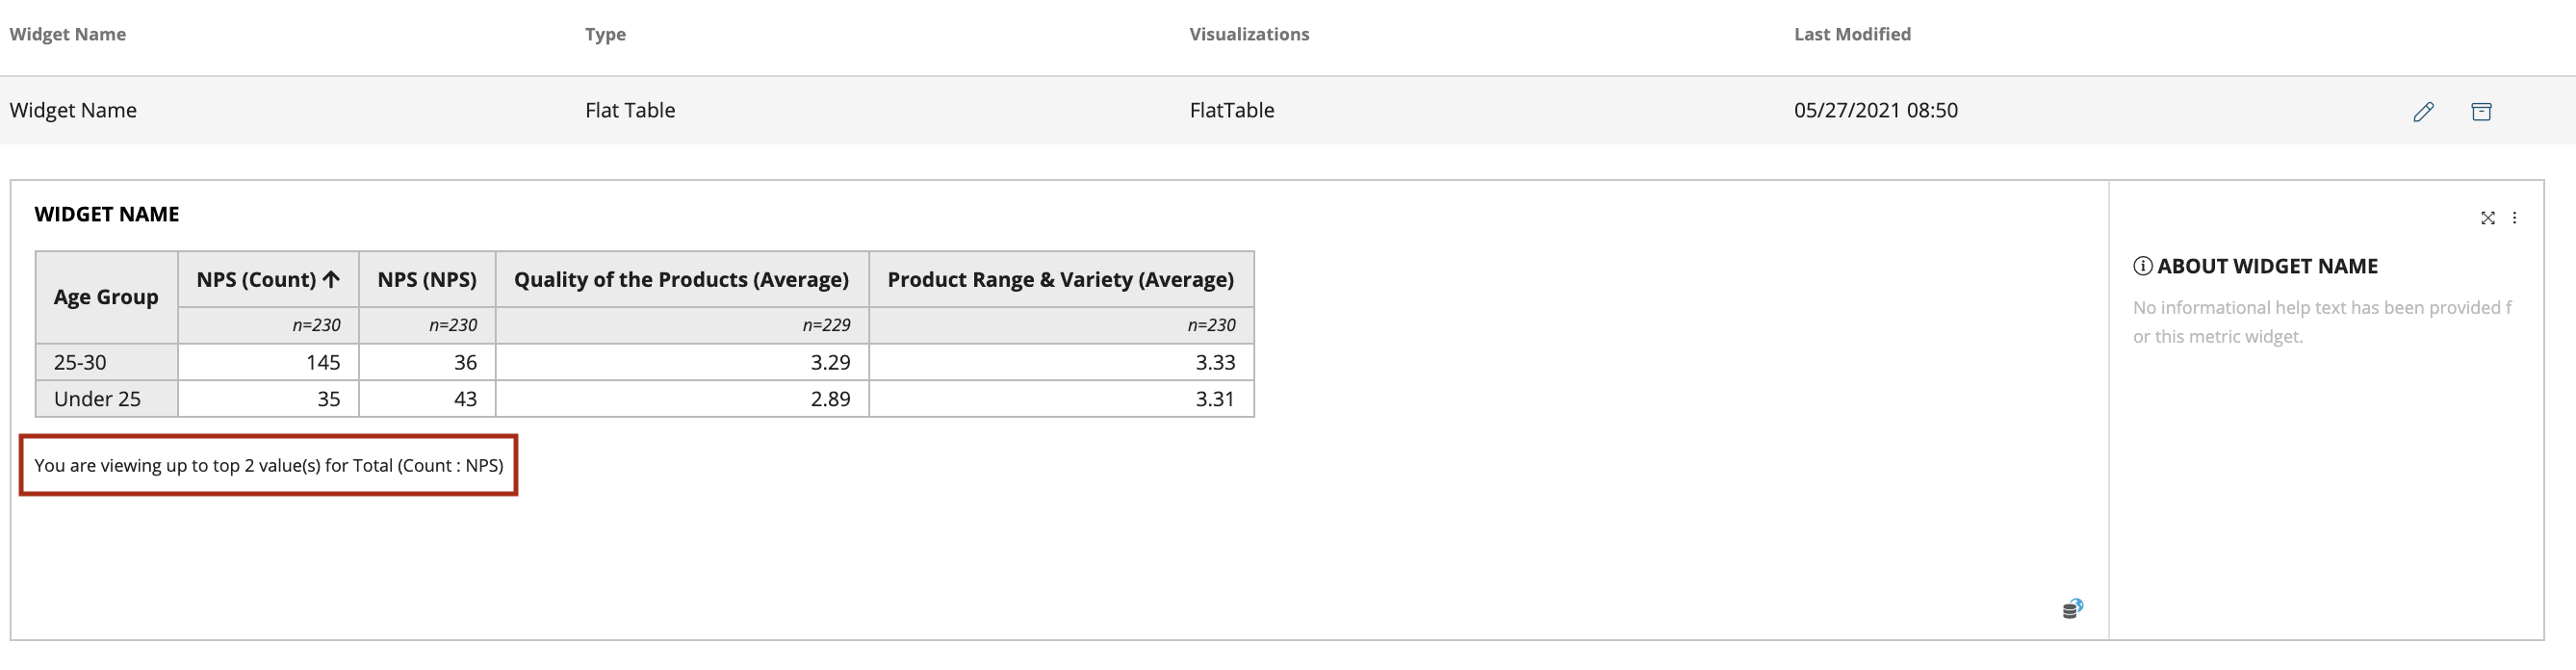
The below screenshot shows upward arrow next to NPS count as the data is sorting in Descending order.
You can also choose to exclude the values from the attributes selected. For instance; in the below example you can choose to exclude data for age group ‘Above 35’.
After clicking on ‘Next’ enter ‘Widget Name’ and ‘Widget Help Text’. This help text is visible to all users. Markdown is supported for help text.The instructions on how to use markdown can be seen on the right hand side of the screen as shown below
Use Markdown syntax for formatting your help text.
For Text Formatting:
Text = Text
Text = Text
Text = Text
INSERT IMAGE
Include a image URL (hosted online) as
The ‘Table Settings’ will show you the summary of the sort order that you have applied on the Flat Table. For e.g.: according to the above screenshot the summary shows that the ‘Table is configured to be sorted by NPS (Count) in Descending order’
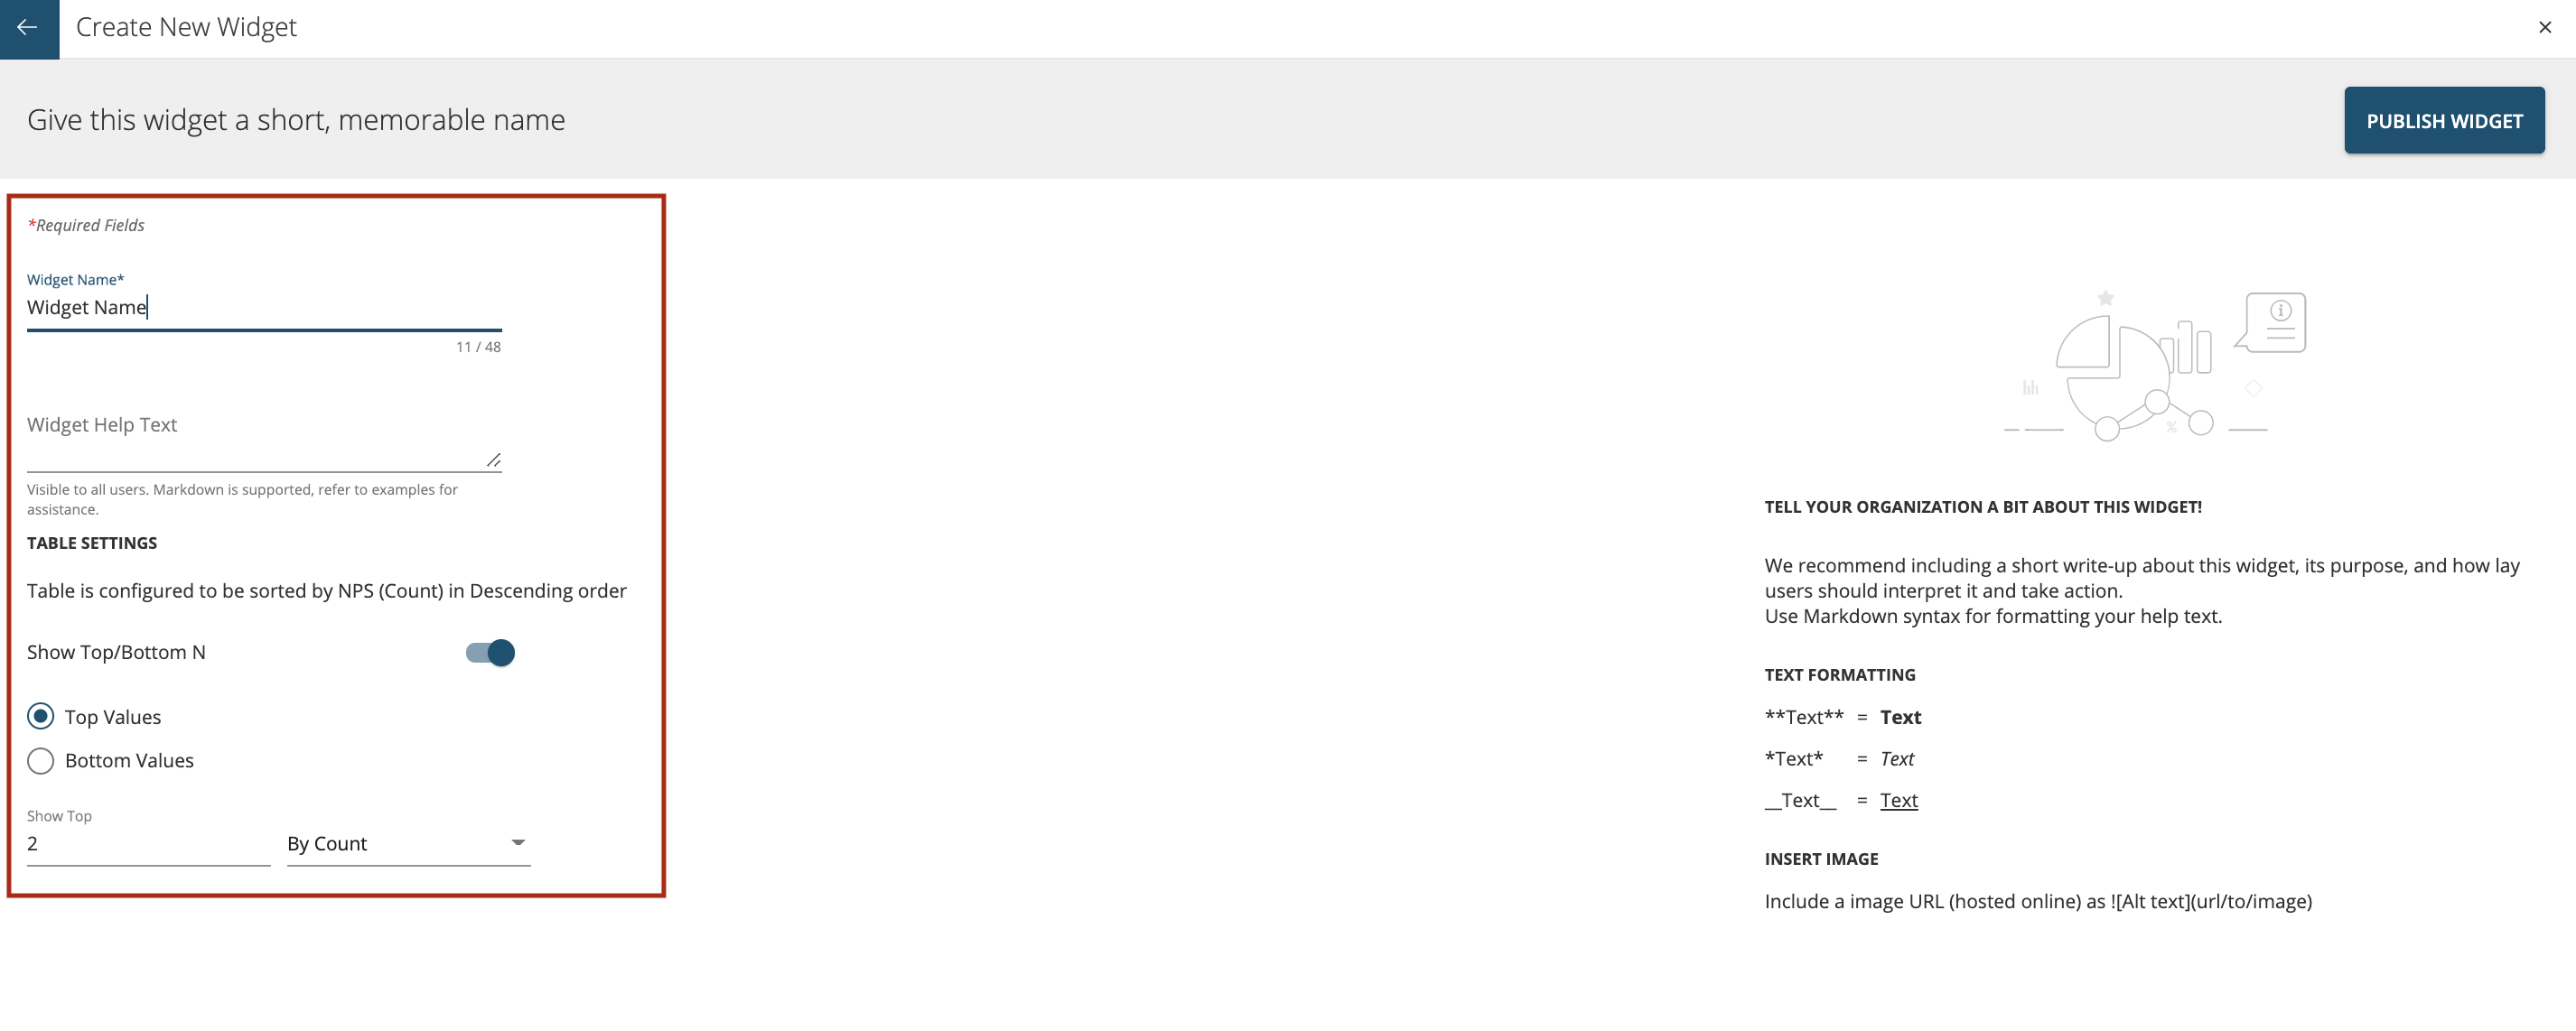
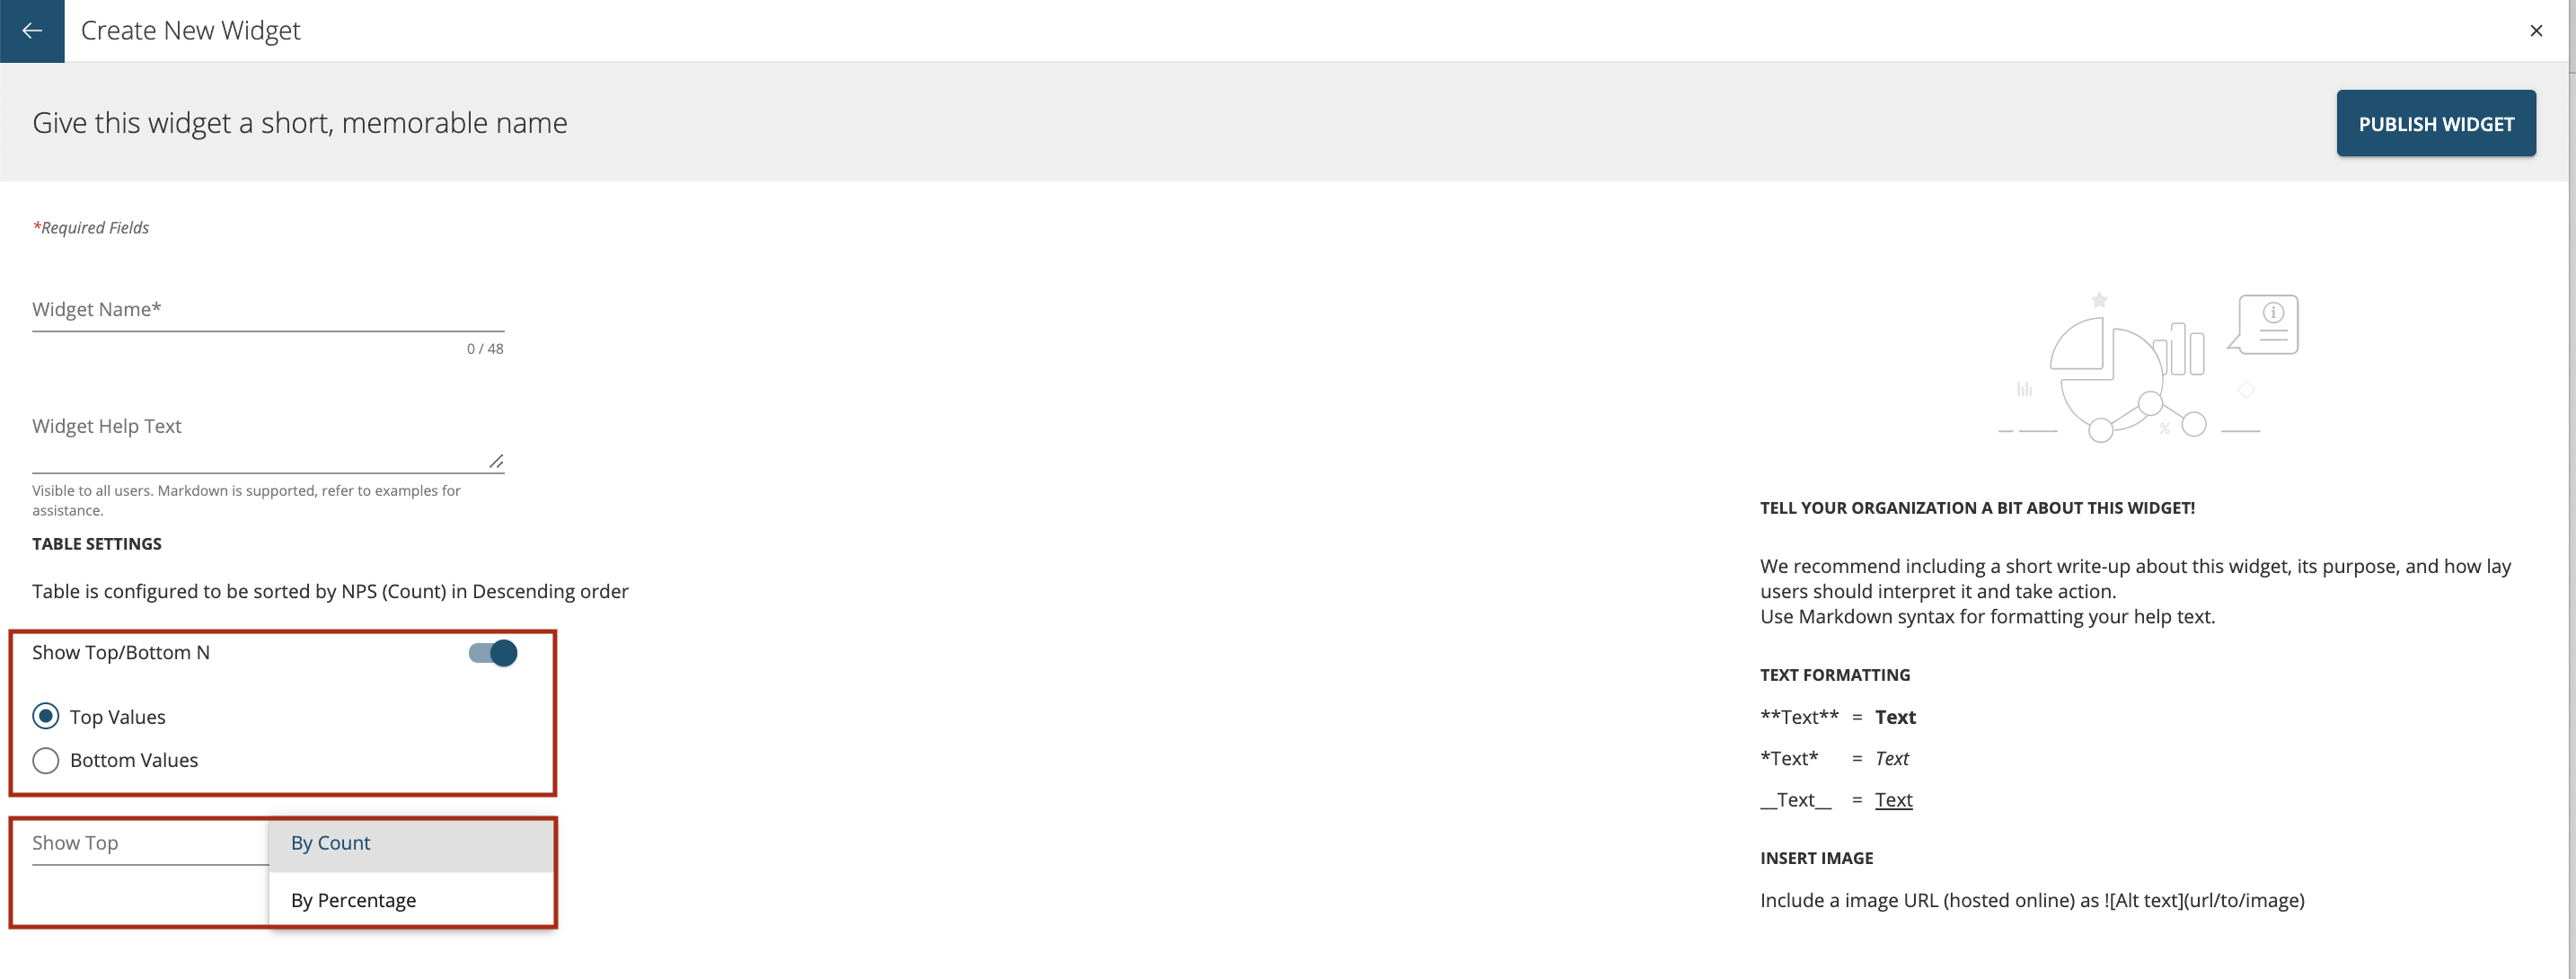
You can also select to show ‘Top Values’ or ‘Bottom Values’ in the table. These values can be shown:
- By Count
- By Percentage Select how many top values you would like to show, for e.g.: 2 or 3 or 4 etc.
Then press ‘Publish Widget’ to save and later publish it on the dashboard/space.
The Flat Table Preview shows the summary of the values selected i.e. ‘You are viewing up to top 2 value(s) for Total (Count : NPS)'
Widgets Management
Search Widgets
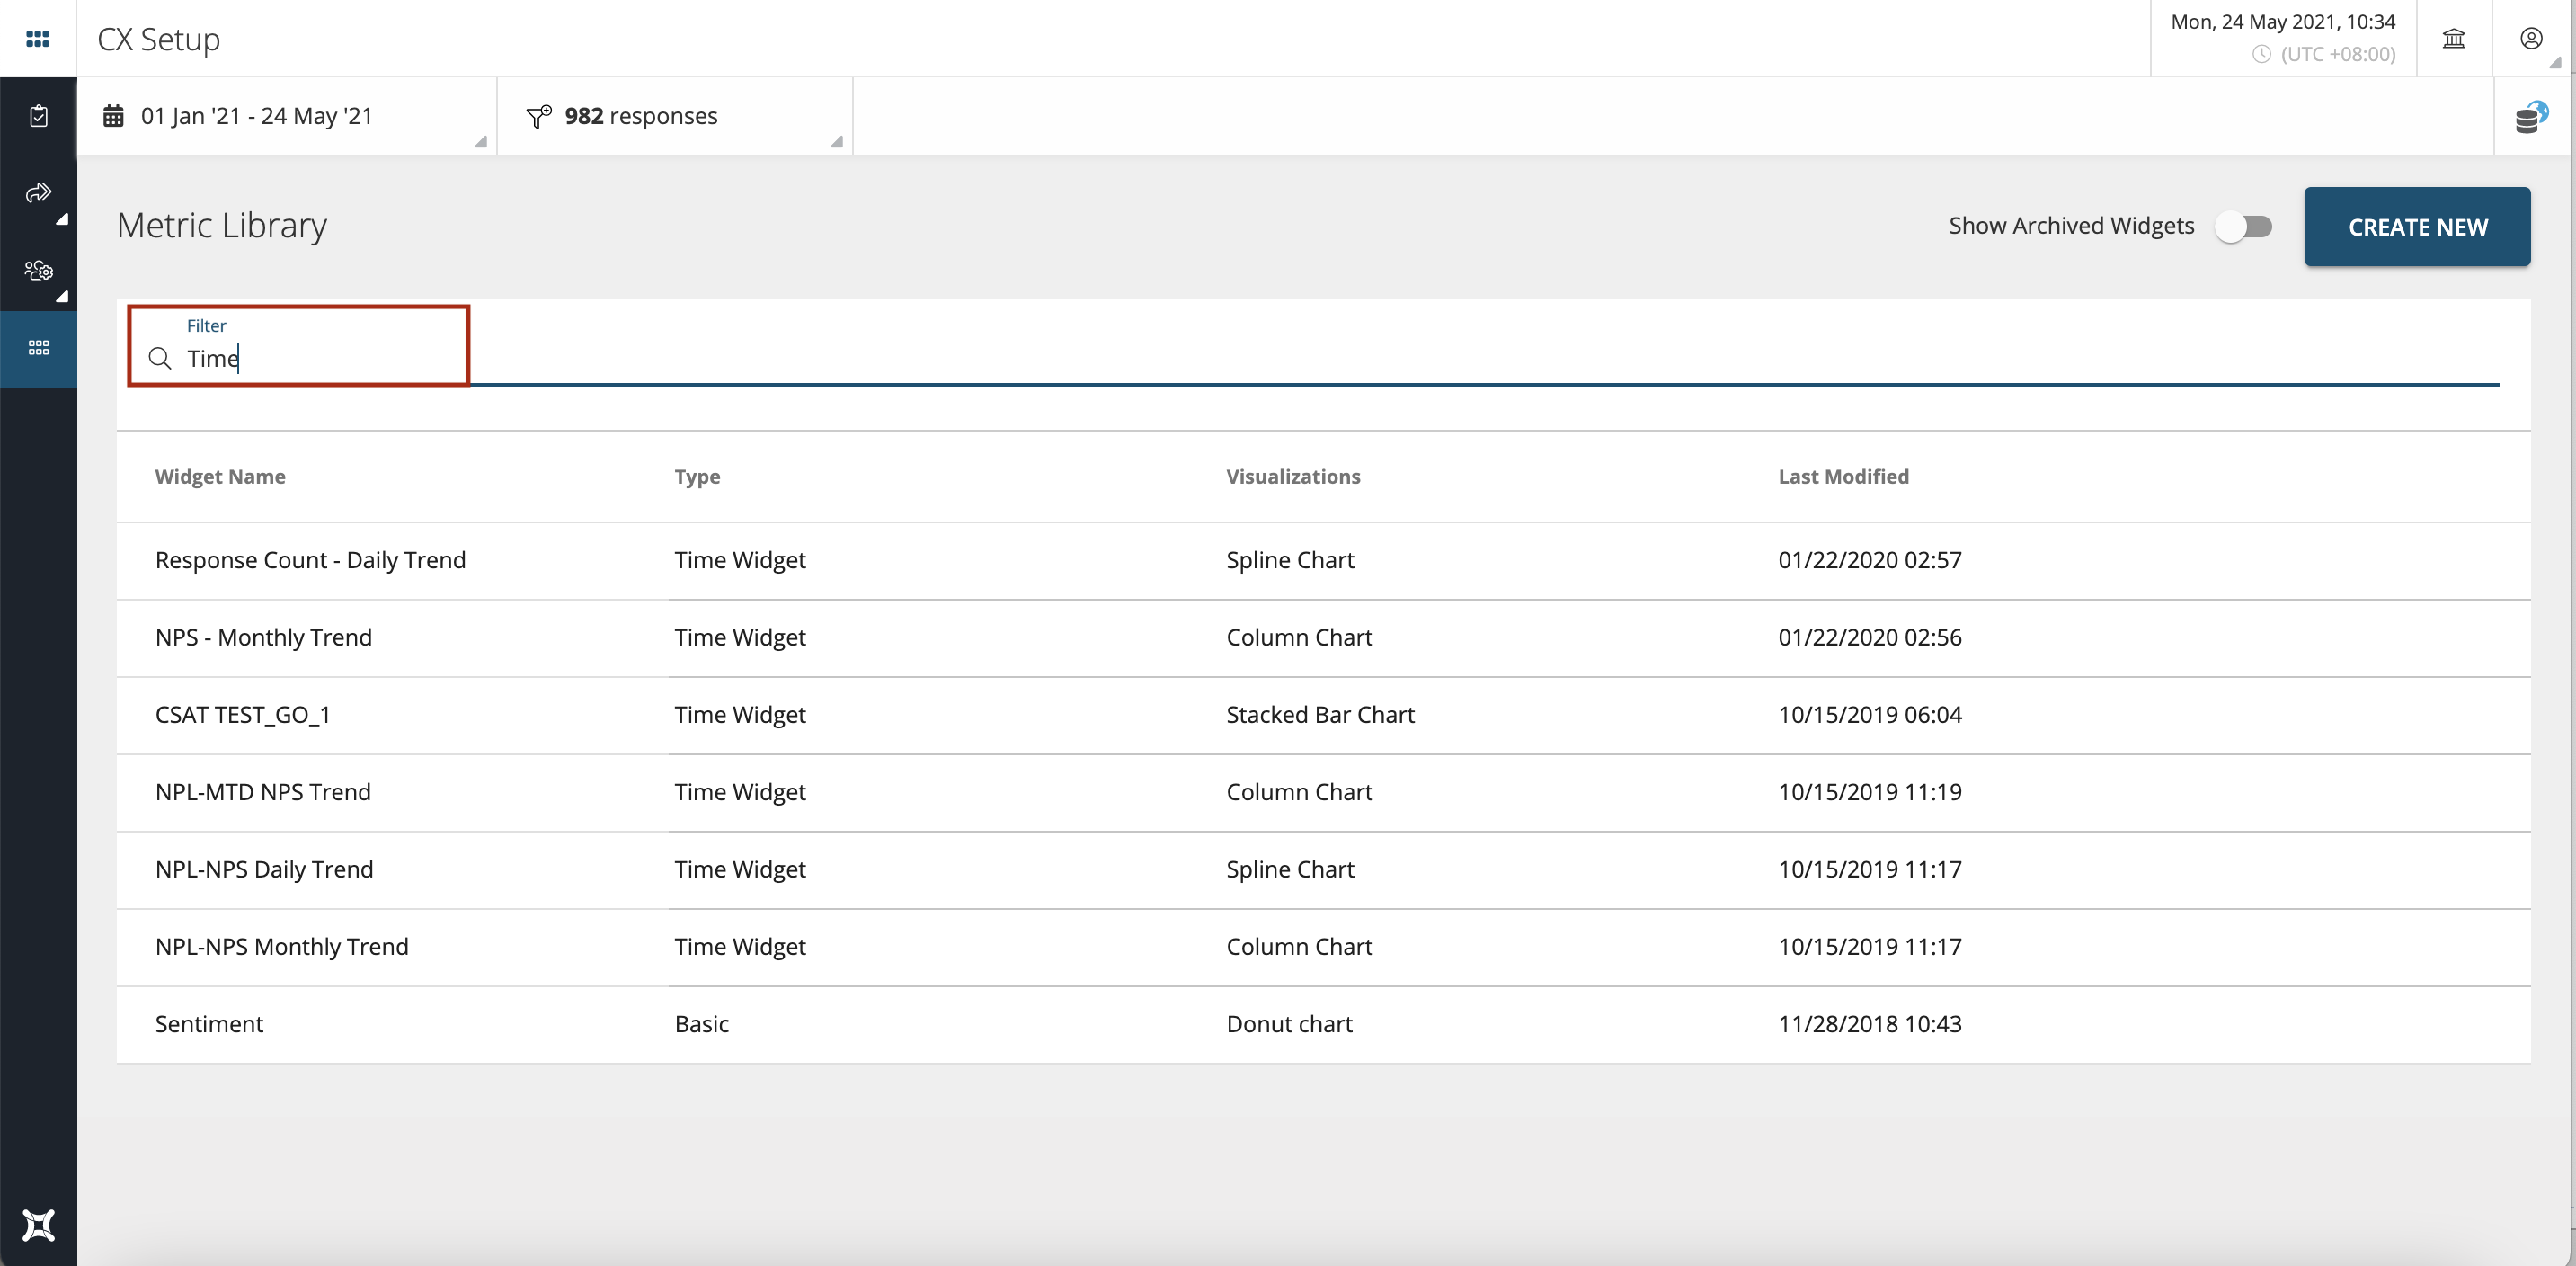
You can search the widgets from the list of widgets by typing in the keywords as shown below. The result will show all the widgets where that word exists whether in widget name or type of widget.
Preview Widgets
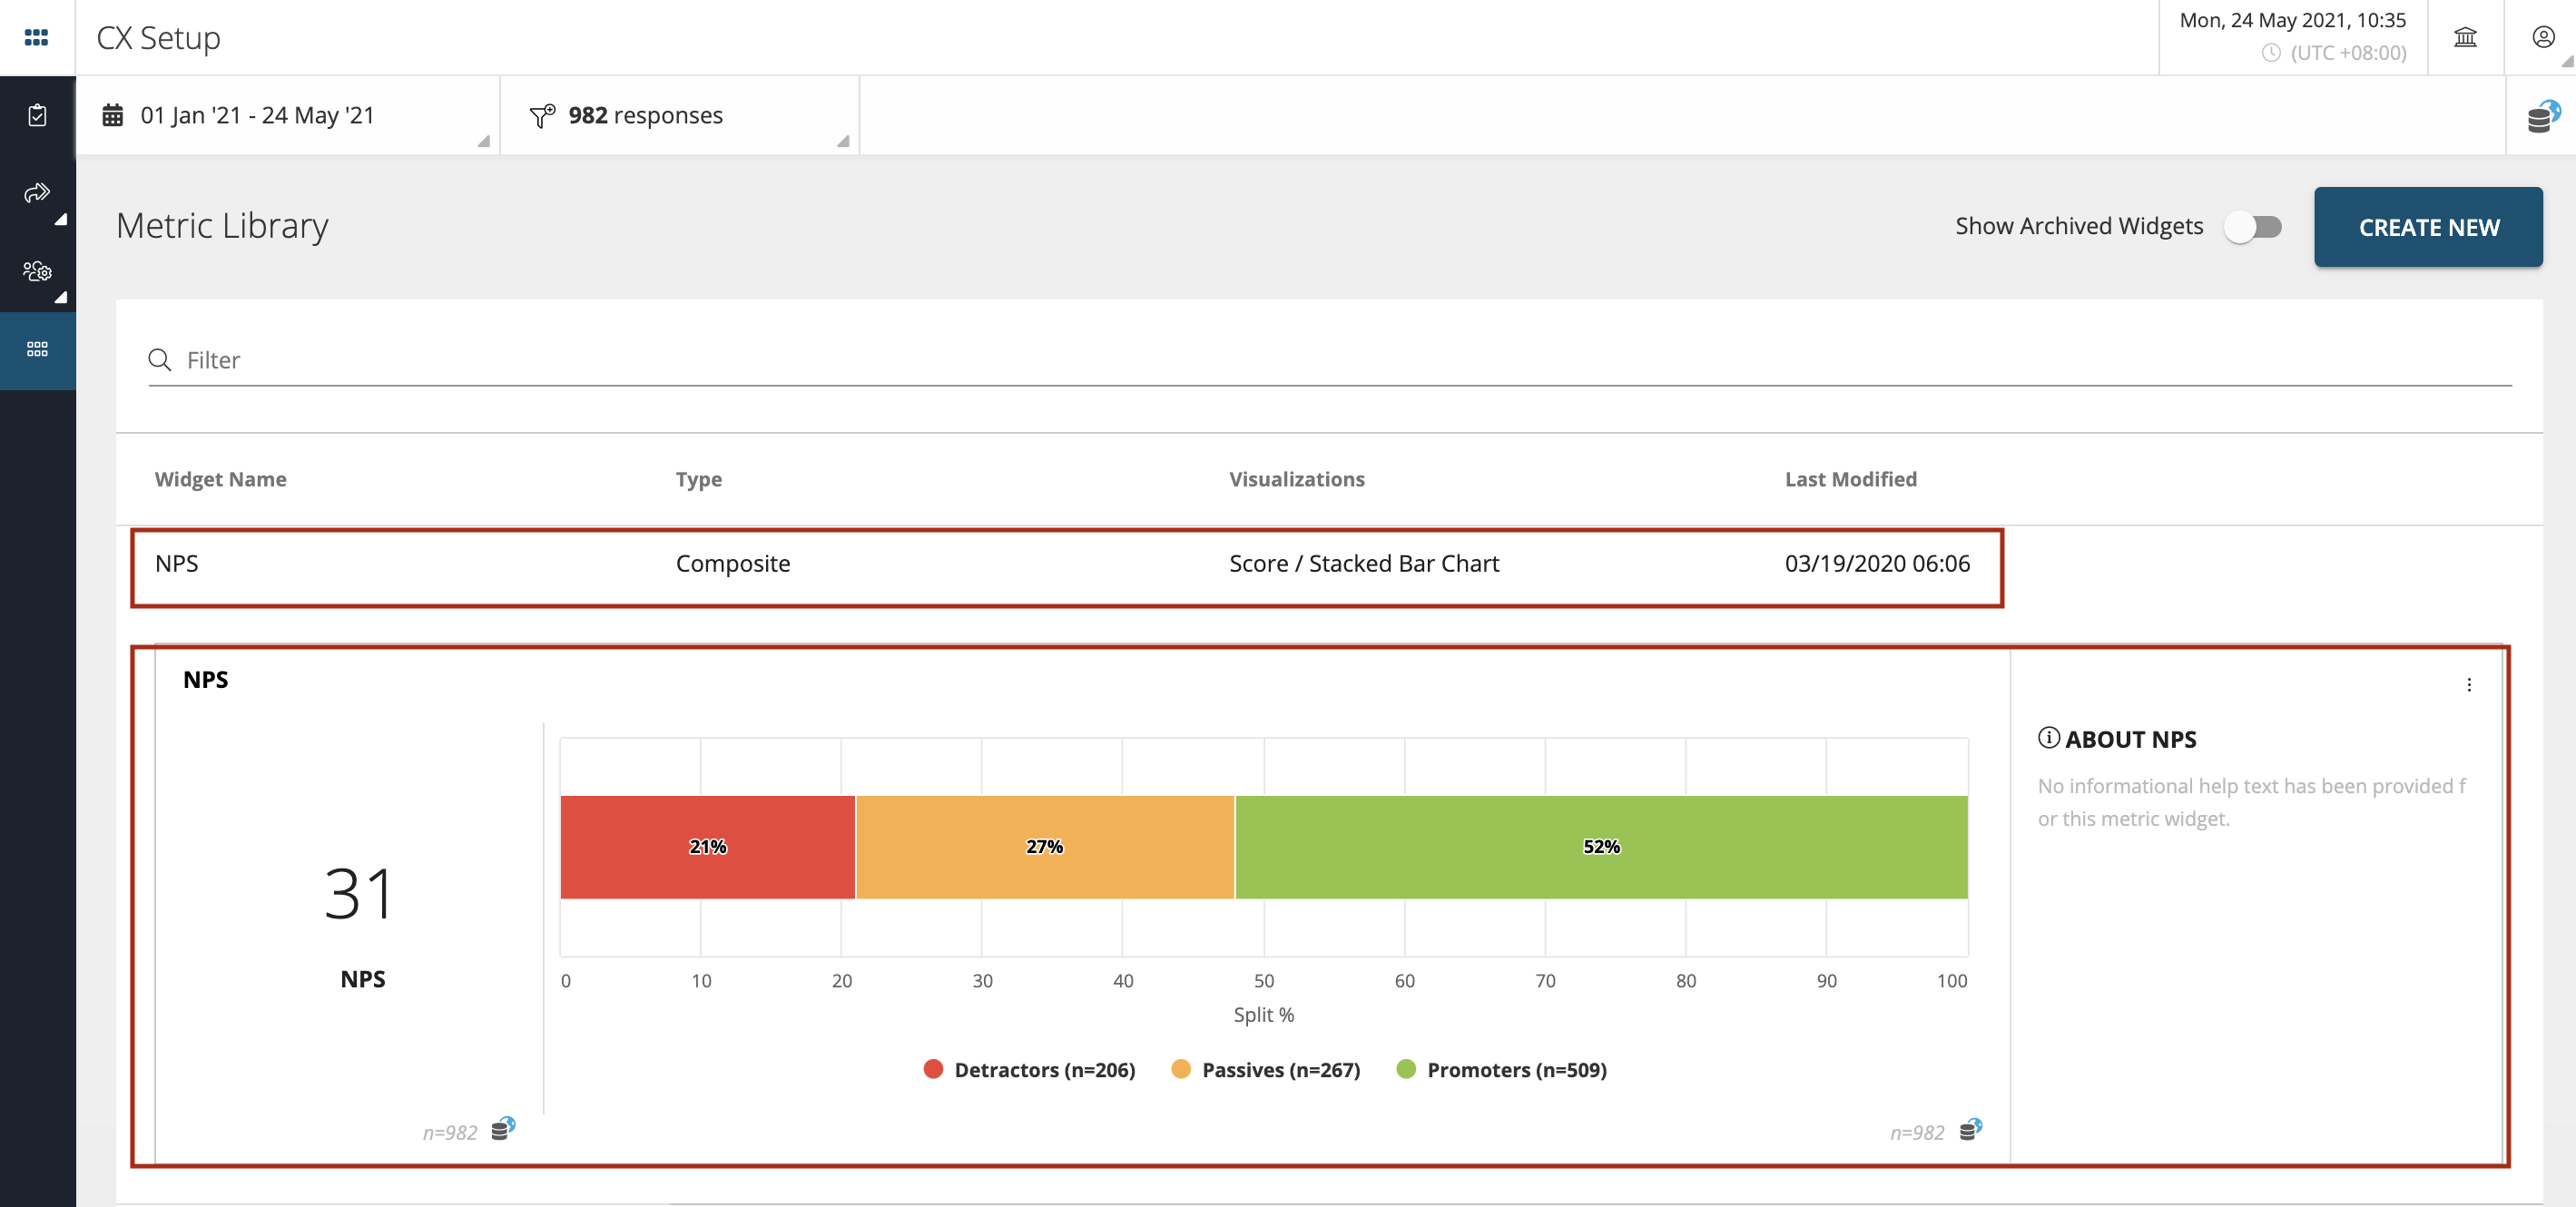
You can preview the widgets from the list of widgets by clicking on the widget row as shown
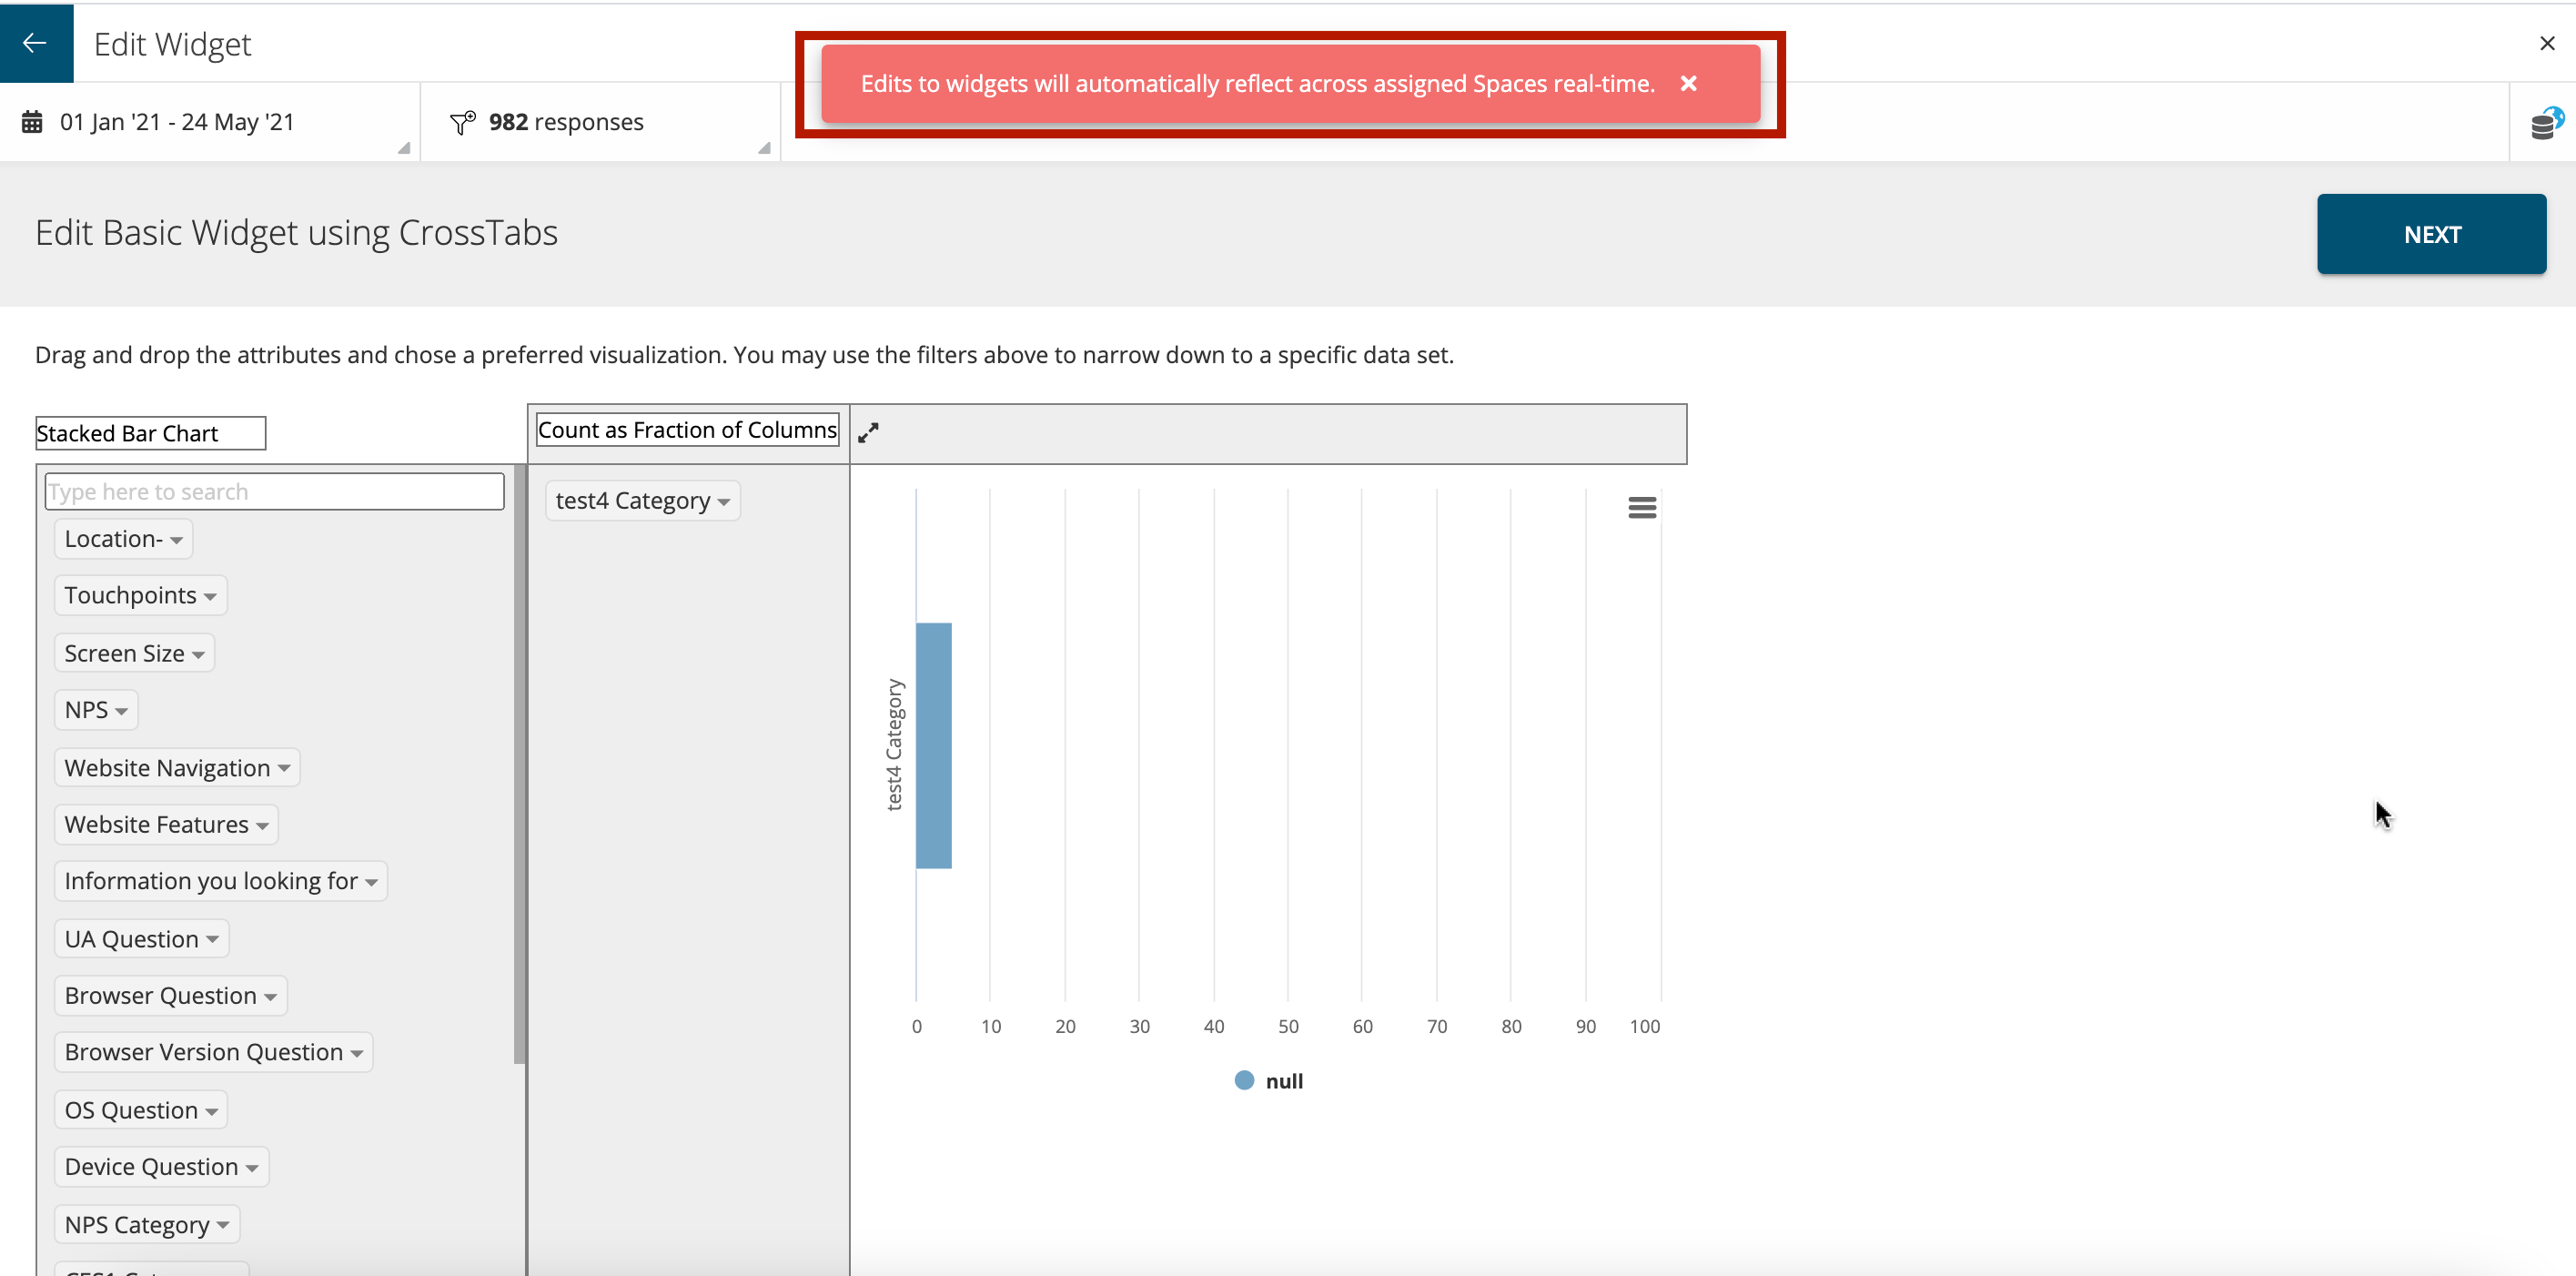
Edit Widgets
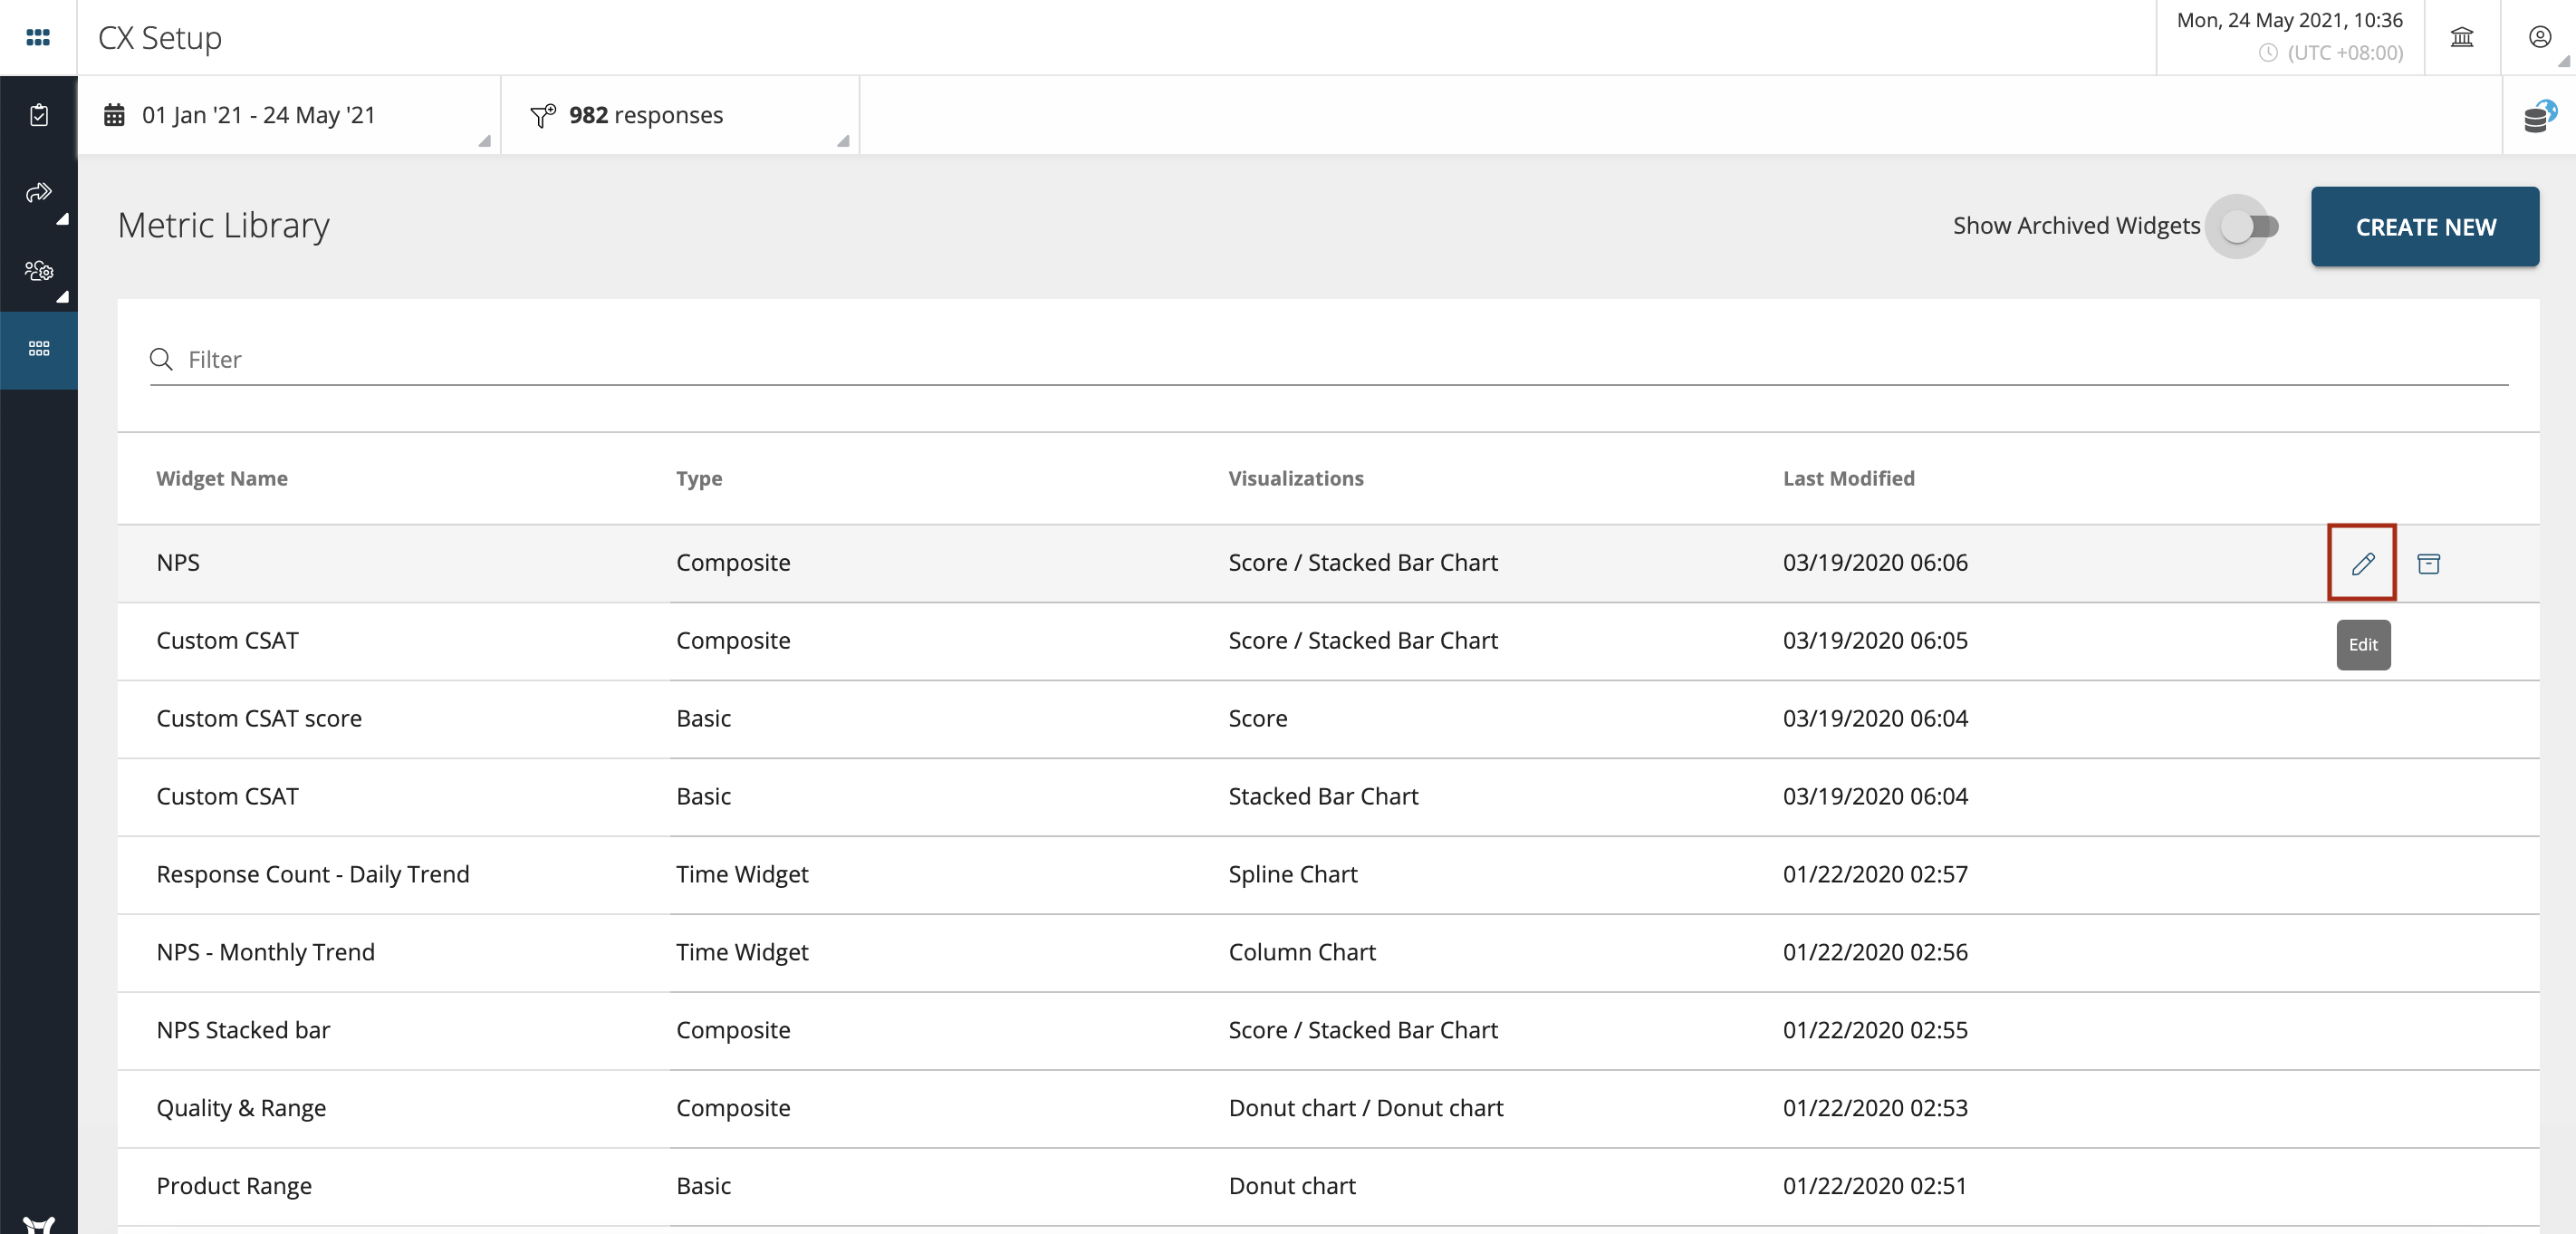
You can edit the existing widgets by clicking on ‘Edit’ button as shown below.
Any edits made to the existing widgets will automatically reflect across assigned spaces in real-time. After making the necessary edits press ‘Next’ to save/update the changes made.
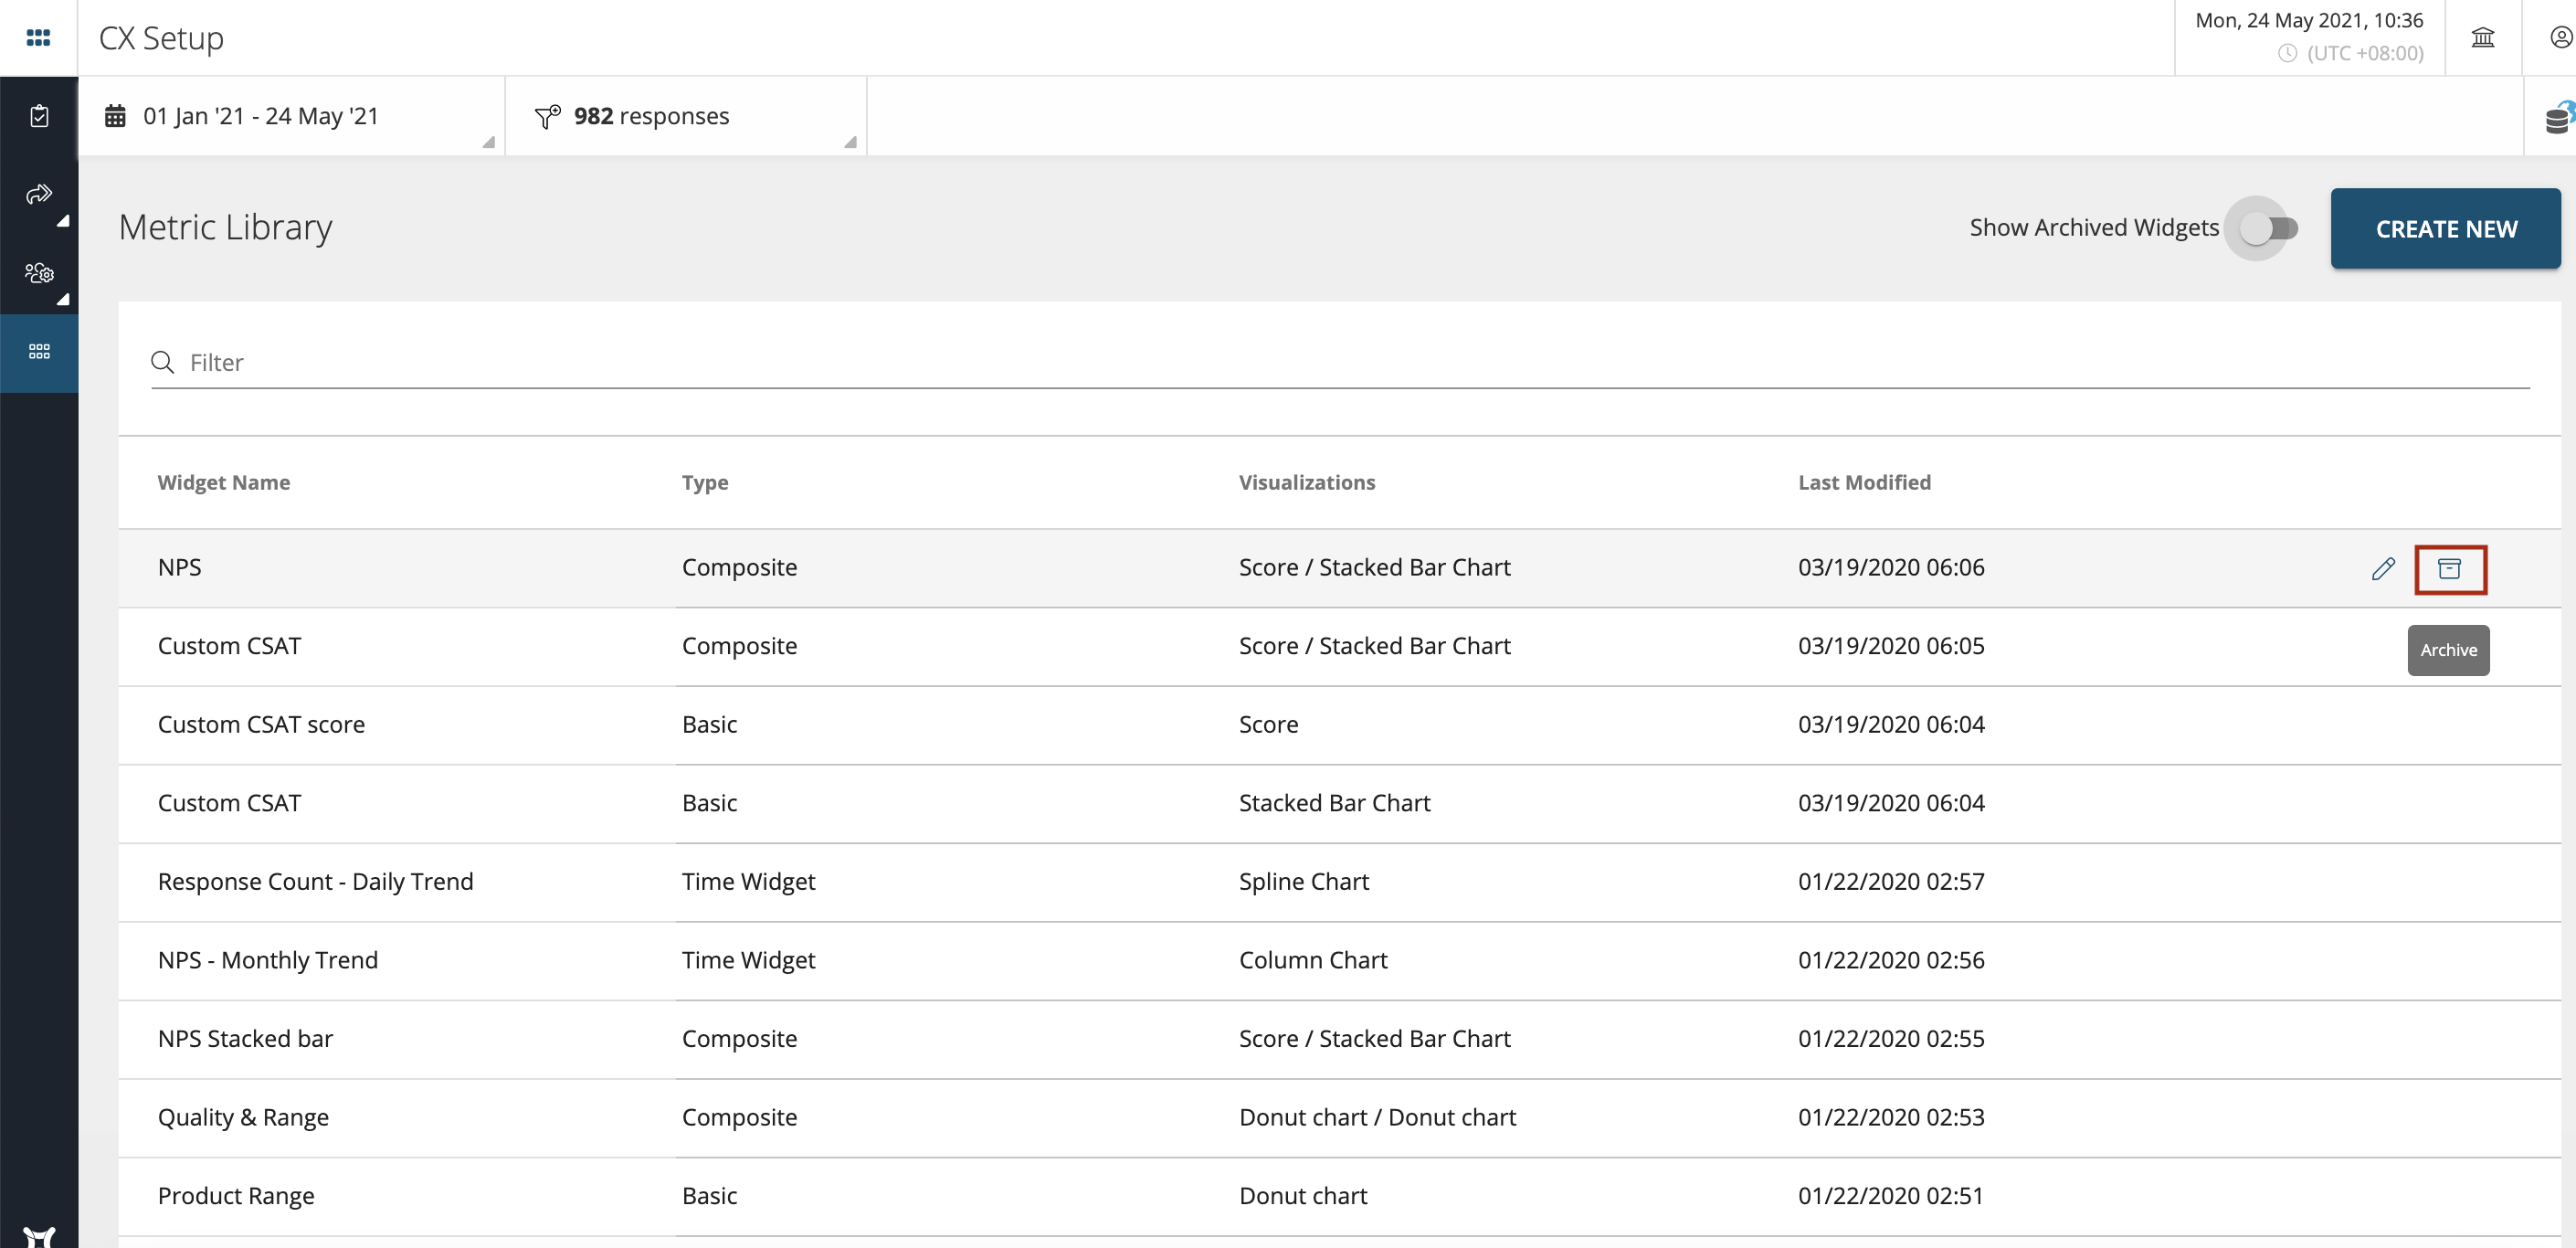
Archive/Unarchive Widgets
Archive Widget: Archiving a widget will hide it from metrics and users will not be able to add them to metric groups. You can still continue to include basic archived widgets to create composite widgets which will be available for all users.
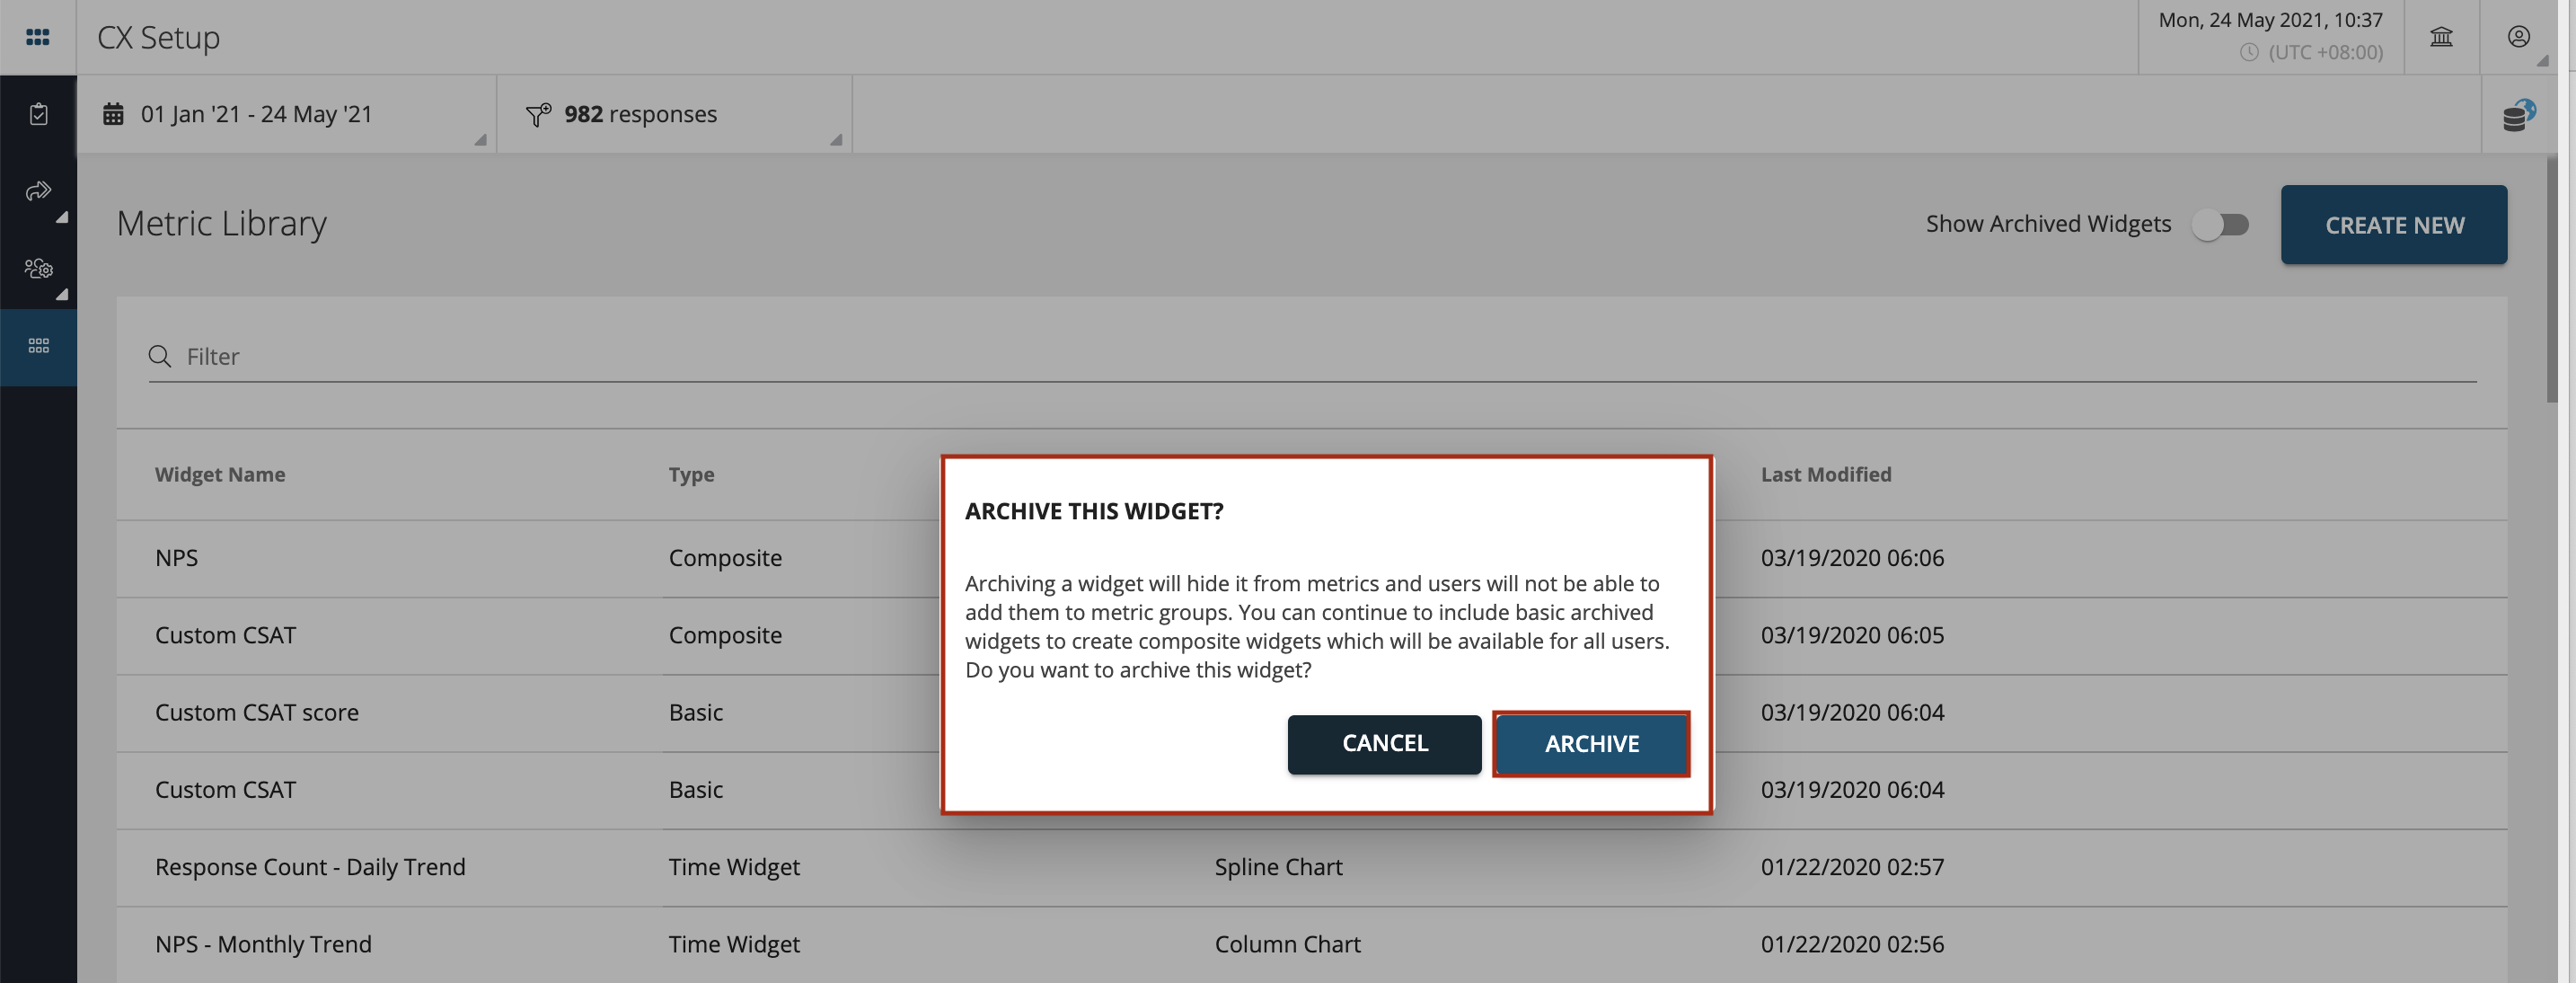
To Archive, select the widget row and click on ‘Archive’ icon as shown below.
Press ‘Archive’
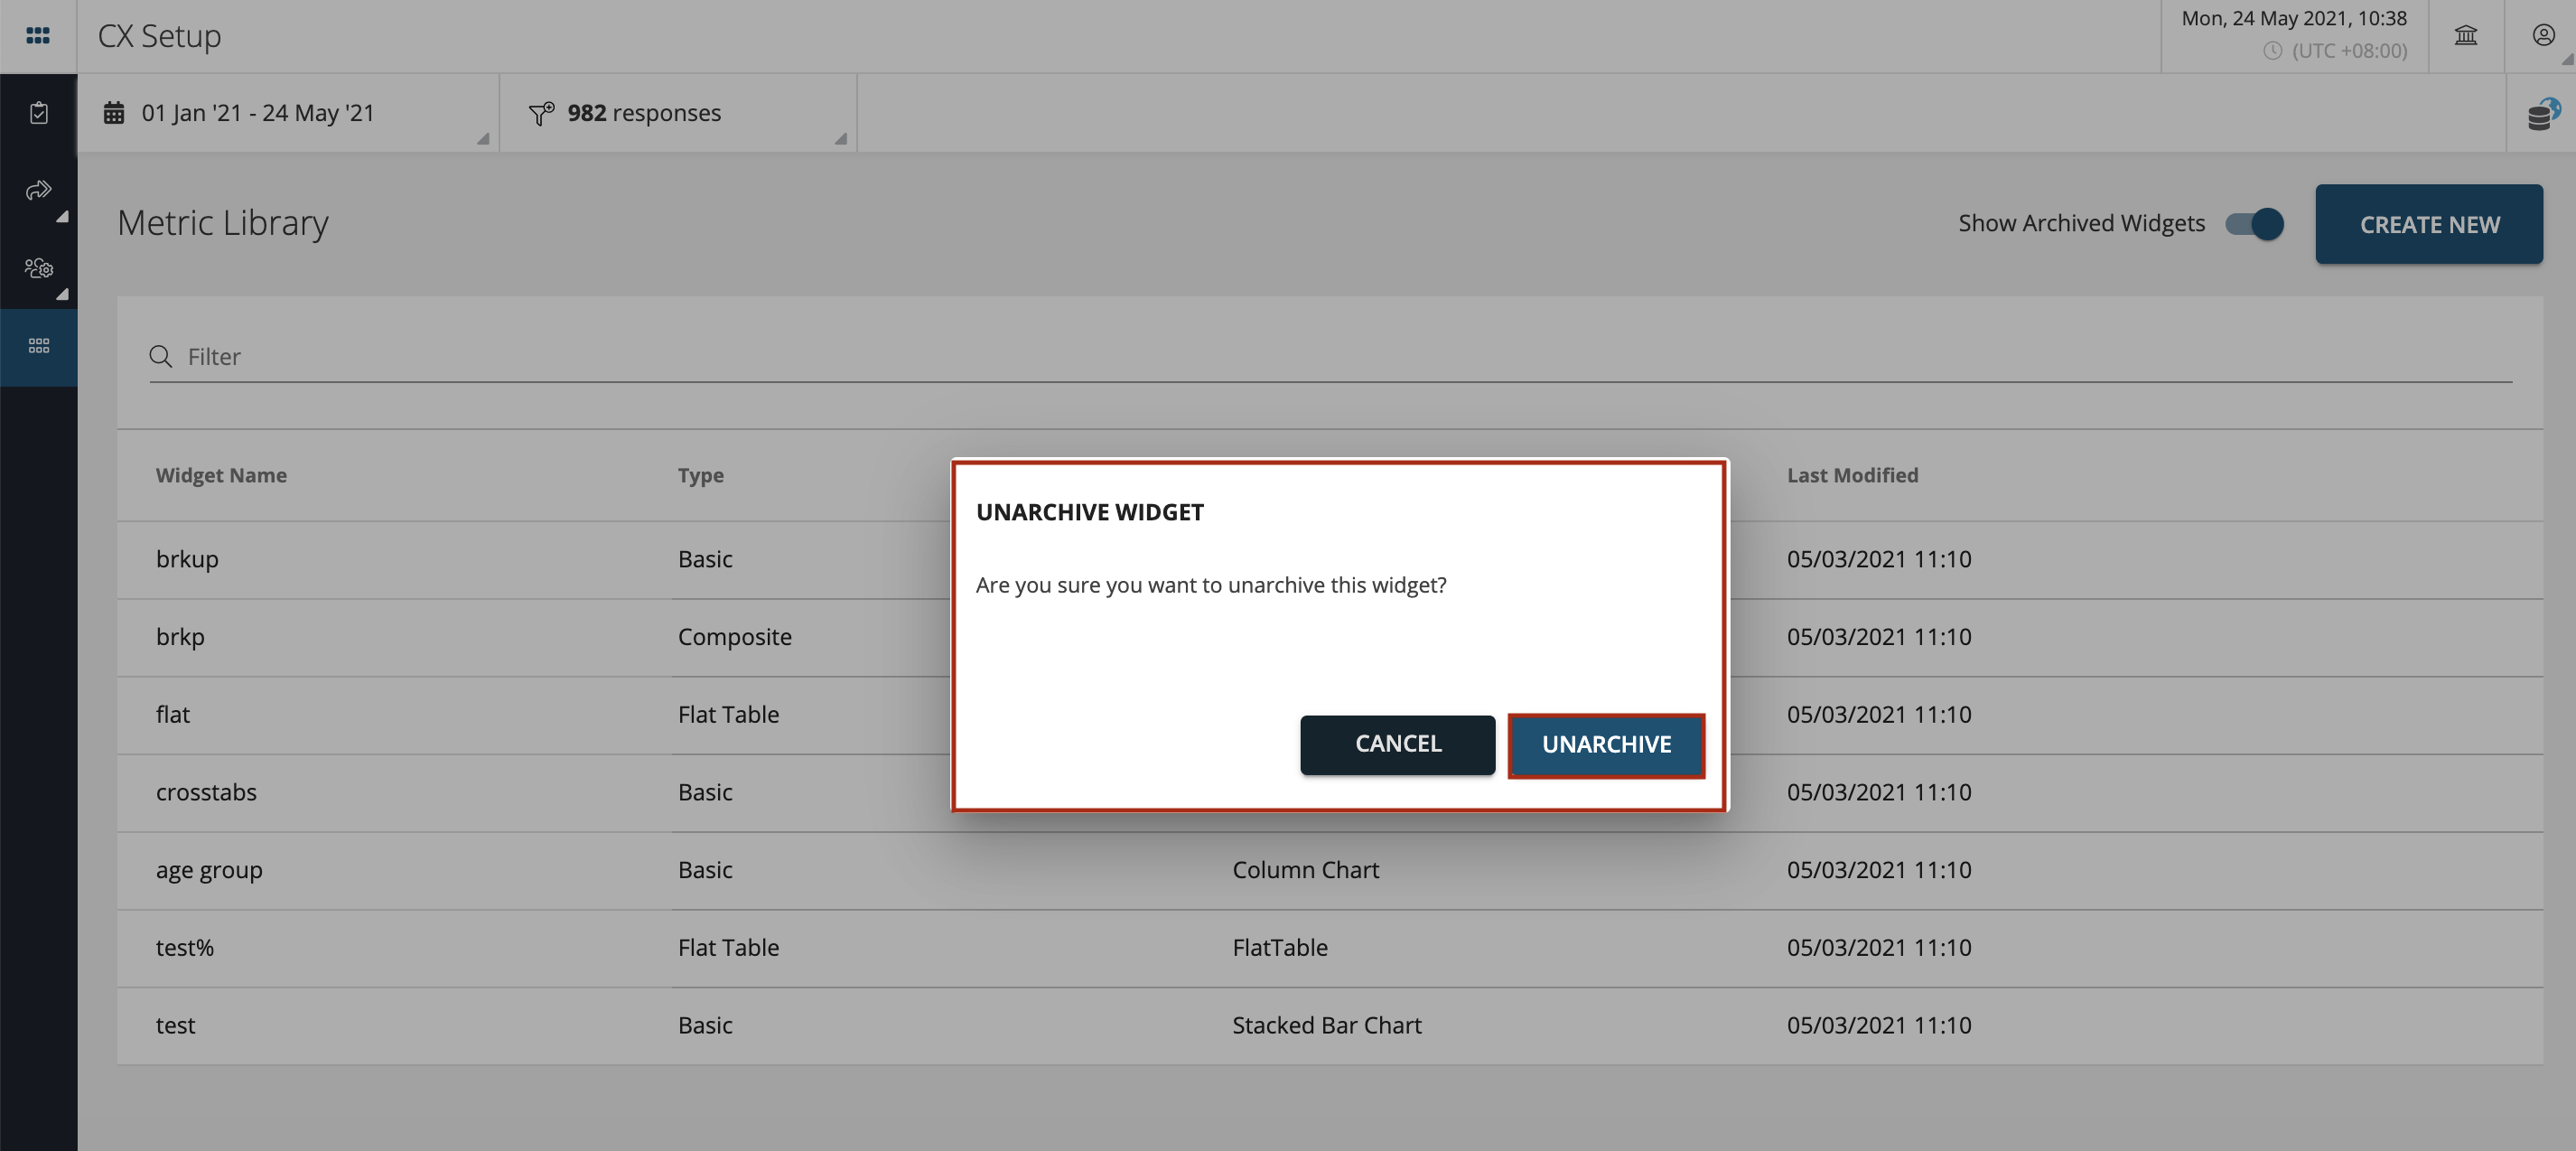
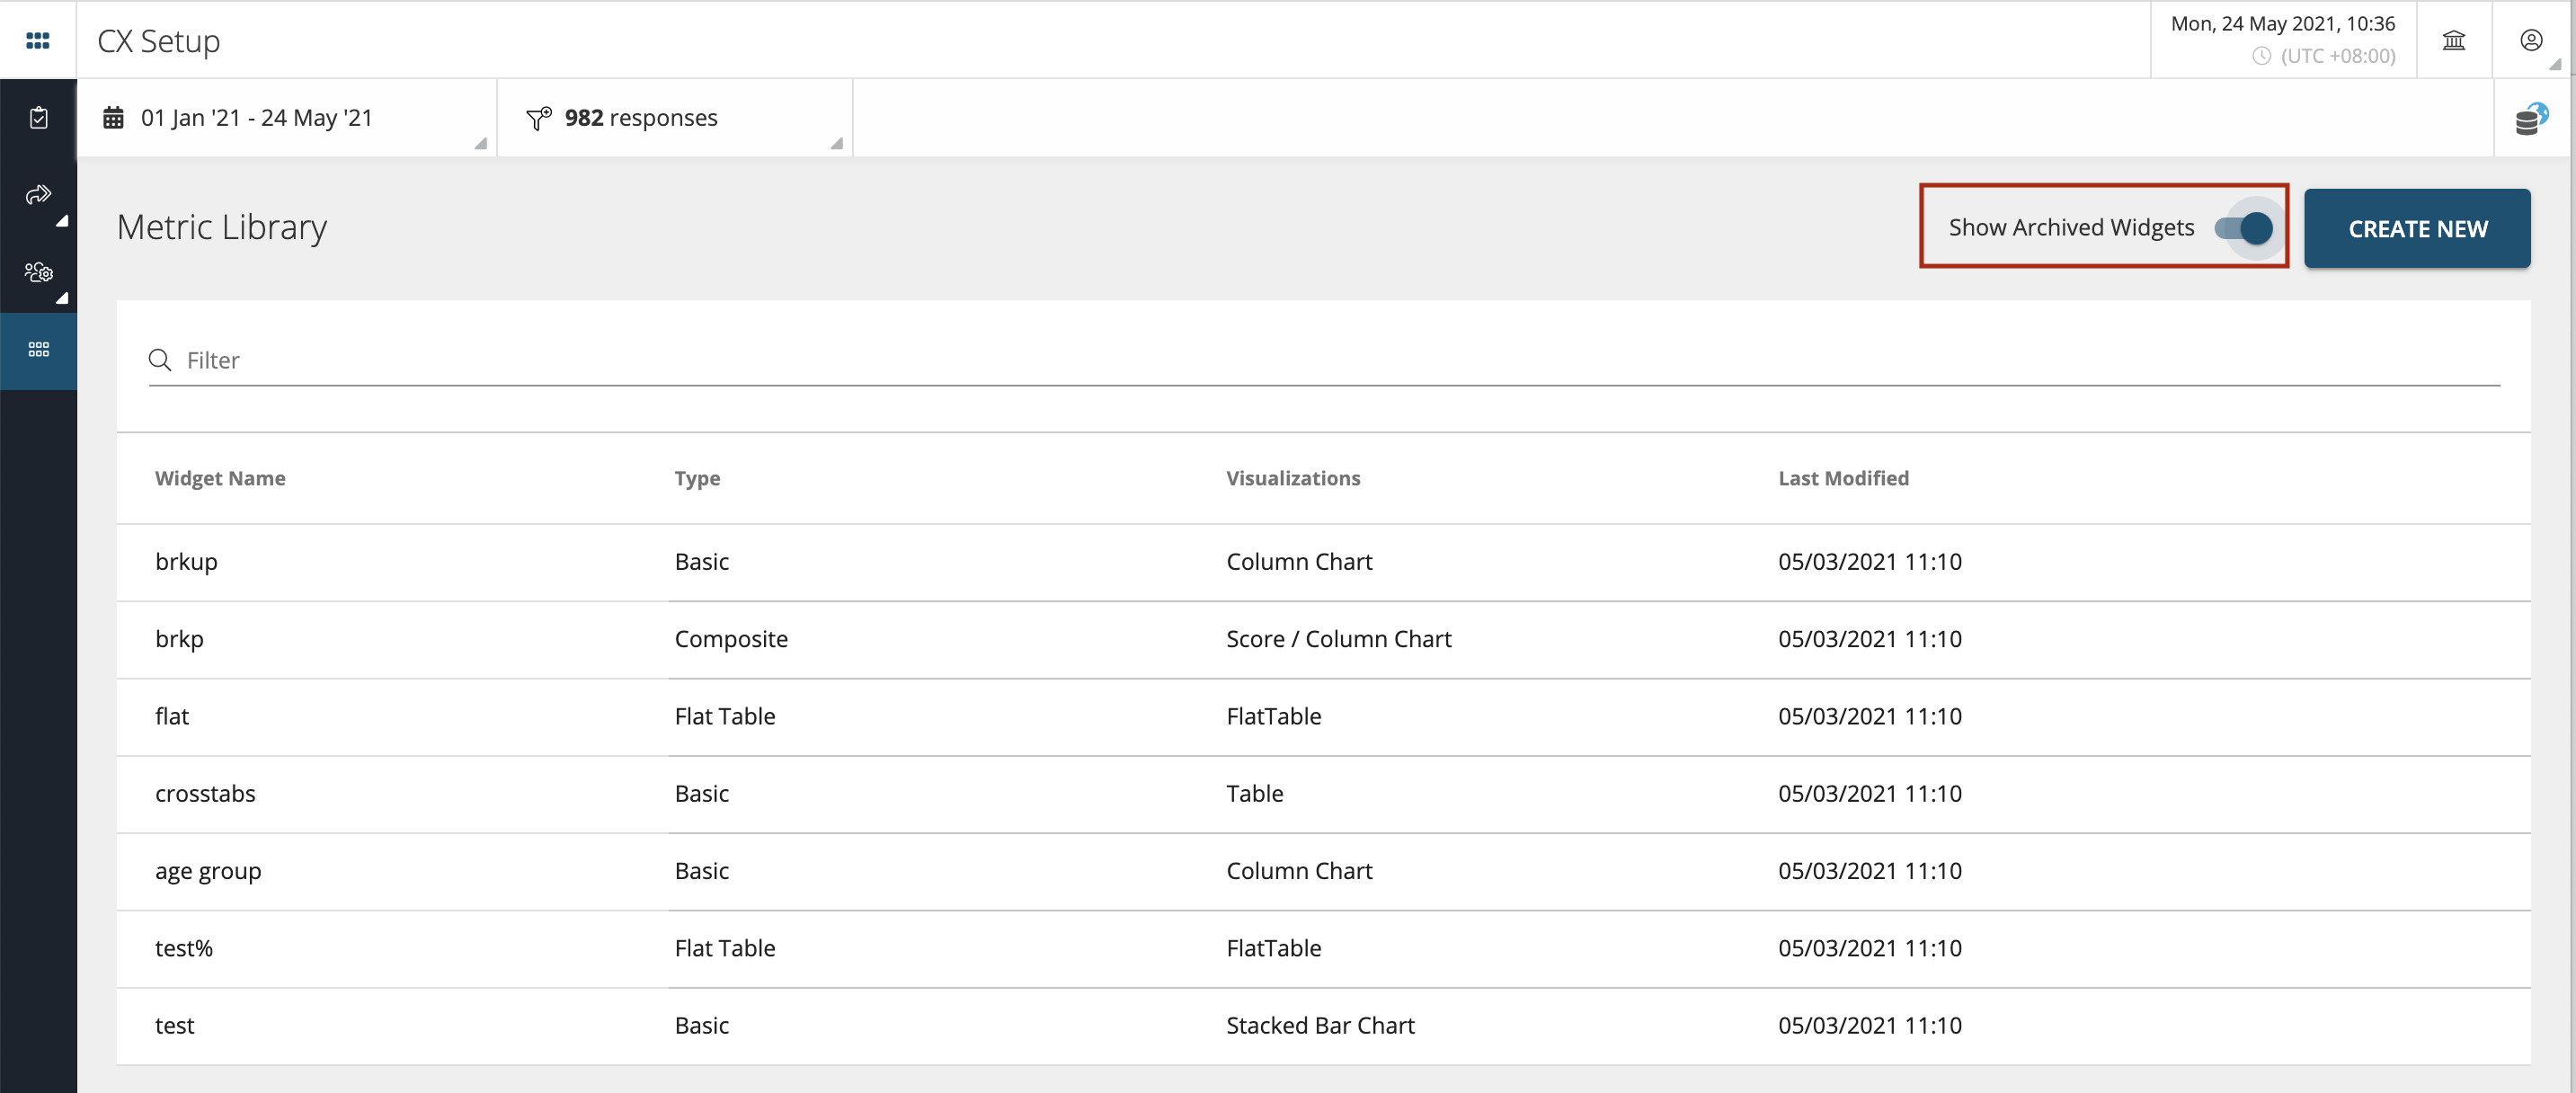
Unarchive Widget: You can also unarchive the widgets which you have archived in the past.
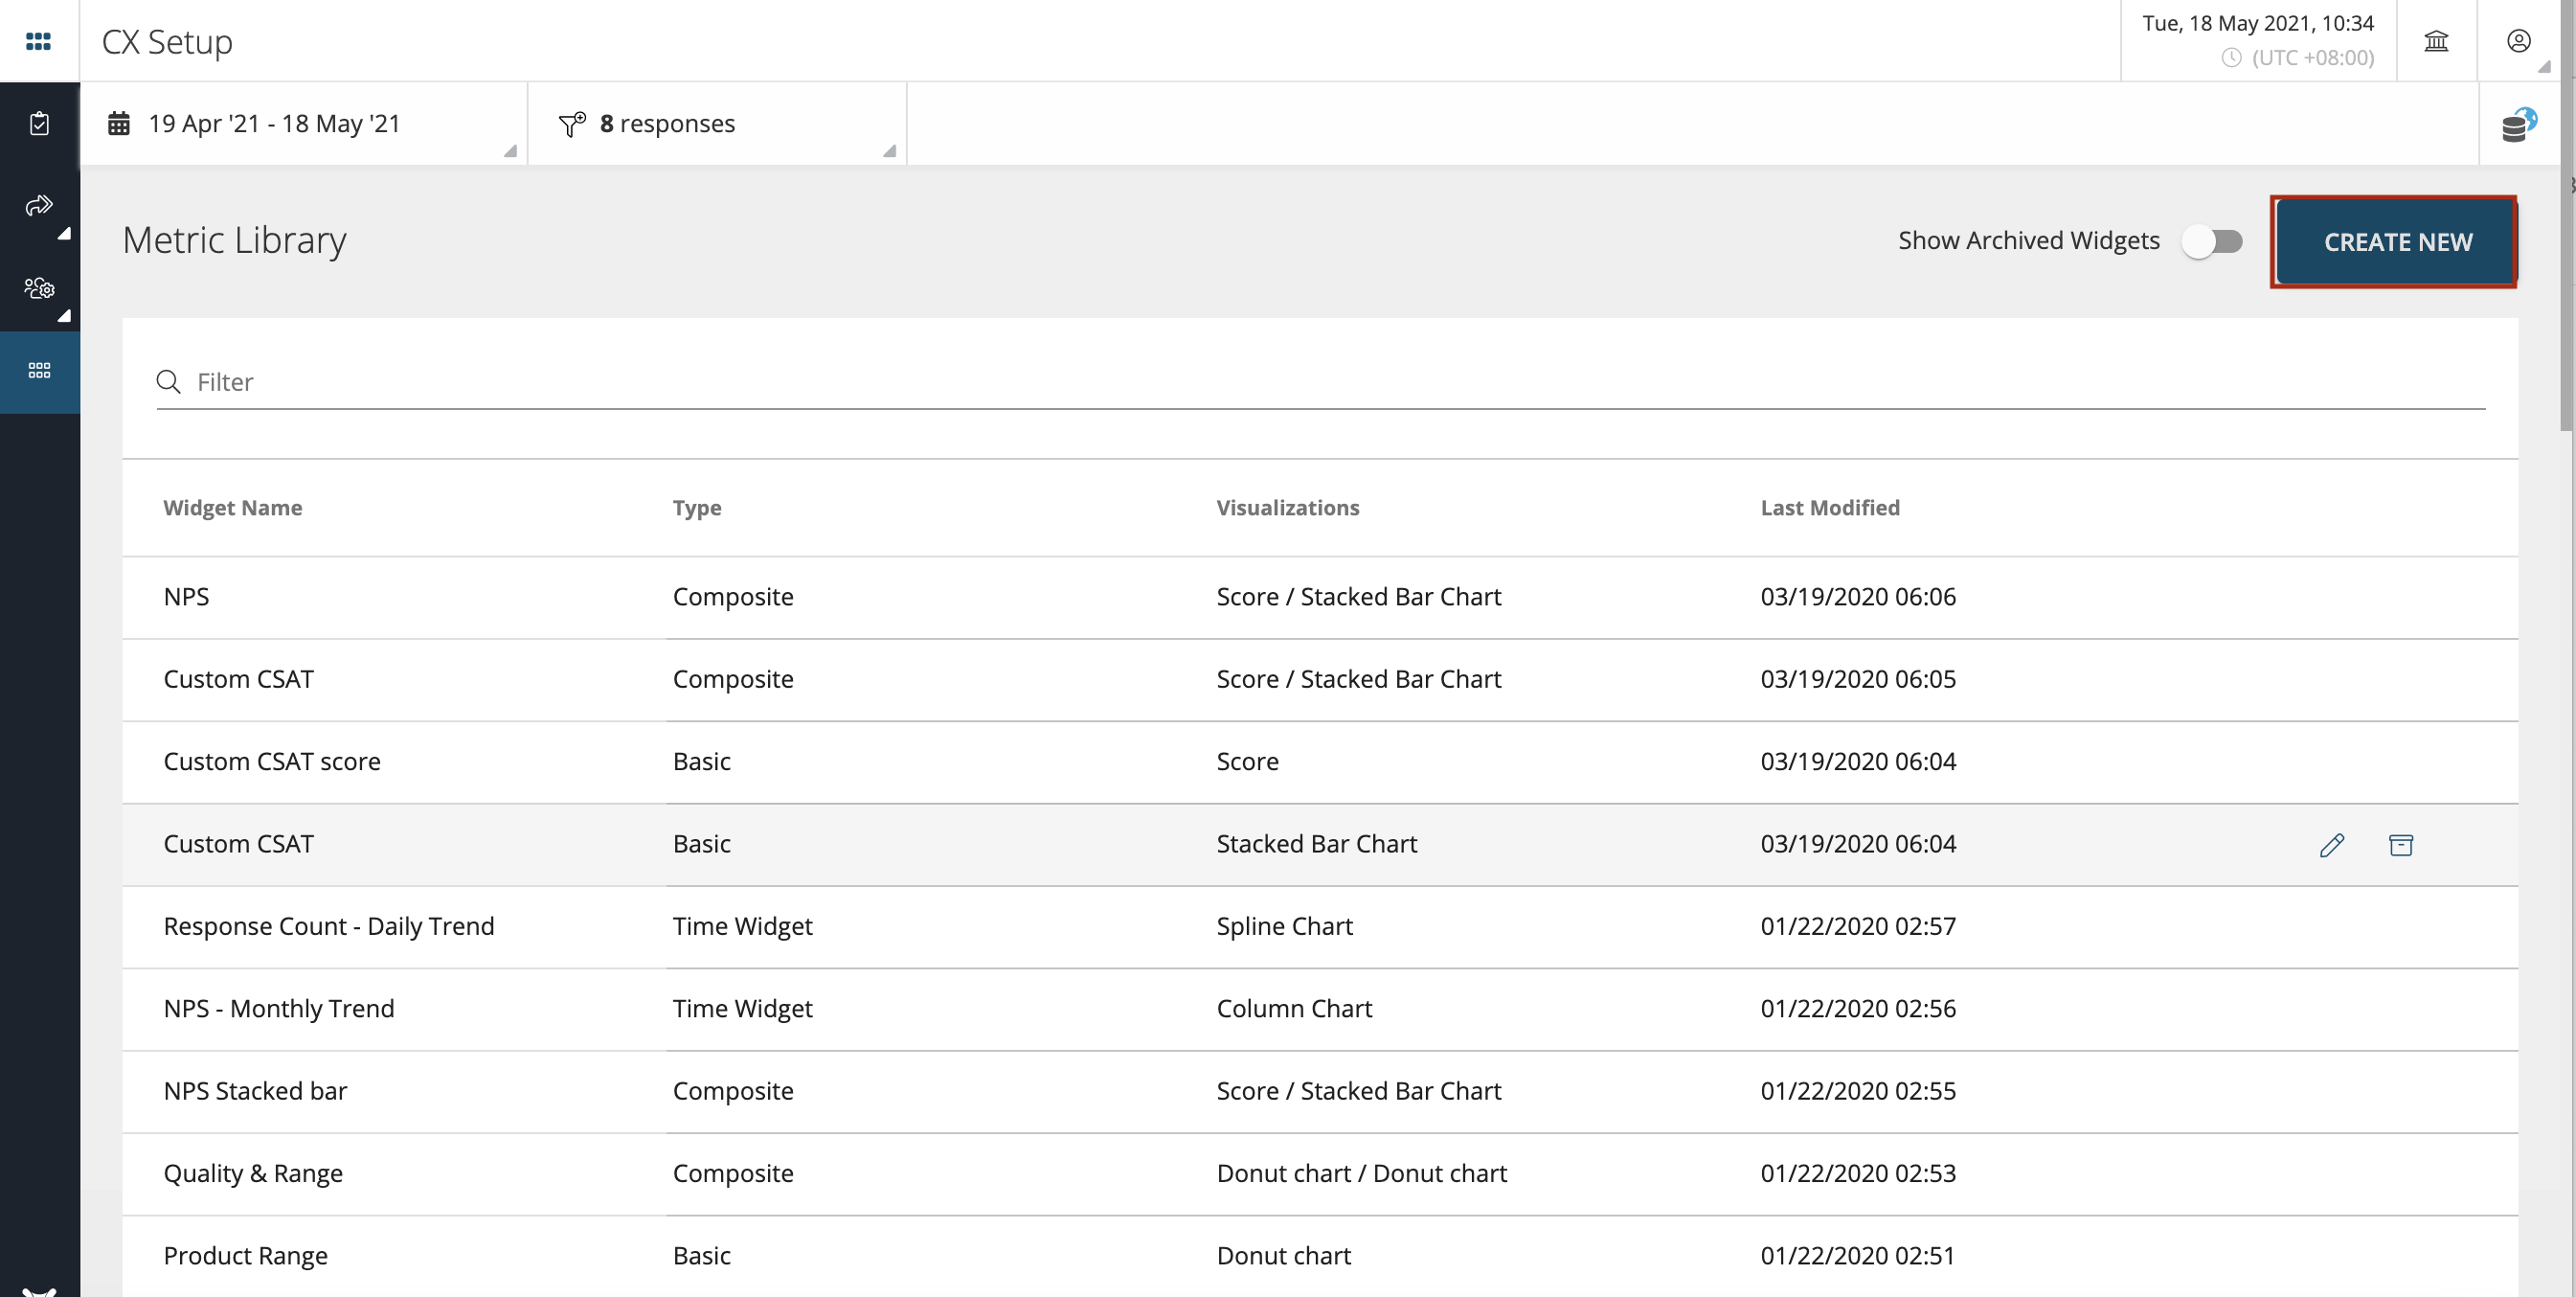
To Unarchive, go to archive list by clicking on toggle button for ‘Show Archived Widgets’ as shown below.
To Unarchive, select the widget row and click on ‘Unrchive’ icon as shown below.
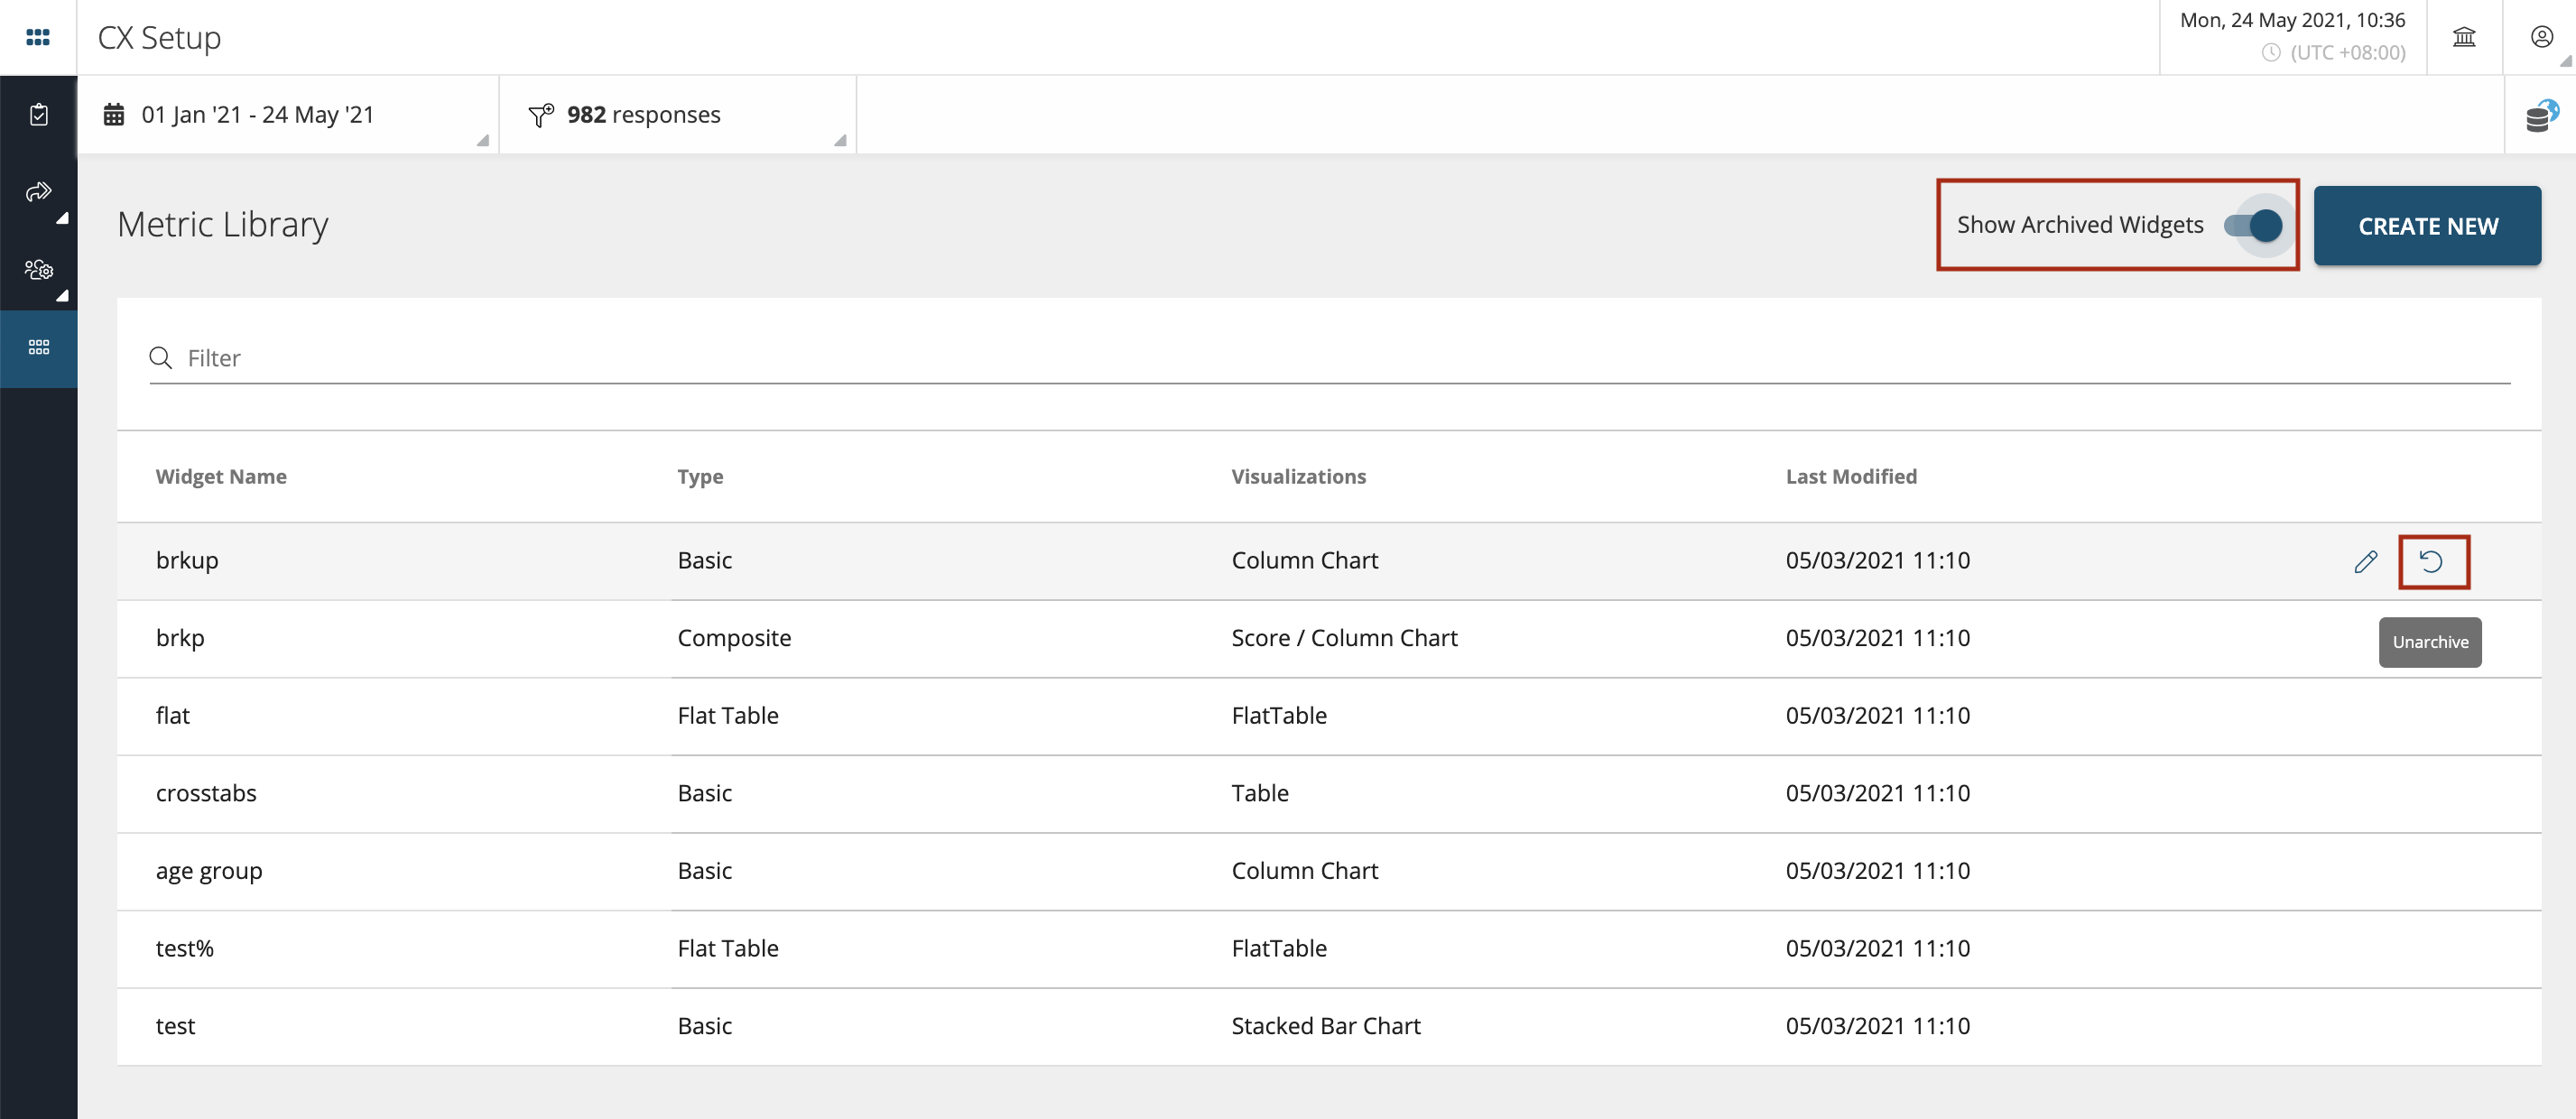
Press ‘Unarchive’