Roles & Departments
Content Outline
Enterprise Settings
Enterprise Settings module has identified the need to provide relevant data at the right time to the right stakeholders. The platform with its Enterprise Settings provides flexibility to create various departments, identify stakeholders and their roles.
Overview
Department
A department is a top most hierarchical level in defining the escalation matrix. It is important to set-up departments for enabling the loop closure as this is where you provide access to the loop closure to the whole department who will be responsible for closing feedback loop with the customers. Additionally, users who belong to same department will have access to tickets relevant to their department.
Roles
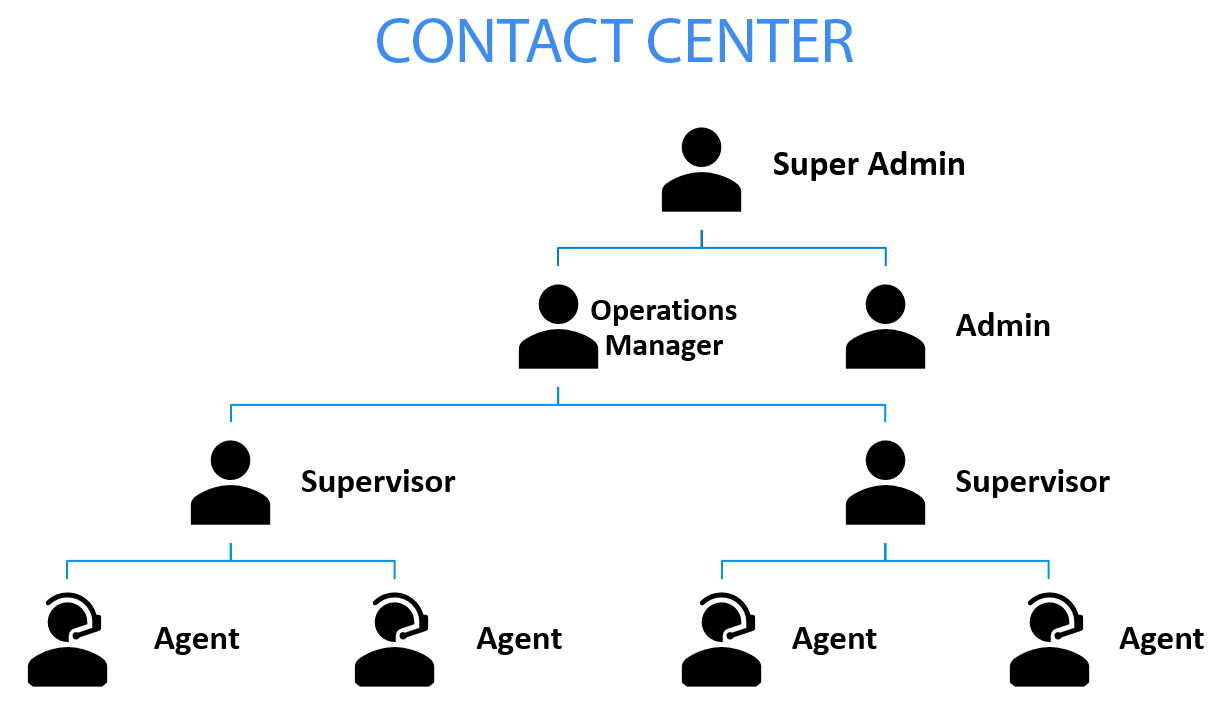
Roles are defined under the department for e.g.: Designations like Department Head, Supervisor, Agent, etc. For instance, in a Telco industry the Contact Centre Organizational Structure could be:
Department: Contact Centre
Roles:
-
Super Admin(SA) - Highest level of access rights within the department
-
Operations Manager(OM) - Reports to Super Admin and has lesser rights than SA
-
Supervisor(SUP) - Reports to OM and has lesser rights than OM
-
Agent - Reports to SUP and has lesser rights than SUP
Create different departments and customize capabilities:
- Create departments basis business functions E.g. Marketing, Finance, Sales etc.
- Control what data each department has access to. E.g. Access to pages, widgets and metrics
- With the DIY dashboard, the departments can be customized to allow each department to see what matters to them
Department Creation
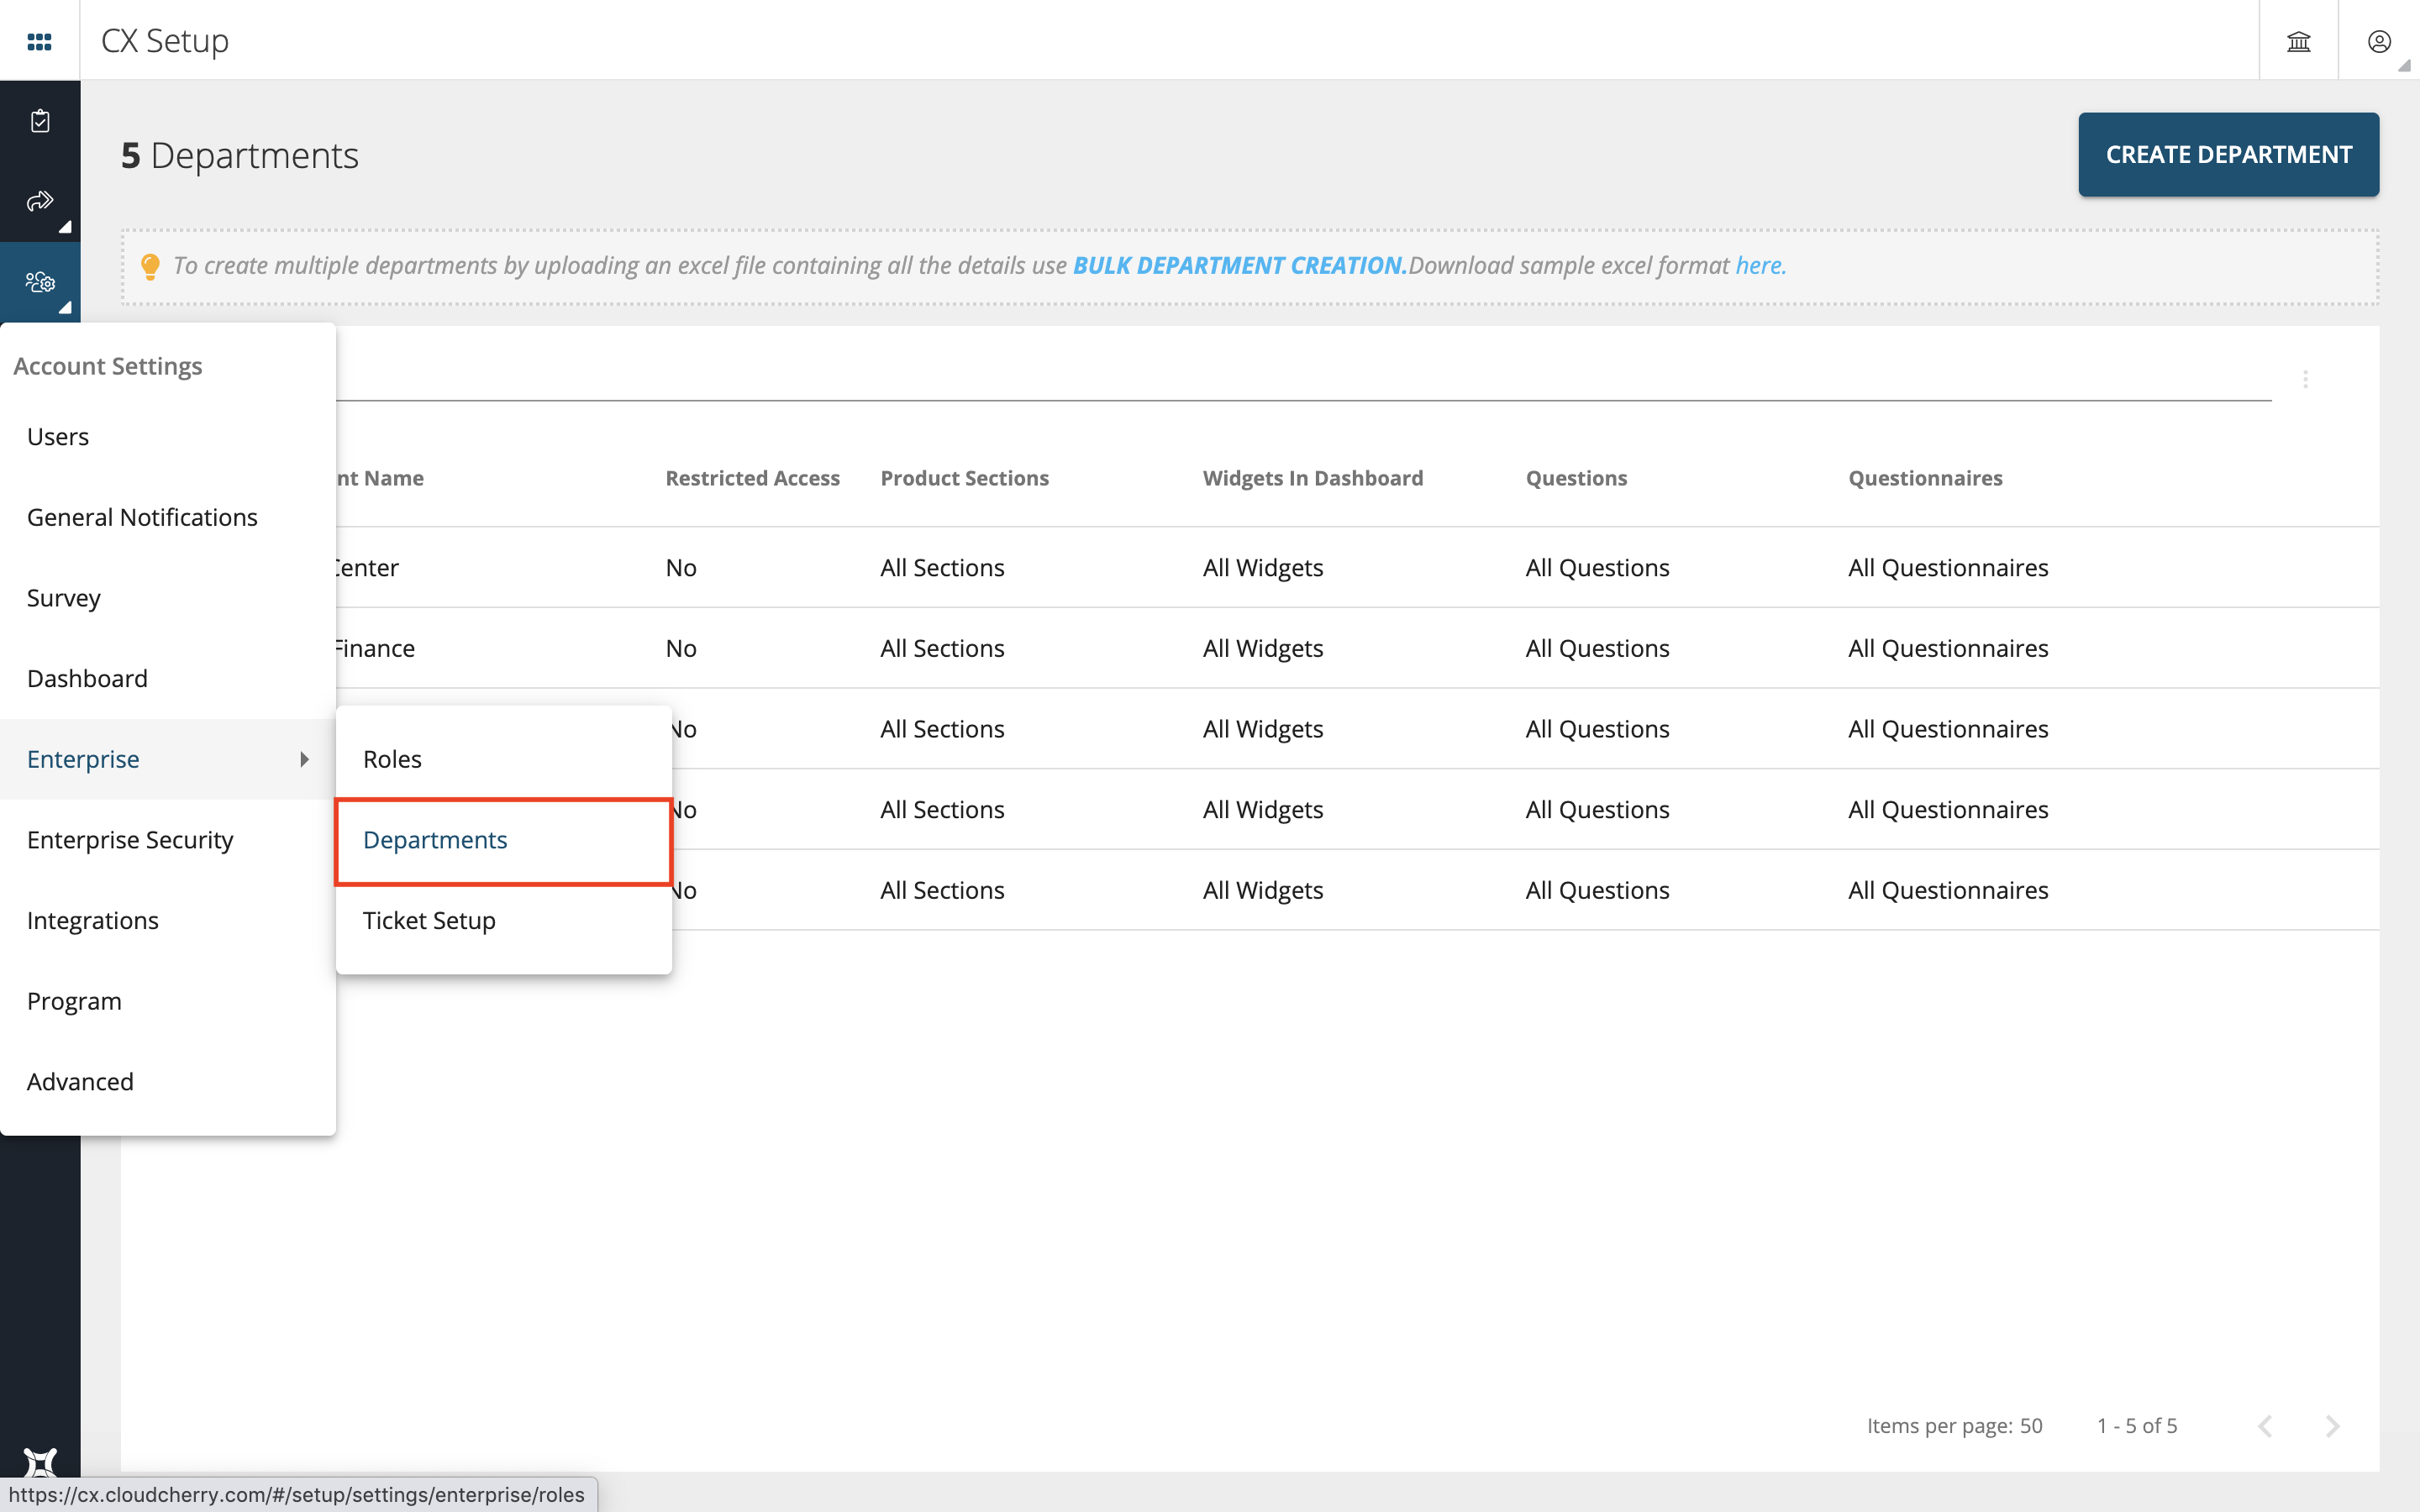
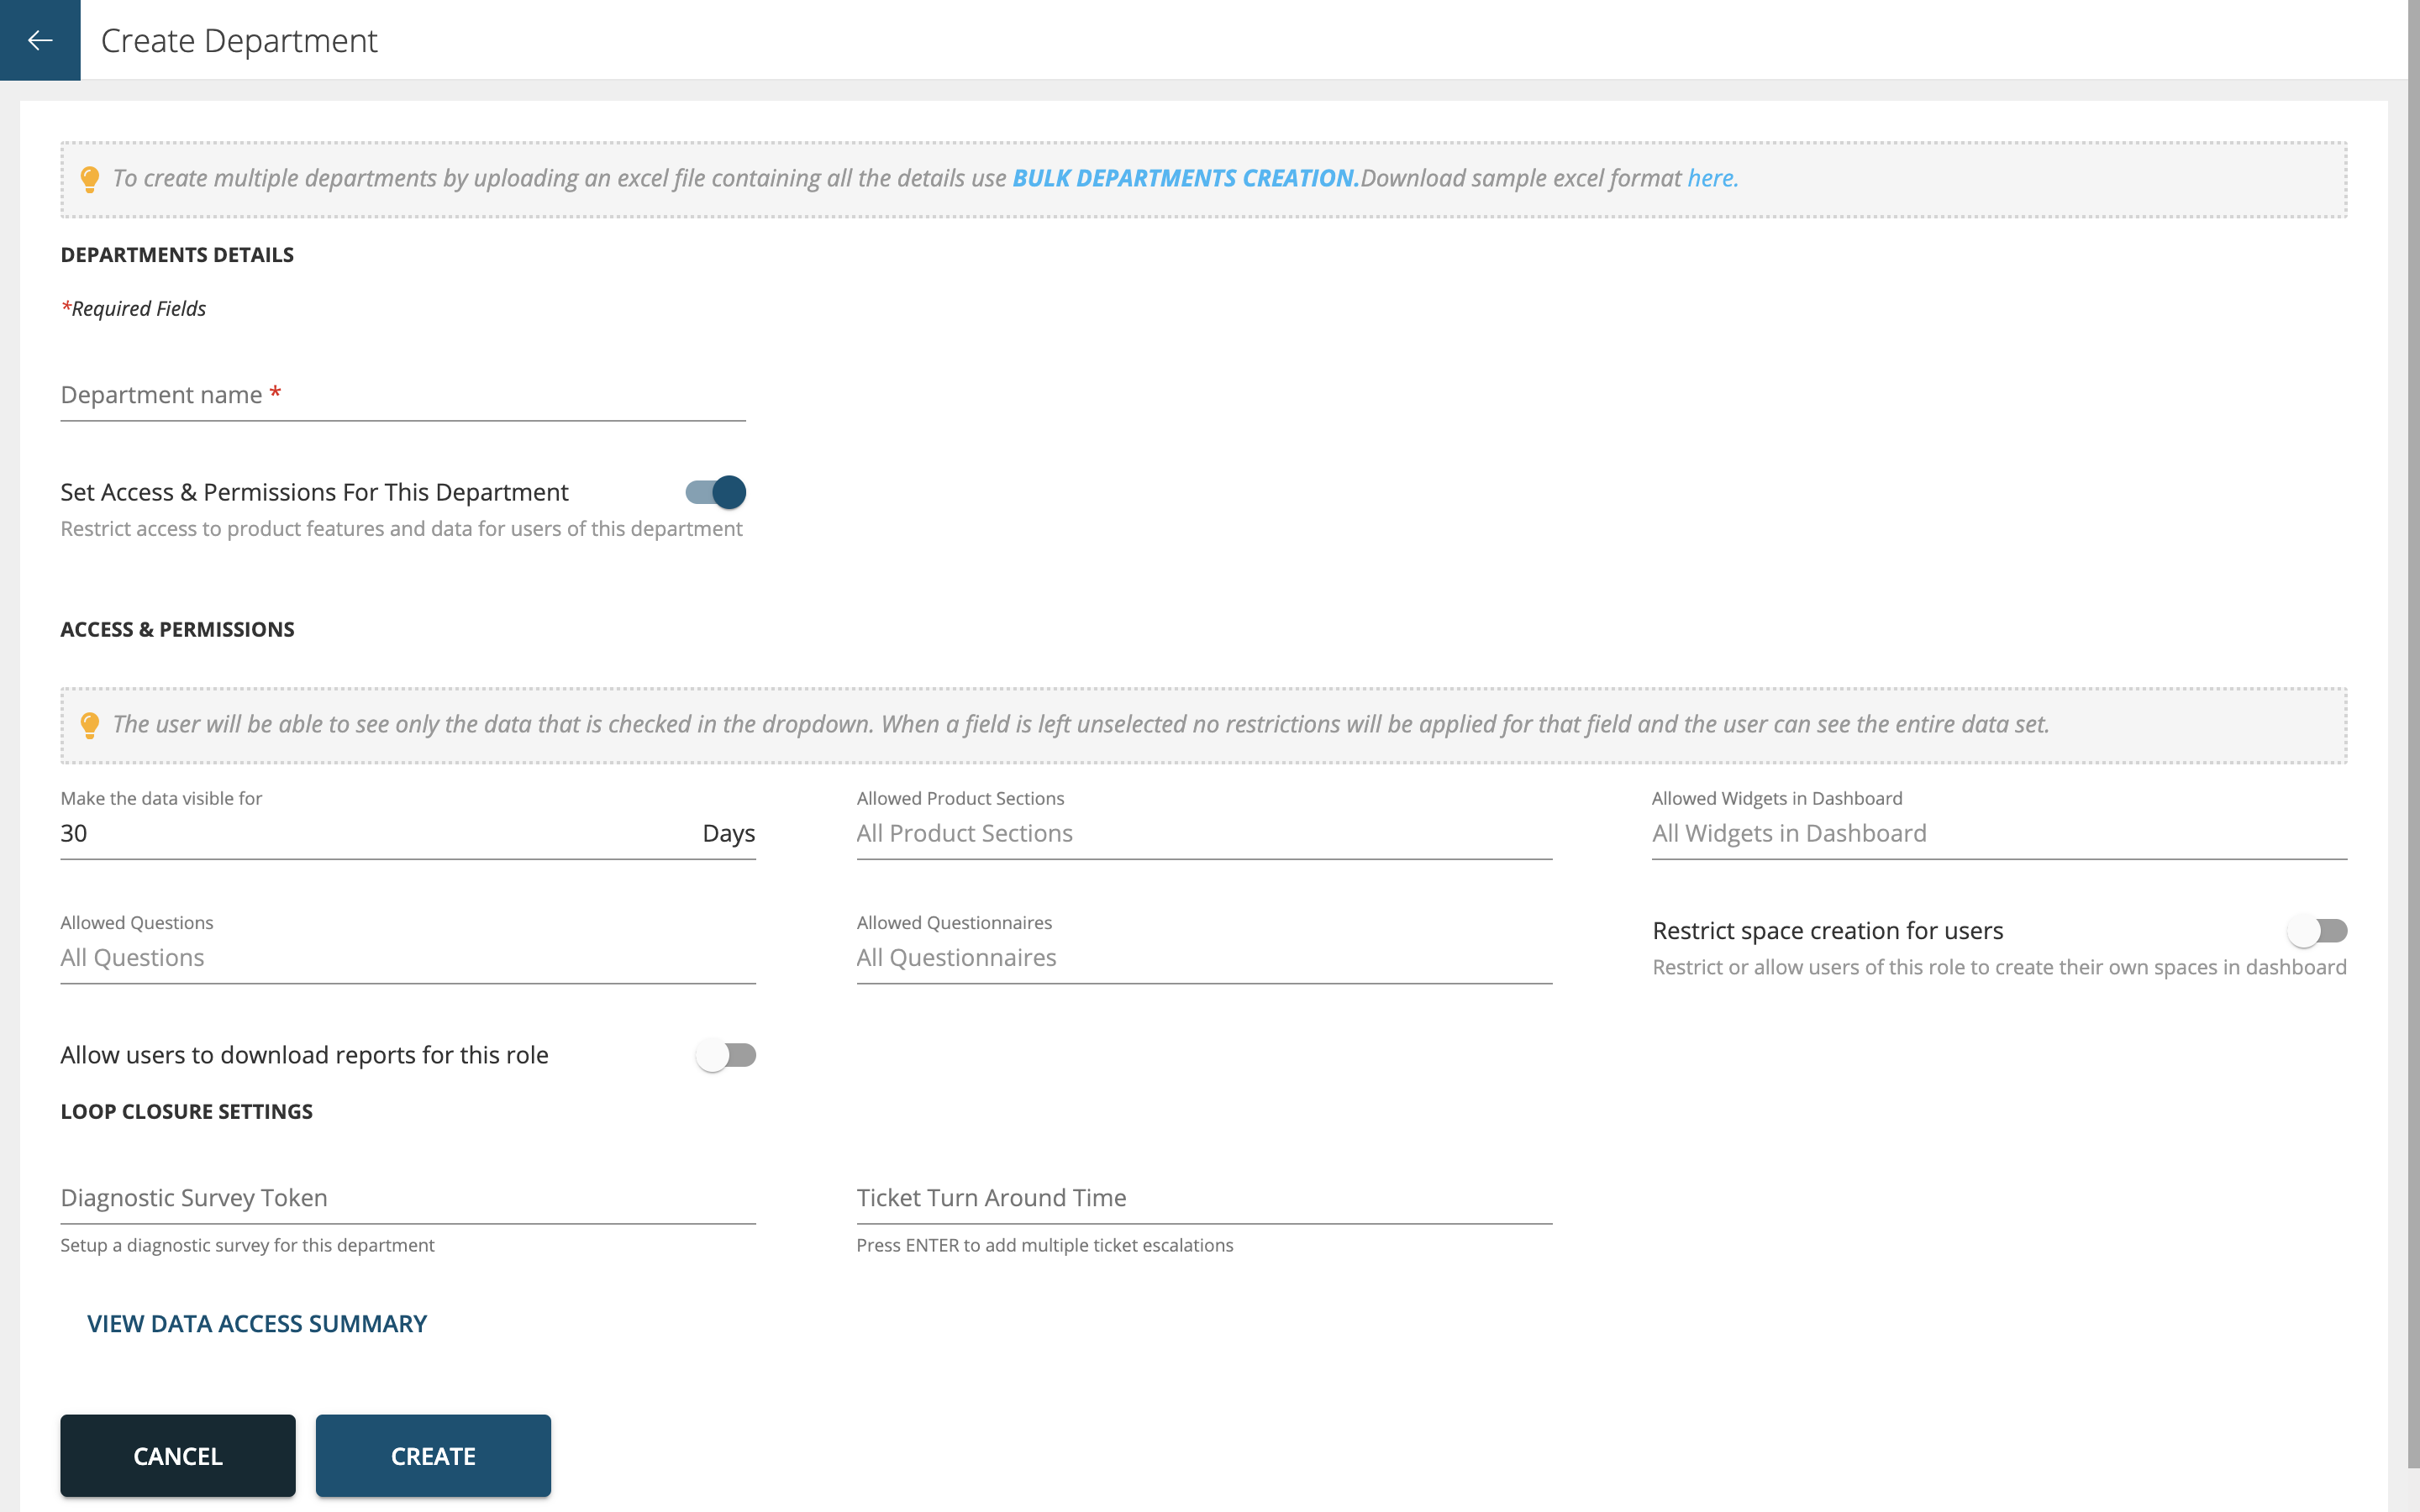
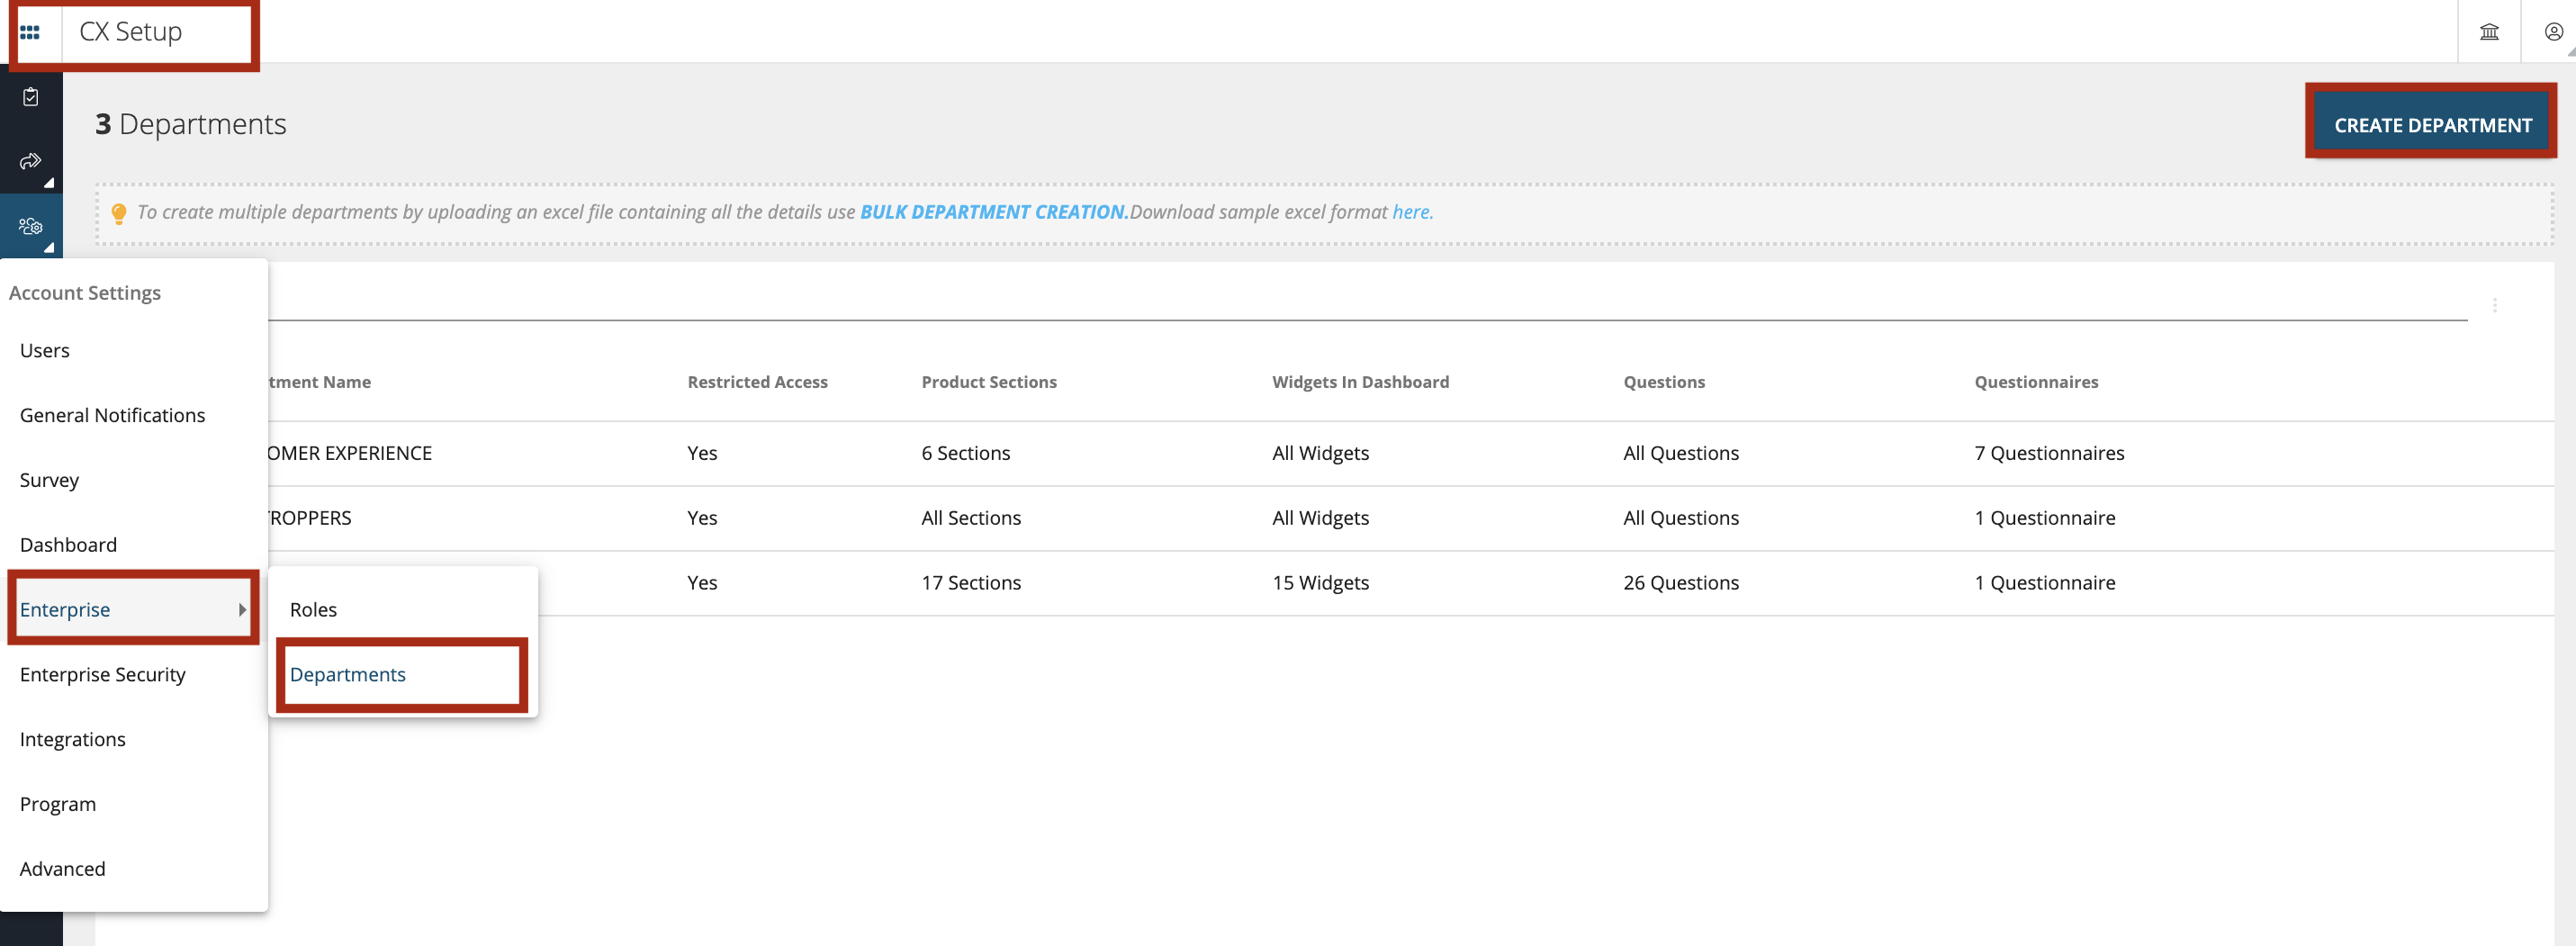
To create a ‘New Department’ go to CX Set-up > Account Settings > Enterprise > Department as shown below. Click on ‘Create Department’ button
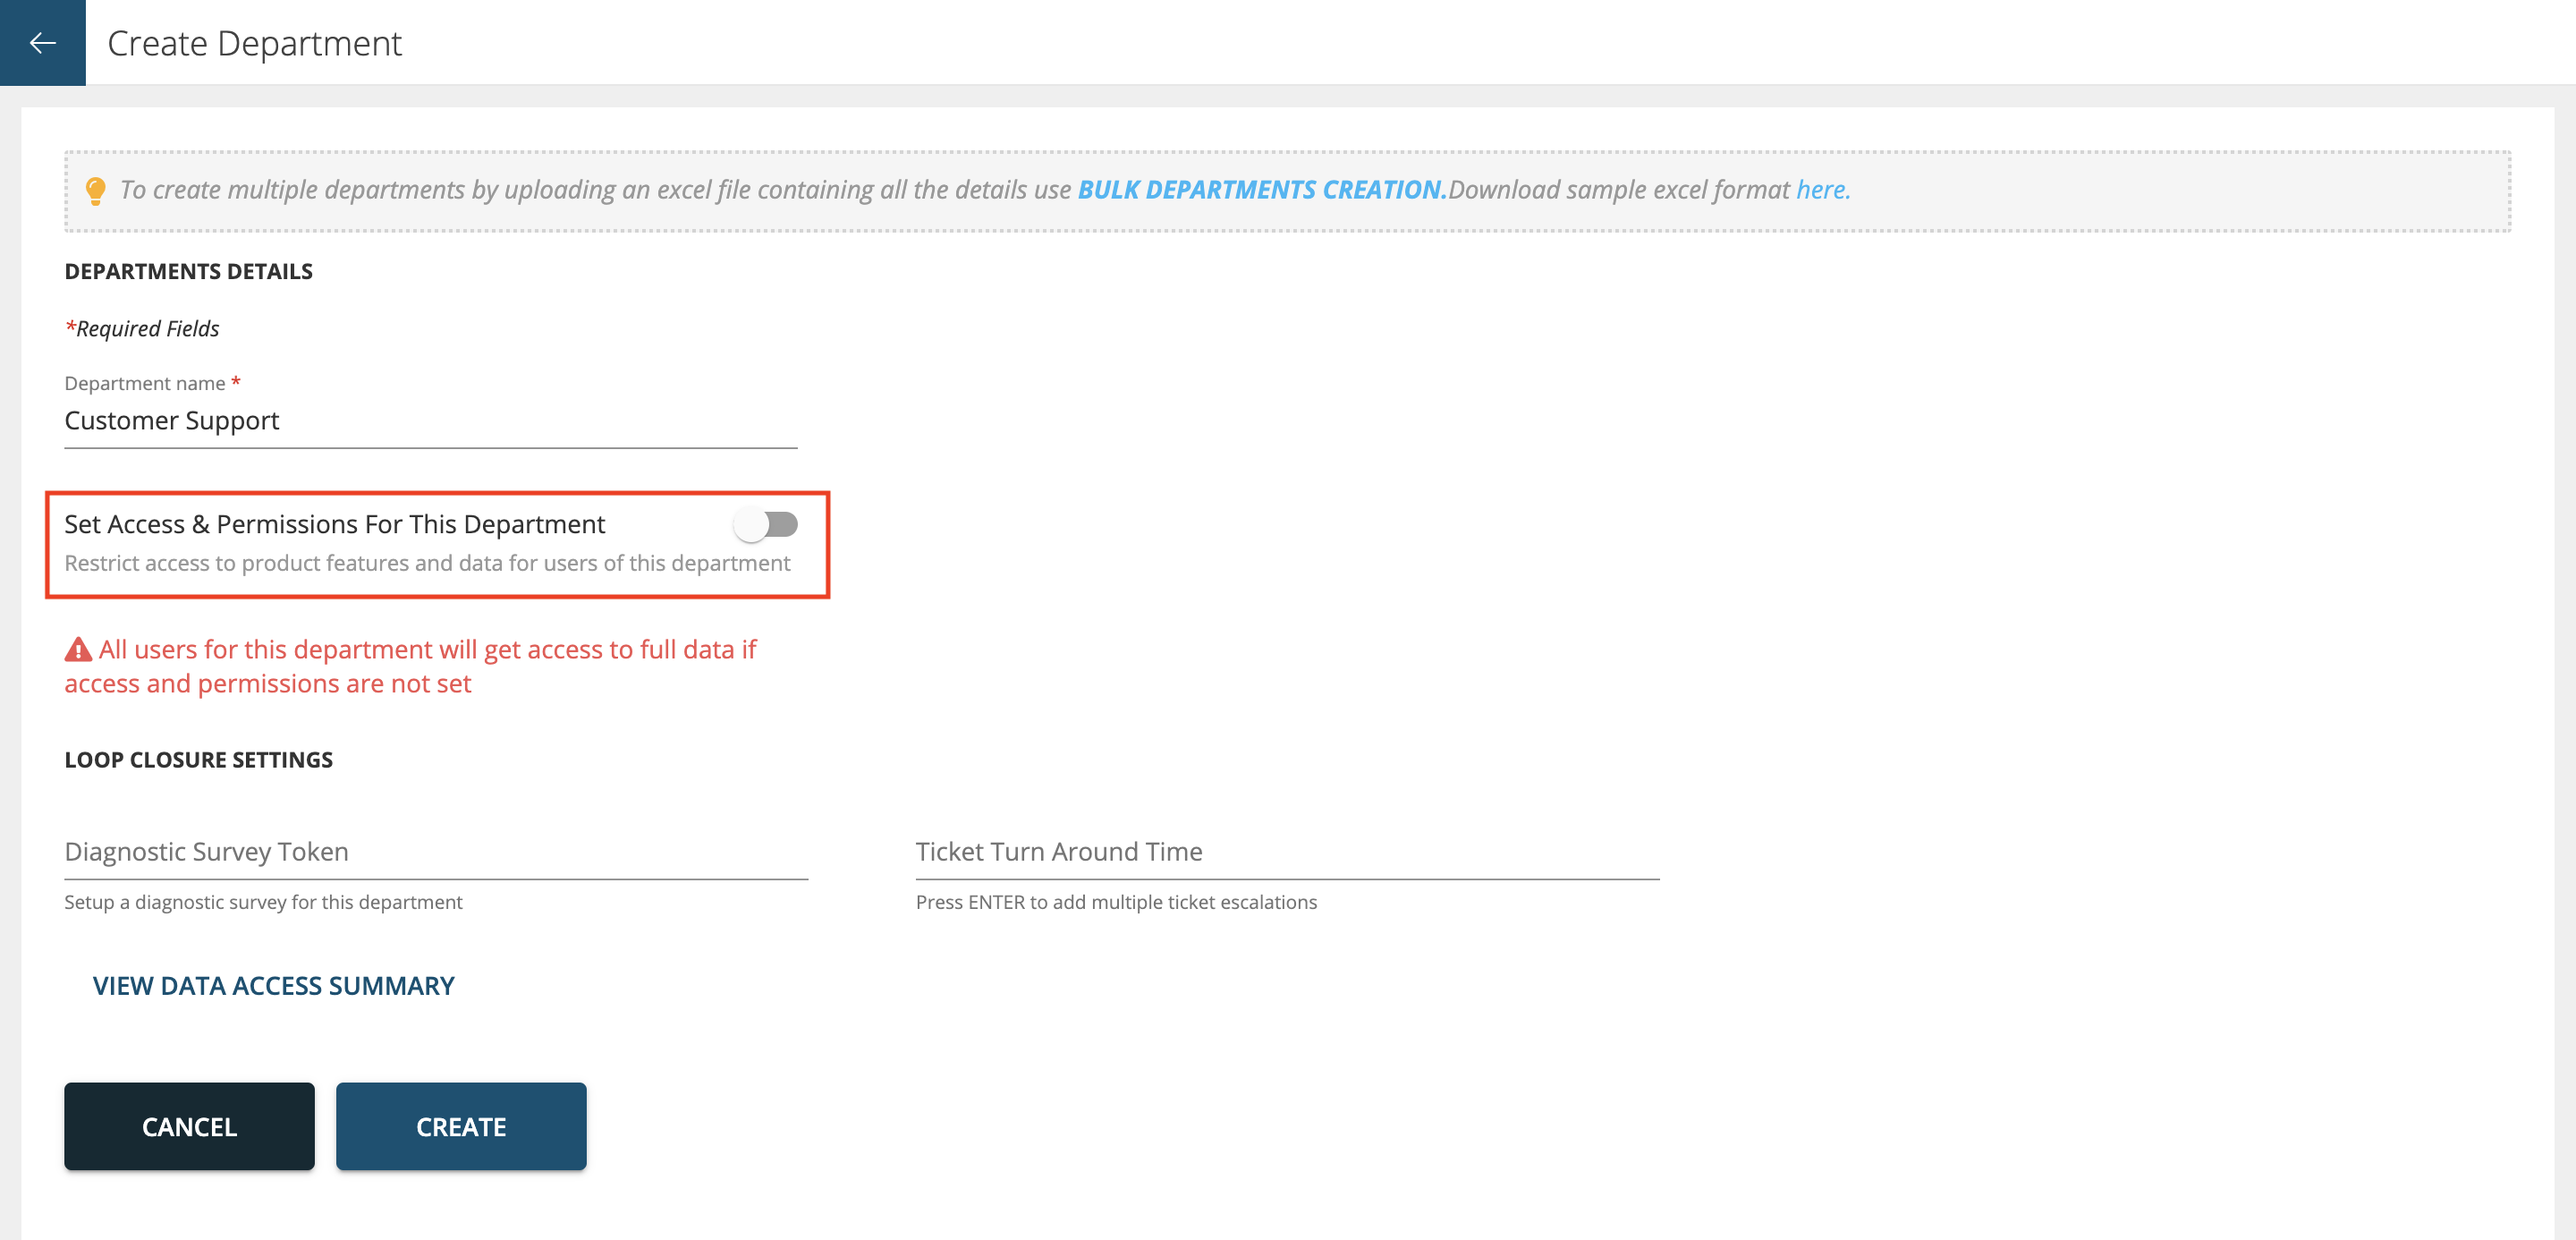
To create a department, give a name to the department. For e.g.: Customer Service. You can create many departments depending on the organization structure and data access restrictions. Toggle on ‘Set Access & Permissions to this Department’. This will let the user see only the data that is checked in the dropdown. When a field is left unselected no restrictions will be applied for that field and the user can see the entire data set.
Types of fields:
- Make the data visible for: Here you can set the number of days for the data to be made visible to users belonging to that department
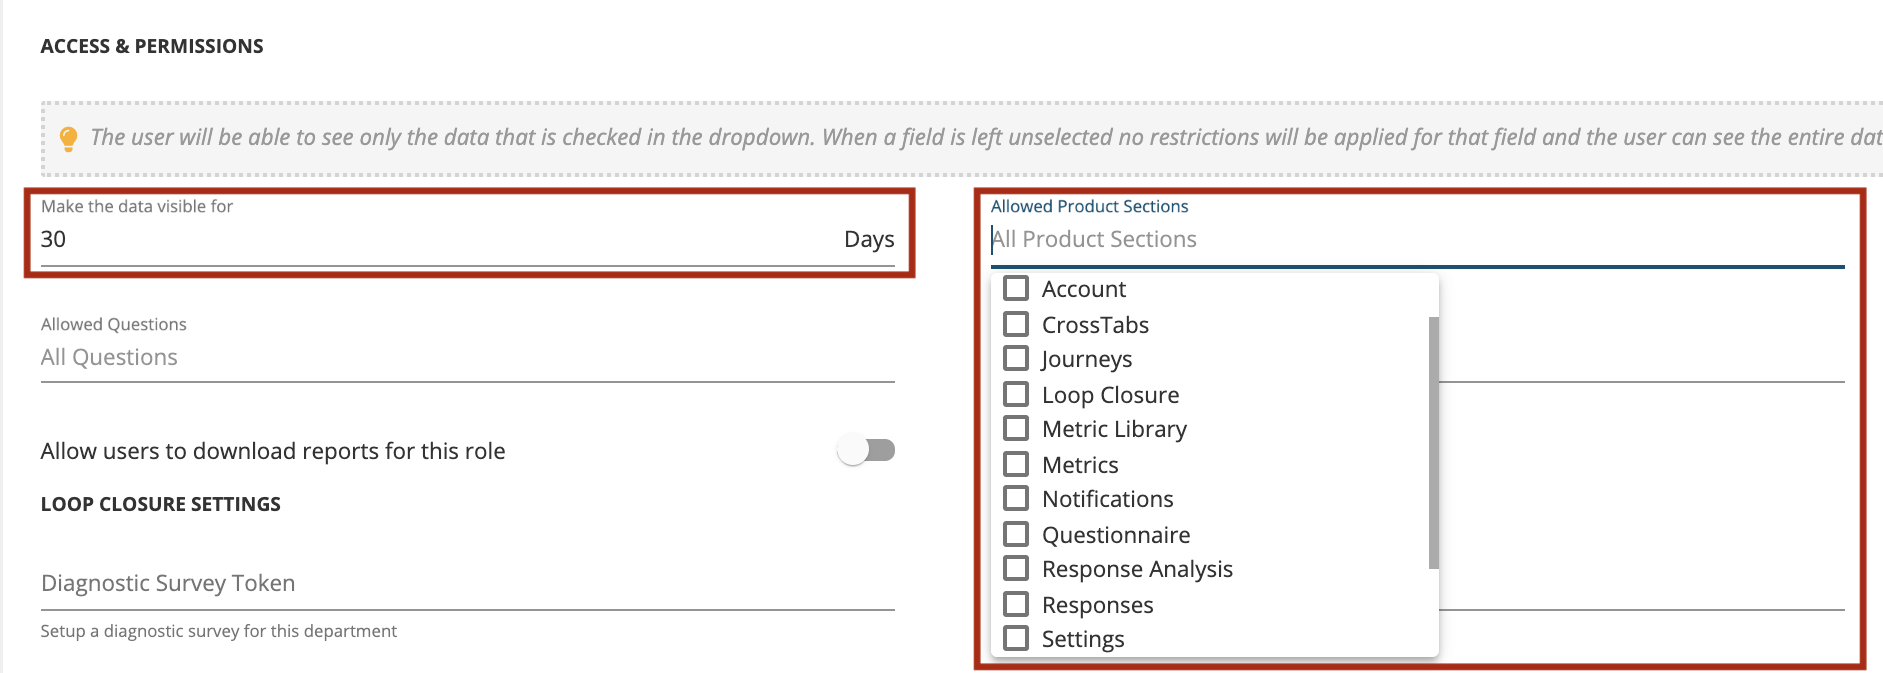
- Allowed Product Sections: In this section you can select different modules for which you want to allow access to like Questionnaire, Responses, Tokens, etc.
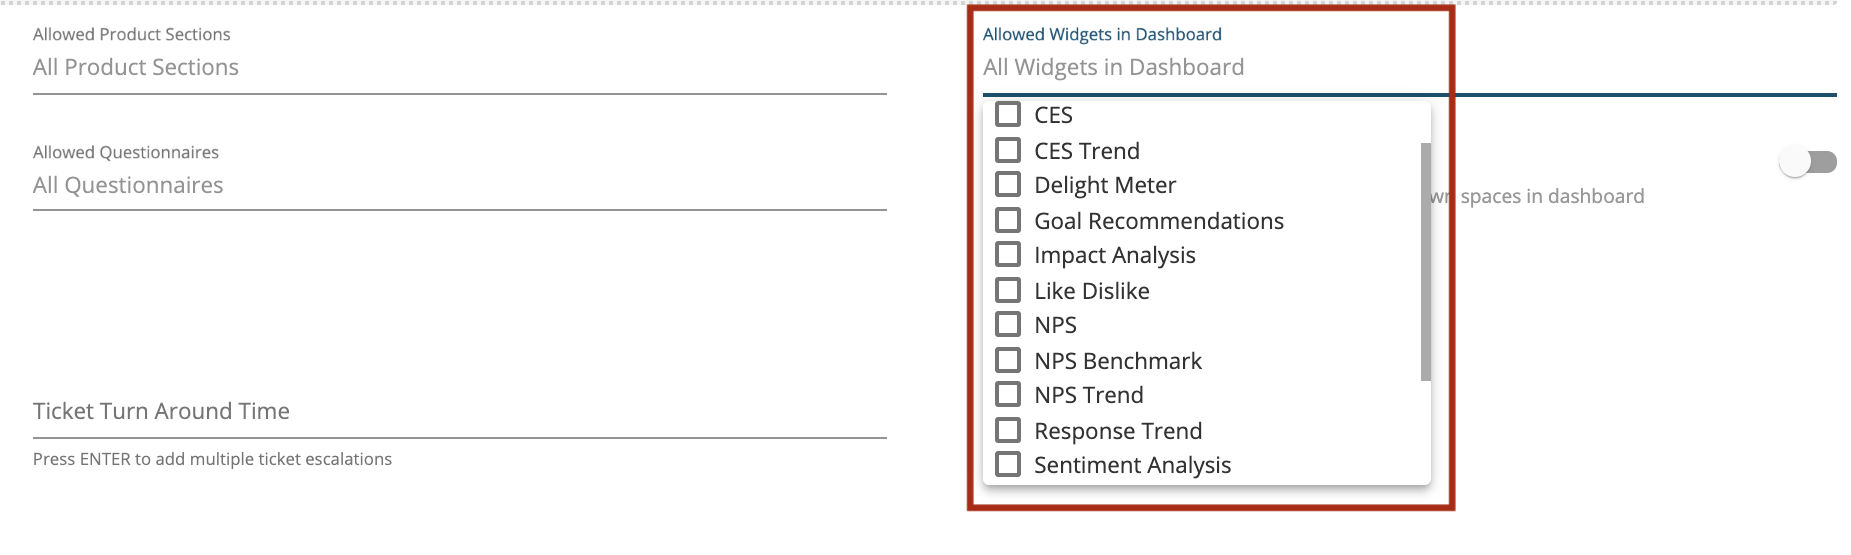
- Allowed Widgets in Dashboard: Here you can select which widgets you want to show on the dashboard and which widgets you want to hide for the users of that department.
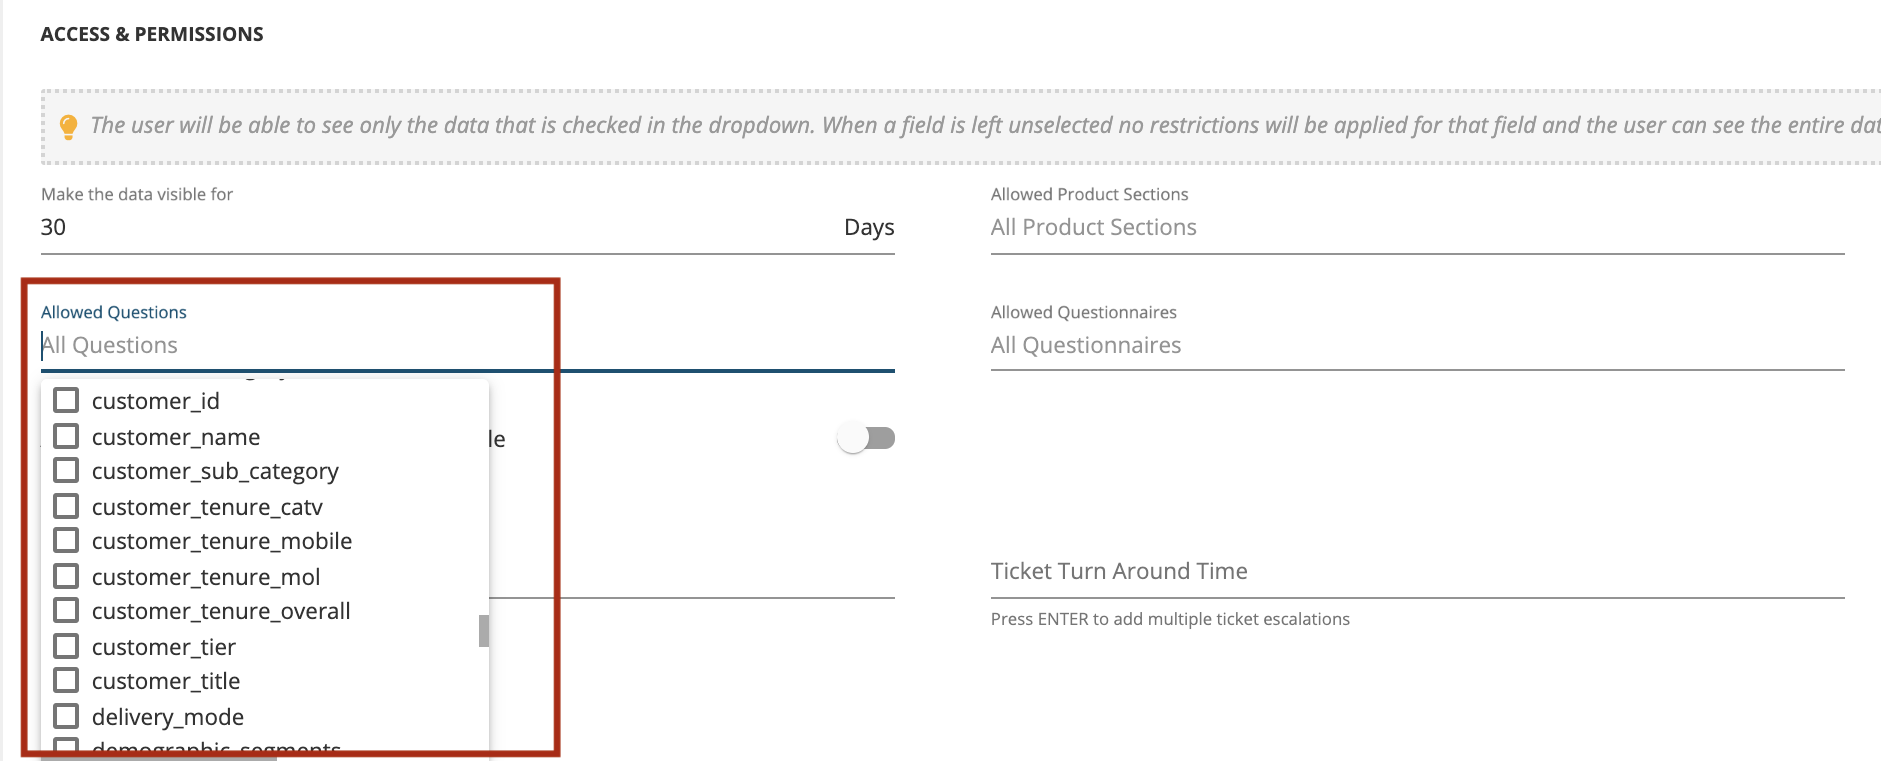
- Allowed Questions: This section is where you can control access level down to questions level. For instance there are 10 questions (both staff prefills and customer facing questions) and you want to restrict the users from seeing PII data like customer Name, Email & mobile number then you can deselect those questions here and choose the remaining 7 questions.
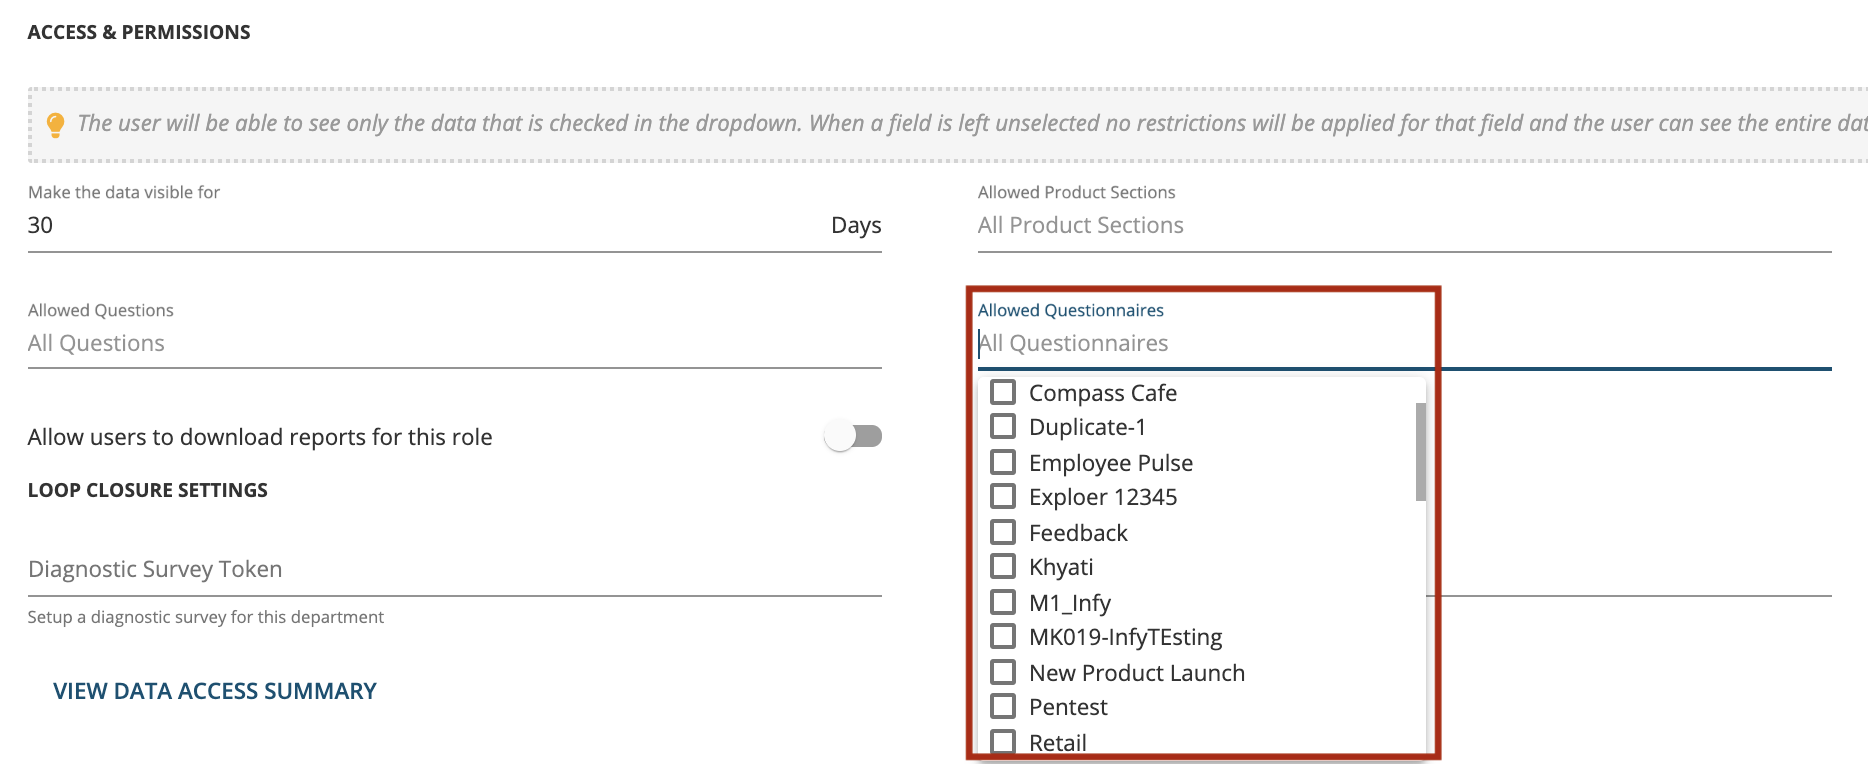
- Allowed Questionnaires: Here you can select the questionnaires relevant to that department
- Restrict Space creation for Users: Restrict or allow users of this role to create their own spaces in dashboard
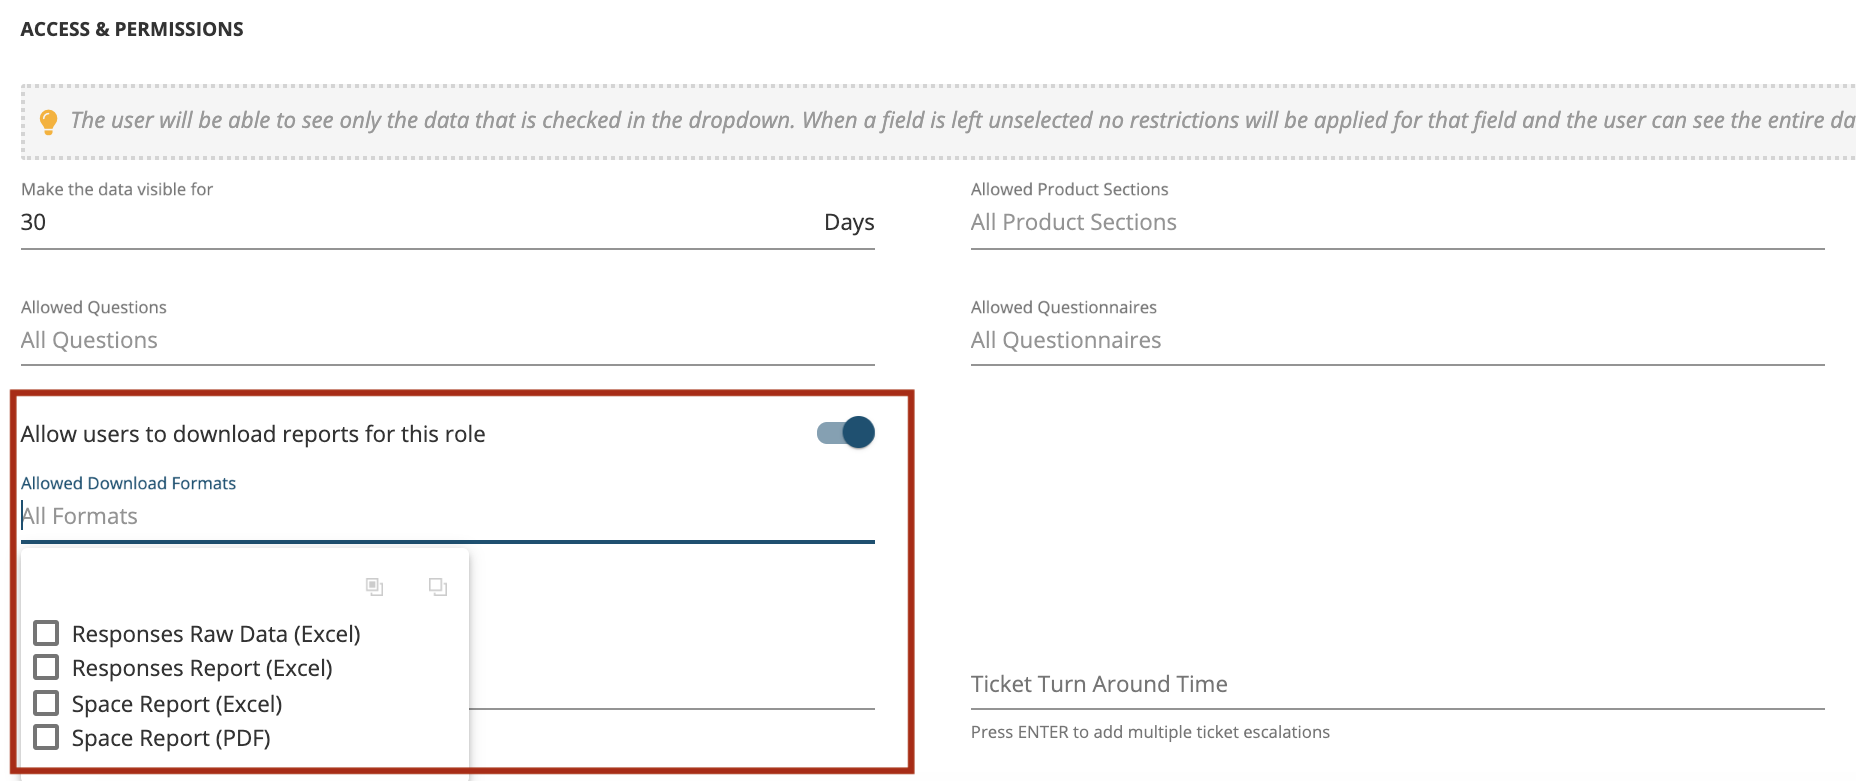
- Allow users to download reports for this Role: You can select different kinds of download formats that you want the users of that department can download. If the toggle button is OFF then that department users will not be able to download any reports.
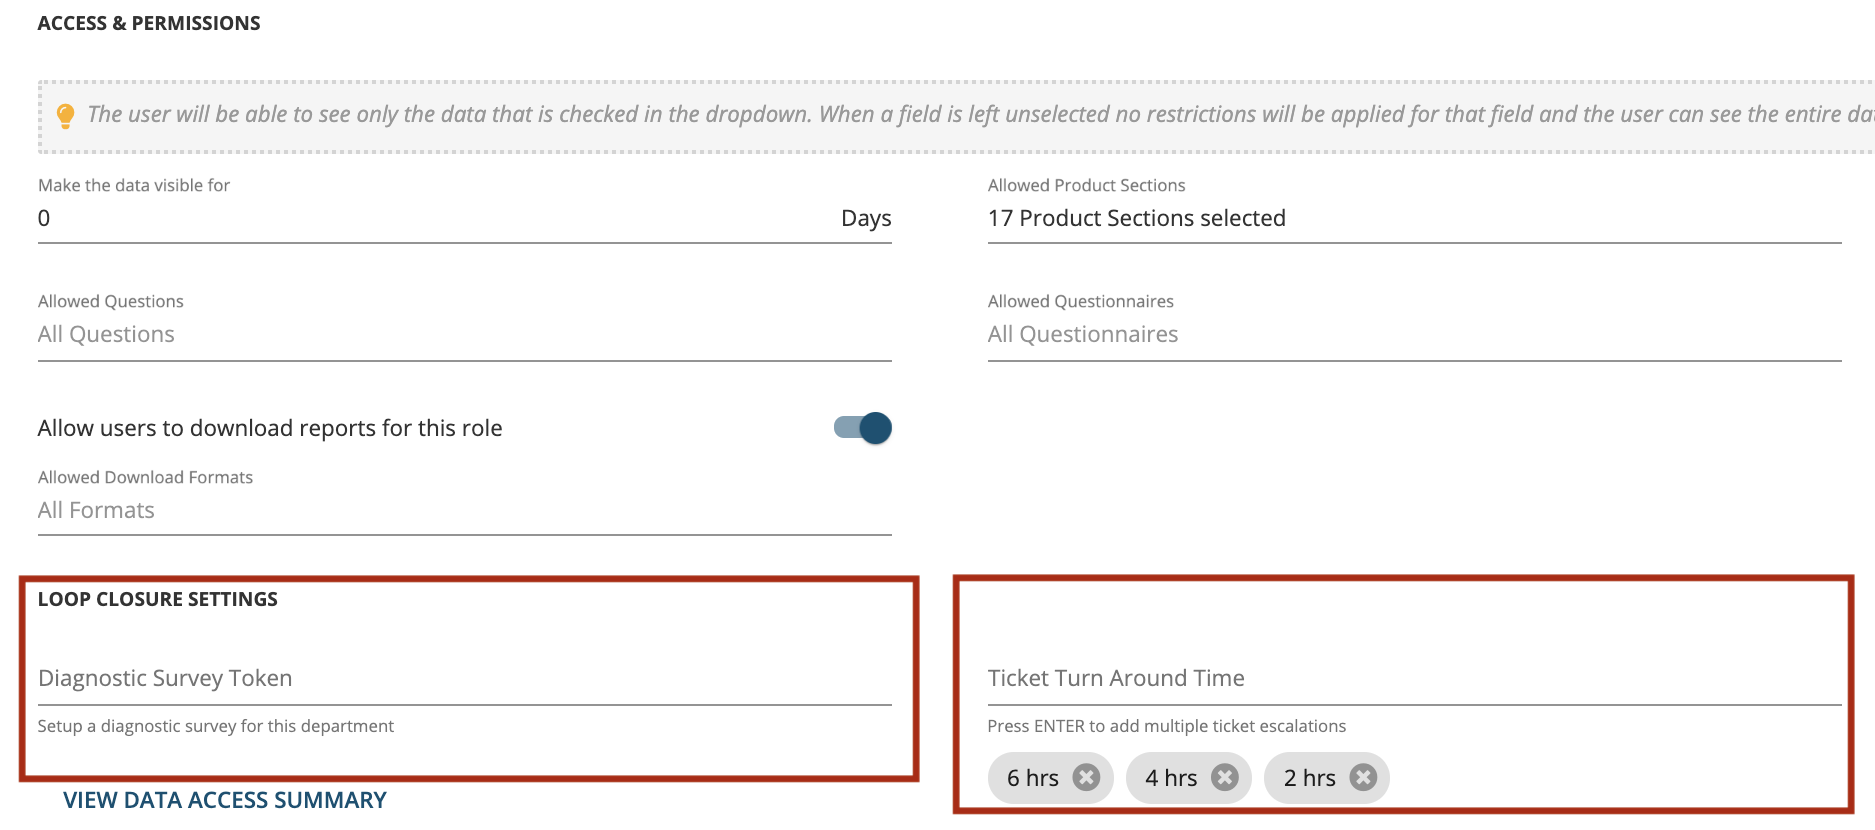
- Loop Closure Settings
- Diagnostic Survey: Setup a diagnostic survey for this department
- Ticket Turn Around Time: You can enter multiple ticket escalations by pressing ENTER After filling all the details press ‘Create’ button.
Type the number of days for which you want the data visible for in ‘Make the data visible for’ field Select the product modules in ‘Allowed Product Sections’
Allowed Widgets in Dashboard: Select the widgets you want to show on the dashboard
Allowed Questions: Select the questions you want to provide access for to the users based on their department
Allowed Questionnaires: Select the questionnaires relevant to that department you want to provide access to
Allow users to download reports for this Role: Select the download formats that you want the users of that department can download.
Insert the Diagnostic Survey if required and also define the Ticket SLA’s in the Ticket Turnaround Time (TAT) section for Loop Closure
View Data Summary: This page shows you the complete summary of the access restrictions & permissions for the department
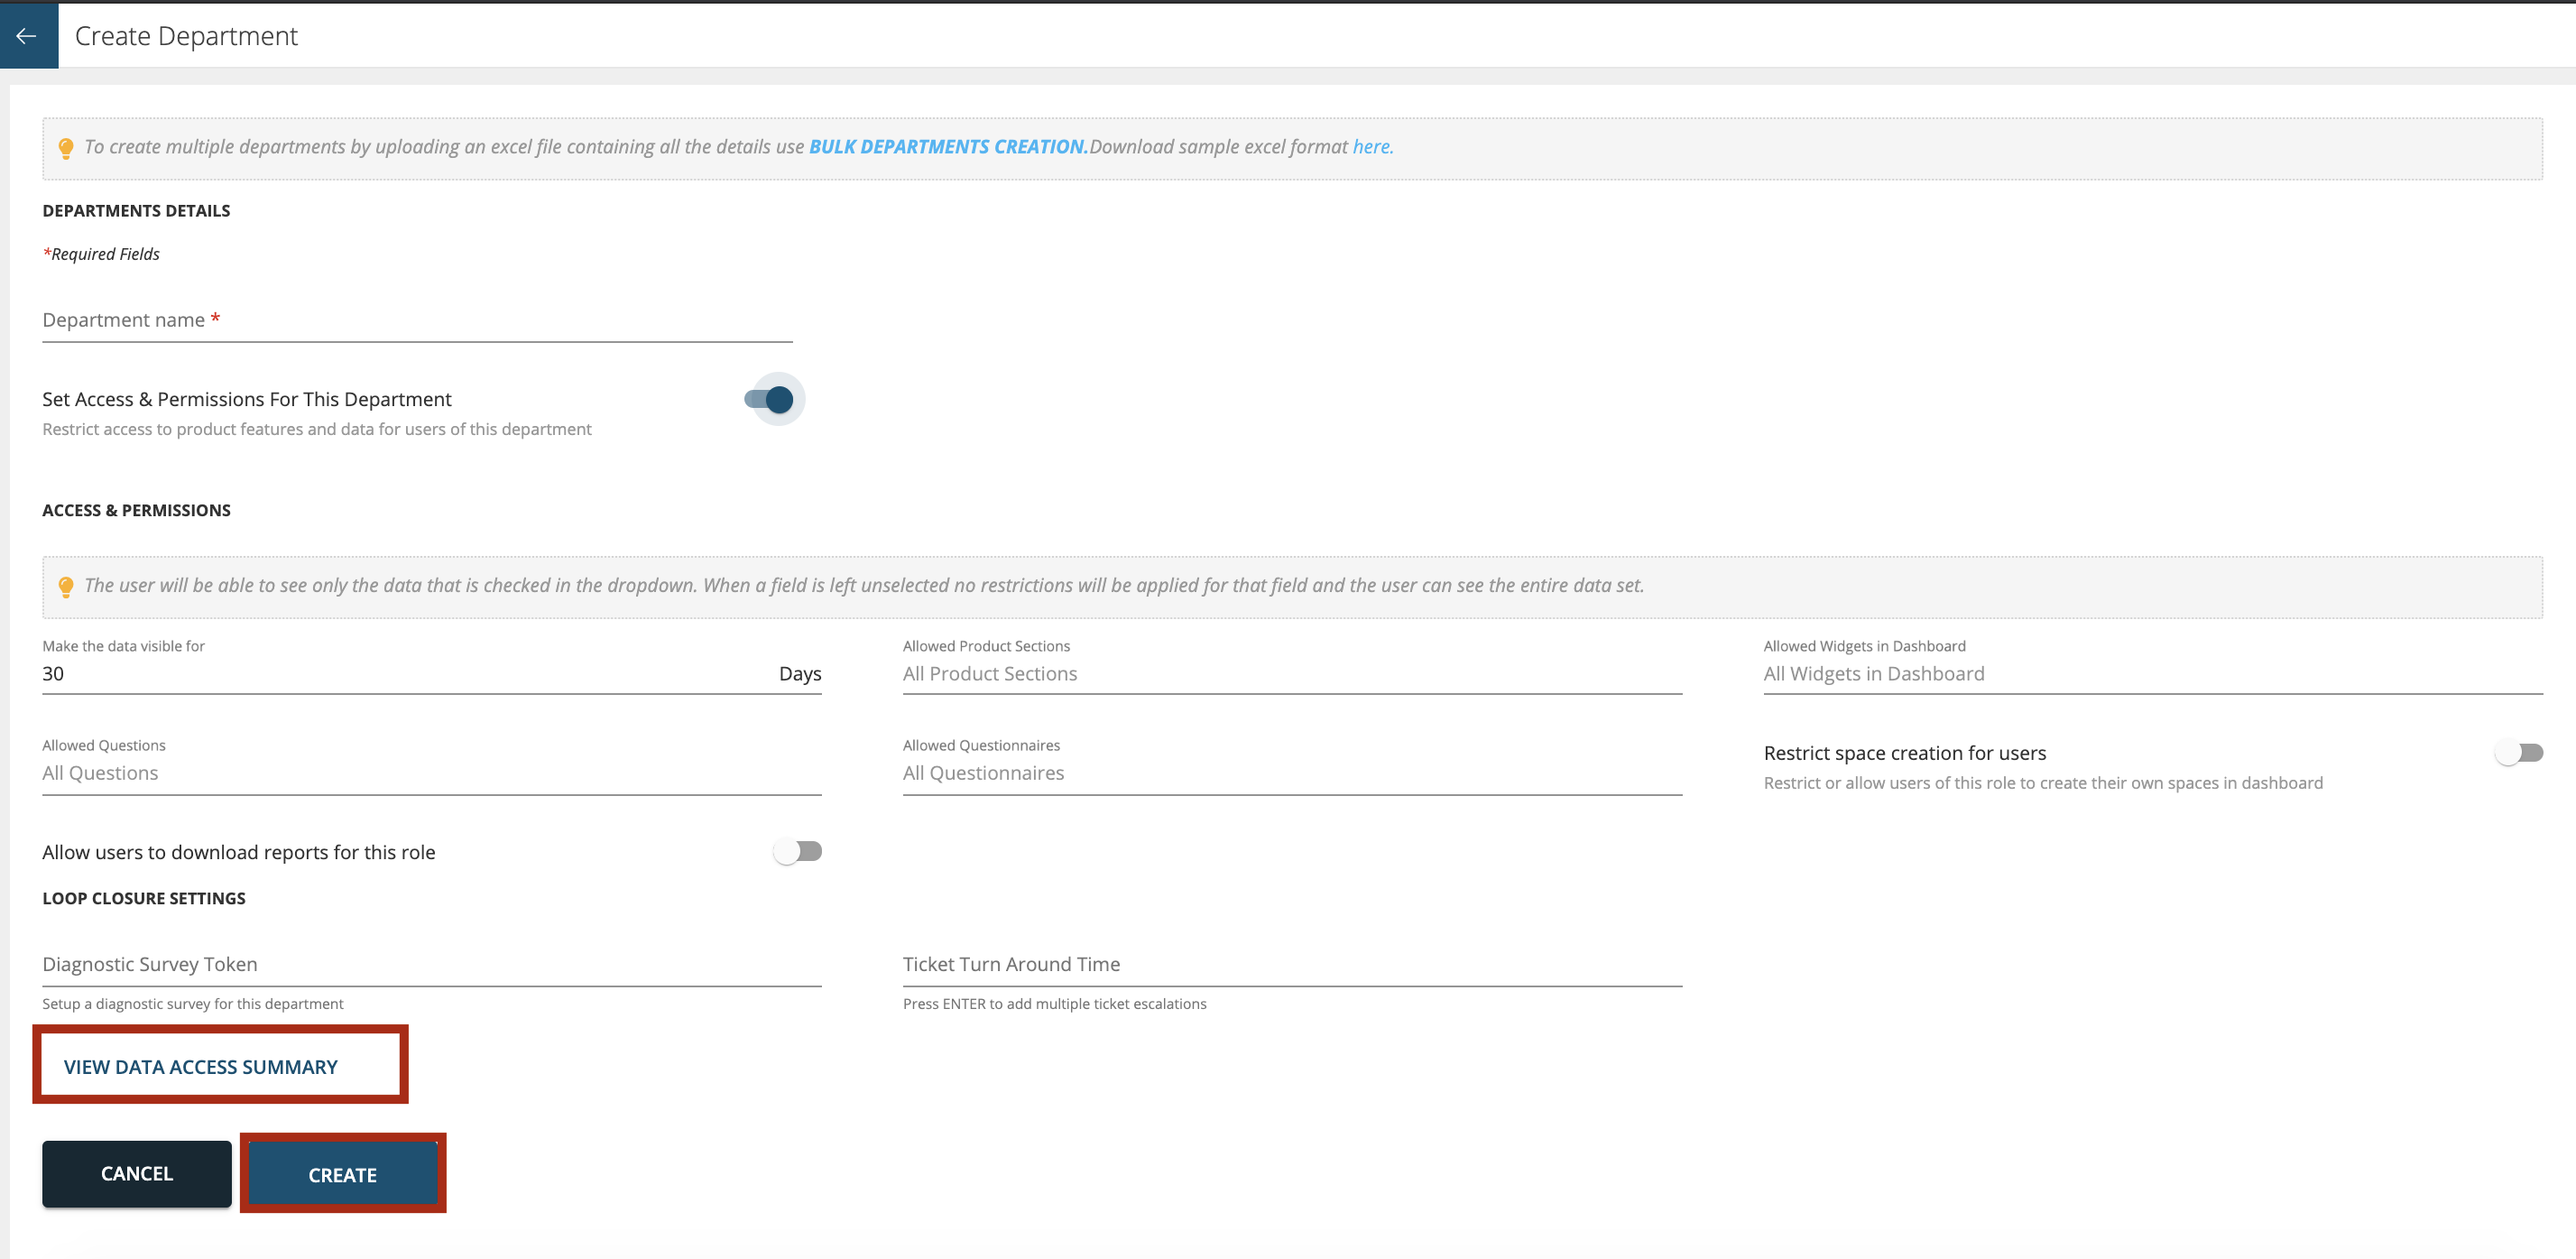
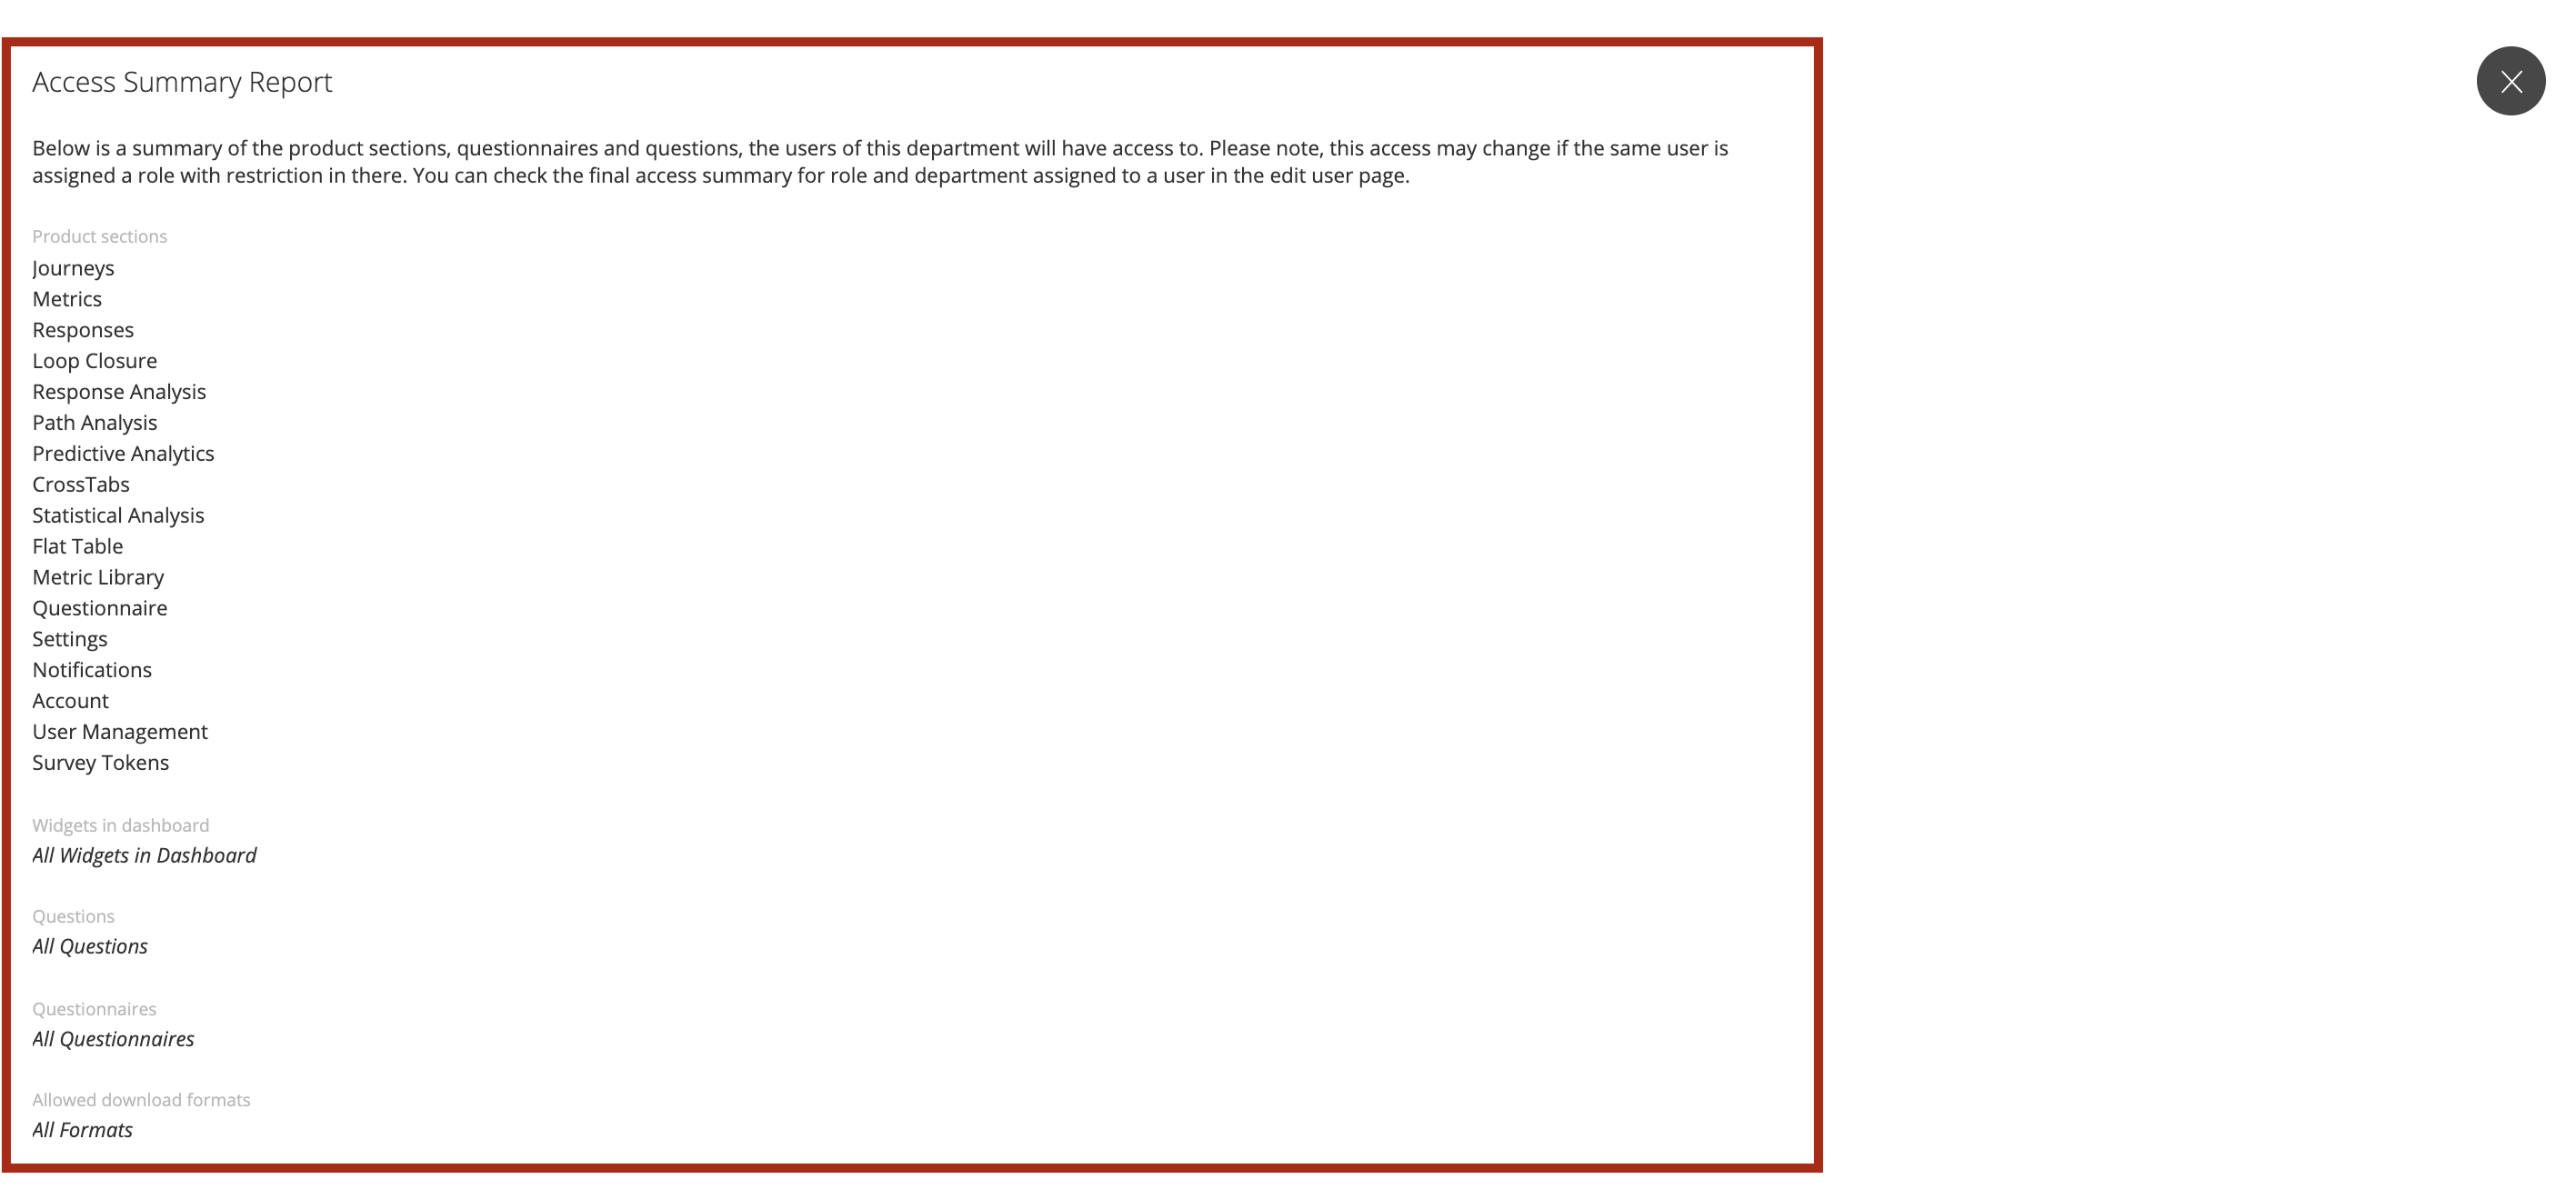
Once all the configurations are in place press ‘Create’ button at the bottom of the page.
Edit Department
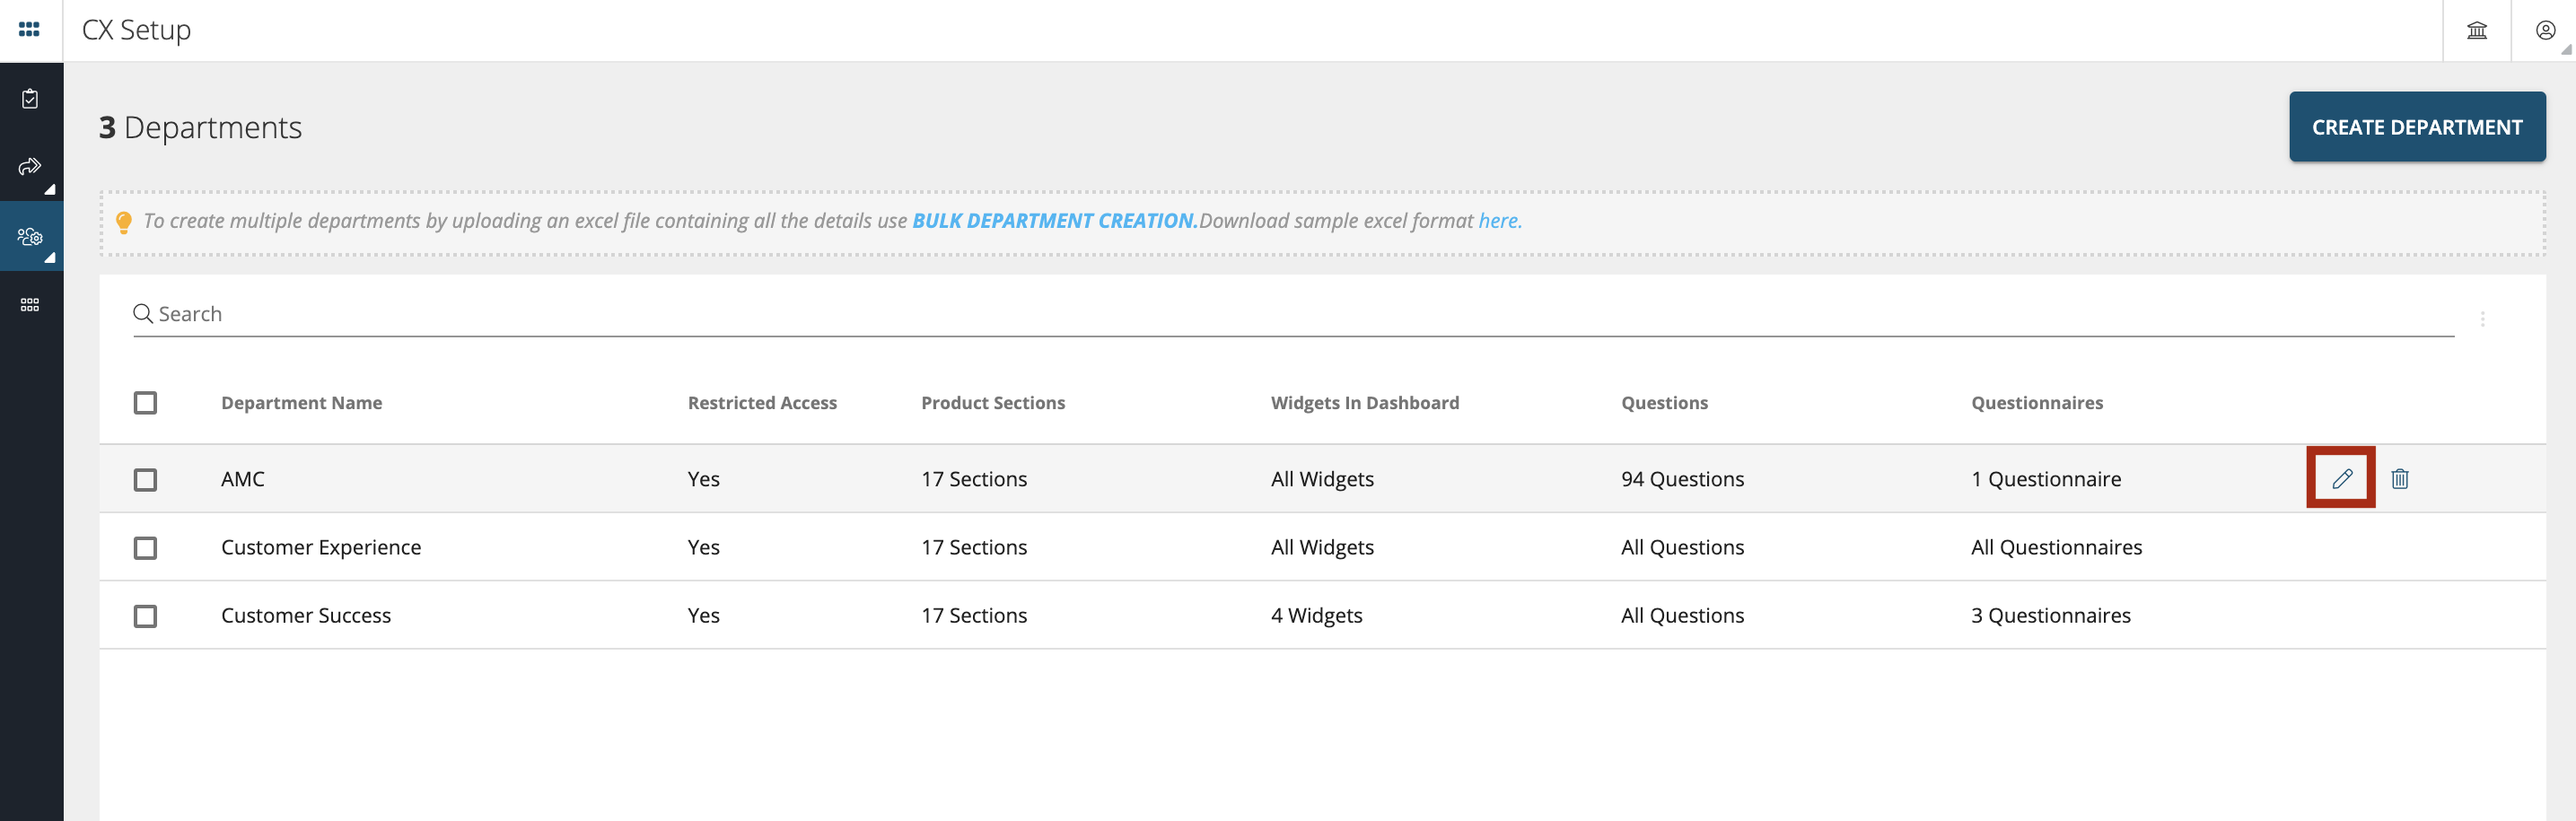
Go to CX Set-up > Account Settings > Enterprise > Department as shown below.
Click on the Edit button as shown below
Bulk Creation of Departments
In order to create multiple departments in one go you can use Bulk Creation of Departments feature available in the Department section as shown below.

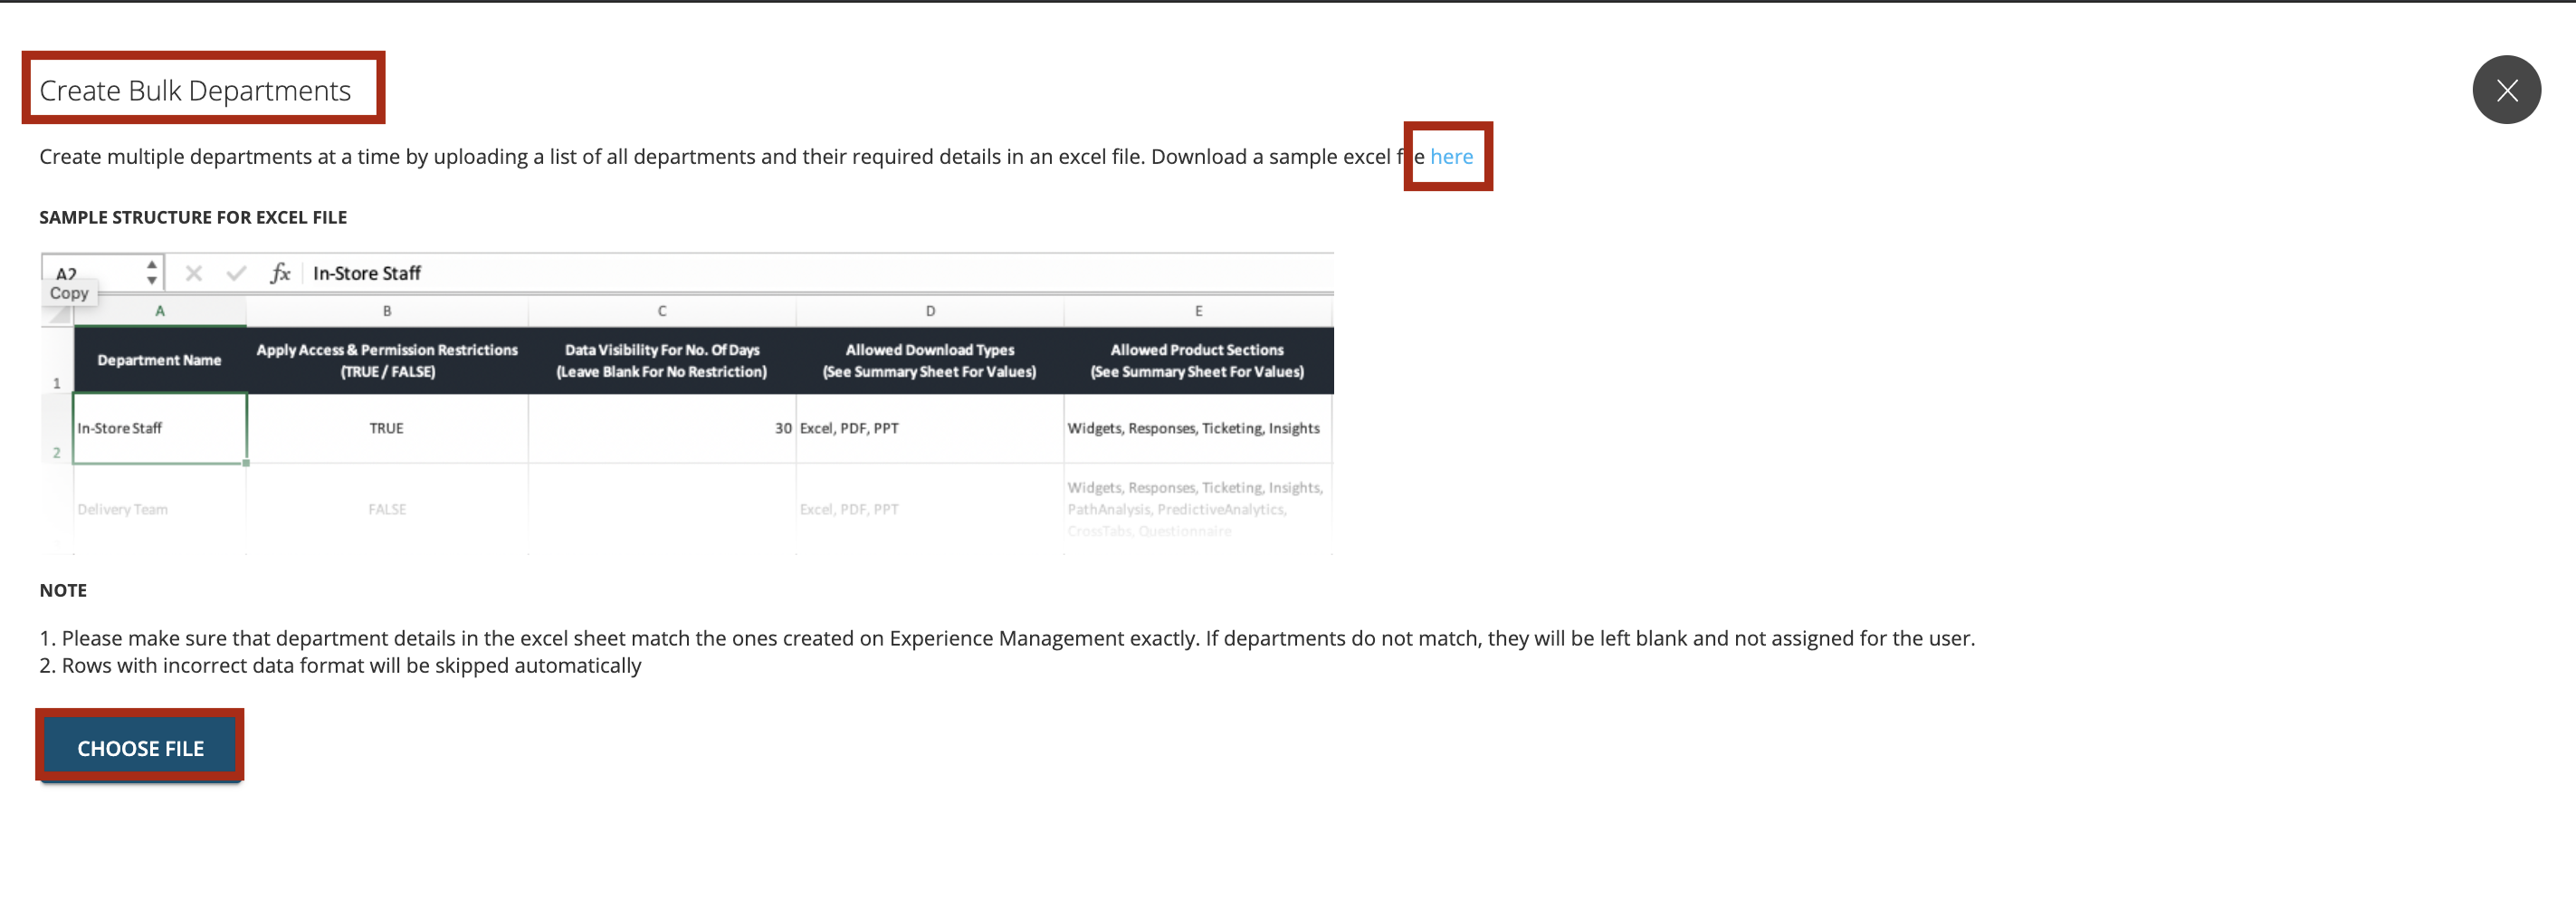
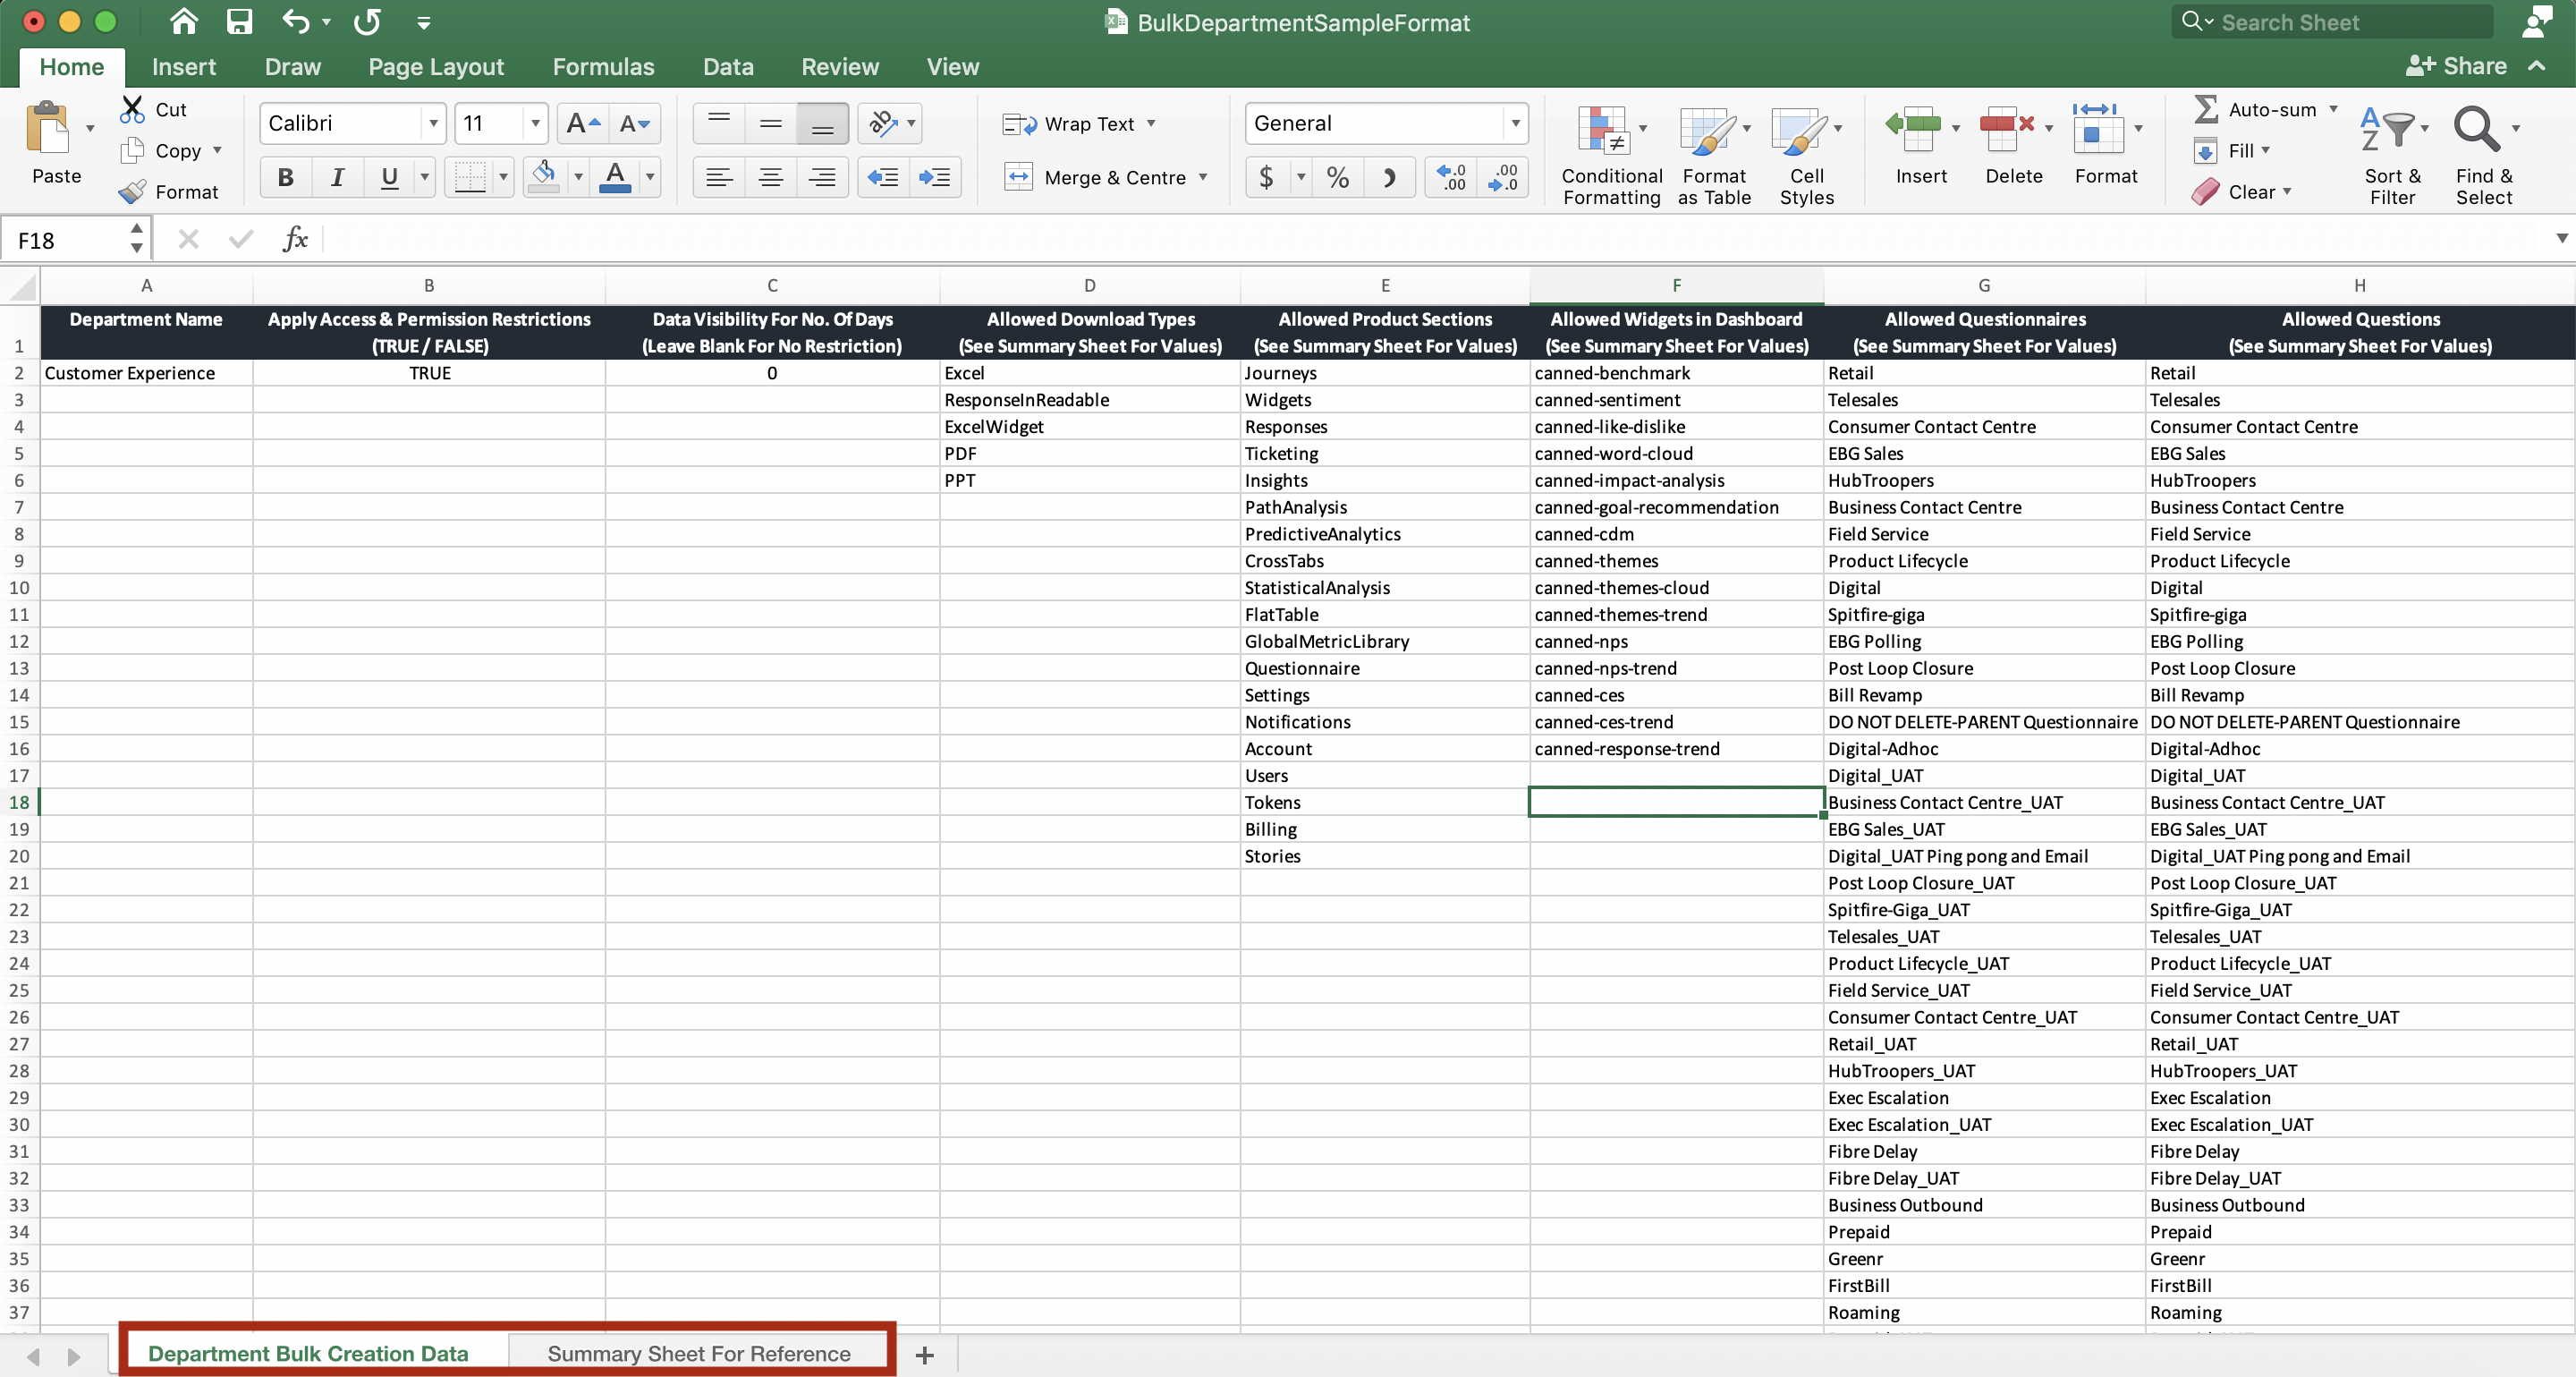
The template which needs to be filled in and uploaded can be downloaded from the same page. The template is in excel version which has two tabs. The first tab ‘Department Bulk Creation Data’ needs to be filled in and the reference values can be fetched from the second tab ‘Summary Sheet for Reference’. Once the sheet is filled you can select ‘Choose File’ and upload this sheet.
Delete Department
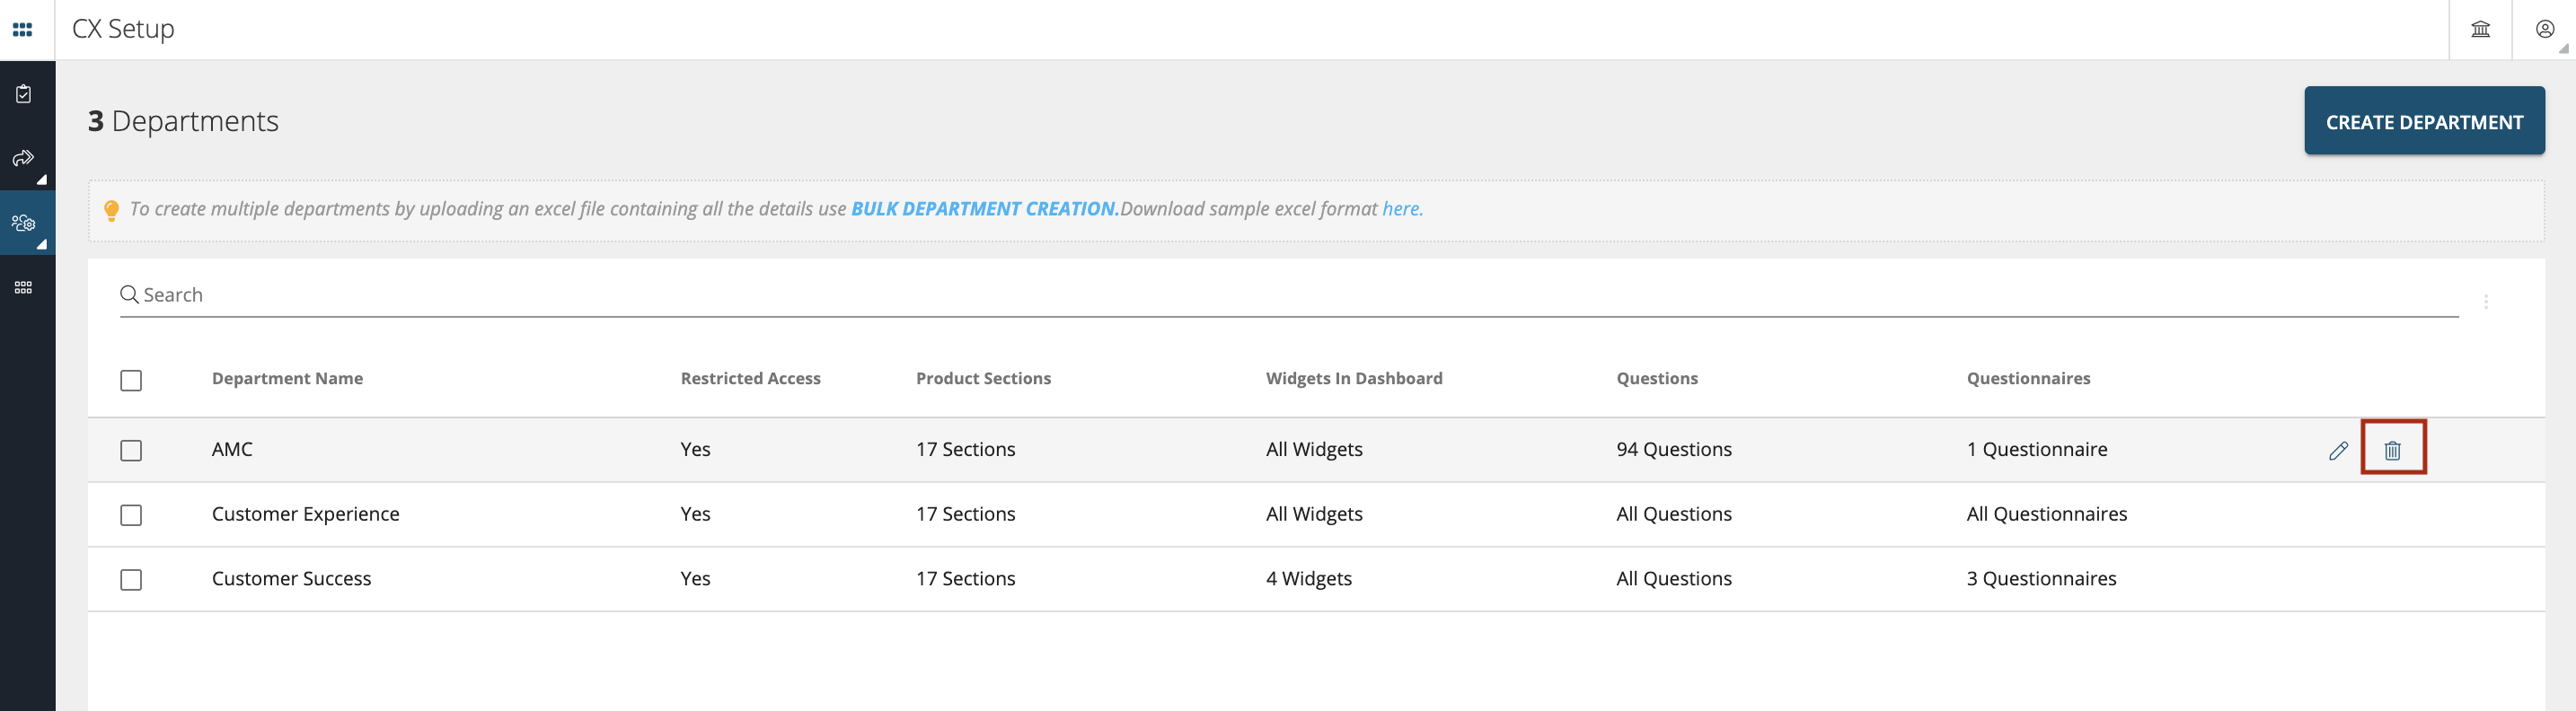
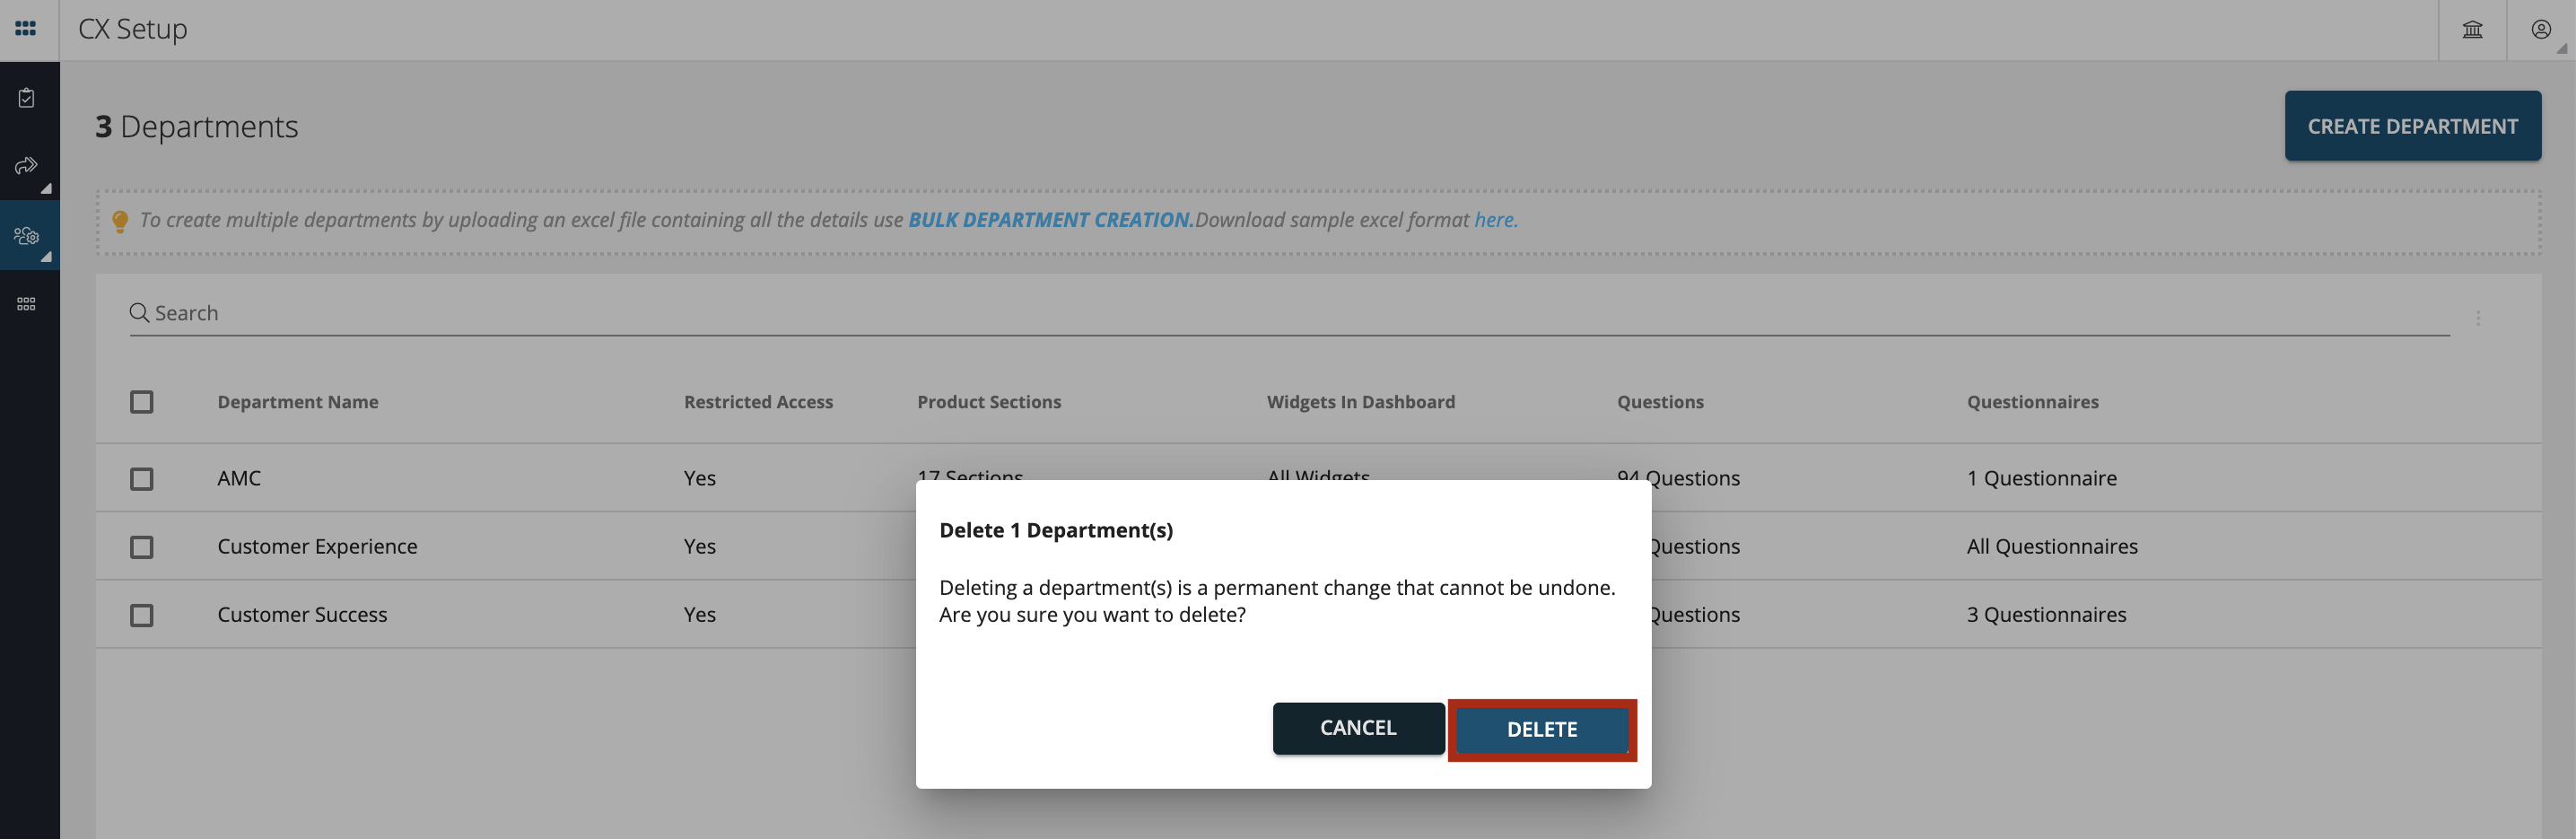
To delete a department, click on the trash icon as shown below.
Search Department
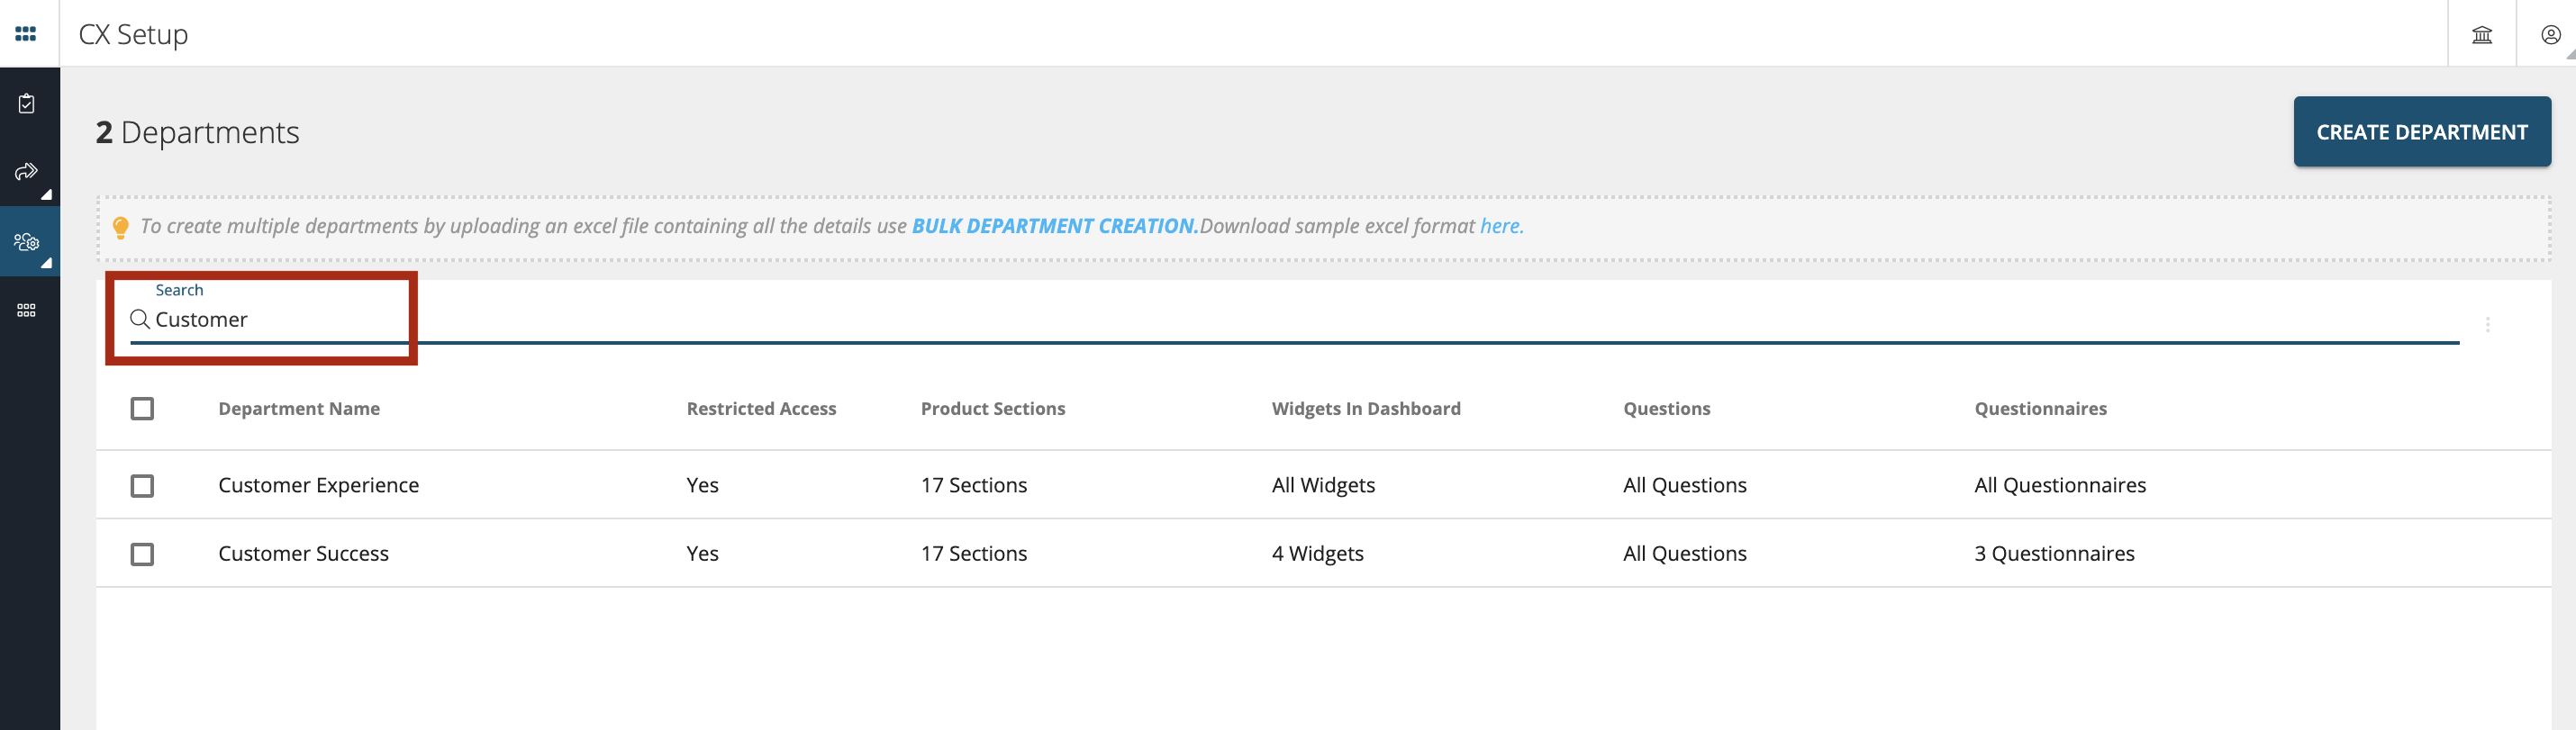
A wildcard search is available in the department tab as shown below. You can use this search to search departments by Name.
Role Creation
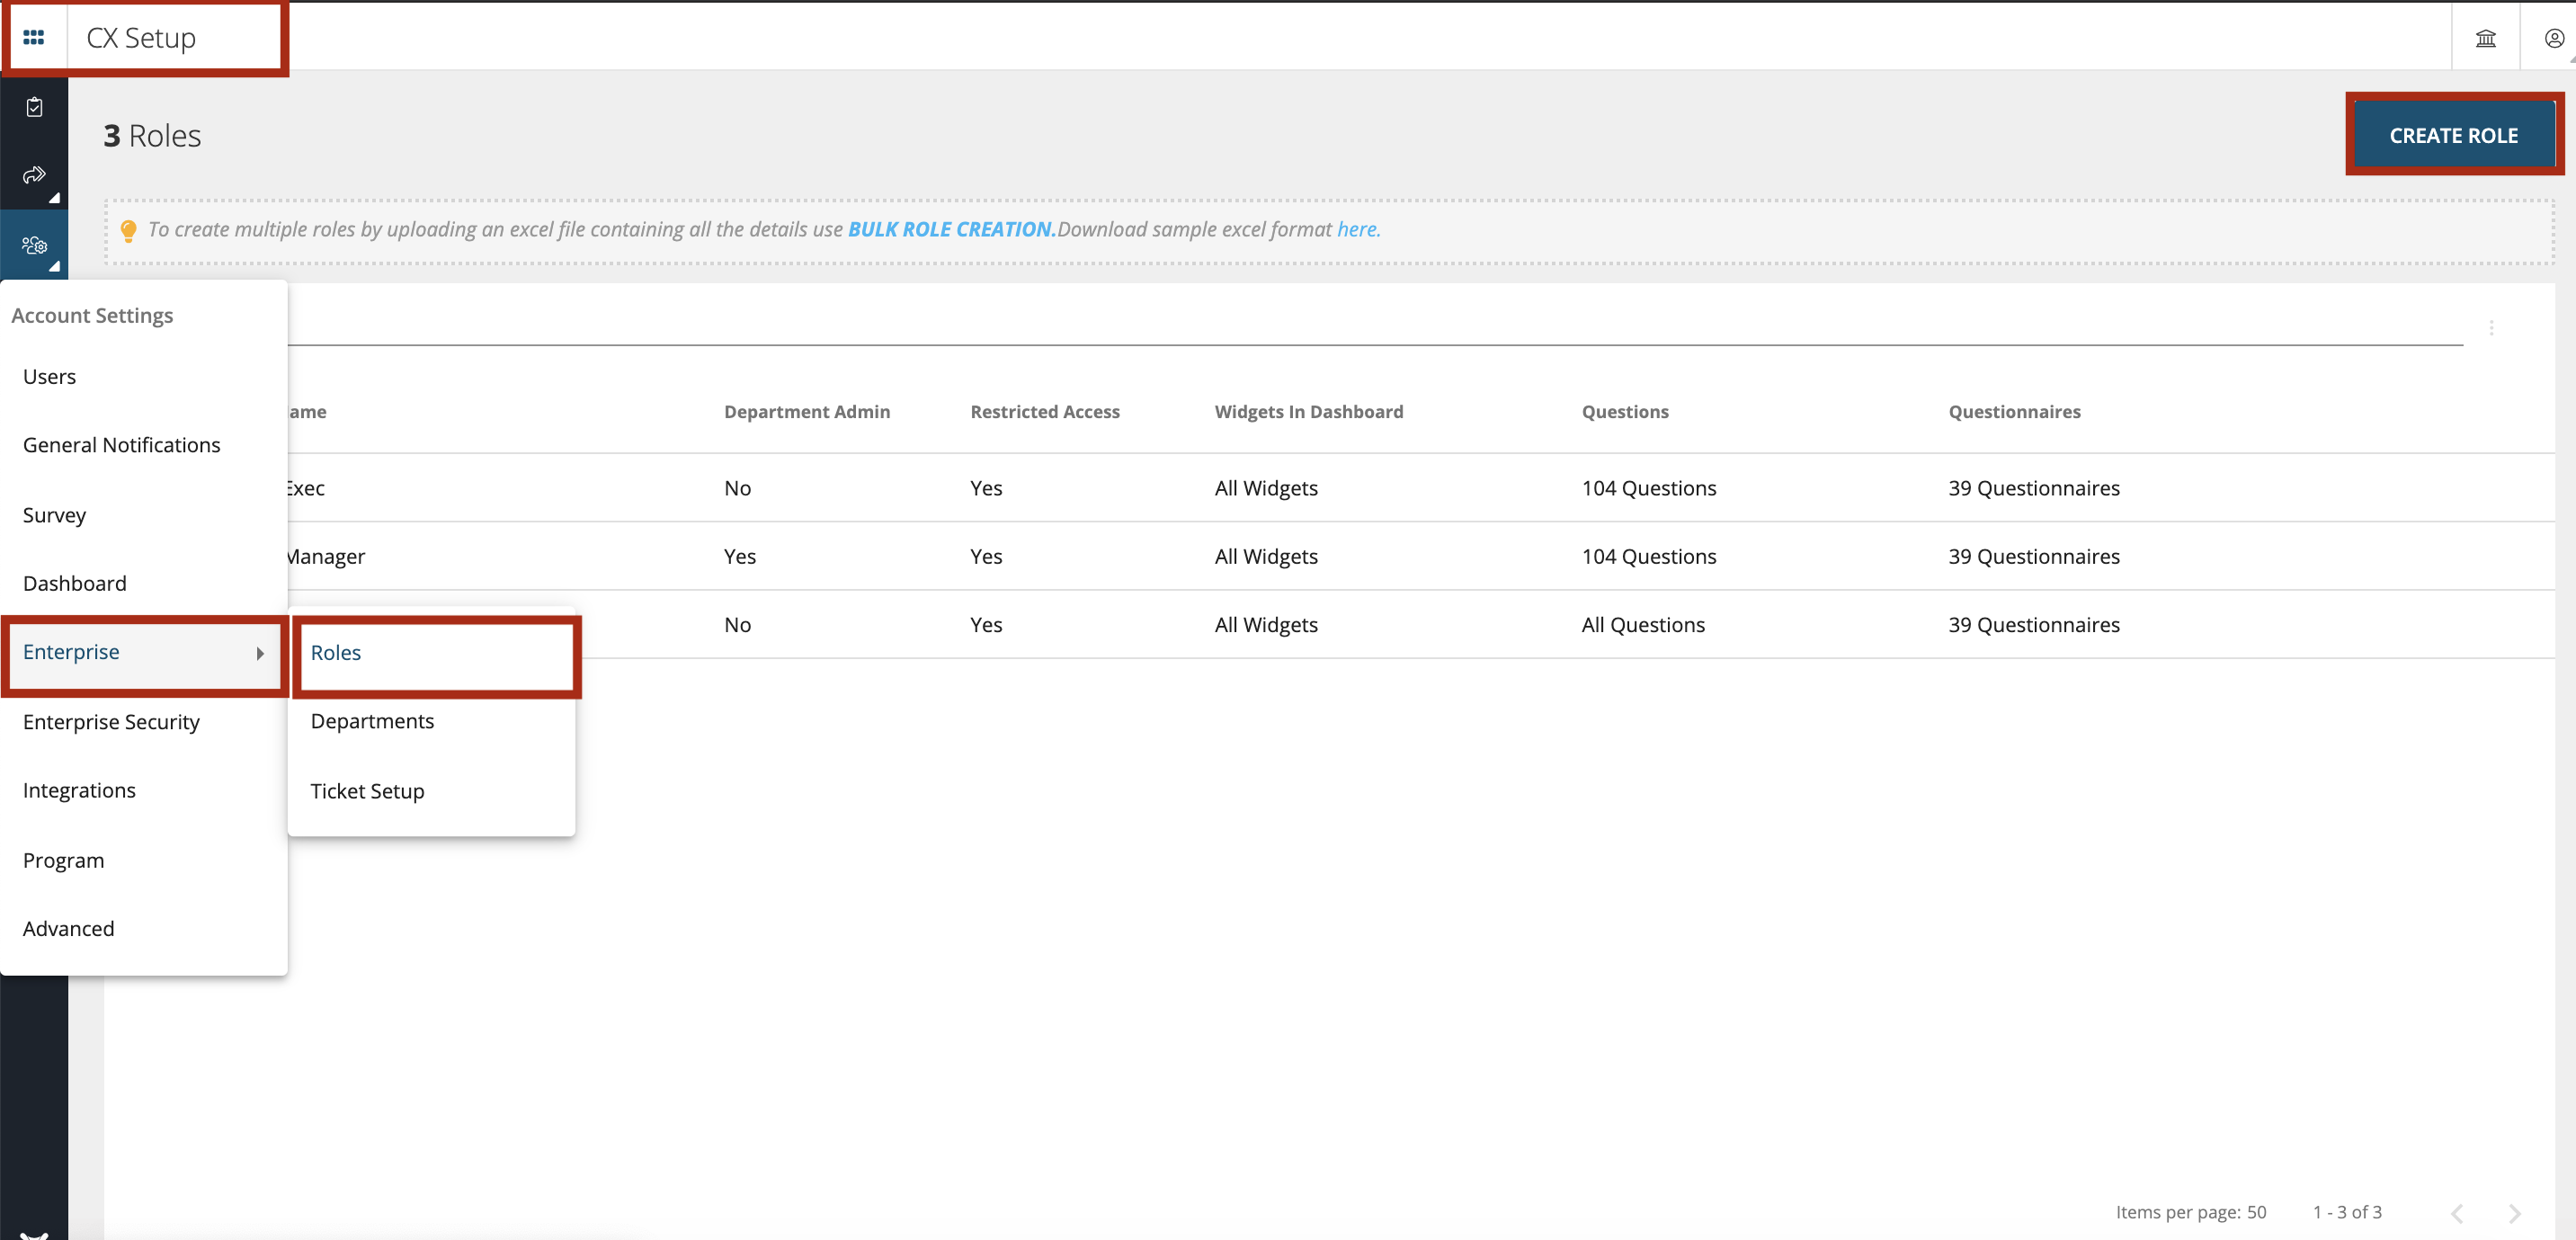
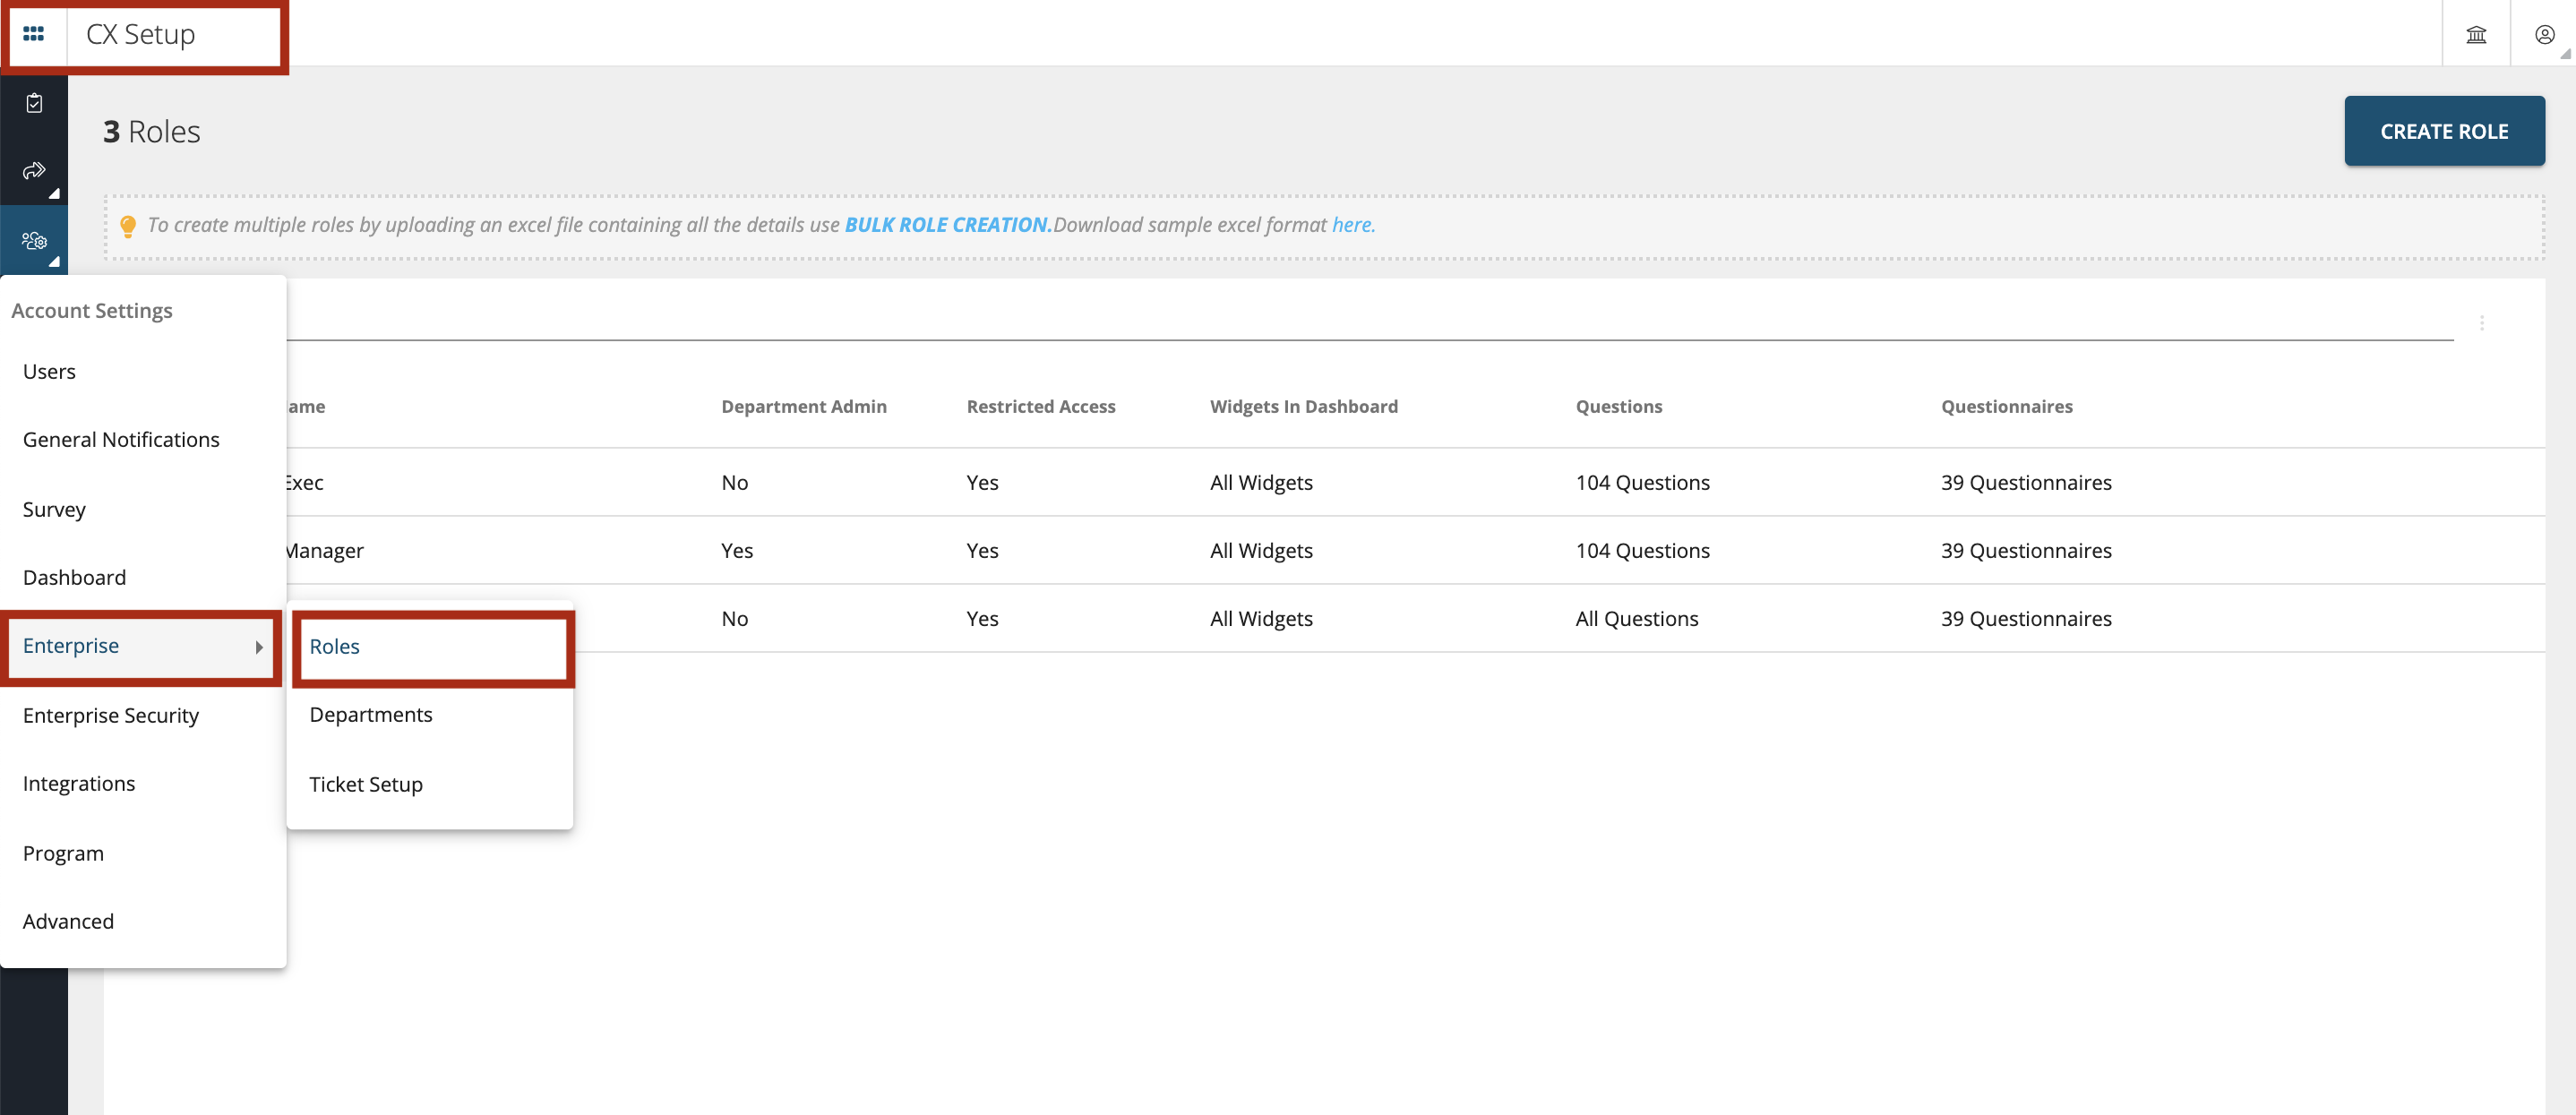
To create a ‘New Role’ go to CX Set-up > Account Settings > Enterprise > Roles as shown below. Click on ‘Create Role’ button
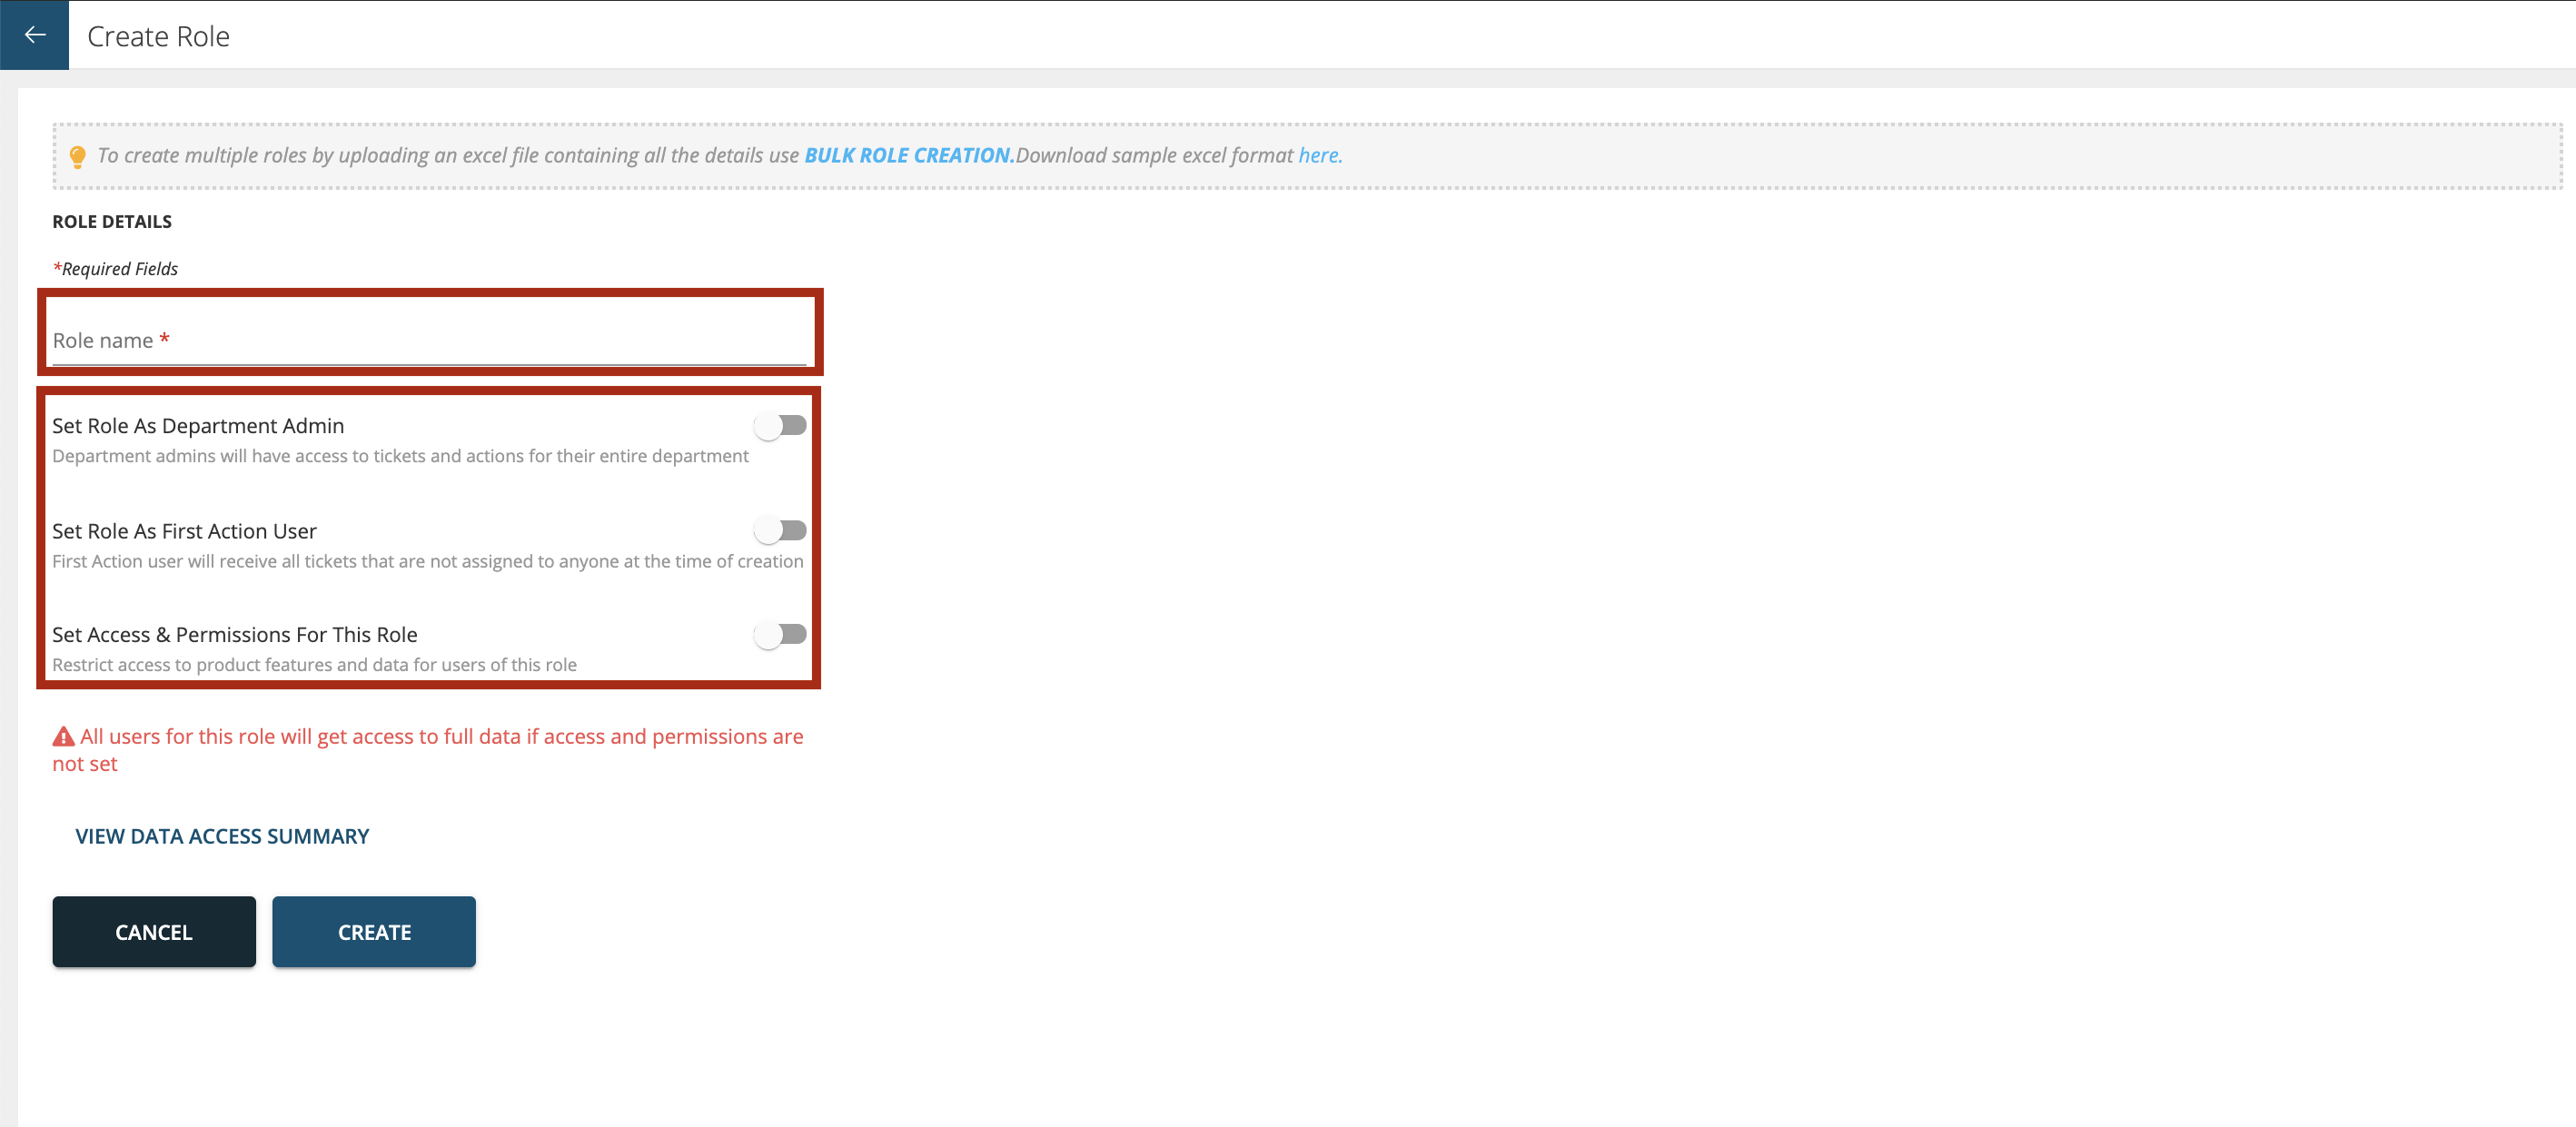
To create a Role, give a name to the Role. For e.g.: AMC Manager, AMC Agent. You can create multiple roles depending on the organization structure and data access restrictions.
- Set Role as Department Admin: Toggle on this if you want the Department admins should have access to tickets and actions for their entire department. For instance; if you have enabled this for 3 roles which fall under same department then all these roles will have access to tickets and actions.
- Set Role as First Action User: Enabling this for the role will allow the users to receive all tickets that are not assigned to anyone at the time of creation. These users will be considered as First Action Users so all tickets will be first assigned to them.
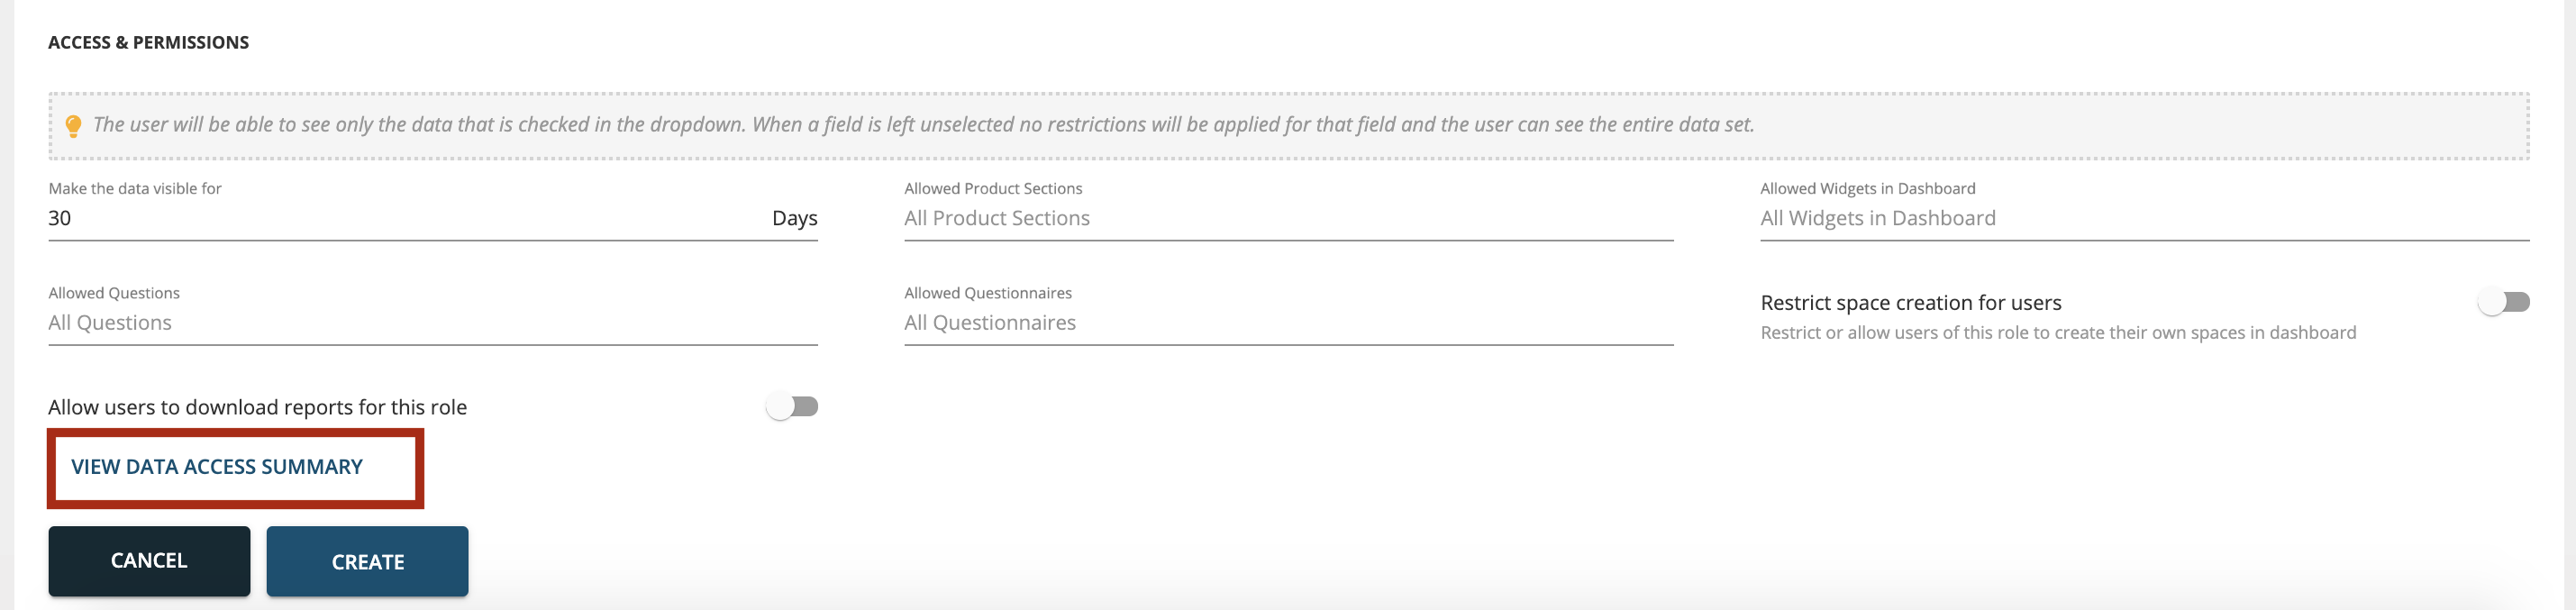
- Set Access and Permissions for this Role: Toggle this one to restrict access to product features and data for users of this role. This will let the user see only the data that is checked in the dropdown. When a field is left unselected no restrictions will be applied for that field and the user can see the entire data set.
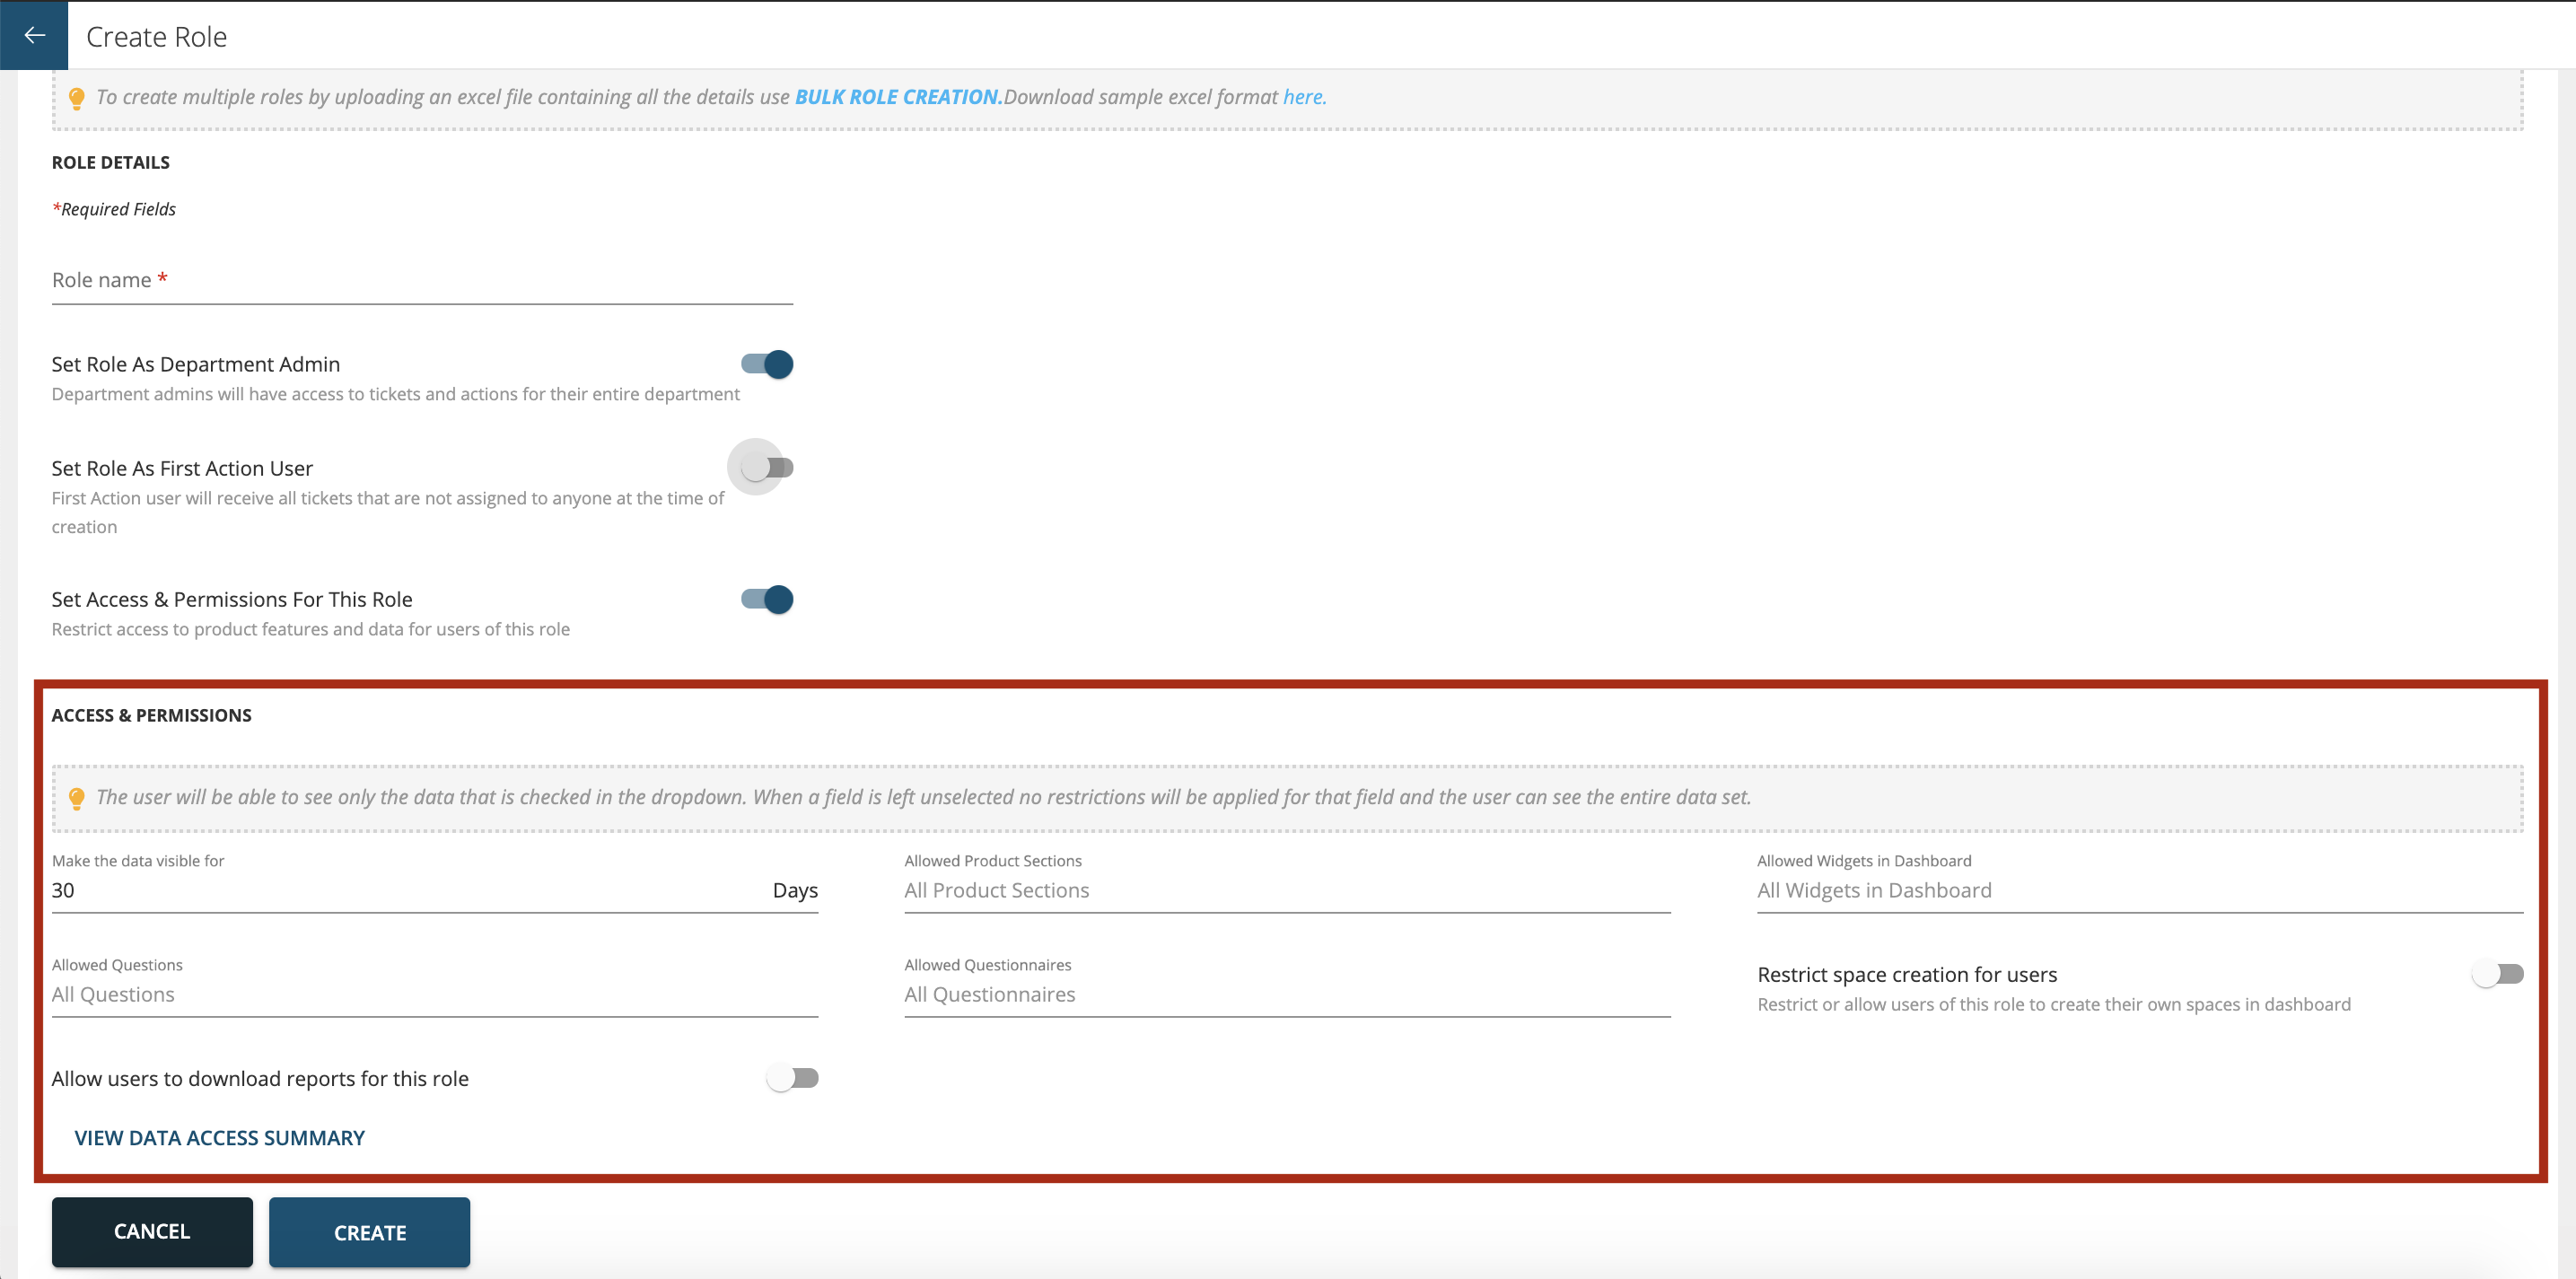
Types of fields:
- Make the data visible for: Here you can set the number of days for the data to be made visible to users who are assigned that role
- Allowed Product Sections: In this section you can select different modules for which you want to allow access to like Questionnaire, Responses, Tokens, etc.
- Allowed Widgets in Dashboard: Here you can select which widgets you want to show on the dashboard and which widgets you want to hide for the users of that role.
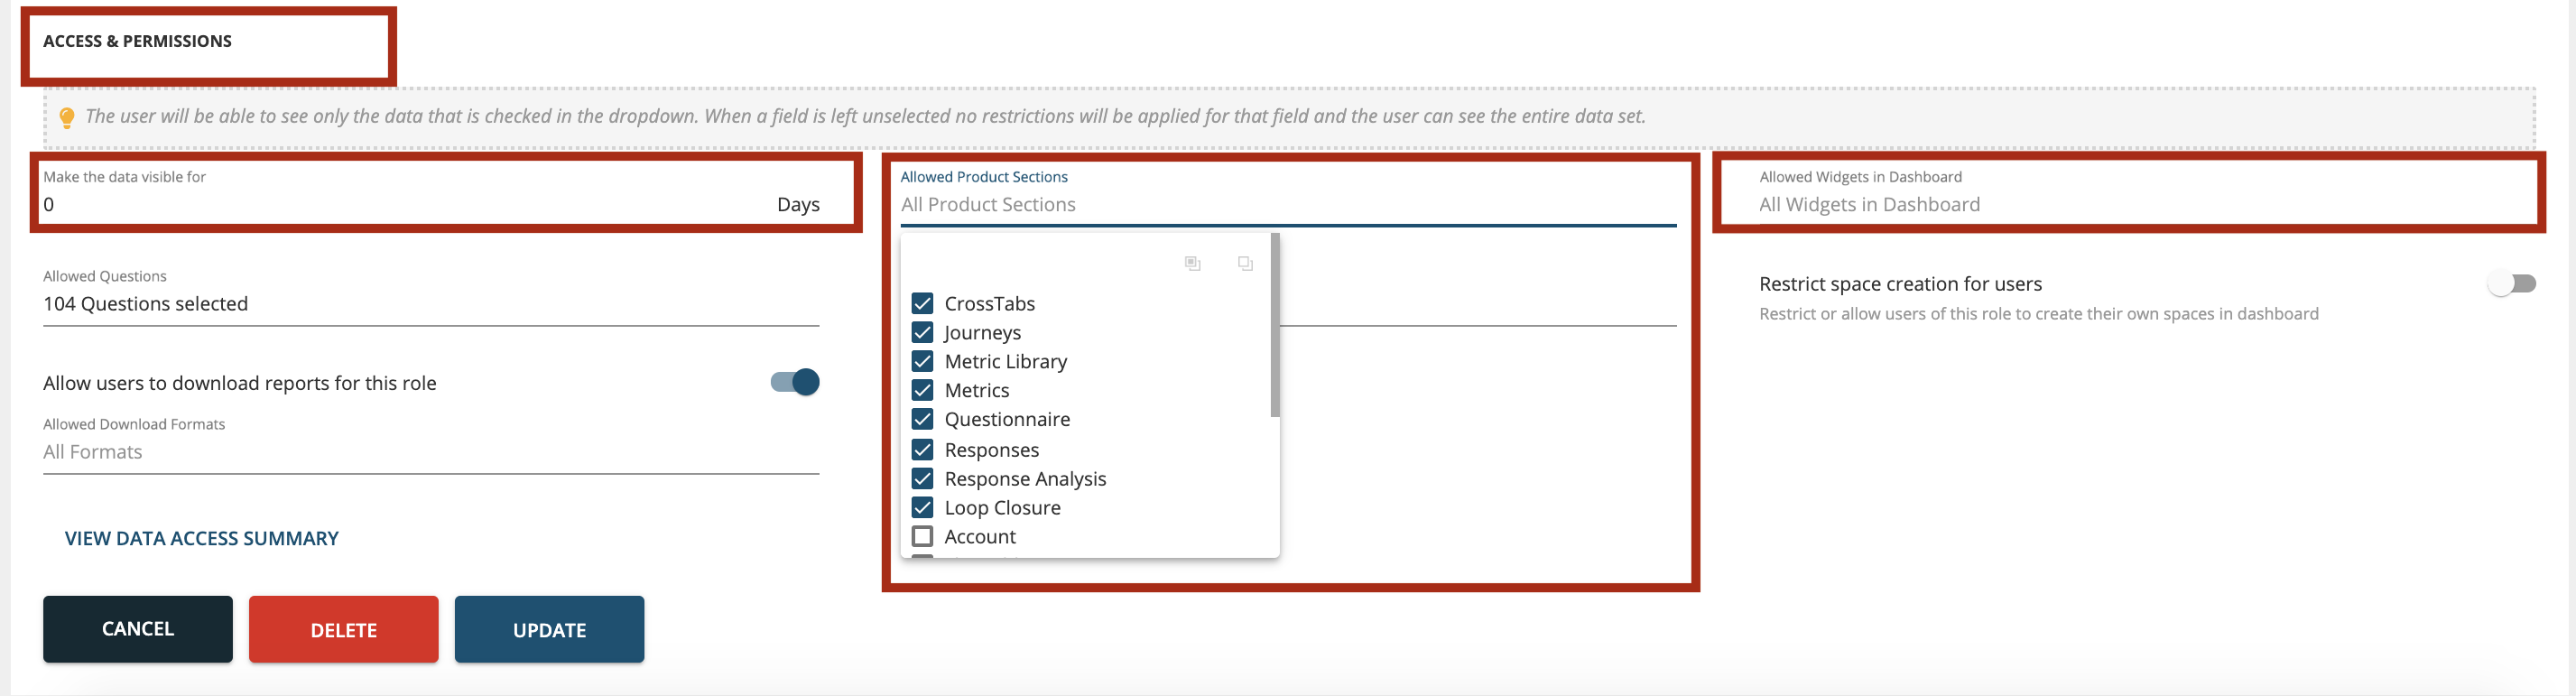
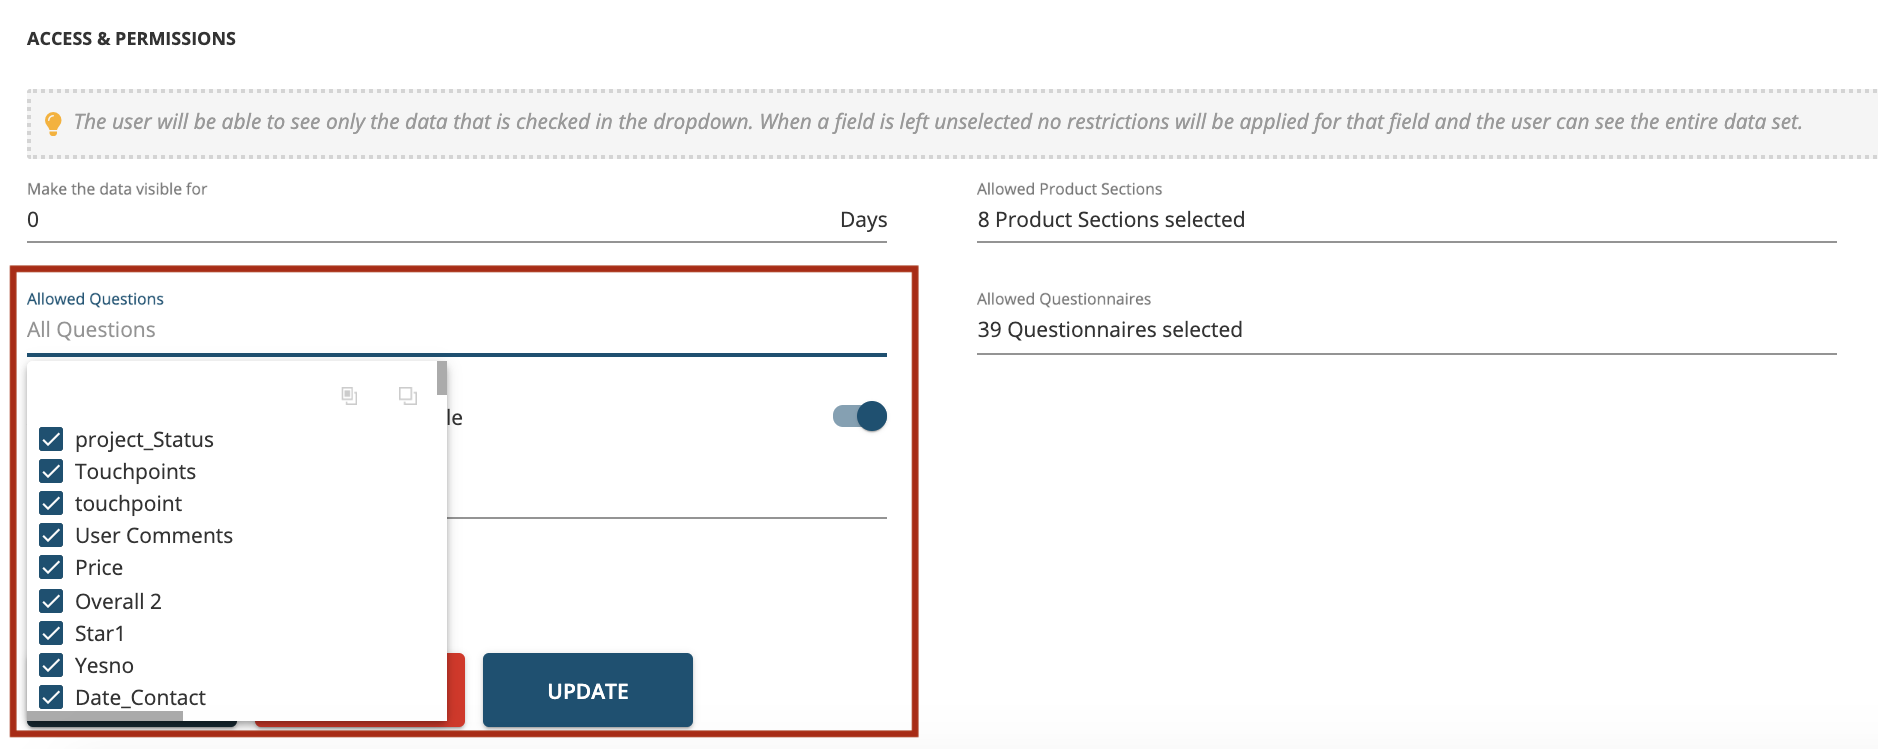
- Allowed Questions: This section is where you can control access level down to questions level. For instance there are 10 questions (both staff prefills and customer facing questions) and you want to restrict the users from seeing PII data like customer Name, Email & mobile number then you can deselect those questions here and choose the remaining 7 questions.
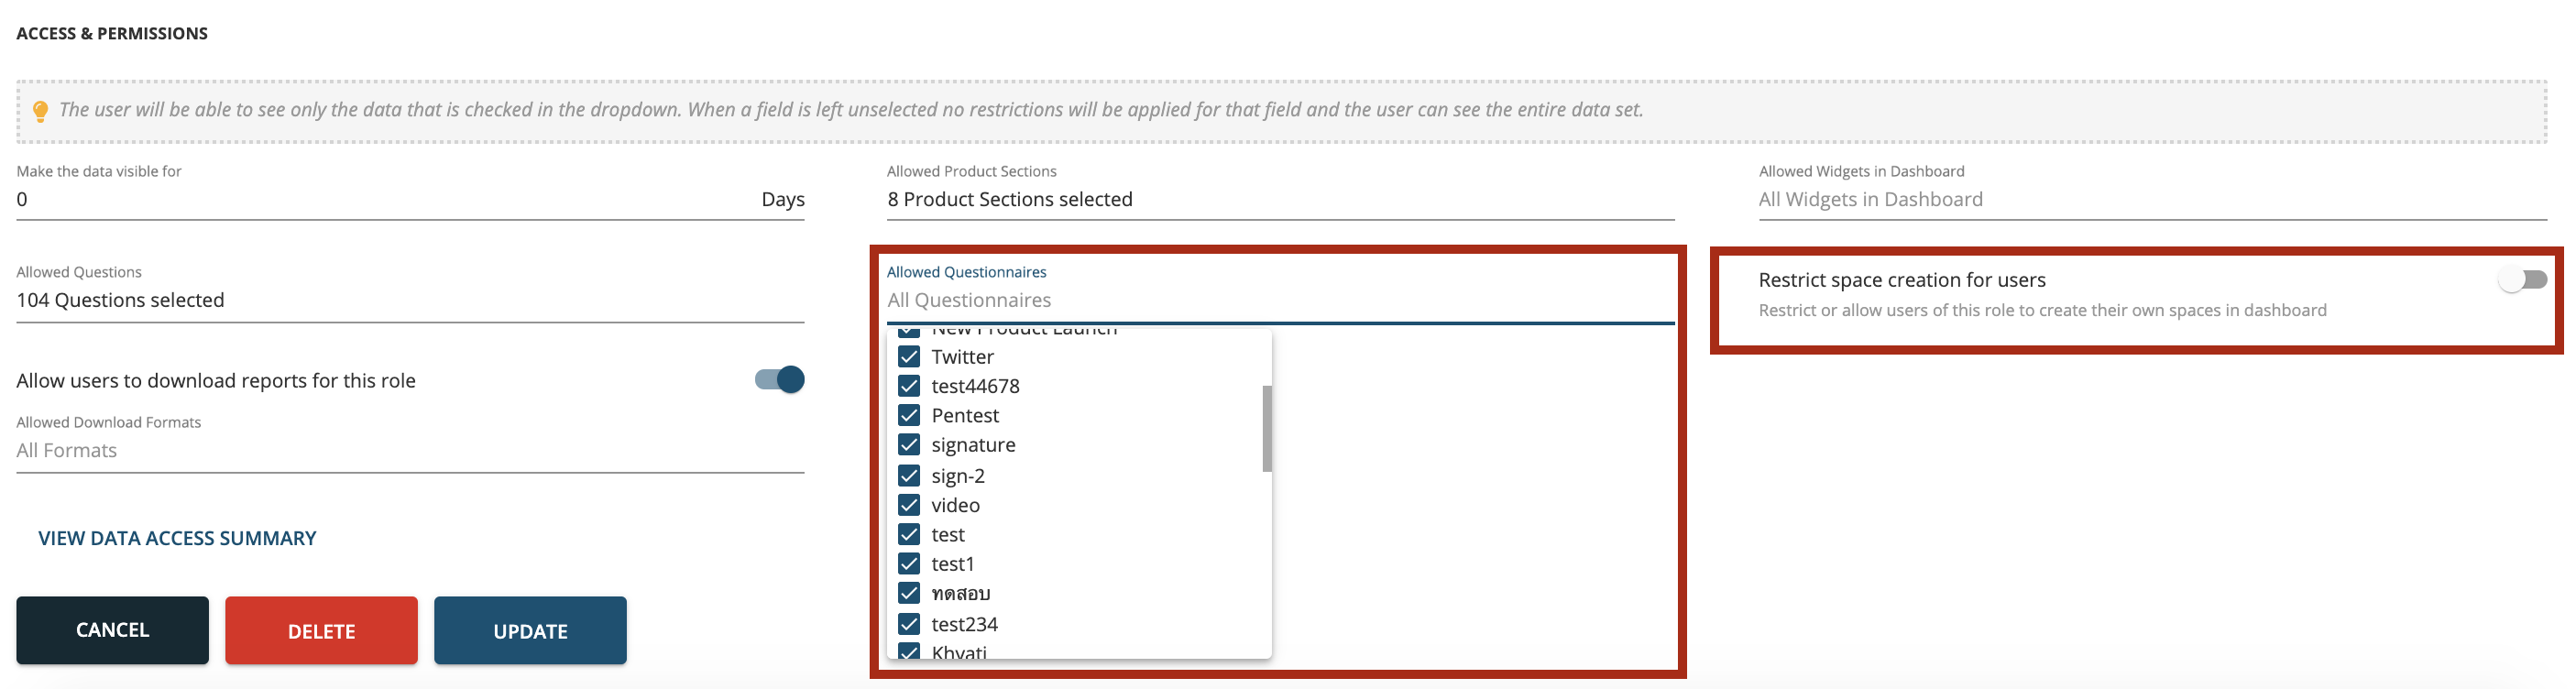
- Allowed Questionnaires: Here you can select the questionnaires relevant to that role
- Restrict Space creation for Users: Restrict or allow users of this role to create their own spaces in dashboard
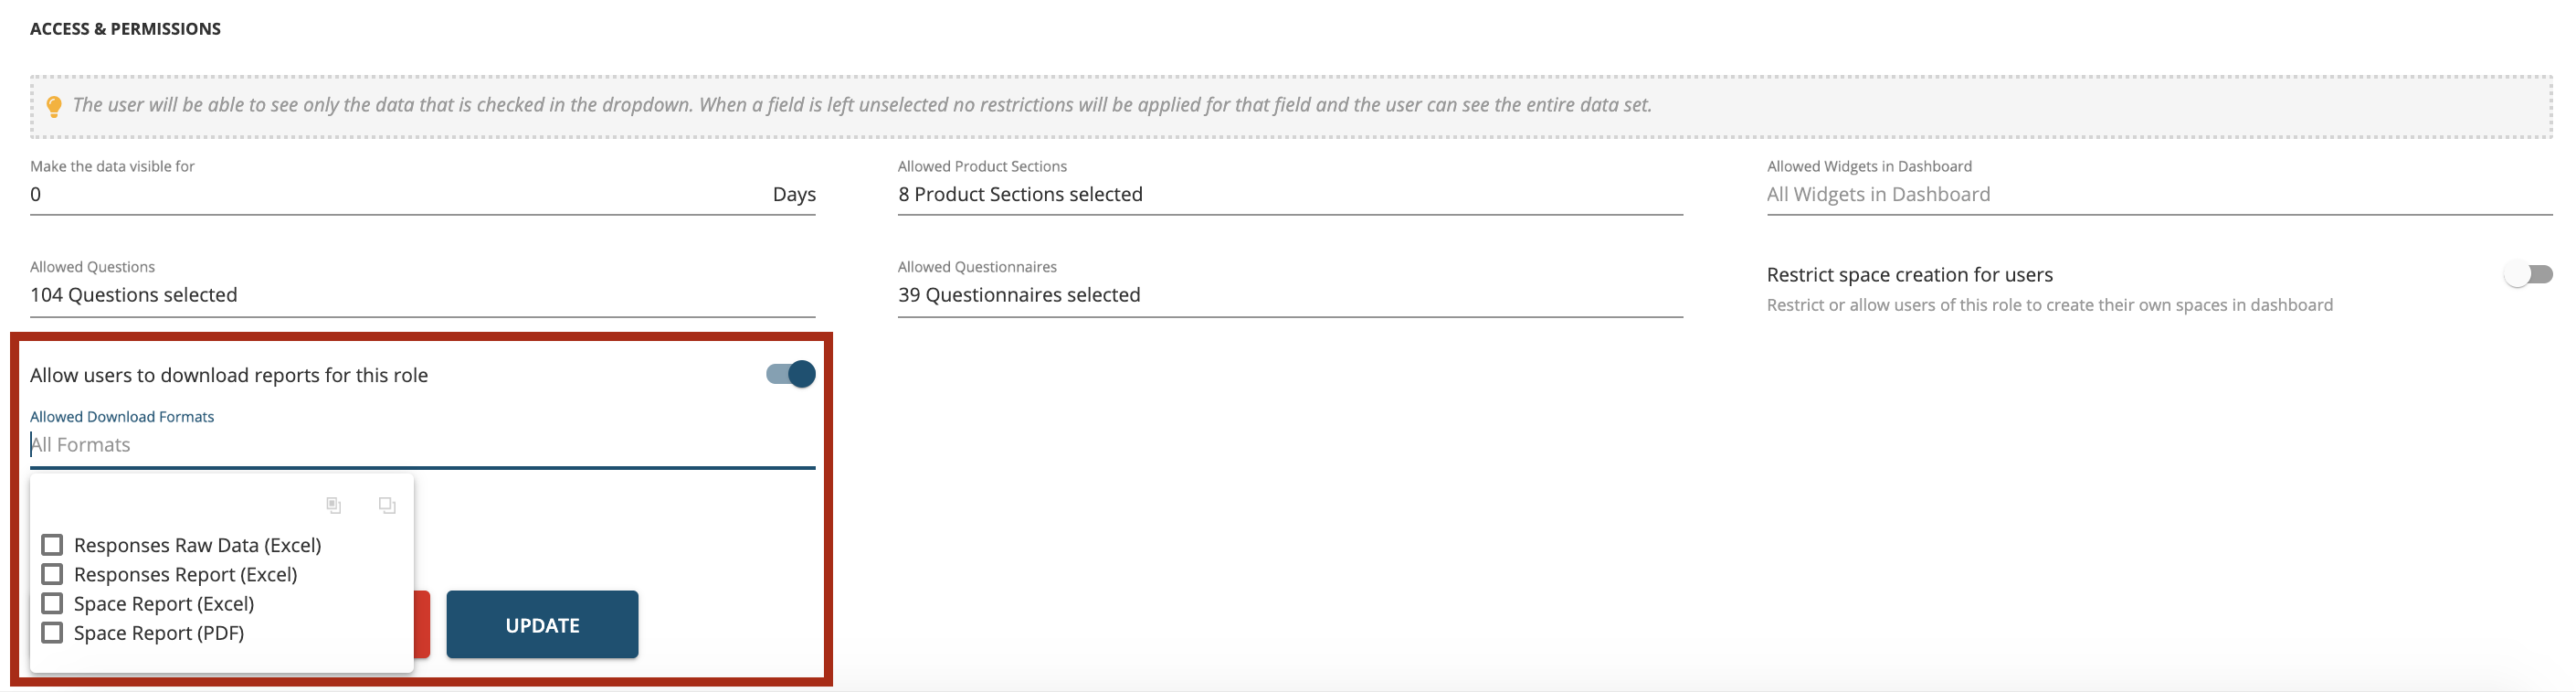
- Allow users to download reports for this Role: You can select different kinds of download formats that you want the users of that role can download. If the toggle button is OFF then that role users will not be able to download any reports.
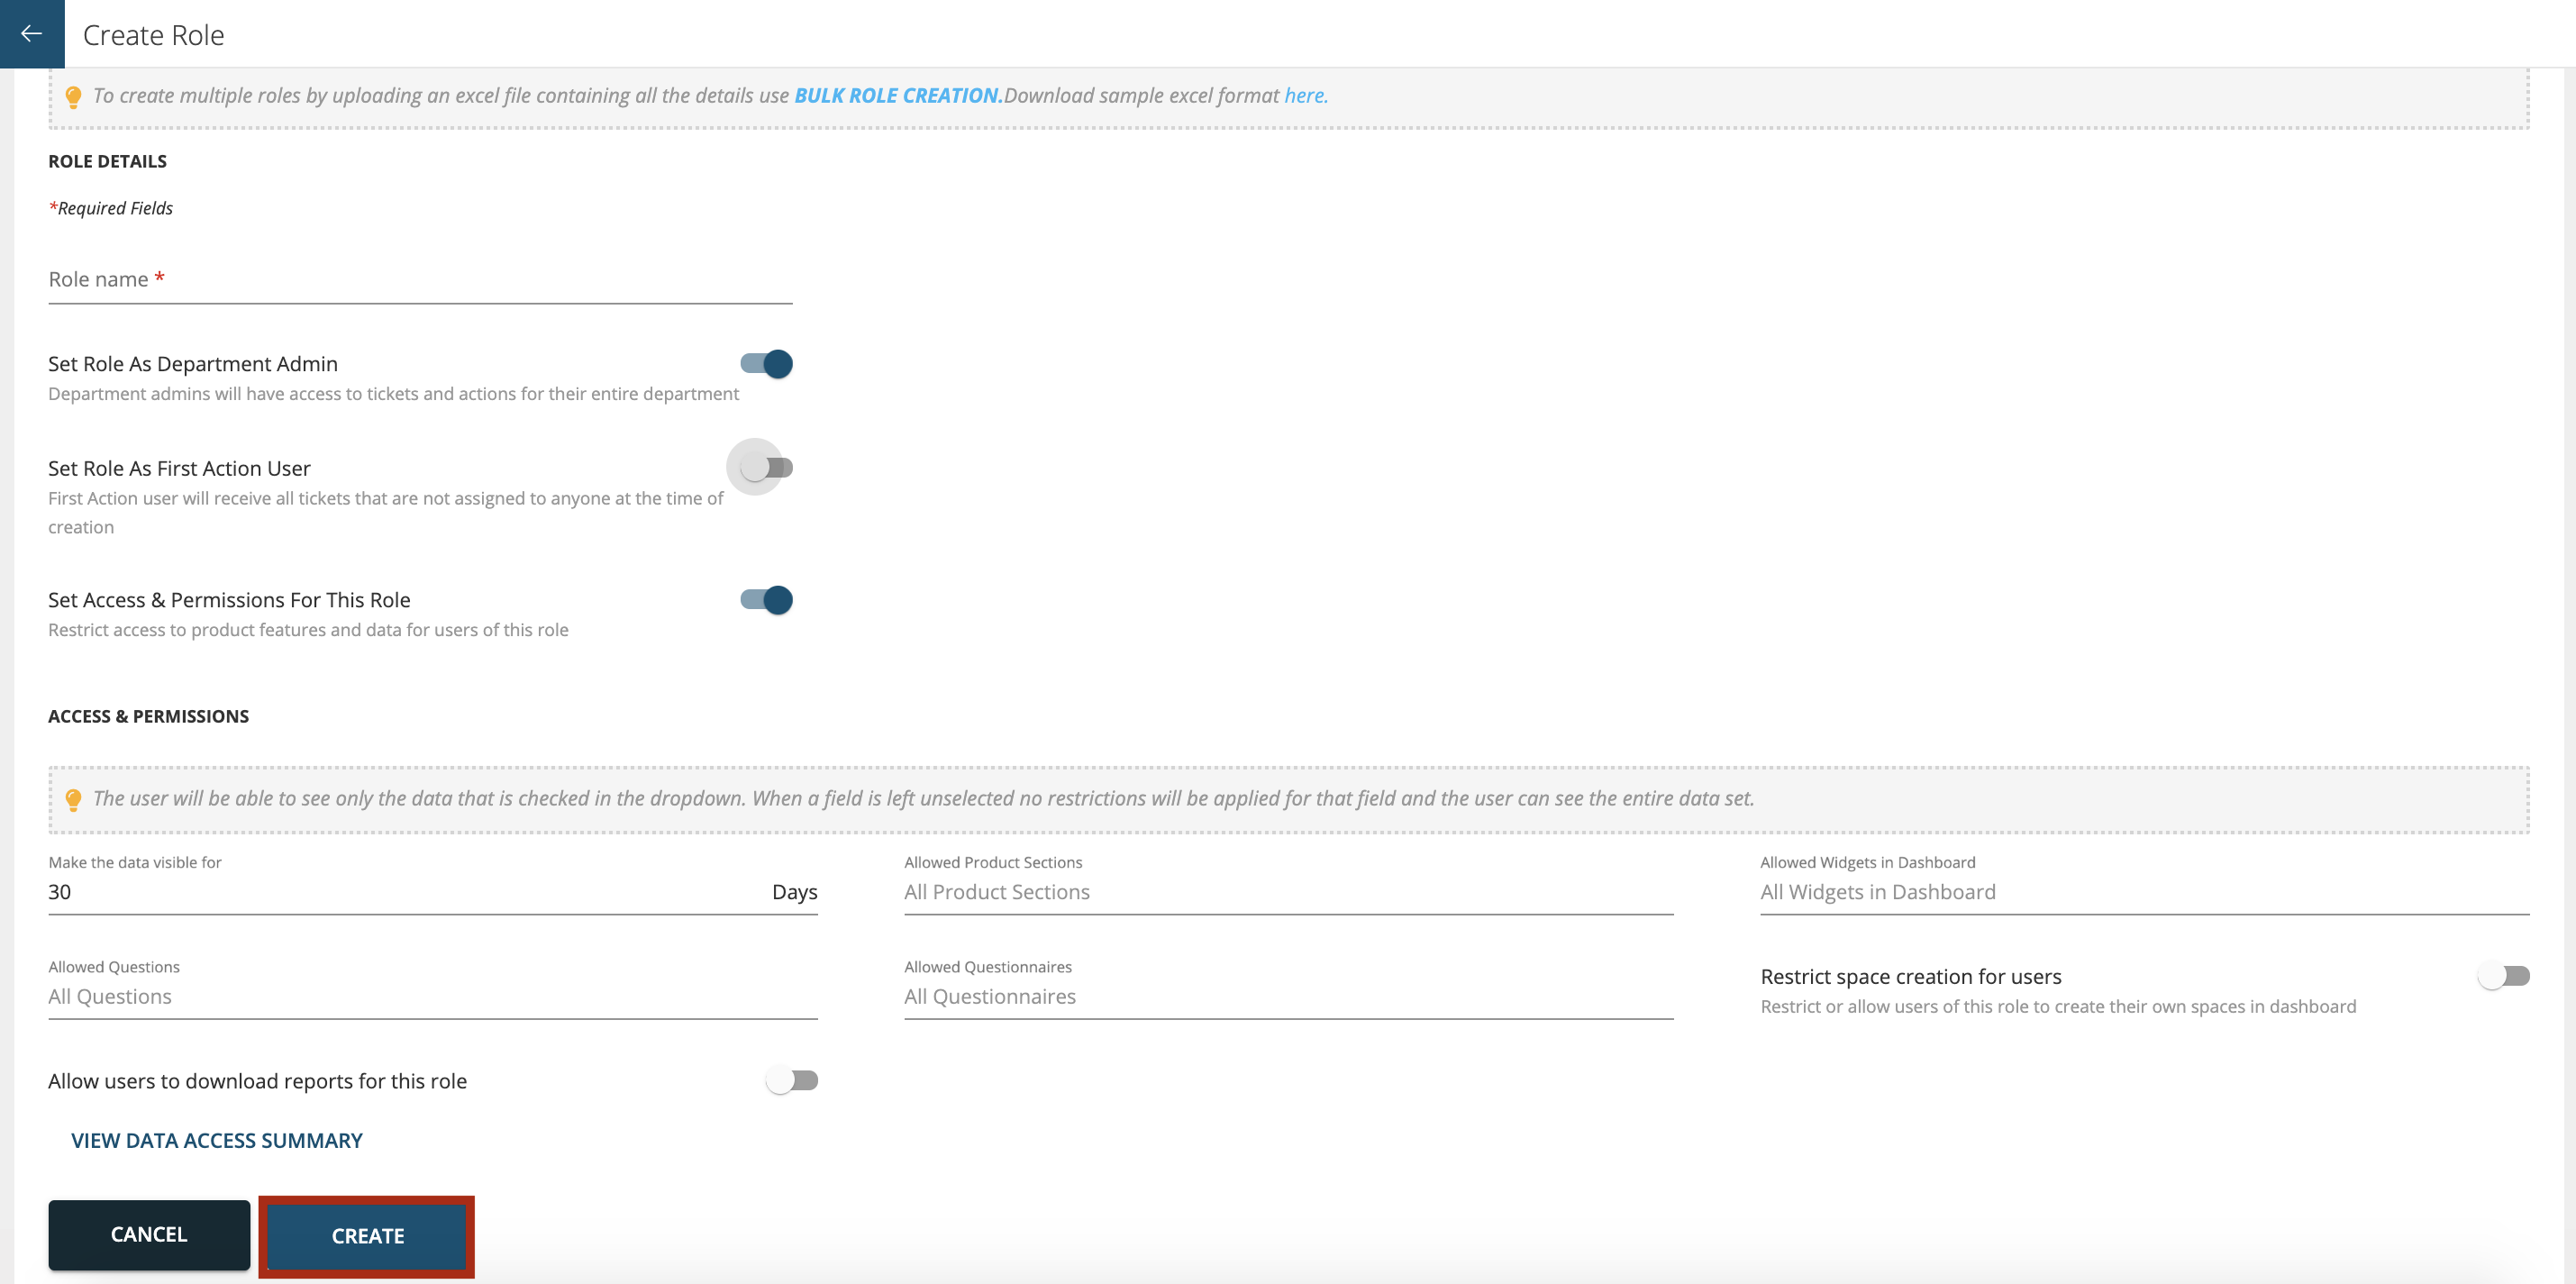
After filling all the details press ‘Create’ button.
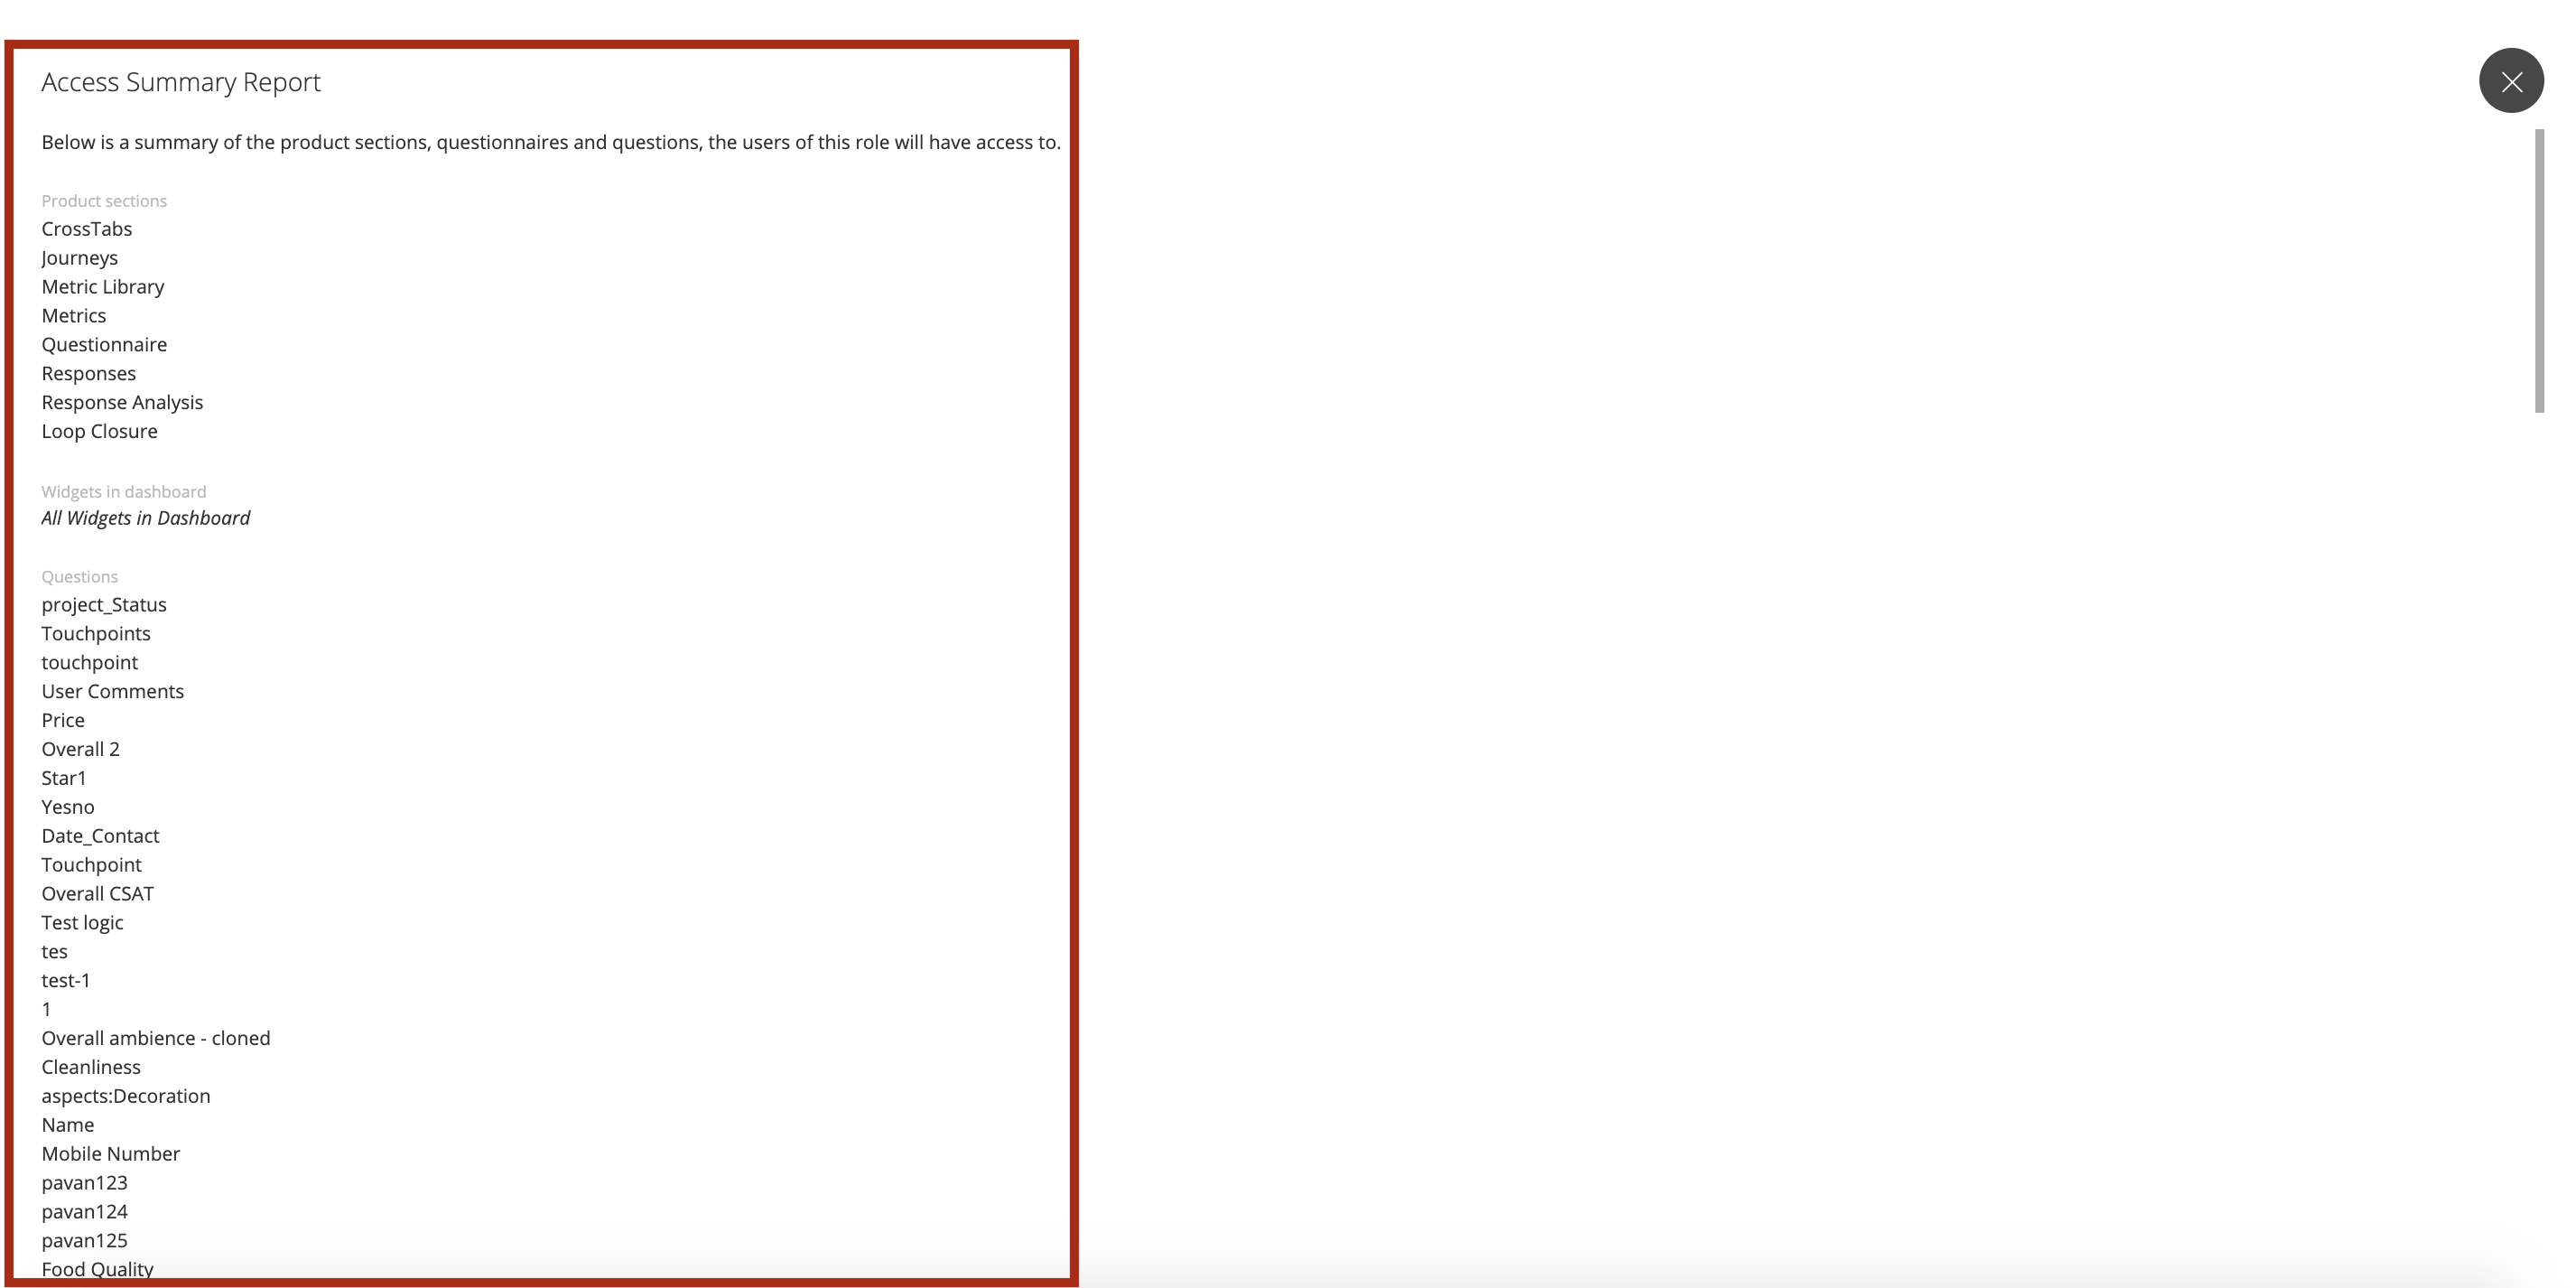
View Data Summary: This page shows you the complete summary of the access restrictions & permissions for the role
Edit Role
Go to CX Set-up > Account Settings > Enterprise > Roles as shown below.
Click on the Edit button as shown below

Bulk Creation of Roles
In order to create multiple Roles in one go you can use Bulk Creation of Roles feature available in the Roles section as shown below.

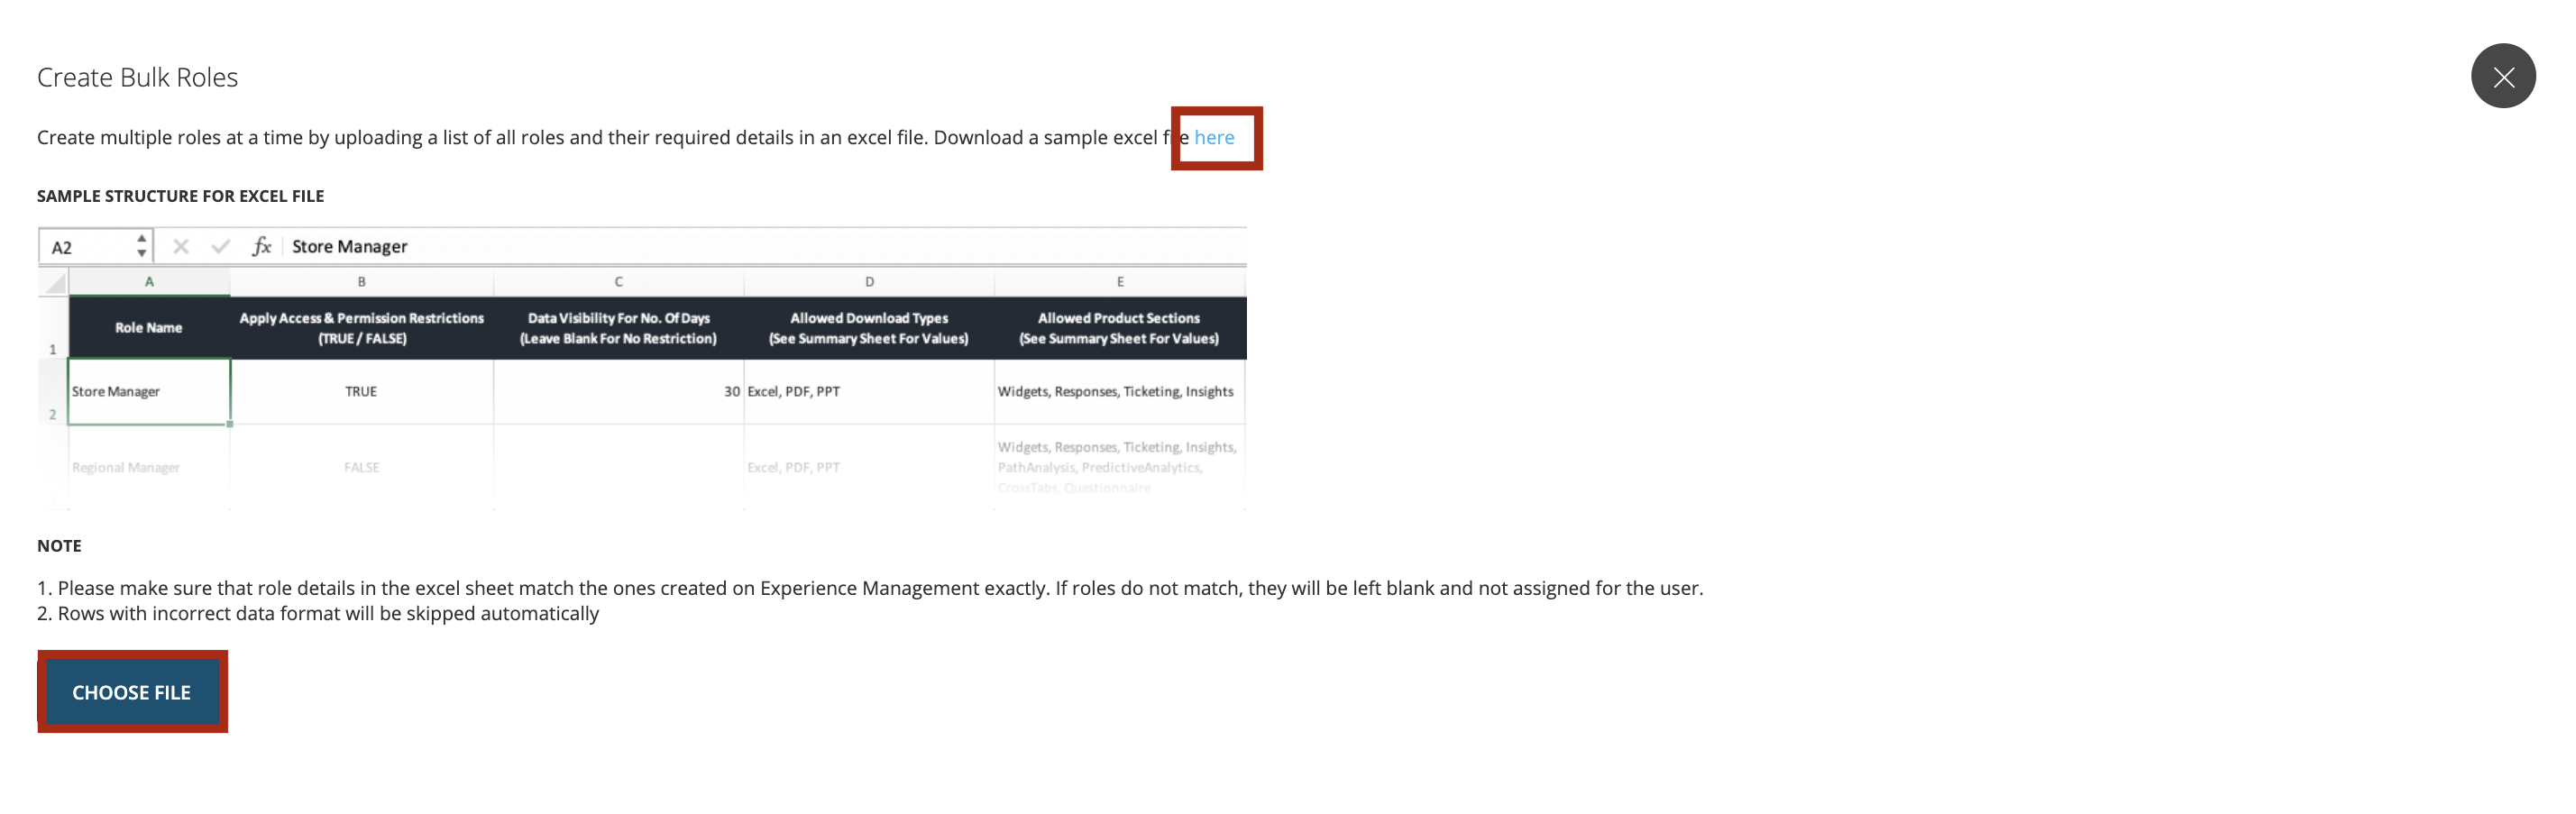
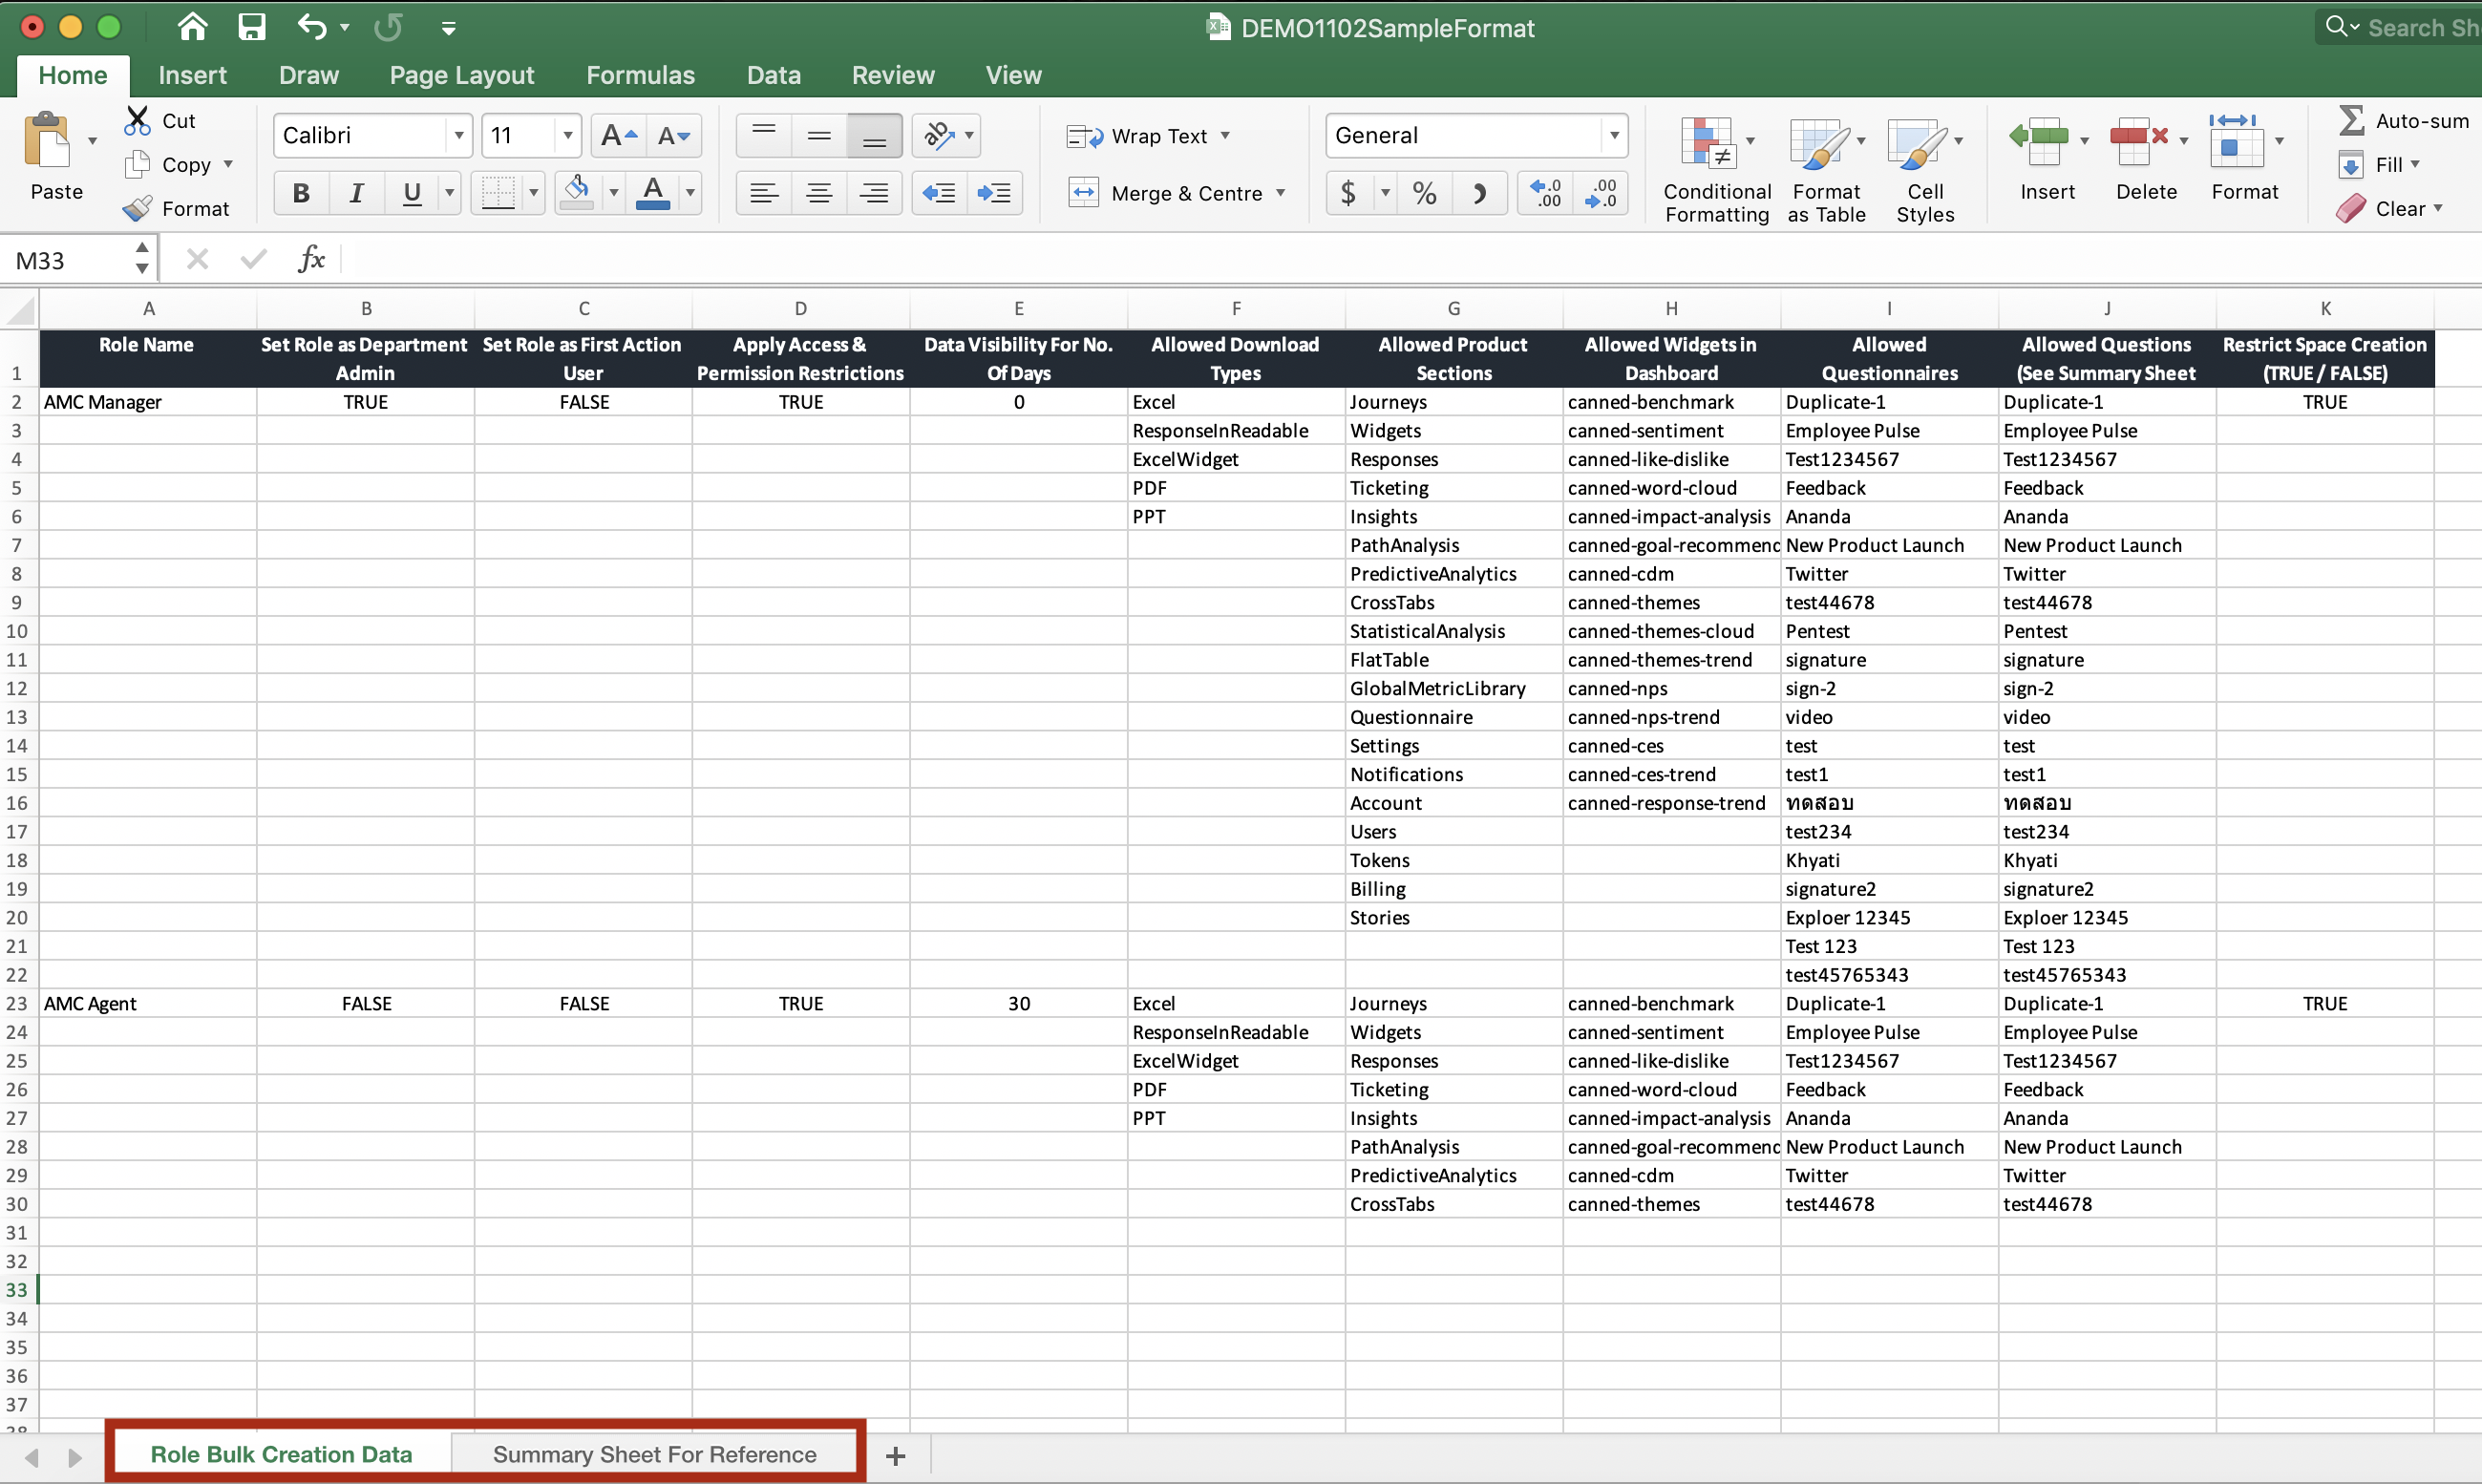
The template which needs to be filled in and uploaded can be downloaded from the same page. The template is in excel version which has two tabs. The first tab ‘Role Bulk Creation Data’ needs to be filled in and the reference values can be fetched from the second tab ‘Summary Sheet for Reference’. Once the sheet is filled you can select ‘Choose File’ and upload this sheet.
Delete Role
To delete a Role, click on the trash icon as shown below.

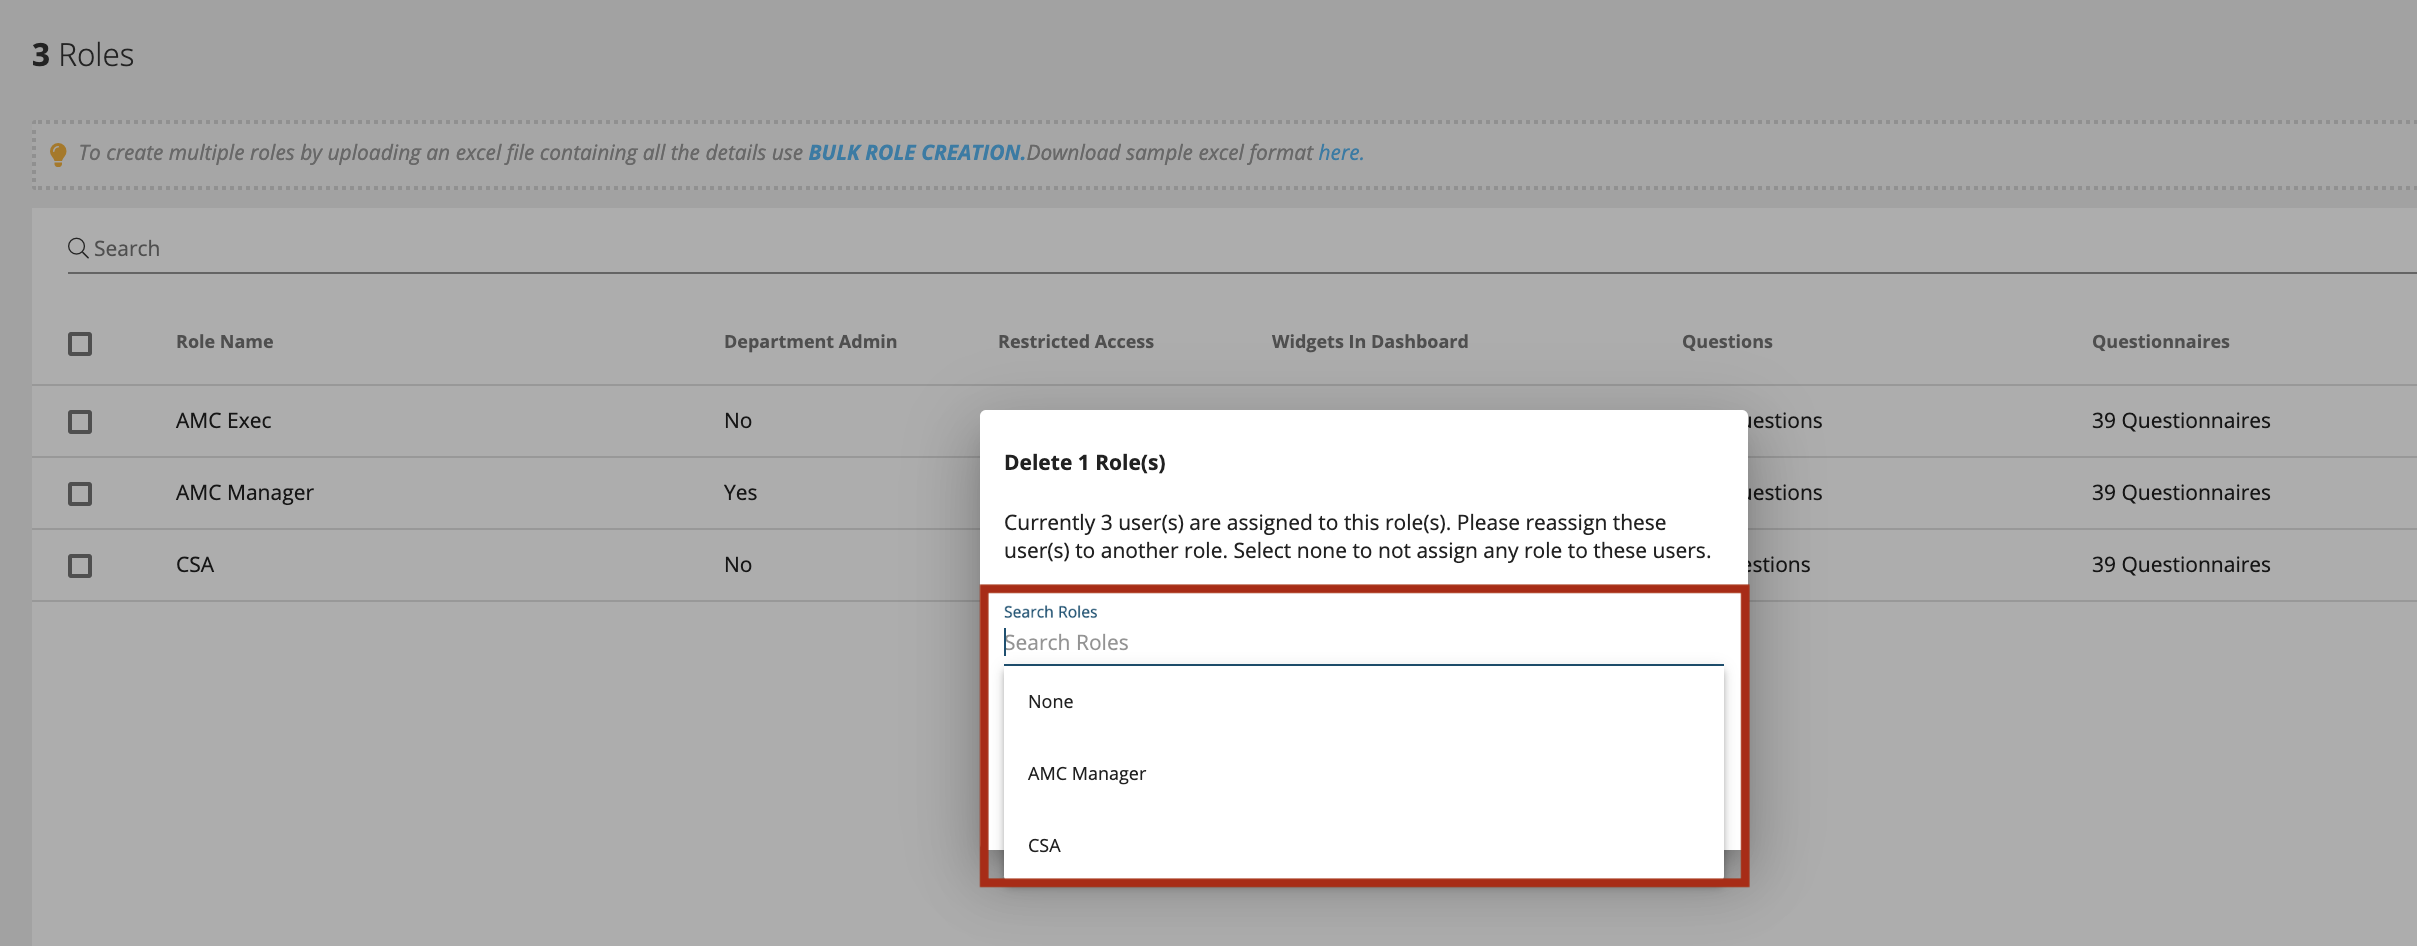
The moment you click on the delete icon the system will give you a prompt showing how many user(s) are currently assigned to this role(s). It will provide you with that option to reassign these user(s) to another role before deleting this role. You can select an existing role or None if you do not want to assign any role to these users.

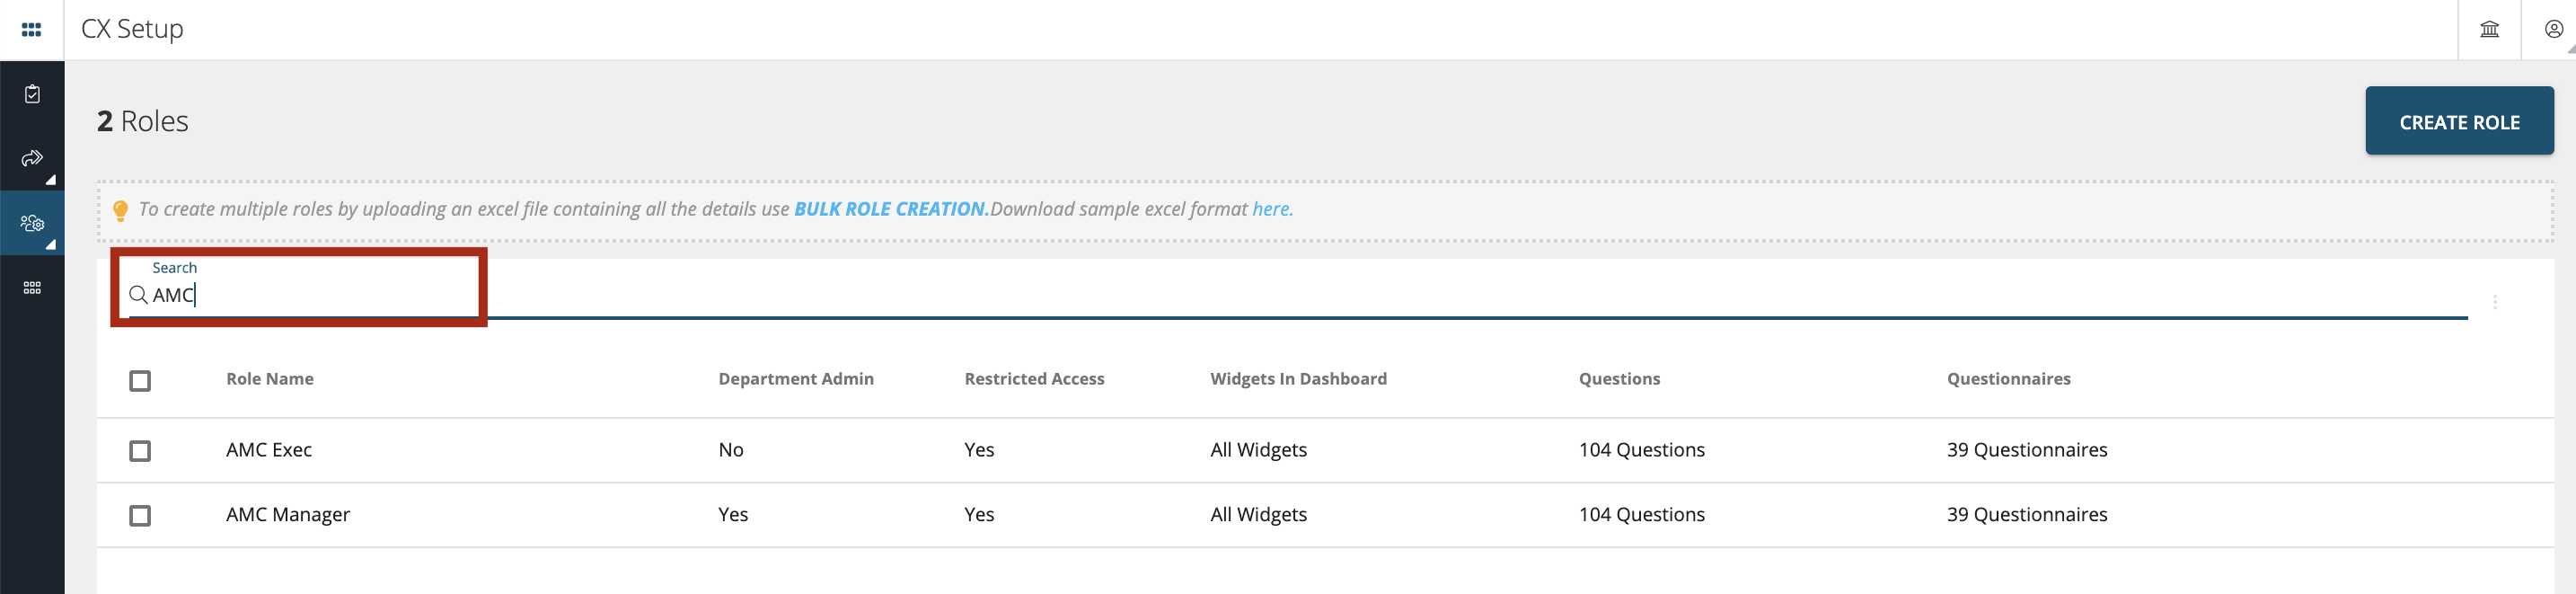
Search Role
A wildcard search is available in the Roles tab as shown below. You can use this search to search Roles by Name.