
Troubleshooting Guide
Content Outline
Objective:
The following document is meant to guide you through issue resolution for the Invitations module.
If your customers are unable to provide their responses to the surveys or they see the message “Oops, the survey URL has expired”, then the following steps need to be followed:
-
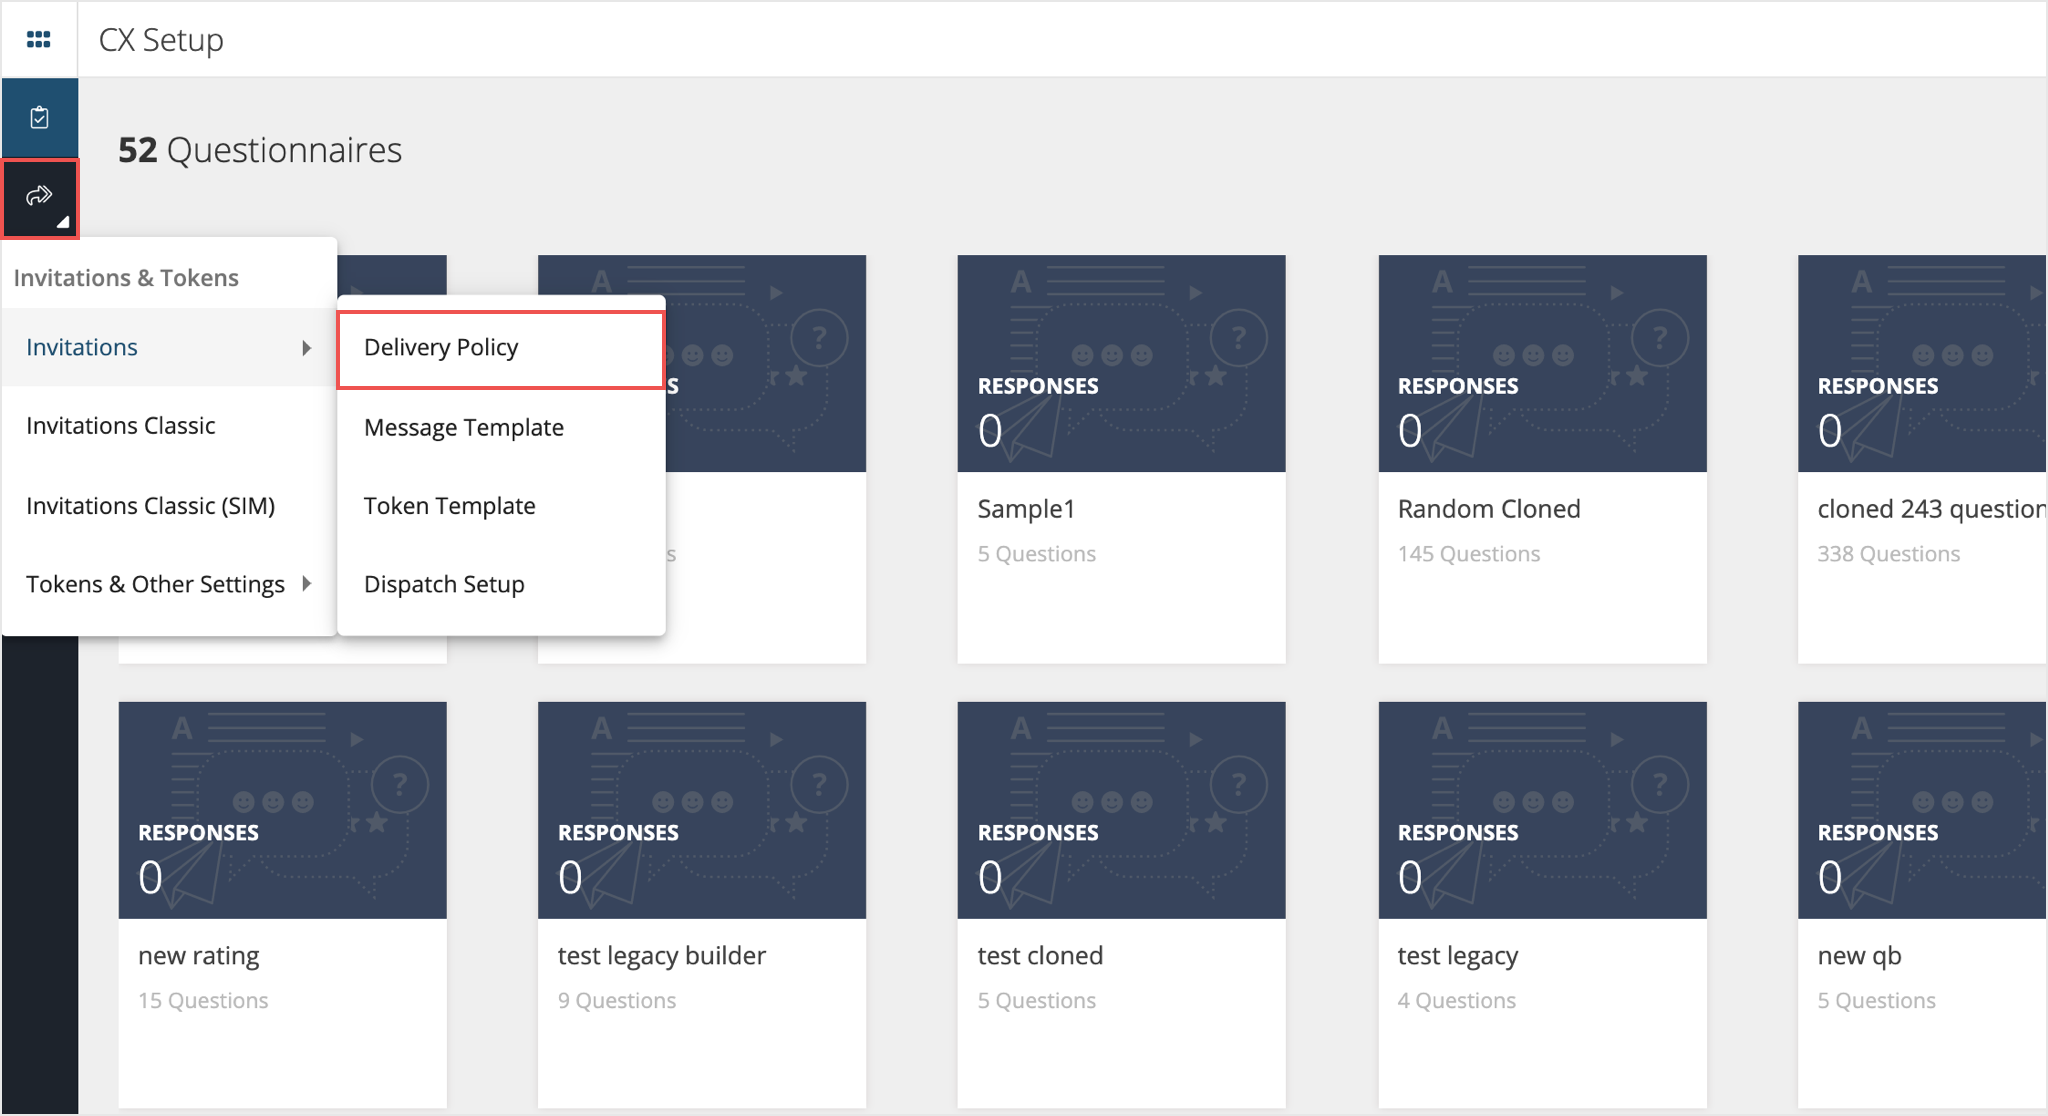
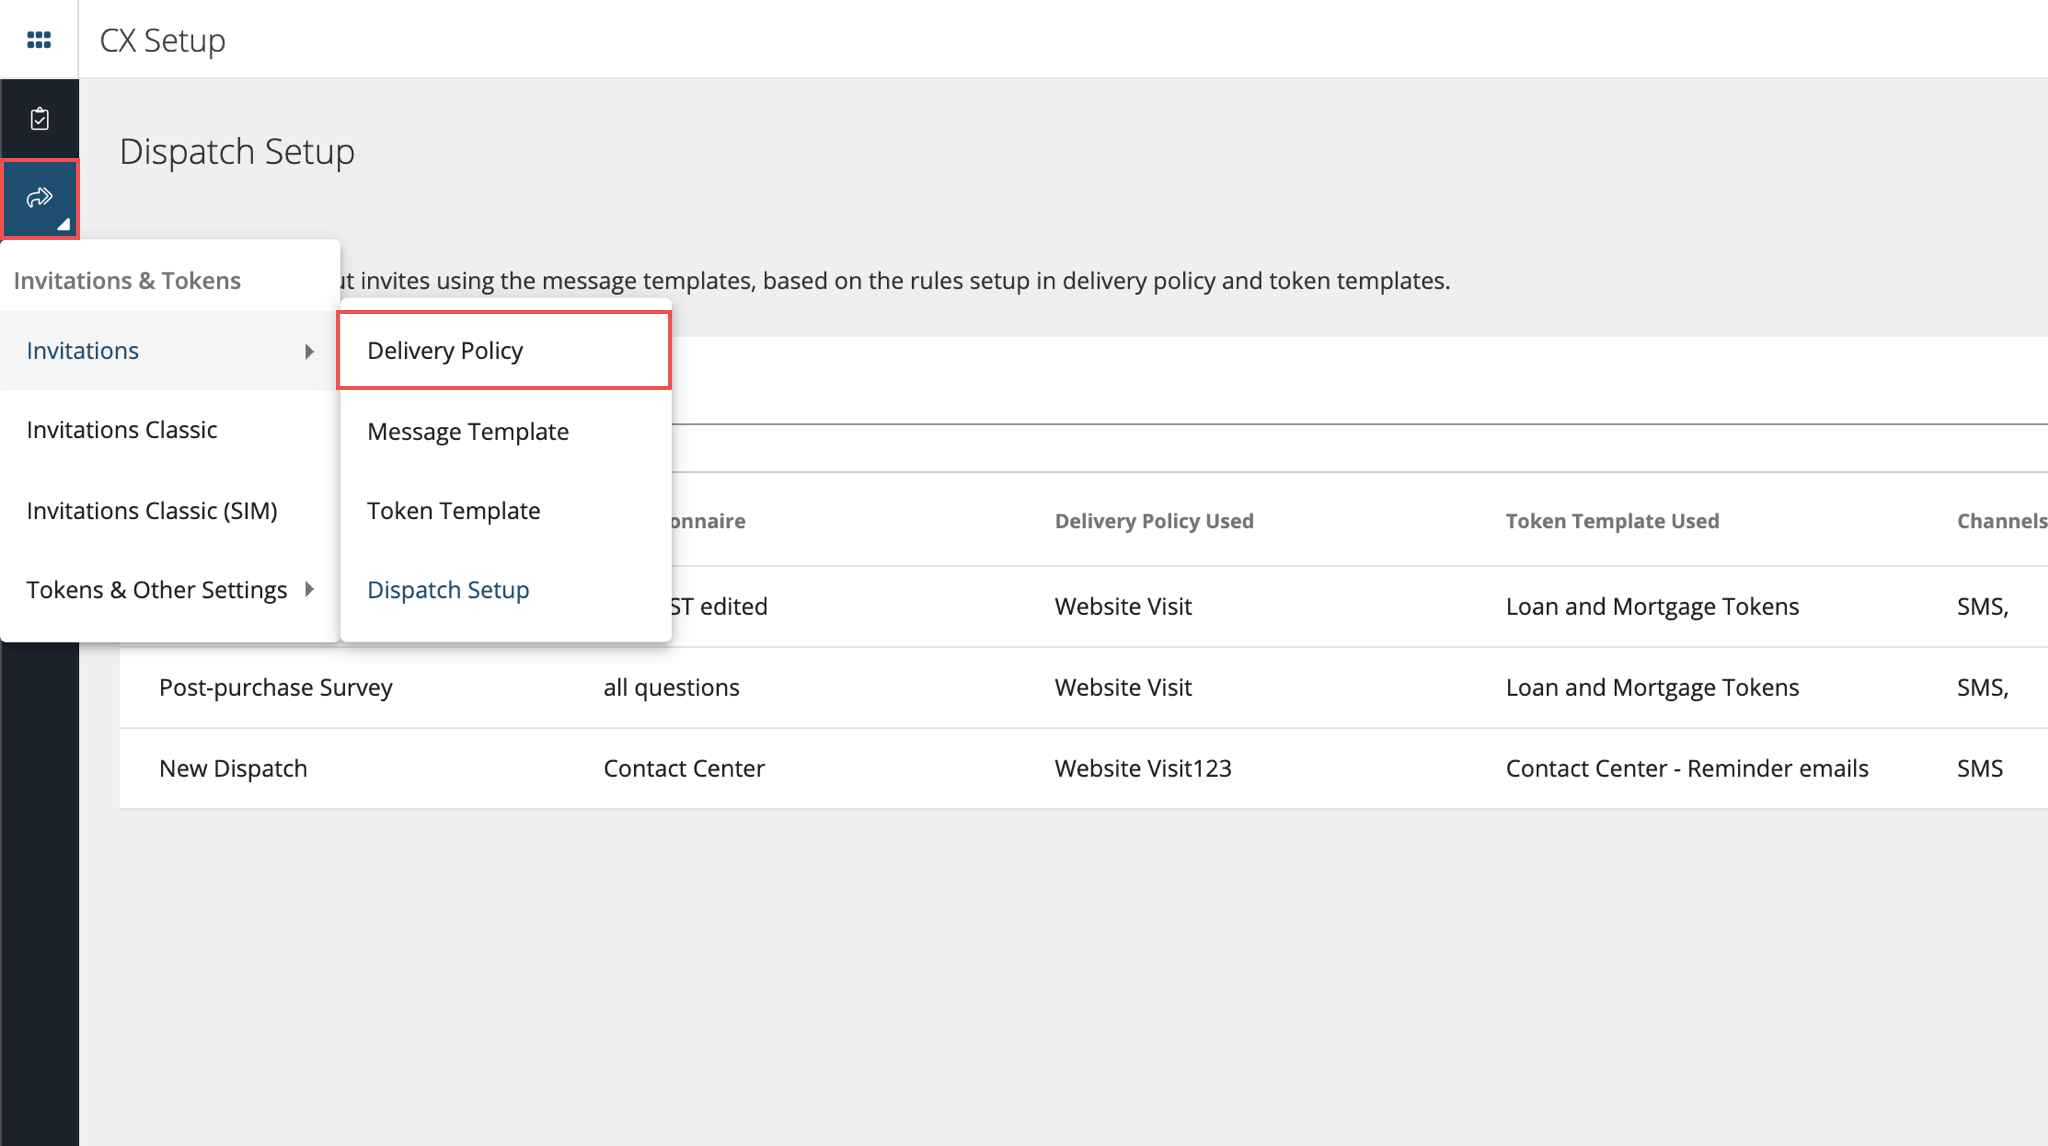
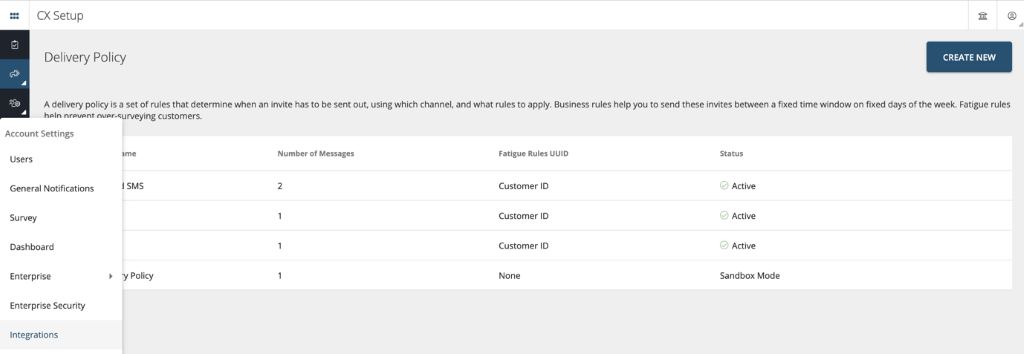
Navigate to CX Setup -> Invitations & Tokens from the left pane -> Invitations -> Delivery Policy.
-
Select the Delivery Policy by clicking on the name of the policy or by clicking on the edit button to the right of the policy name.
-
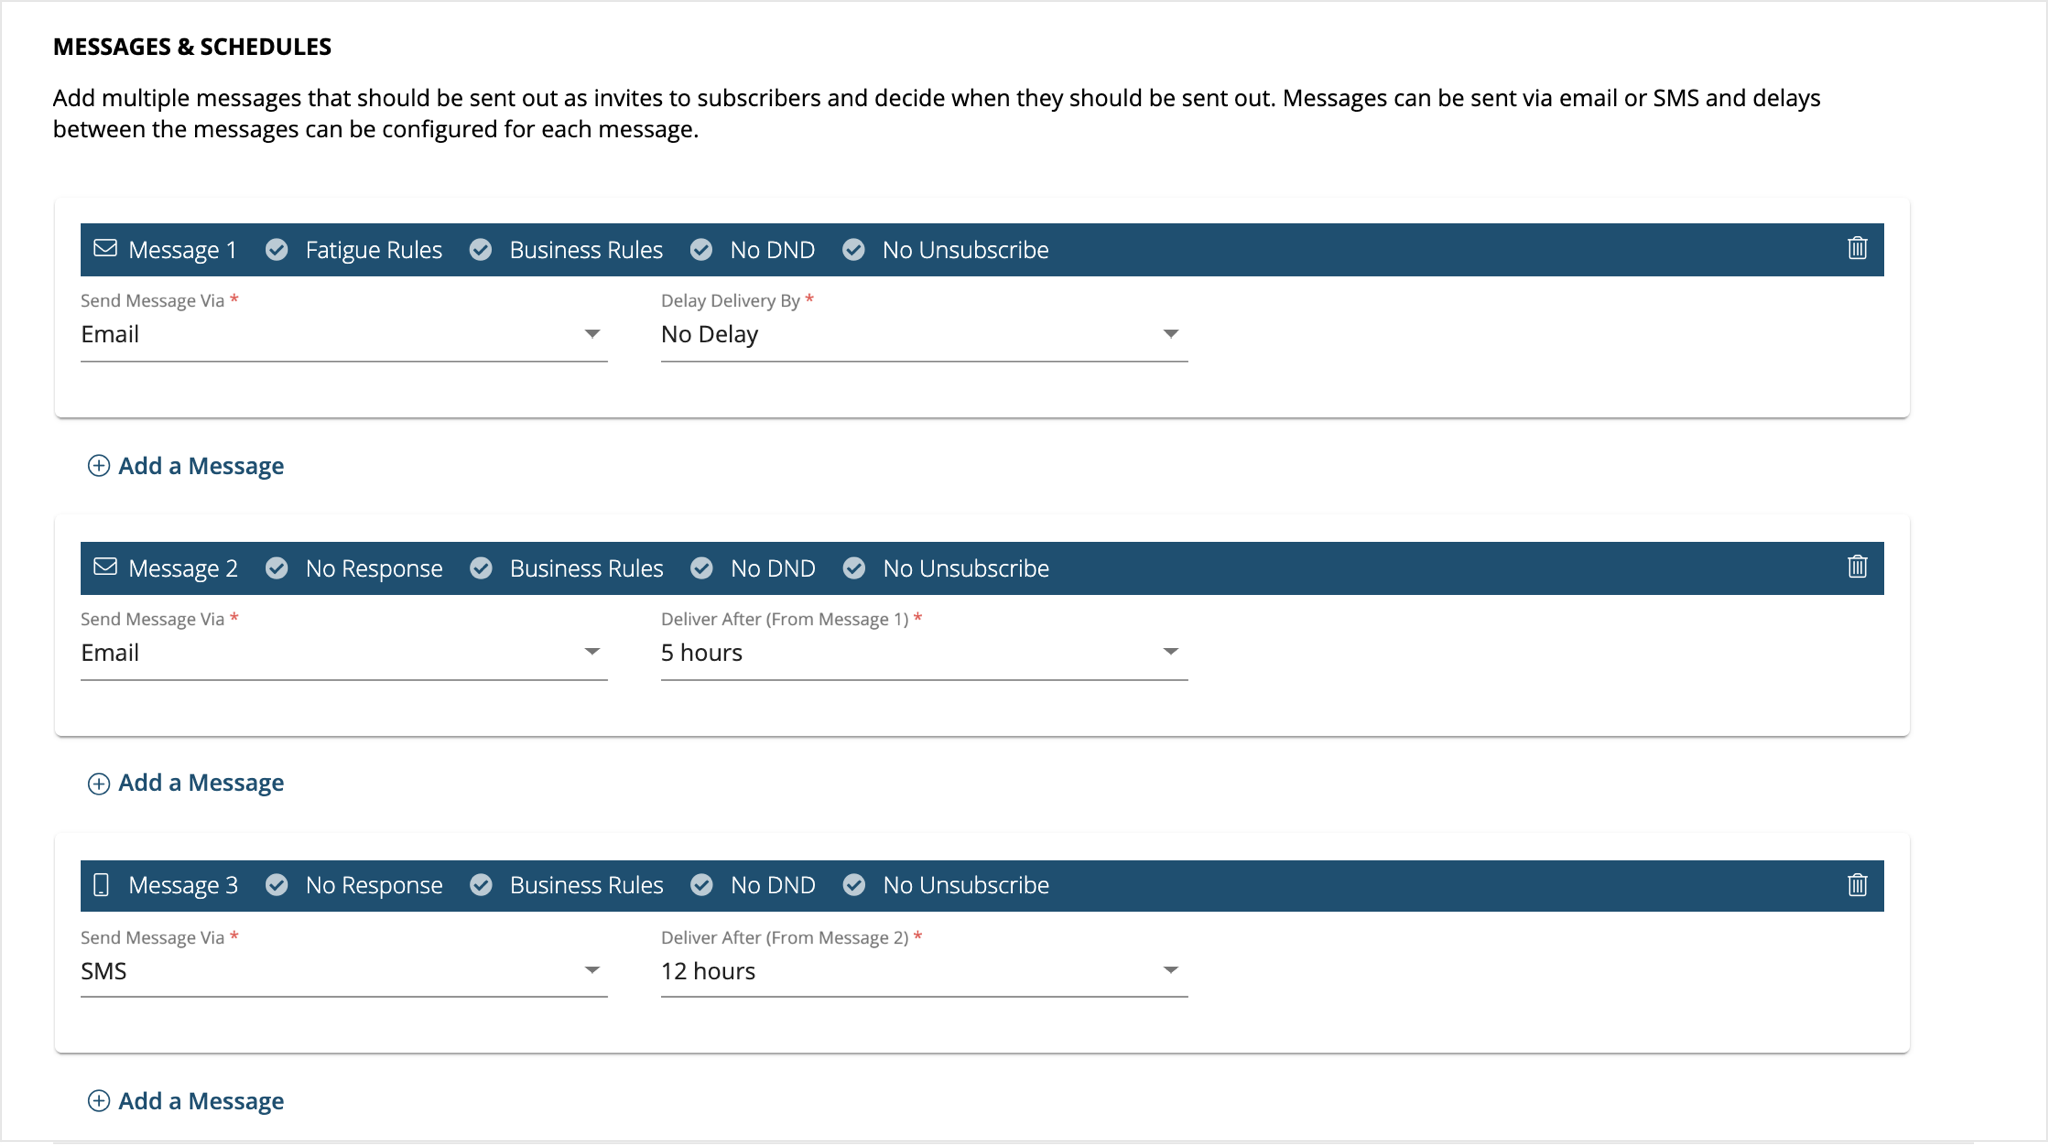
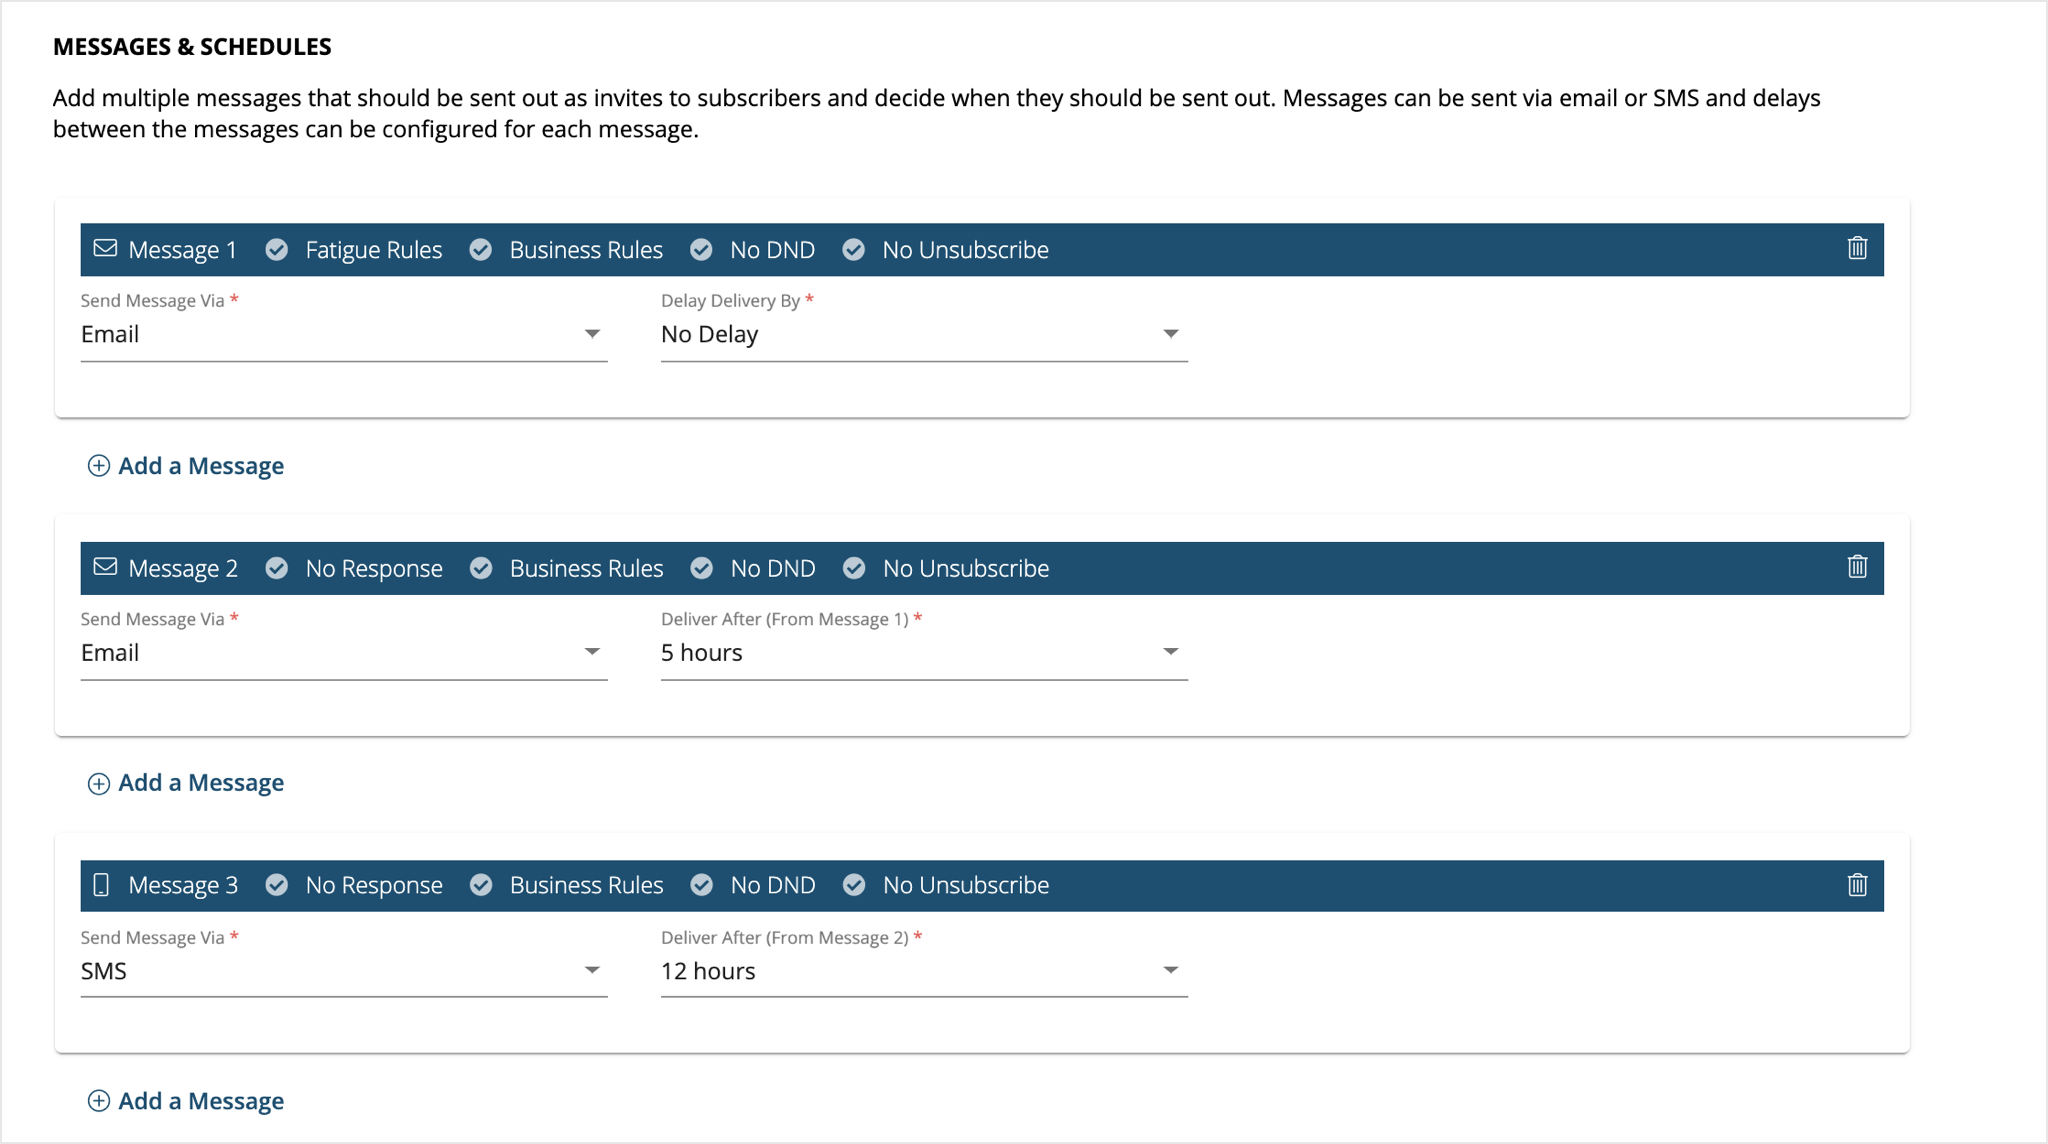
Scroll to section marked Messages & Schedules and note down the total duration of time between the first message and the final one.
-
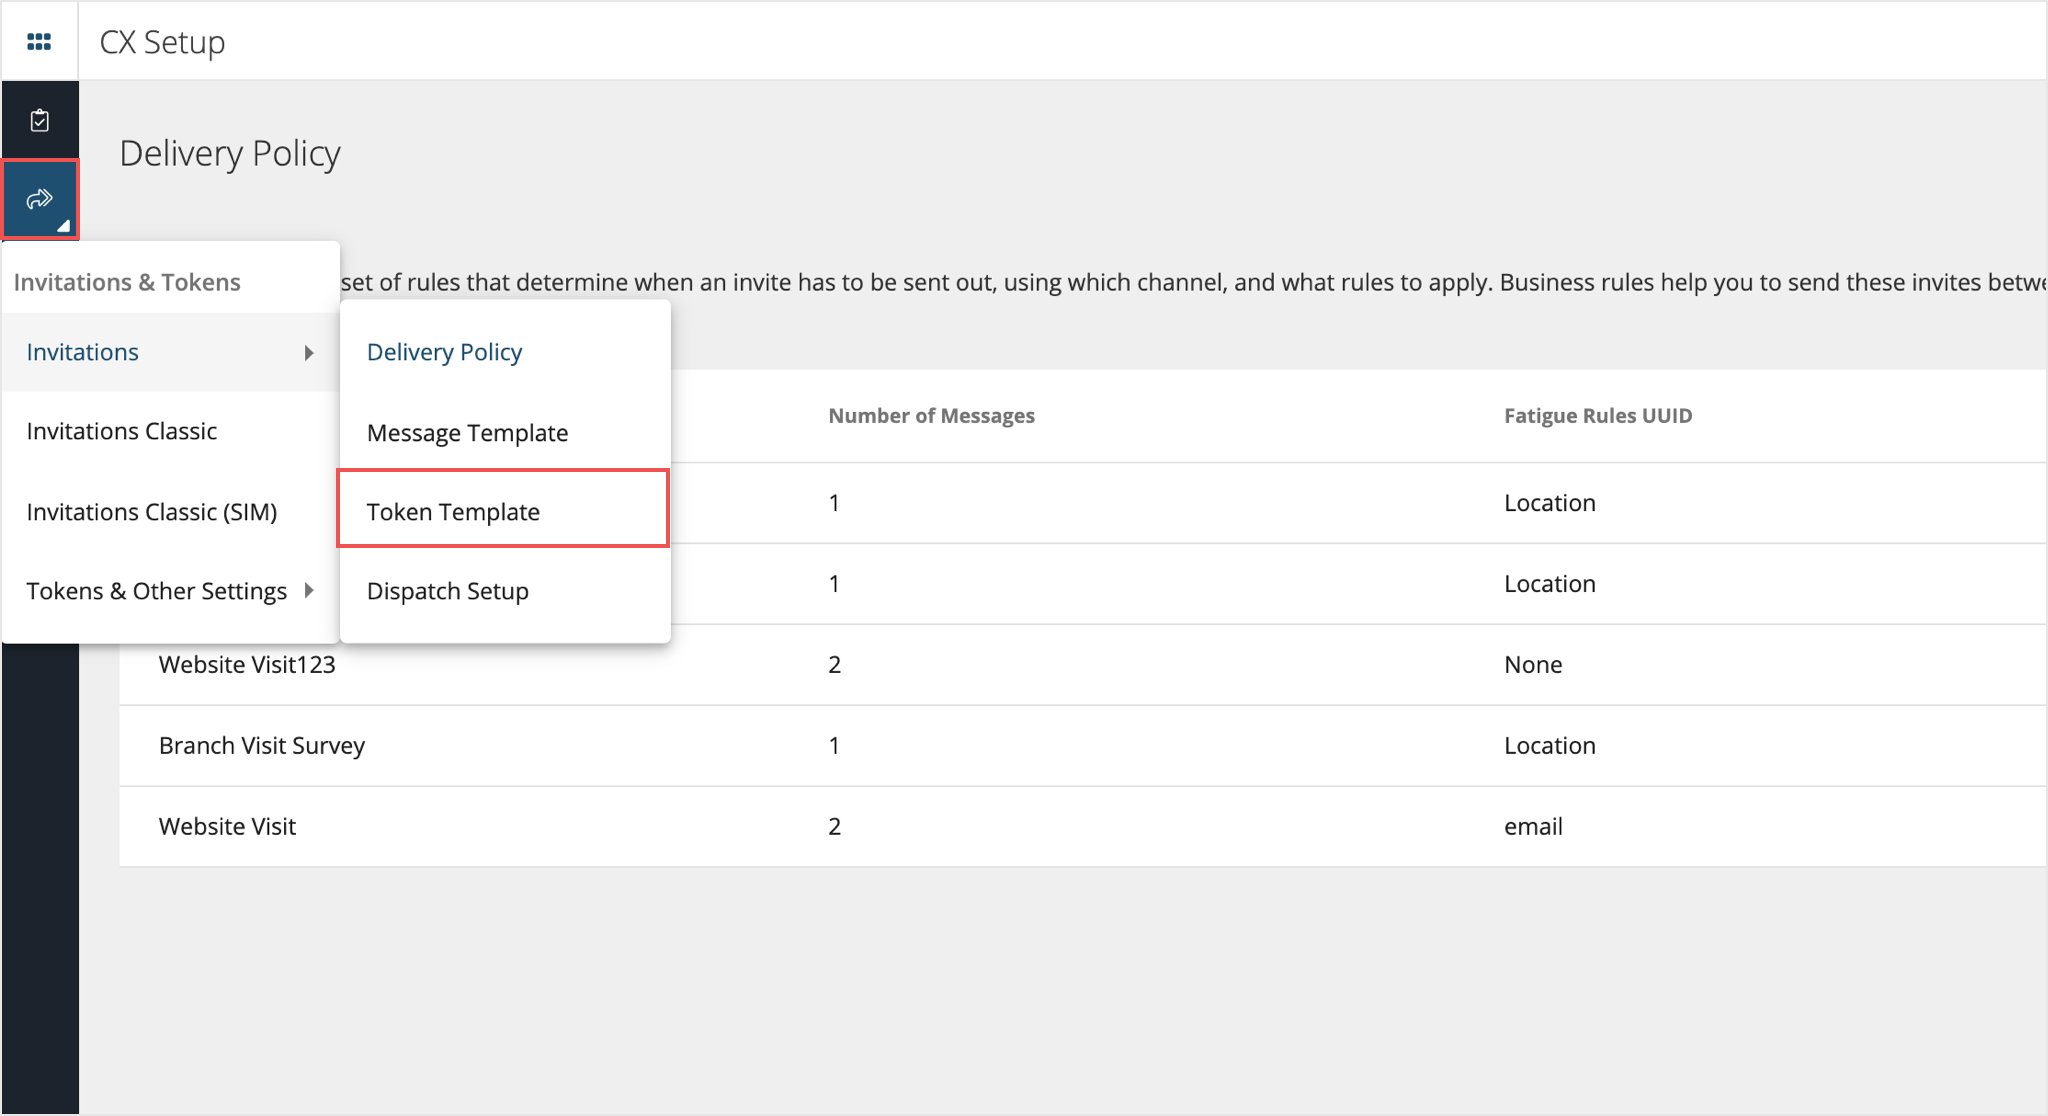
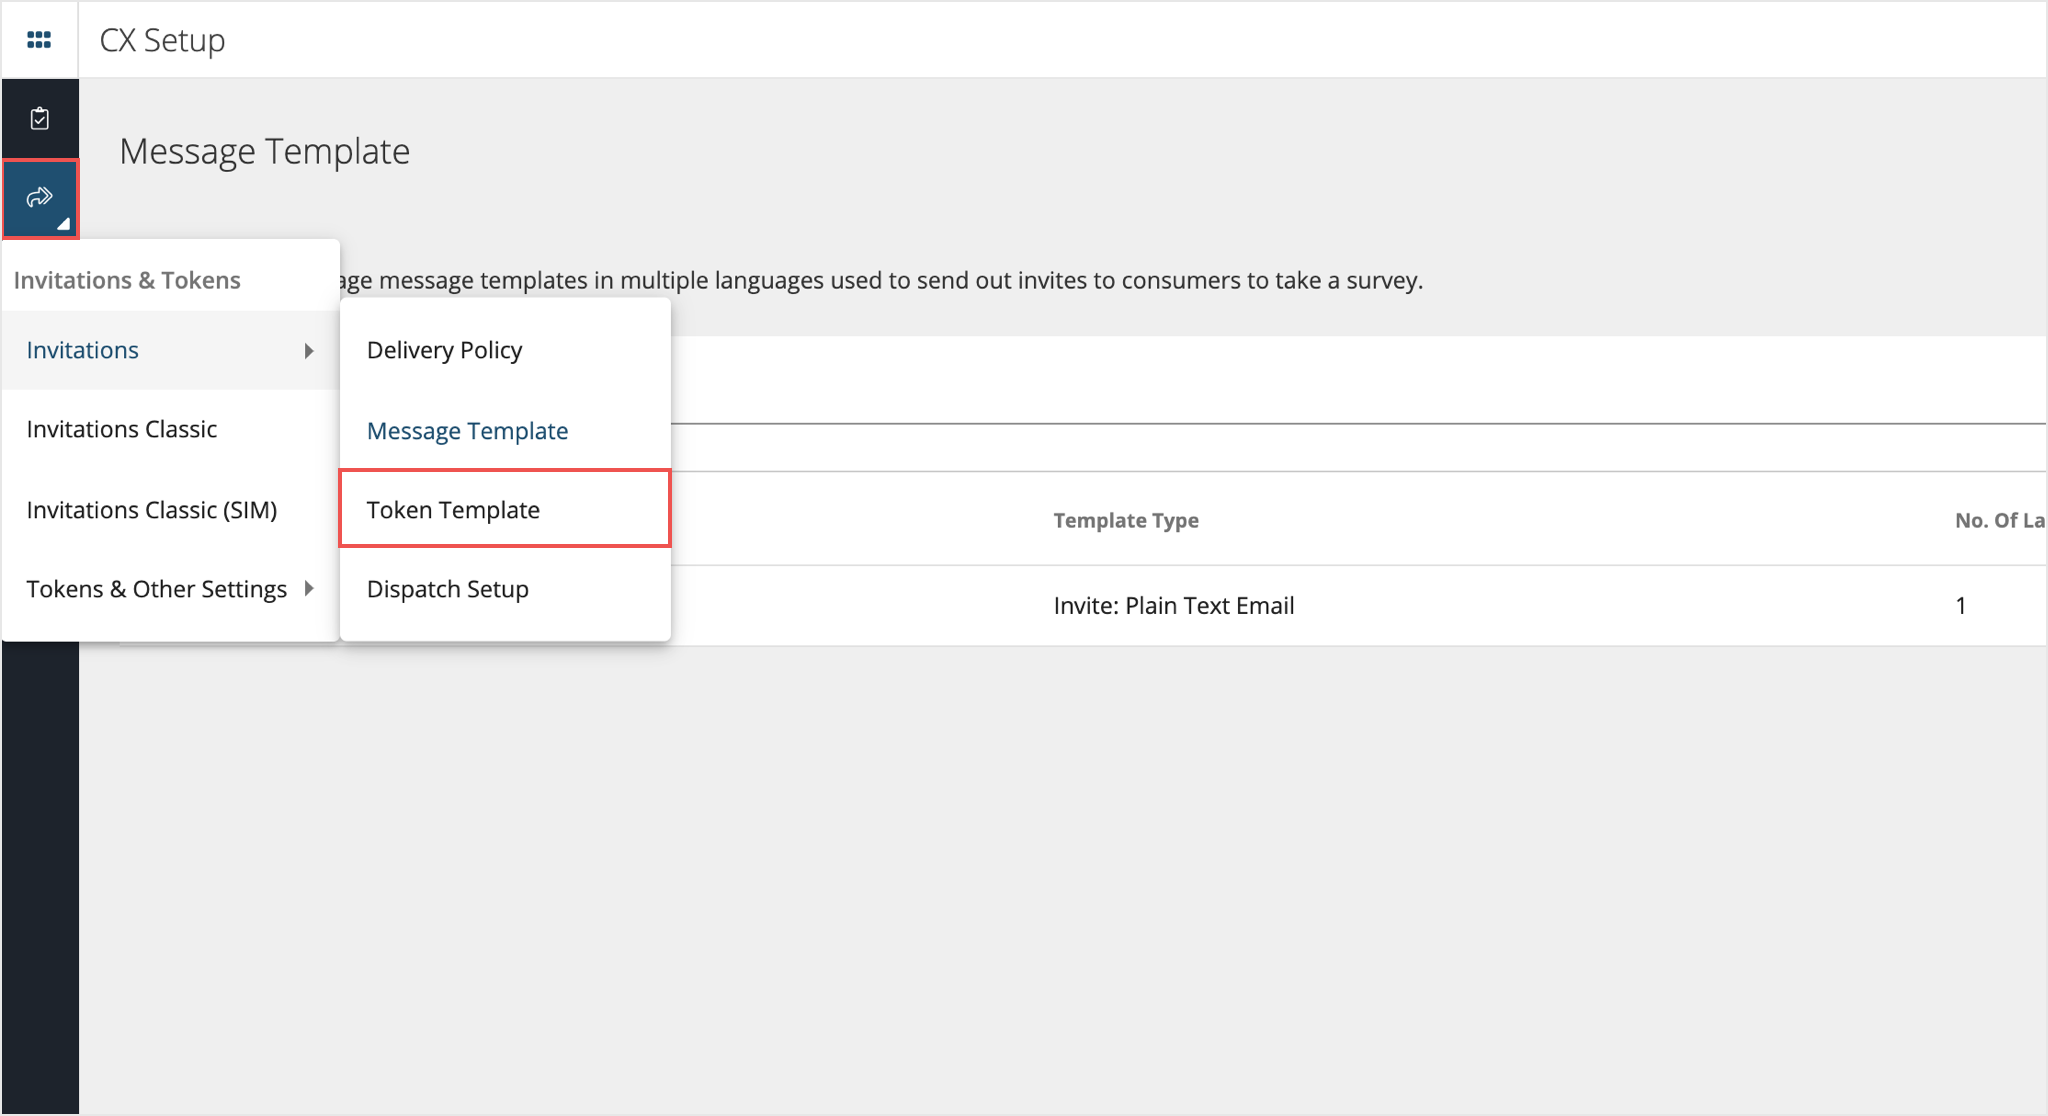
Now head over to Token Template page by navigating to CX Setup -> Invitations & Tokens from the left pane -> Invitations -> Token Template and select the token being used for the survey in question.
-
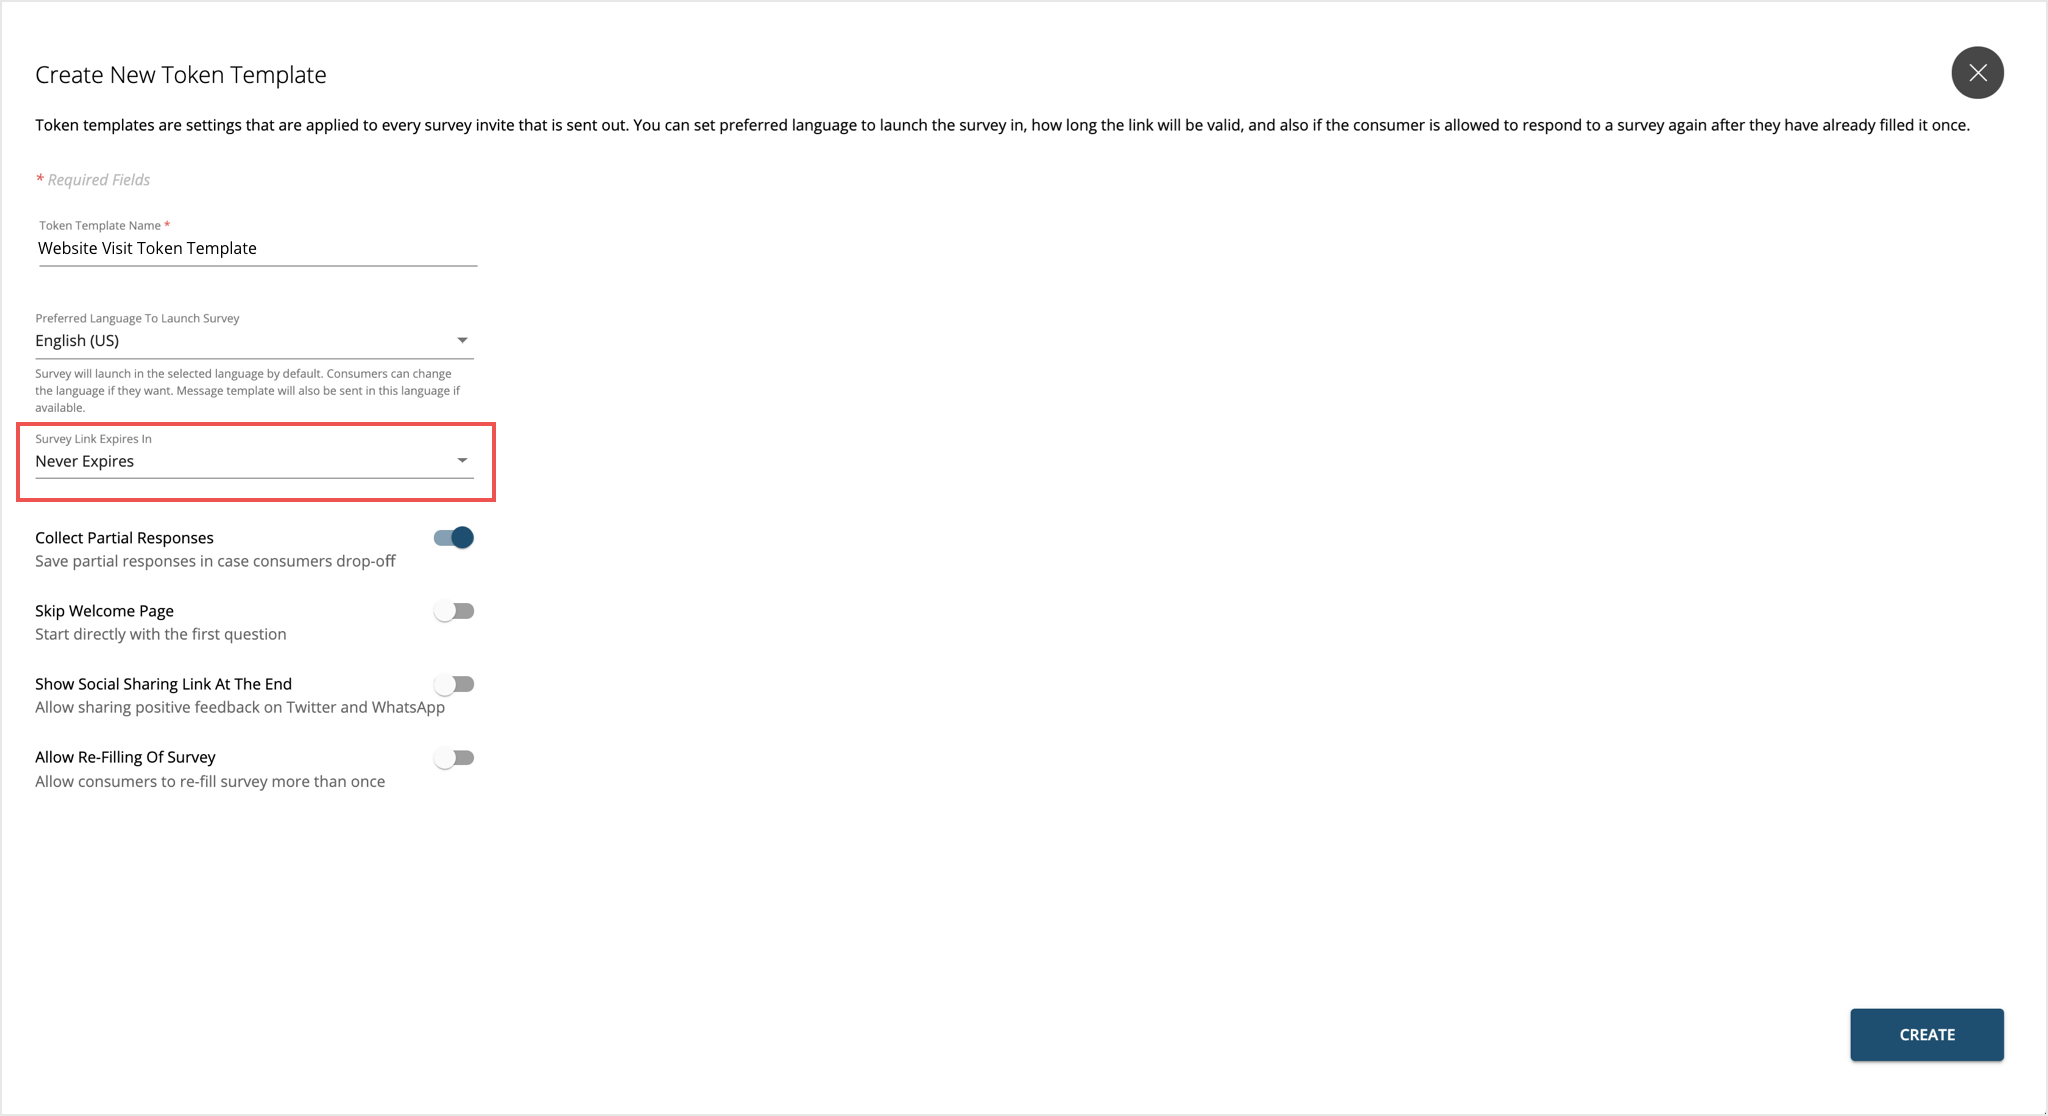
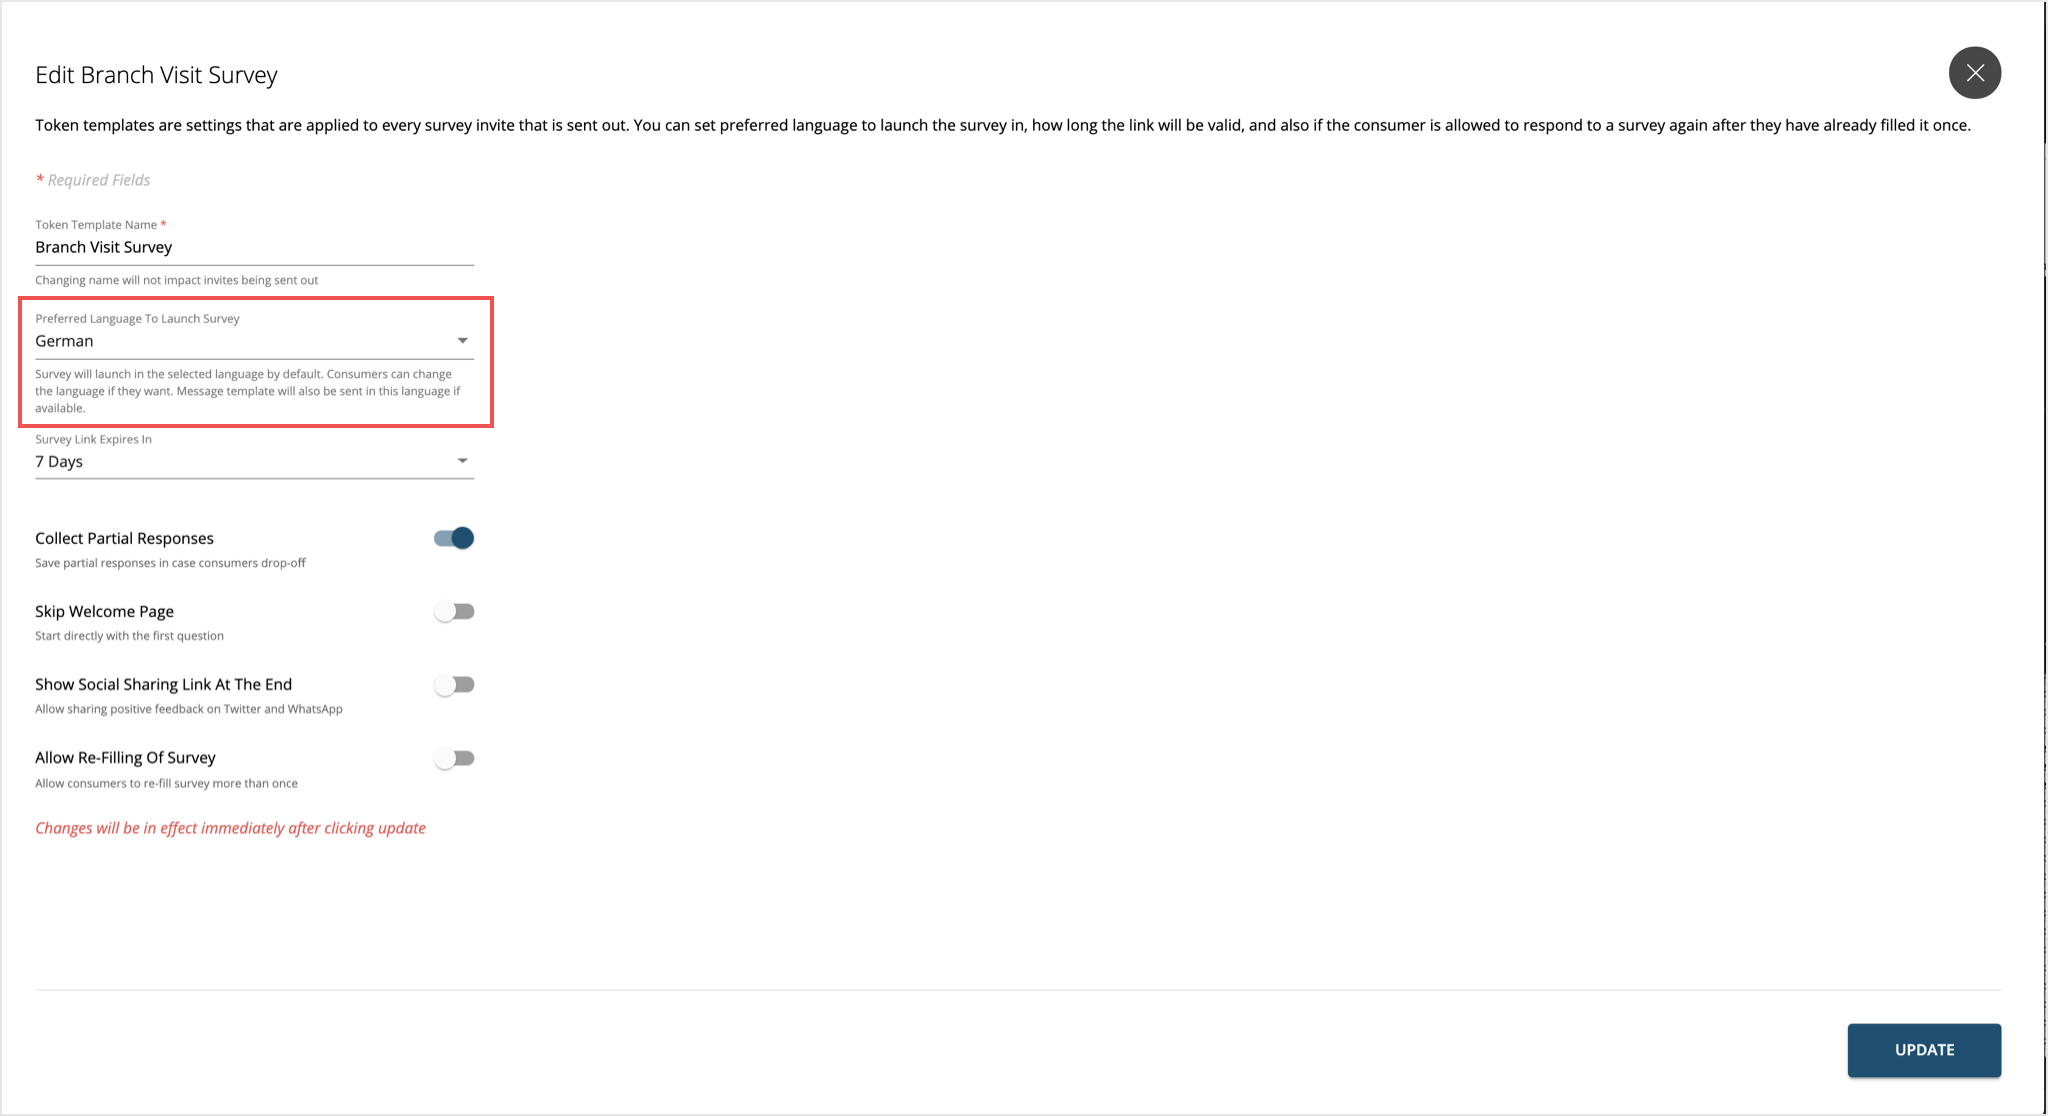
Ensure the option from the dropdown for “Survey Link Expires in” for the token exceeds the total duration of time for your Delivery Policy.
Note: : If you have business rules set up, be sure to add the non-operating hours to the total duration as well as allowing ample amount of time for your customer to respond on receipt of the survey.
The invitations module allows for message templates with dynamic fields which help to personalize the invitations you send to your customers. If you notice the dynamic fields have incorrect data, check the following:
Step 1: Check if the dynamic field in the message template is compatible with the questionnaire you are surveying for.

Step 2: Ensure to add a default value in case the information is not present for a particular customer.
Step 3: Make a note of the prefill question ID for which dynamic substitution is required.
Step 4: Verify the question ID is being passed in the API payload along with the correct variable value. Ensure the mapping of the tag to the variable is completed in your system.
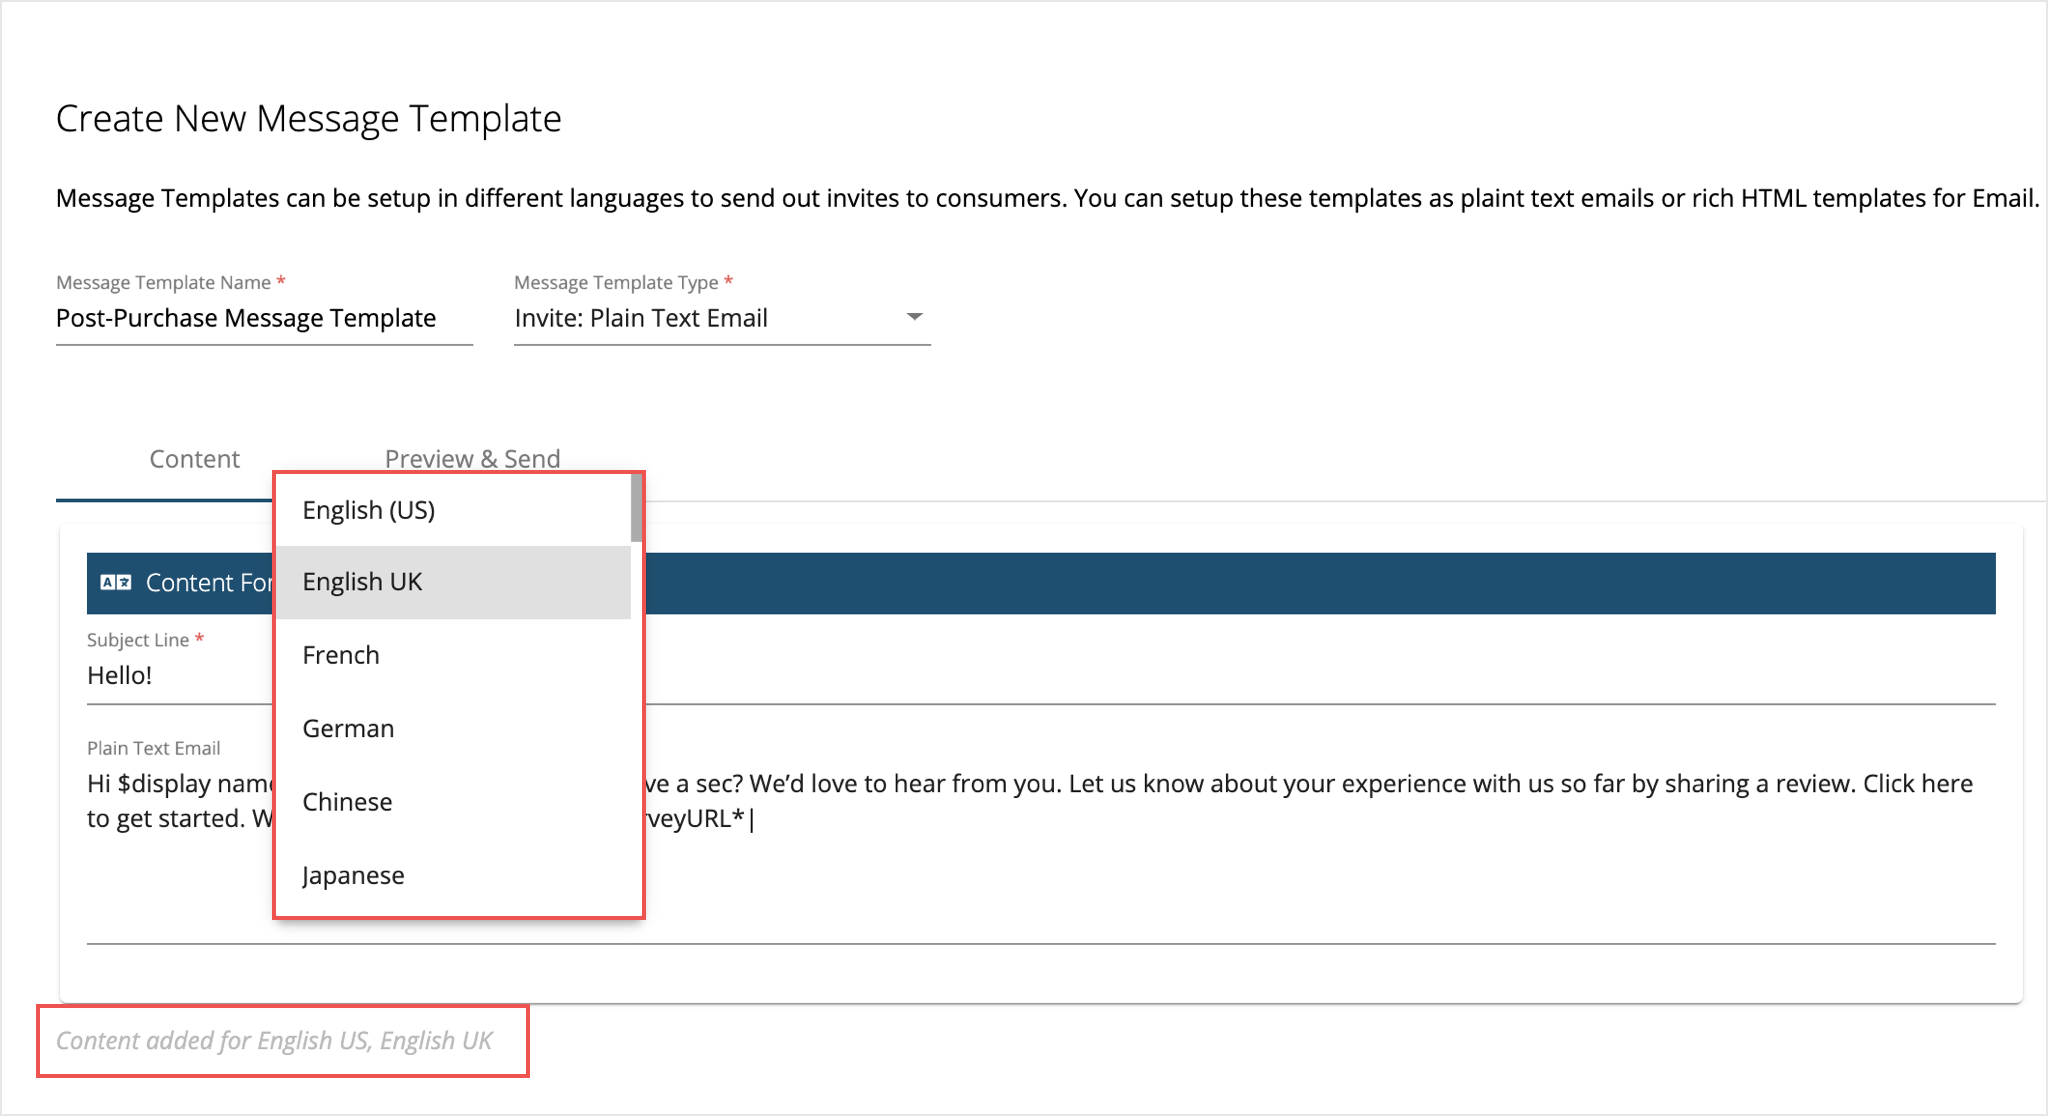
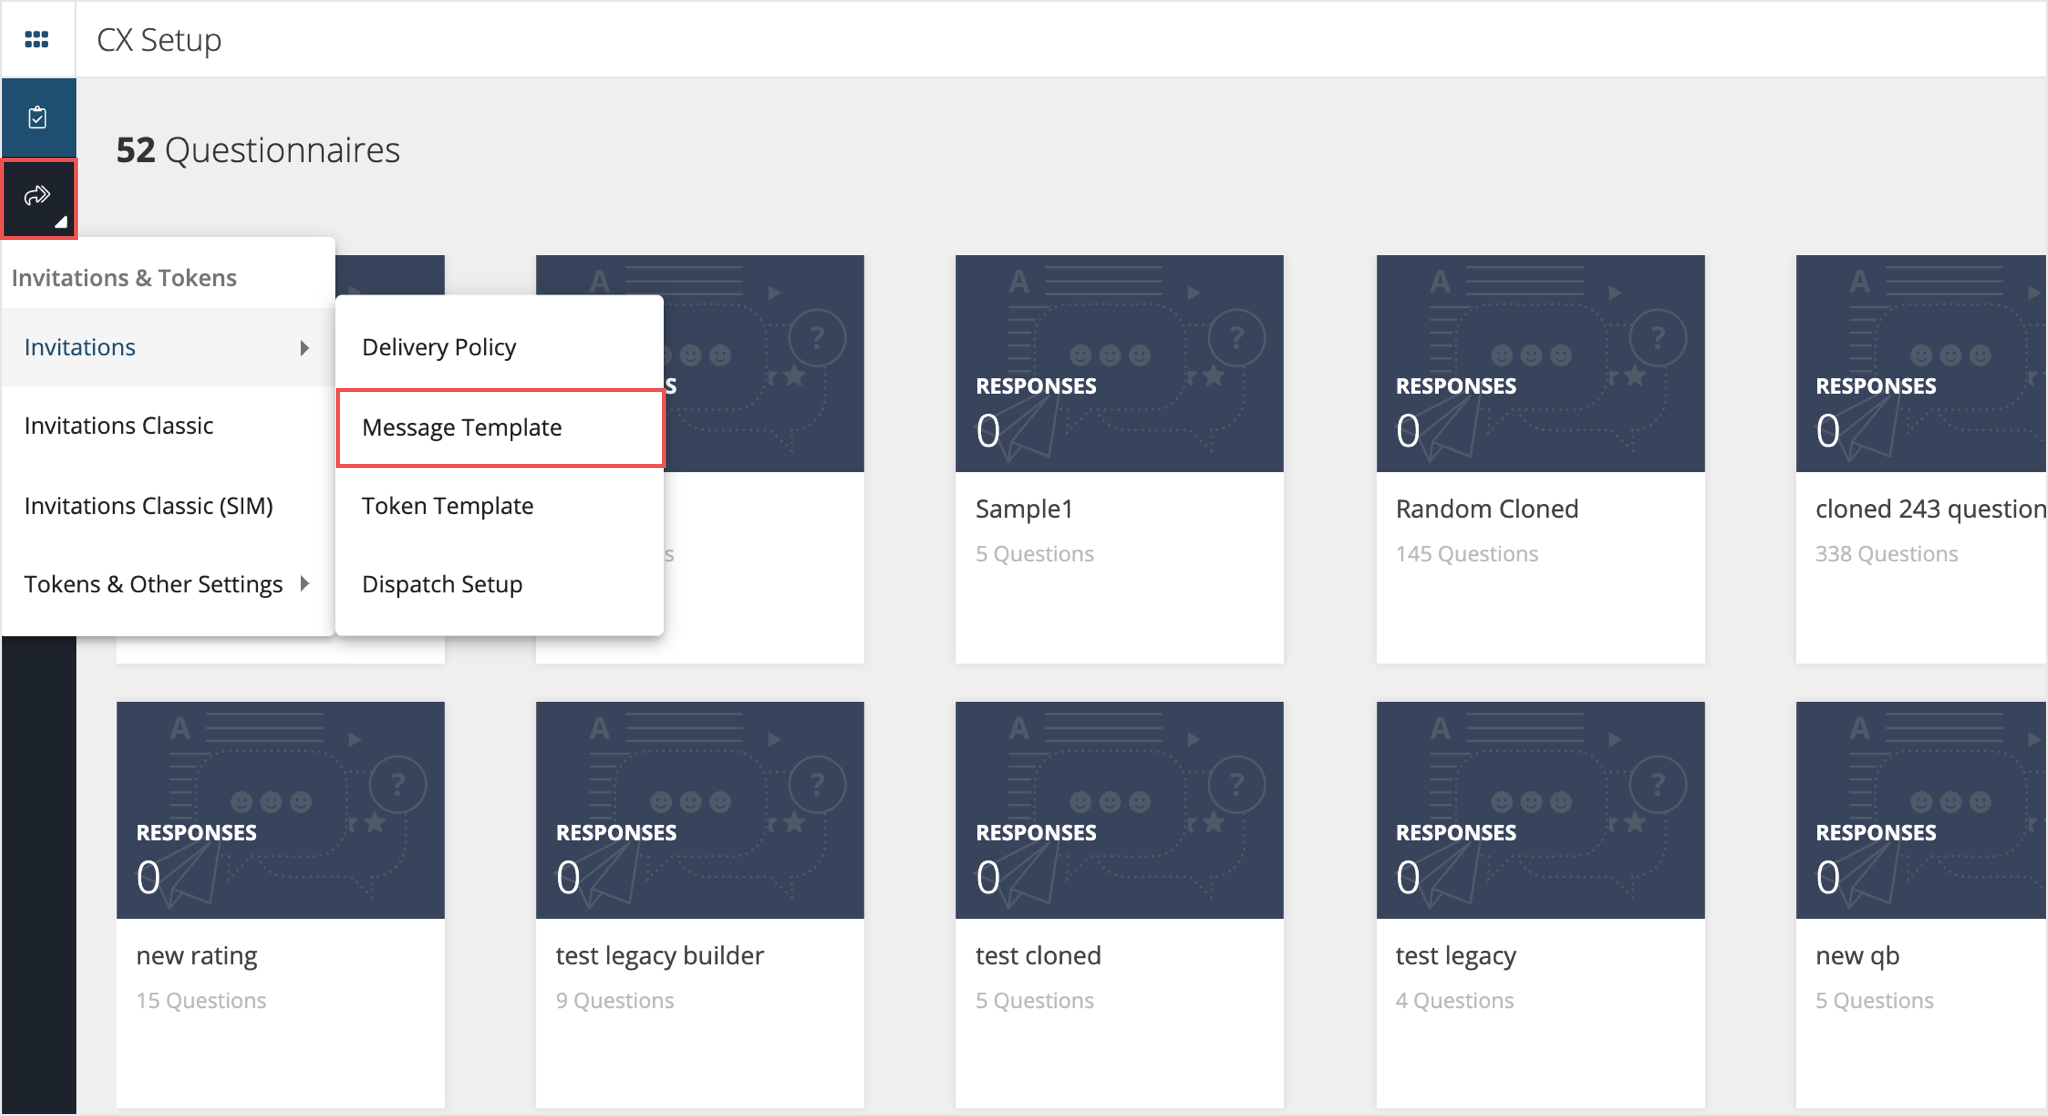
The Invitations Module supports multiple languages which can be configured from the Message Template page. When the invitations are being sent to the users, the preferred language is determined by Token Template selected. The below steps will show you how to adjust your preferred language settings:
-
Navigate to CX Setup -> Invitations & Tokens from the left pane -> Invitations -> Message Template.
-
Select the Message Template associated with the survey by clicking on the name of the template or the edit button ( ) on the right side of template name.
-
Under the Content tab -> Content For, ensure you have added the HTML (plain text on rich) or SMS content for the intended language. Don’t forget to save your changes.
-
Now head over to Token Template page by navigating to CX Setup -> Invitations & Tokens from the left pane -> Invitations -> Token Template and select the token being used for the survey in question.
-
Select the preferred language for the token, making sure it’s the same as the message content and save it.
-
From the Dispatch Settings (CX Setup -> Invitations & Tokens from the left pane -> Invitations -> Dispatch Settings) select the dispatch.

-
Tie up the Token to this dispatch (ensure your delivery policy allows for the selected message template).
During the creation of message templates, it is possible to preview changes on the go without having to make a dispatch live. See the below steps, if you are unable to preview and test your messages:
-
Navigate to CX Setup -> Invitations & Tokens from the left pane -> Invitations -> Message Template.
-
Select the Message Template associated with the survey by clicking on the name of the template or the edit button ( ) on the right side of template name.
Note: The Preview & Send feature is only available for email type message templates.
-
Click on the tab marked Preview & Send and select the questionnaire for which the preview is required.
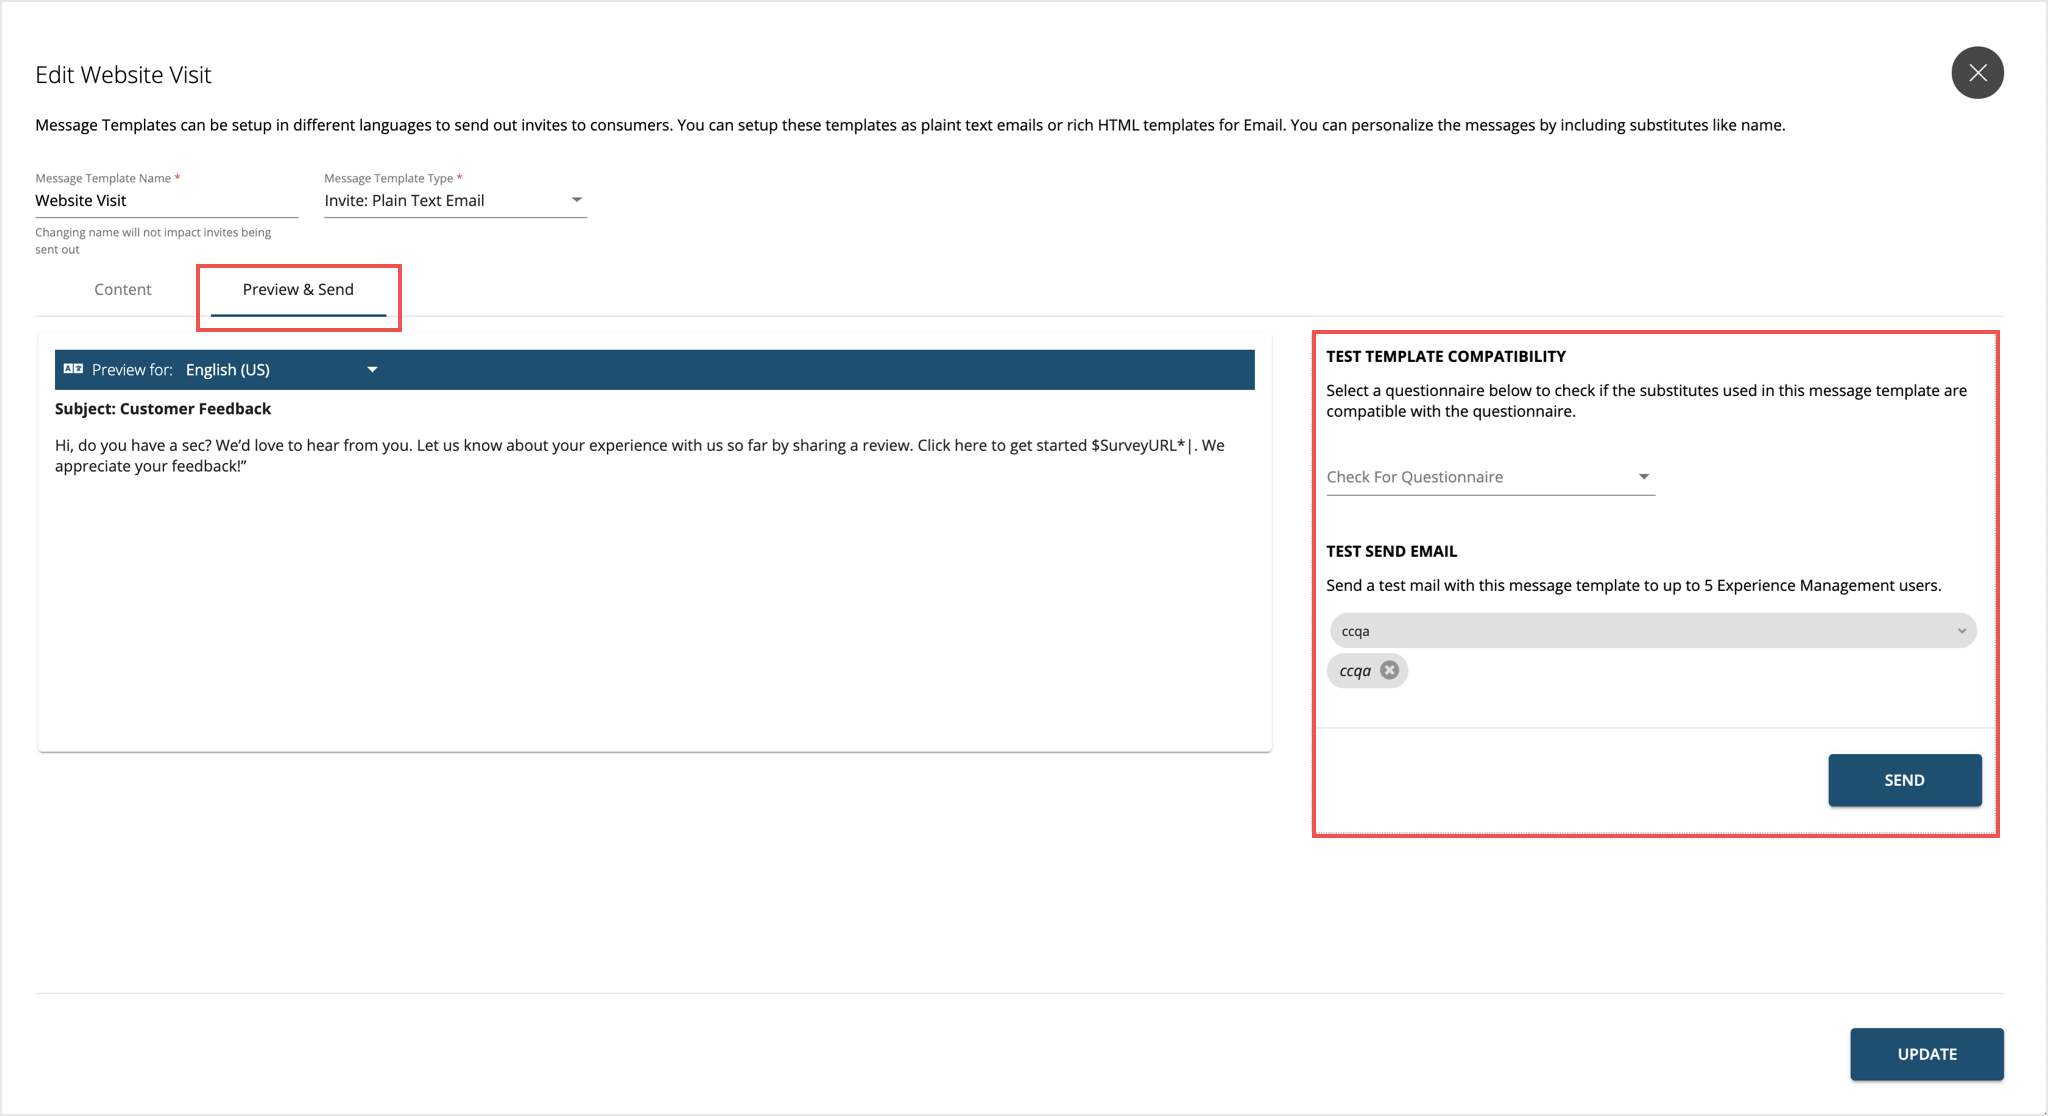
Note: If the selected questionnaire is not compatible (the template uses prefills which are not present in the selected questionnaire), the send function won’t work.
-
To send the test email, select the users from the drop down on the right-hand side.
Note: You can only select recipients that are users of your Webex Experience Management account. The limit of users you can select is five.
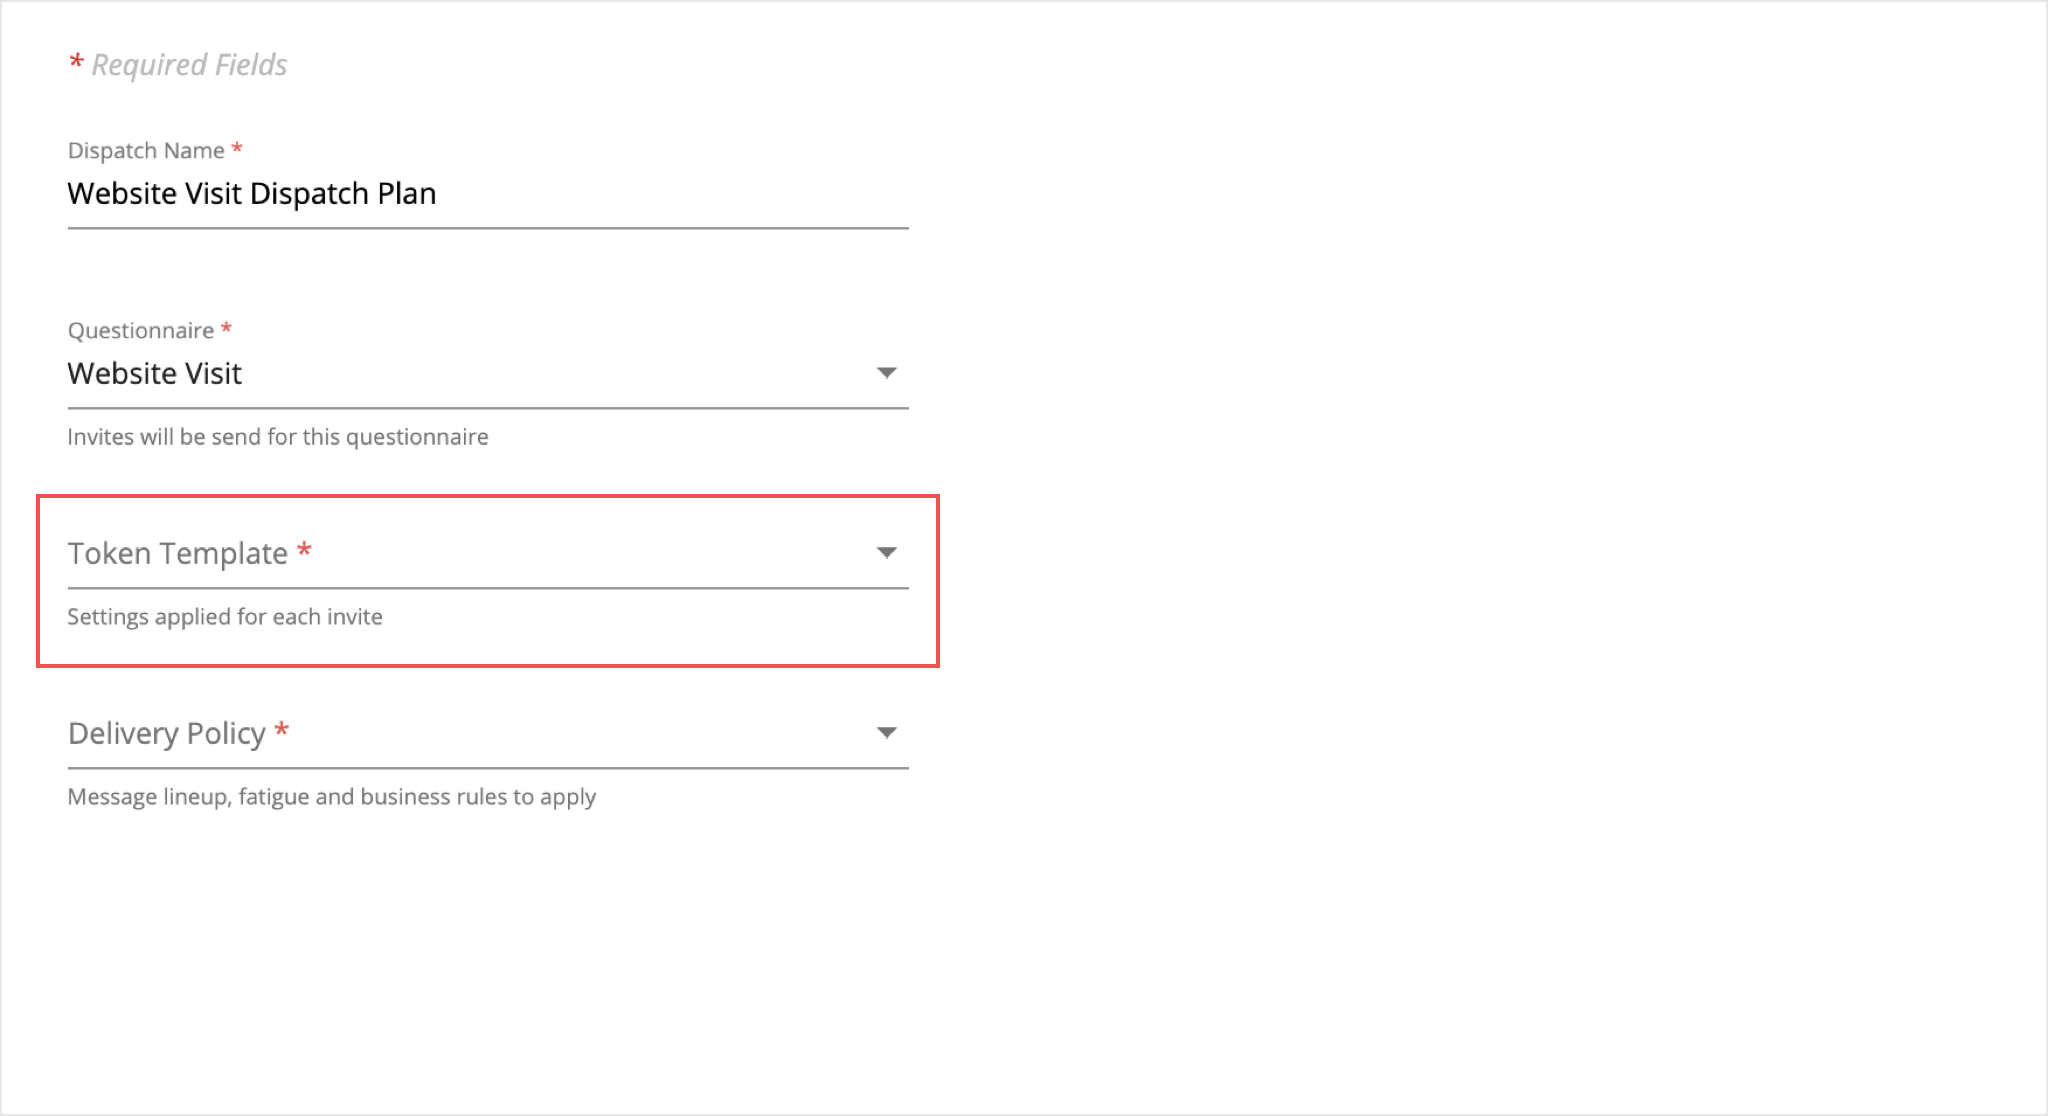
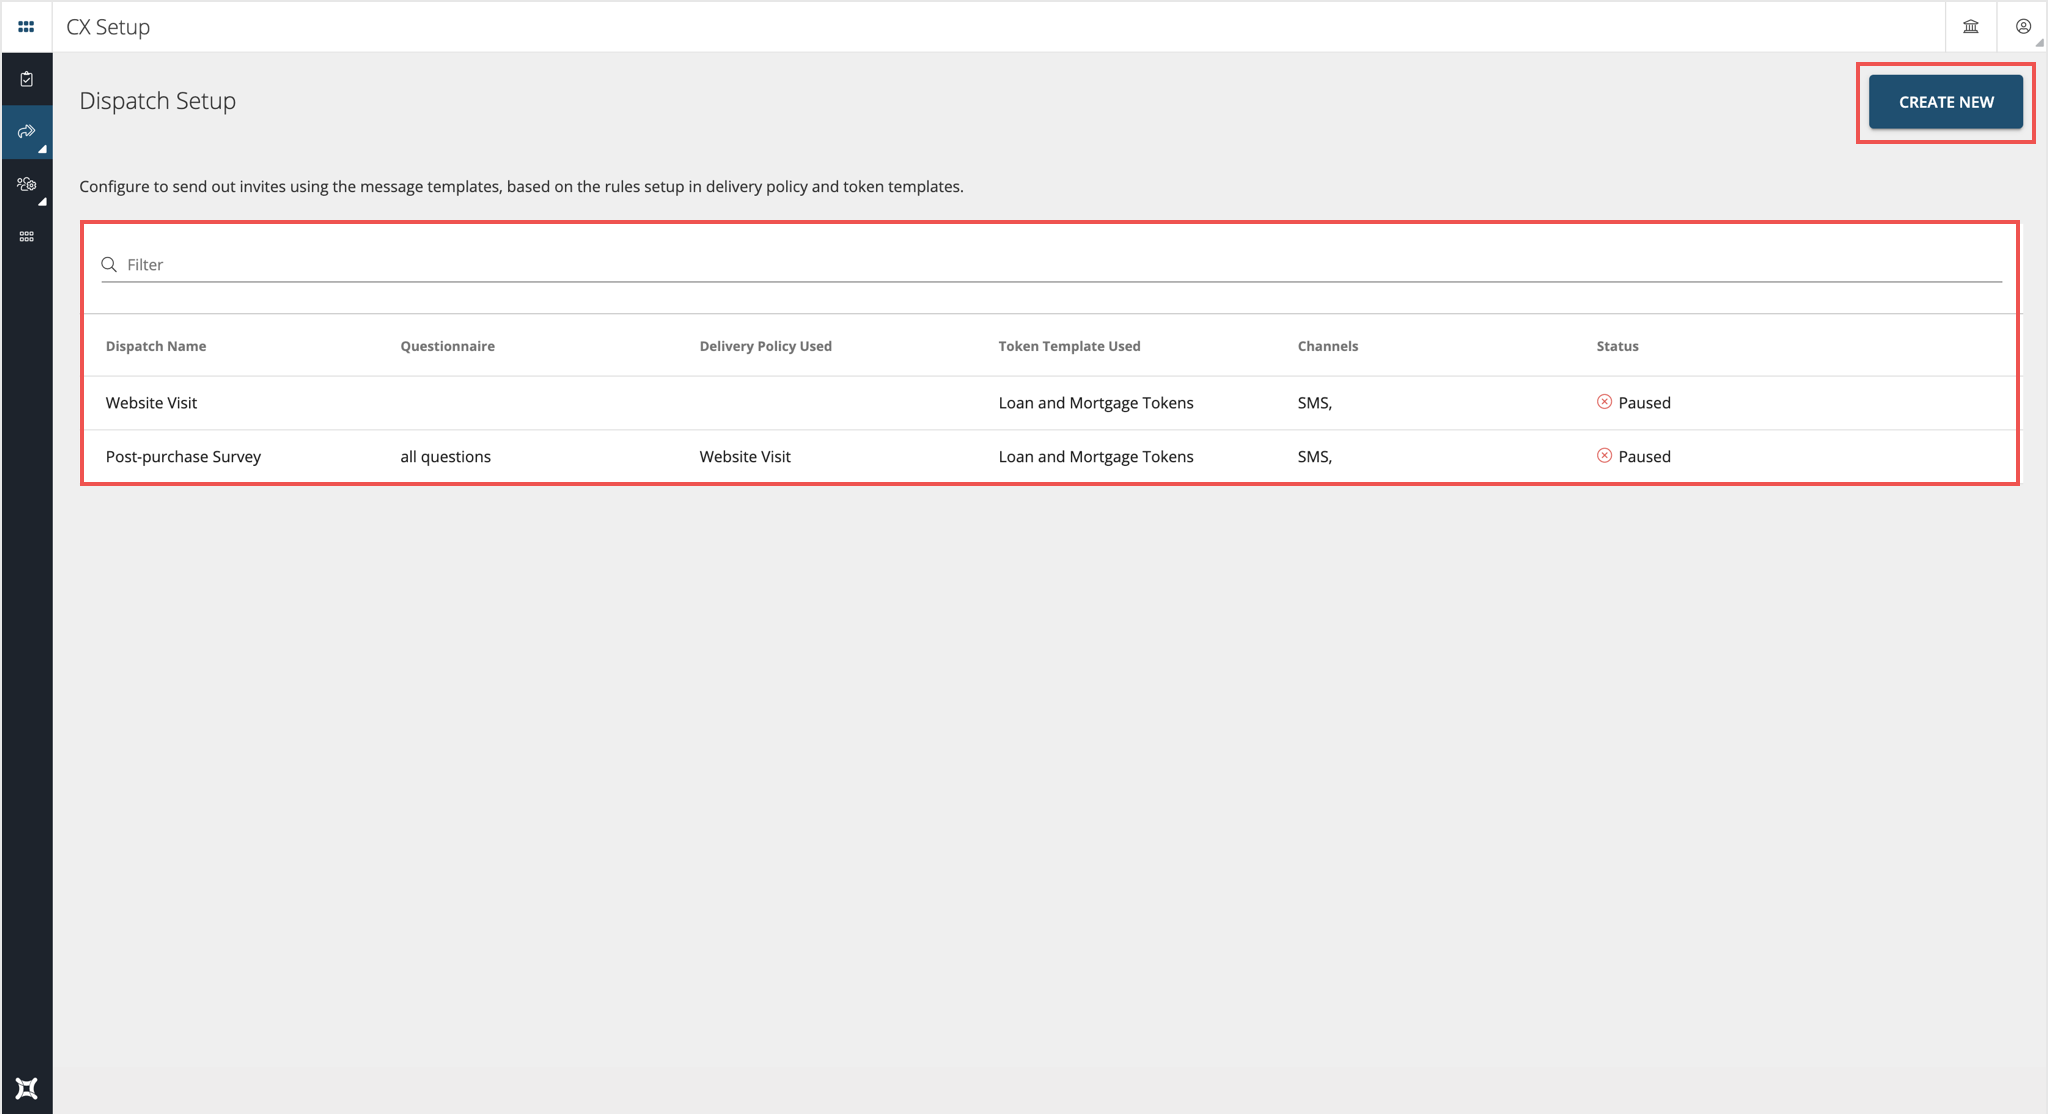
To set up a dispatch, a questionnaire, a token and a policy for delivery must be associated. If you notice that while setting up your dispatch, a particular Delivery Policy is not present, follow the below steps:
-
From the Dispatch Settings (CX Setup -> Invitations & Tokens from the left pane -> Invitations -> Dispatch Settings) select the dispatch (select Create New if you do not want to edit an existing dispatch).
-
Make a note of the Questionnaire Name if you are editing an existing dispatch. For a new dispatch, note the Questionnaire that you wish to use).
-
Navigate to CX Setup -> Invitations & Tokens from the left pane -> Invitations -> Delivery Policy.
-
Select the Delivery Policy which is not showing up during the setup of the dispatch and scroll down to the section marked Fatigue Rules.
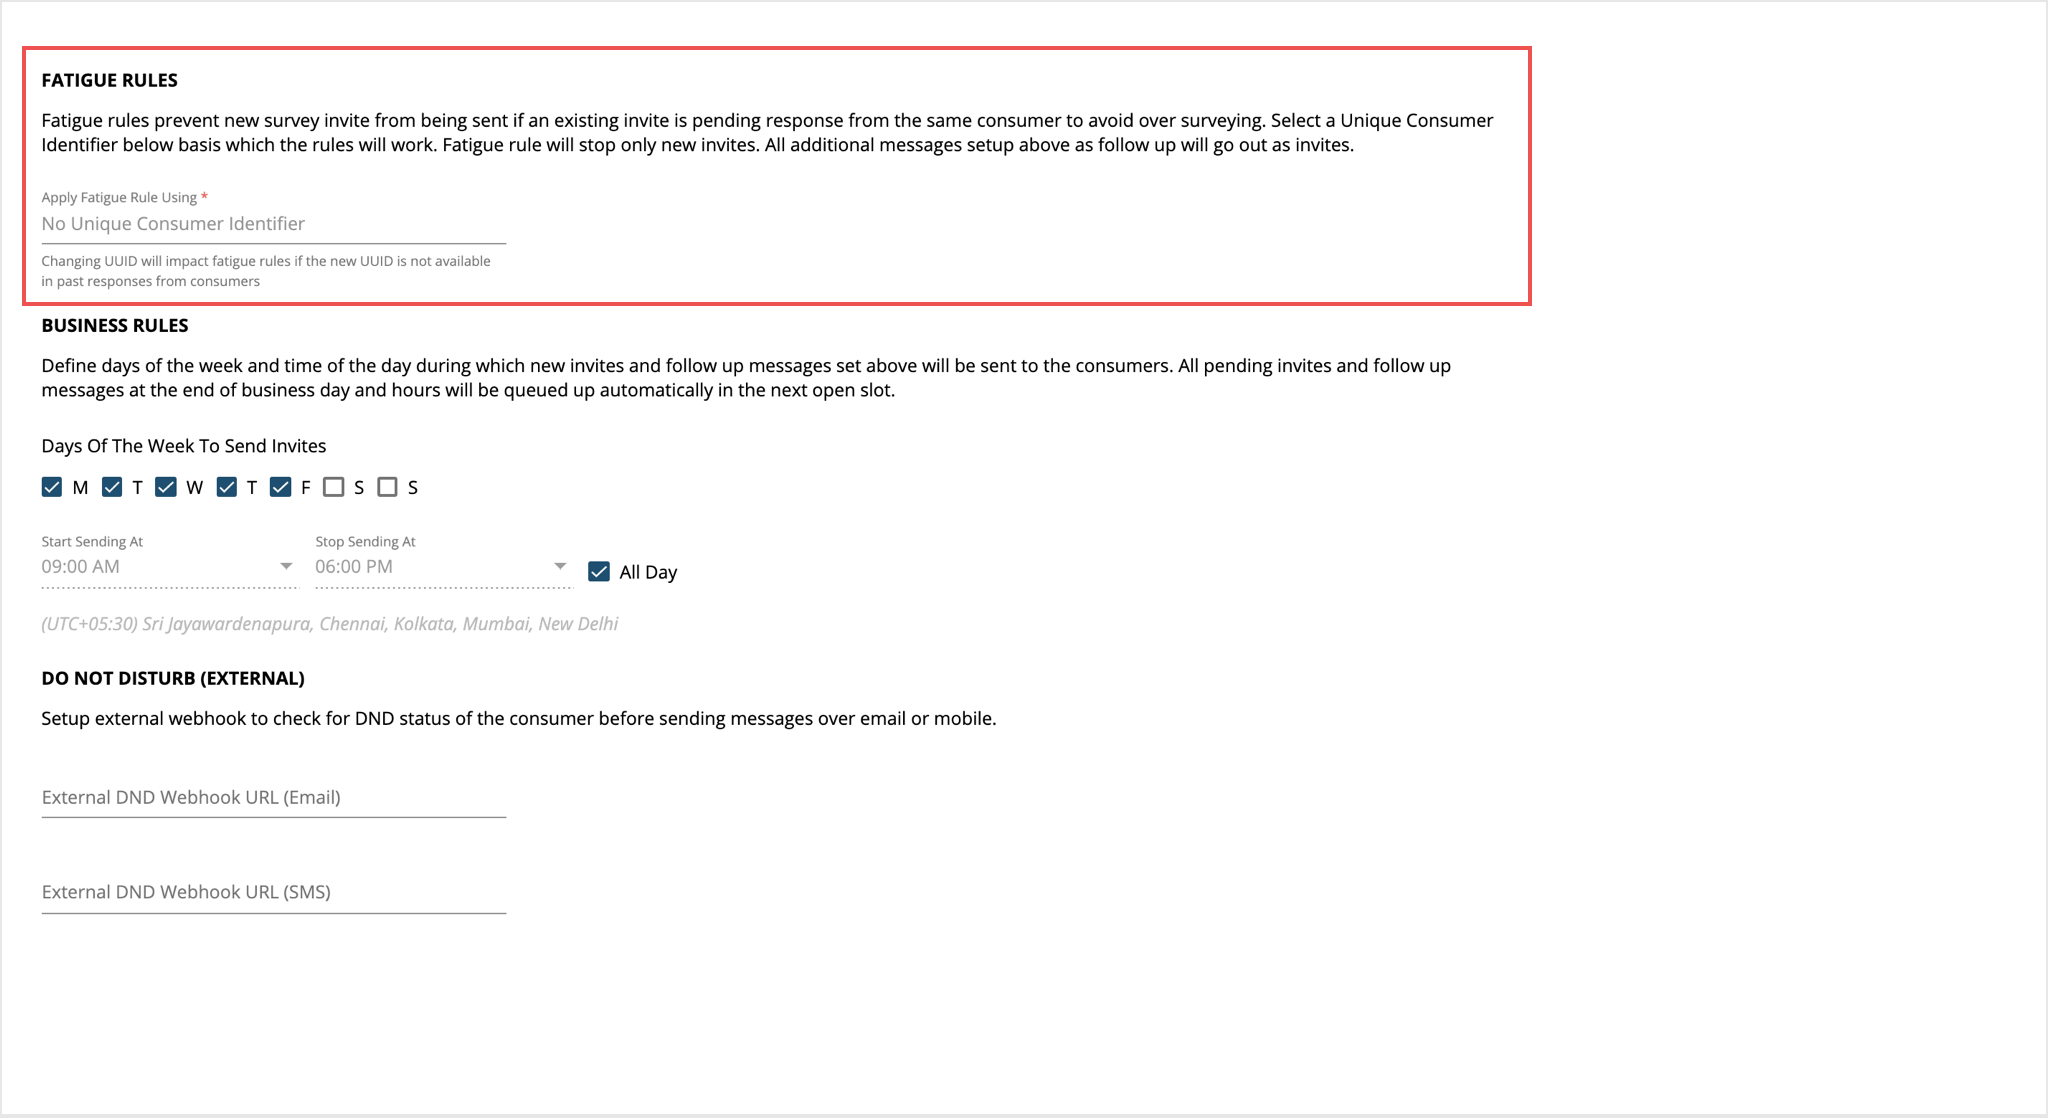
-
Make a note of the unique identifier. Now navigate to the Questionnaire Builder (CX Setup -> Questionnaire Builder) and select the earlier noted questionnaire from step 2.
-
If the UUID is not present in the questionnaire, you should add it as a prefill. Alternatively, you can note any other prefill from that questionnaire and edit the fatigue rules to use that prefill as the UUID (be sure to enable the option “Show all questionnaire prefills for UUID”).
-
Return to the Dispatch Settings page and update the dispatch or create a new dispatch with the modified delivery policy.
Delivery Policy can be used not only to define the order and type of messages that need to be delivered but also the time between consecutive messages. If you are having trouble setting the time between consecutive messages, refer to the below steps:
-
Navigate to CX Setup -> Invitations & Tokens from the left pane -> Invitations -> Delivery Policy.

-
Select the Delivery Policy by clicking on the name of the policy or by clicking on the edit button to the right of the policy name.
-
Scroll to section marked Messages & Schedules and for the first message, set the “Delay Delivery By” from the options in the drop down. Repeat this for every consecutive message within that delivery policy.
-
Scroll further down to the section titled “Business Rules” and choose the days of the week during which you want the surveys to reach your customers.
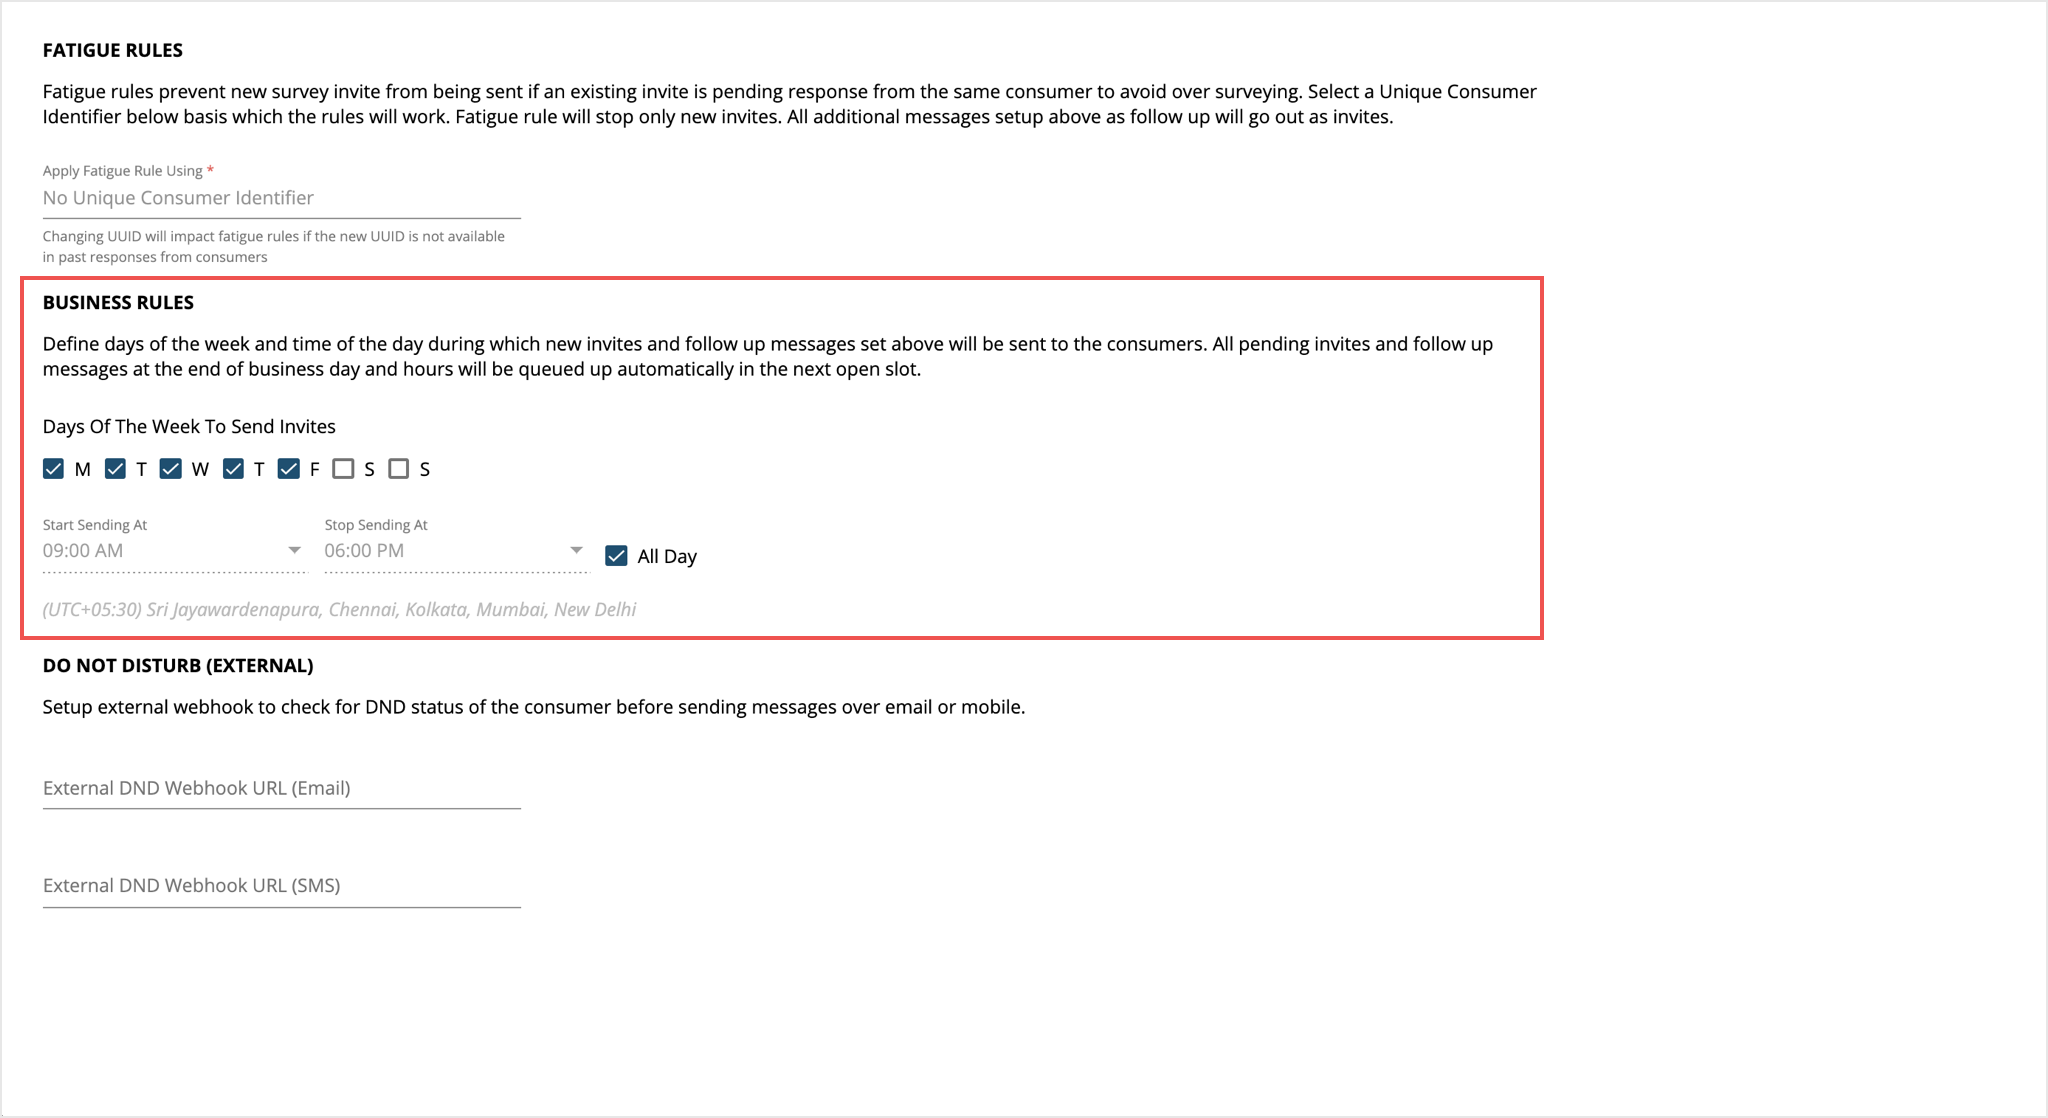
-
You can also set the operating hours during which the messages will be sent for the selected days.
Note In the example in point no. 3 and 4, the delay between the messages is considered during non-operating hours as well. However, if the delay elapses during the non-operating, the message is not sent until the start of the next window of operating hours as defined.
The Delivery Policy requires an Amazon or Azure queue to be configured in Experience Management. This configuration is saved along with each Delivery Policy.
If you are having trouble creating a new Delivery Policy in your Experience Management with the following message: “INVITATION QUEUE DETAILS MISSING”, then follow the below steps:
Step 1: You can start by navigating to CX Setup -> Account Settings -> Integrations.
Step 2: Use the scroll bar on the top of the integrations page to navigate to the header titled “Invitations Queue”.
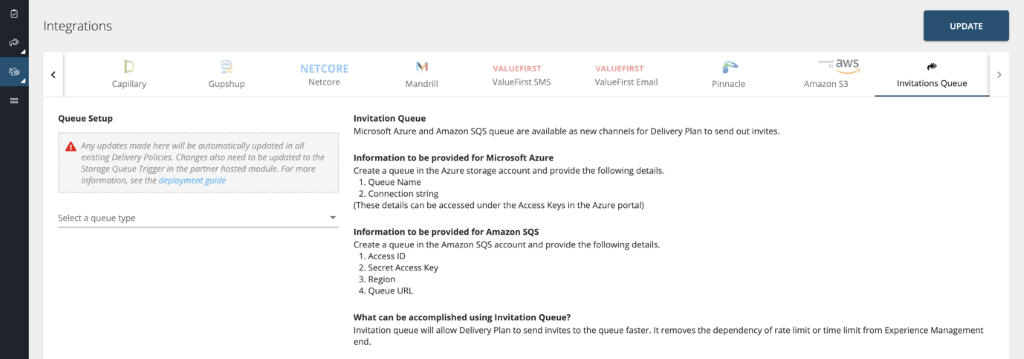
Step 3: Select a queue type from the dropdown (Microsoft Azure Queue or Amazon SQS Queue and enter the requisite information. For Microsoft Azure Queue, you need to provide the Queue name and the Connection String. For Amazon SQS Queue, you need to provide the Access ID, the Secret Access Key, Region and the Queue URL.
Step 4: Click on update and begin creating the Delivery Policy.
If you are facing API failures and notice errors that indicate your invitations are not being pushed to Experience Management, then this might indicate that the API endpoint for your hosted infrastructure is not updated in your account. A typical error associated with this issue is: “invitationsExternalHostURL for dispatchRequest is not set”
To remedy this, follow the below steps:
Step 1: Note down your API Endpoint where your dispatcher is hosted
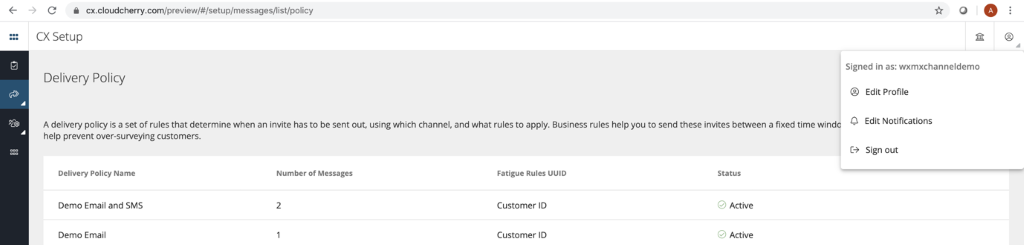
Step 2: Navigate to the Edit Profile section of your account

Step 3: Scroll down till you reach a boxed section titled “API ENDPOINT FOR SENDING INVITES”
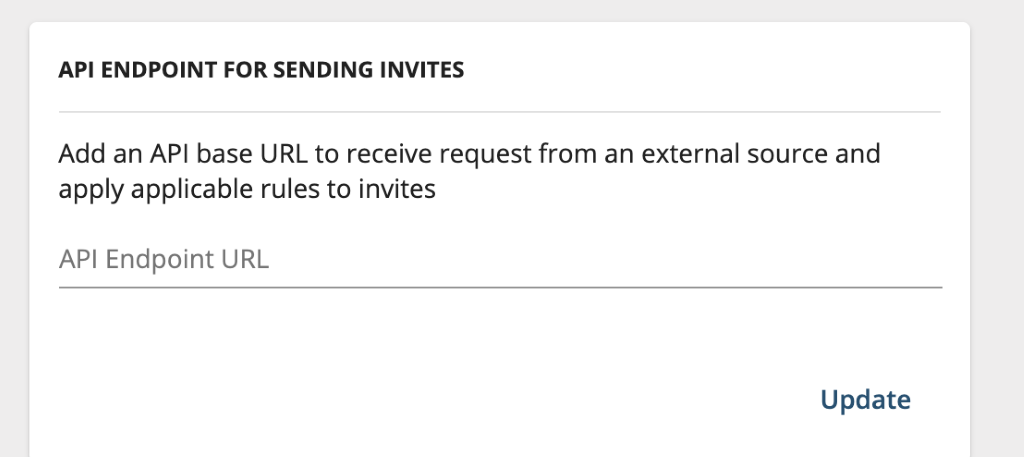
Step 4: Enter the API Endpoint URL and click on update
If you are trying to log in to your ACM application’s frontend but even after entering the correct credentials you are getting an error as below:
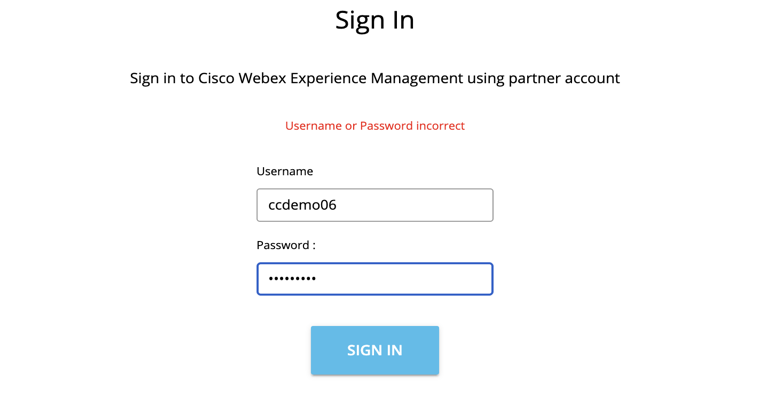
Follow the below steps to fix this error (provided the issue is not with the correctness of the credentials):
Step 1: Note down your API Endpoint where your dispatcher is hosted
Step 2: Navigate to the Edit Profile section of your account
Step 3: Scroll down till you reach a boxed section titled “API KEY”
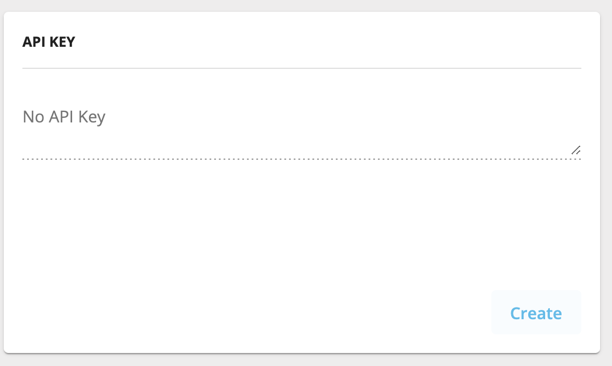
Step 4: Click on create, to generate a new API key.
Step 5: Using the account credentials (not the generated API key), re-attempt login to the ACM application.
If the above list of Troubleshooting Topics does not address your concerns, please reach out to us at support@xm.webex.com
Also check out, the Configurations Checklist.
Configurations Checklist
Check your Experience management account by verifying the below.
-
Navigate to the Delivery Policy being used and check if the:
-
Delivery Policy is live
-
Correct channel/s is configured in Delivery Policy
-
Selected UUID is present
-
Business rules allow for delivery during the timeframe in question
-
-
Next, check the survey which is intended for use with the Delivery Policy if the:
-
UUID question is present
-
UUID question is an active prefill
-
Prefills for channel related PII questions are active
-
BatchId prefill is present and active
-
-
Head now to the Message Template and check if the:
-
Template is available for the intended channels of the Delivery Policy
-
Template is using dynamic tags in the message body belonging to the questionnaire.
-
-
In the Token Template section, check if the:
-
Token is set to expire before the last consecutive messages in the Messages & Schedules line up
-
Preferred Language selected for the Token has corresponding message templates associated with it in case language prefill is not being passed
-
-
Navigate to the Dispatch Setup and check if the:
-
Correct Delivery Policy, Questionnaire, Token Template and Message templates are associated with the Dispatch
-
Dispatch is live
-
-
Once Invitations configurations are verified, check if the:
-
Correct queue details are added in the Invitations Queue Set up section under Integration, verify with your Network/Infra admin
-
API key is generated for the admin account
-
API endpoint is added in the Edit Profile page, this can only be done from the superadmin account (credentials provided to the account admin)
-
Navigate to the ACM page using the front-end URL provided by your Network/Infra admin.
-
Select the Dispatch for which the Invitations are not being sent
-
Add/Edit the Dispatch with all the necessary information, as highlighted below:
-
Channels Setup (Vendor details for email and SMS)
-
Static Responses (Prefills, if any)
-
Notification Setup (Email ID for receiving debug, information, warning, error and failure notifications)
-
-
Ensure that correct vendor details are added as below:
-
For SMS
-
URL
-
Access Key
-
Originator
-
SMS character Support
-
Short Code (optional)
-
-
For Email
-
Sender Name
-
Sender Email Address
-
SMTP Server
-
SMTP Username
-
SMTP Password
-
Port
-
Enable SSL (True or False)
-
-
-
Also, it is good practice to update notifications from the Notification Setup mentioned above with the email address of the admin who can monitor failures, this is important if you don’t readily have access to the API responses.
Important:
Any changes in Experience Management configurations concerning Invitations will require one hour to reflect in the cache.
Any changes in ACM with respect to adding/editing a dispatch or vendor details in a particular dispatch will require a restart of the dispatcher component. It will take one hour also for these changes to reflect in the dispatch request component.
If any dispatch request is sent with misconfigurations, it will lead to an error state in the dispatcher, which will freeze any processing for 4 hours. Invitations will resume sending after the completion of four hours with the latest information in the cache. So, ensure you are waiting for the appropriate amount of time after making changes in the templates or restarting the dispatcher component on making changes in the ACM application.